Loading...
Loading...
Loading...
Loading...
Loading...
Loading...
Loading...
Loading...
Loading...
Loading...
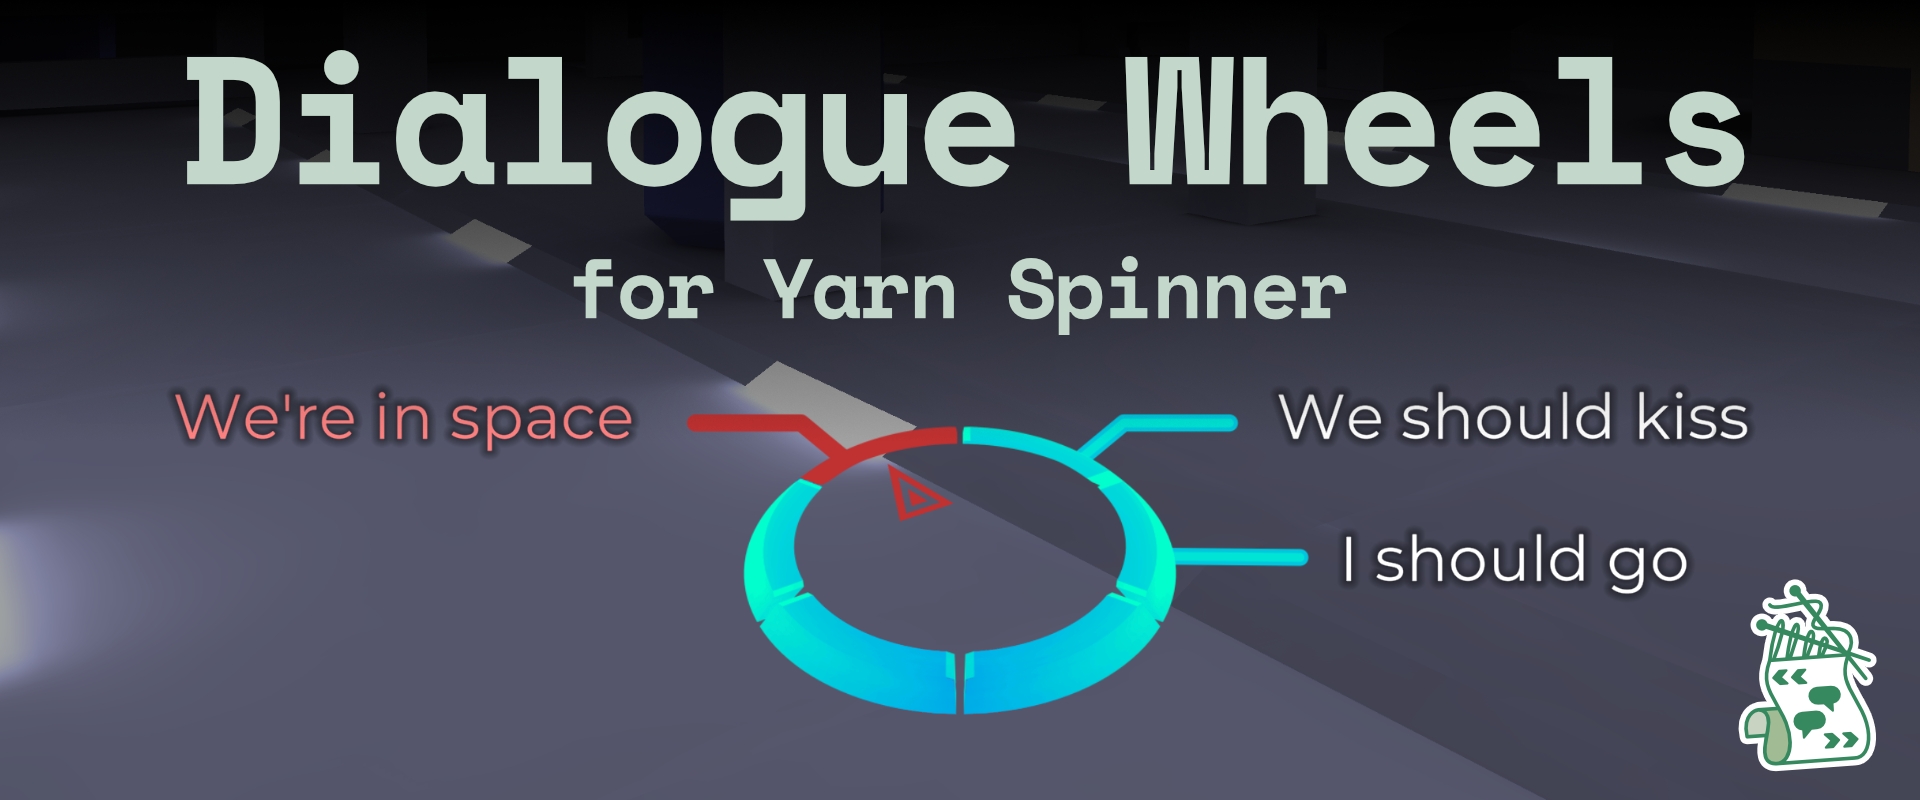
The guide and documentation for the paid add-on, Dialogue Wheel for Yarn Spinner.
This Unity package provides two prefabs: Six-Segment Dialogue Wheel and Automatic-Layout Dialogue Wheel. The package requires Yarn Spinner for Unity.
This add-on is not part of the open source Yarn Spinner package, and can be purchased from the Yarn Spinner Itch.io Store:
Dialogue Wheel for Yarn Spinner provides an Automatic-Layout Dialogue Wheel and a Six-Segment Dialogue Wheel prefab. Both are customisable, powerful, and extremely flexible:
customise fonts, colours, and styles of wheels
enable and disable segments (Six-Segment Wheel)
specify specific segments for specific dialogue (Six-Segment Wheel)
theoretically unlimited options on the wheel (Automatic-Layout Dialogue Wheel)
works for 2D or 3D games
This guide provides documentation on using both prefabs.
The oldest supported version of Unity for the Dialogue Wheel is 2021.3.
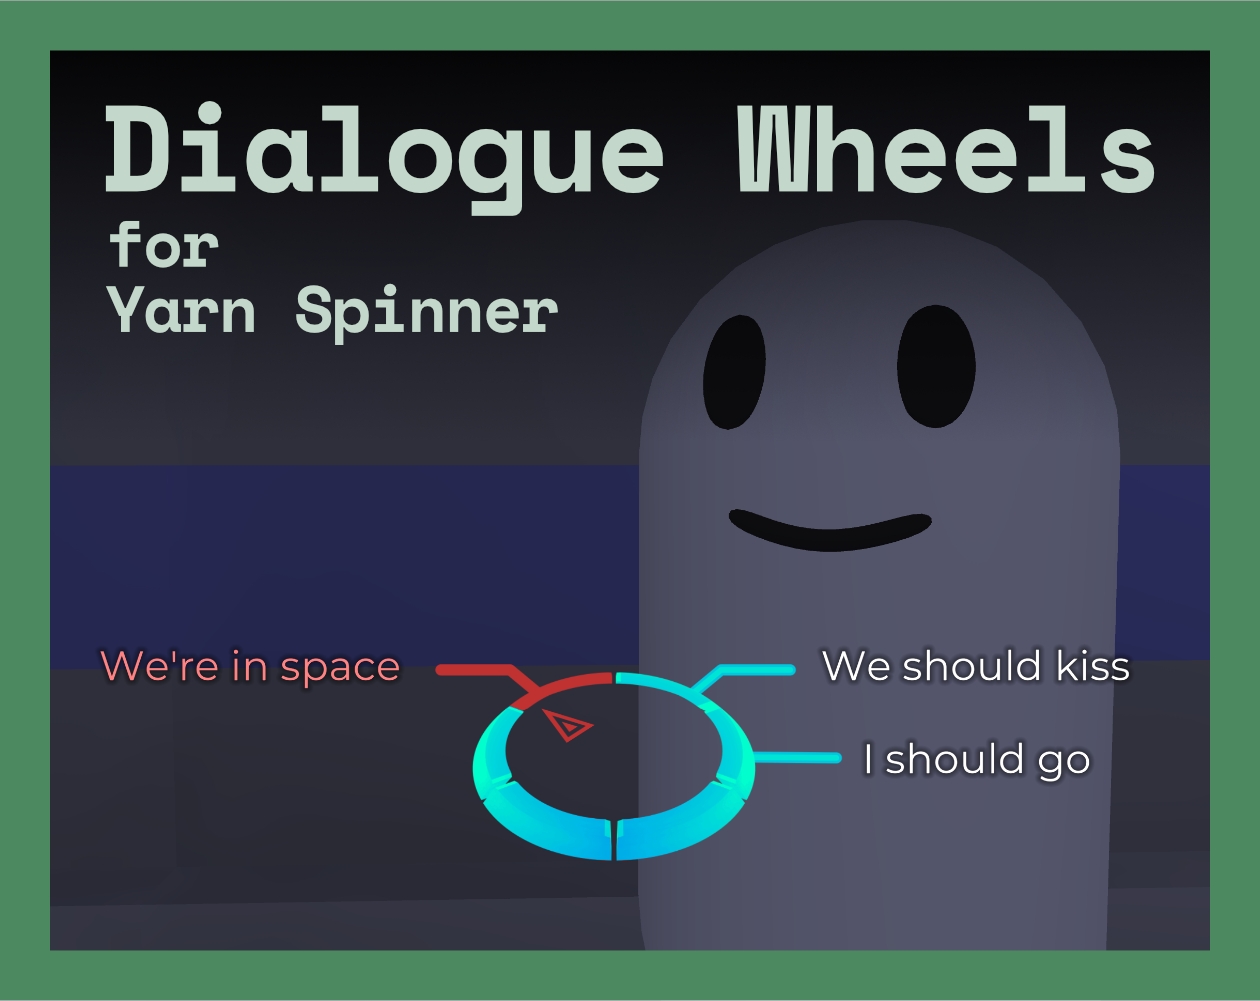
The Six-Segment Dialogue Wheel provides a dialogue wheel with a light scif-fi appearance, and support for up to six segments, and the ability to specify exactly which of the segment positions is used for an option in your Yarn scripts.
To learn how to use the Six-Segment Dialogue Wheel, read this guide.
The Automatic-Layout Dialogue Wheel provides a dialogue wheel with a simple graphical appearance, and can—theoretically—support as many options as you'd like, automatically adjusting to display them. You cannot force an option to appear in a specific place on the wheel.
To learn how to use the Automatic-Layout Dialogue Wheel, read this guide.
Learn how to install the Speech Bubbles for Yarn Spinner Package.
You can purchase Speech Bubbles for Yarn Spinner from the Yarn Spinner Itch Store.
To use the Speech Bubbles for Yarn Spinner package in Unity, you'll also need to make sure you've got the Yarn Spinner for Unity package installed.
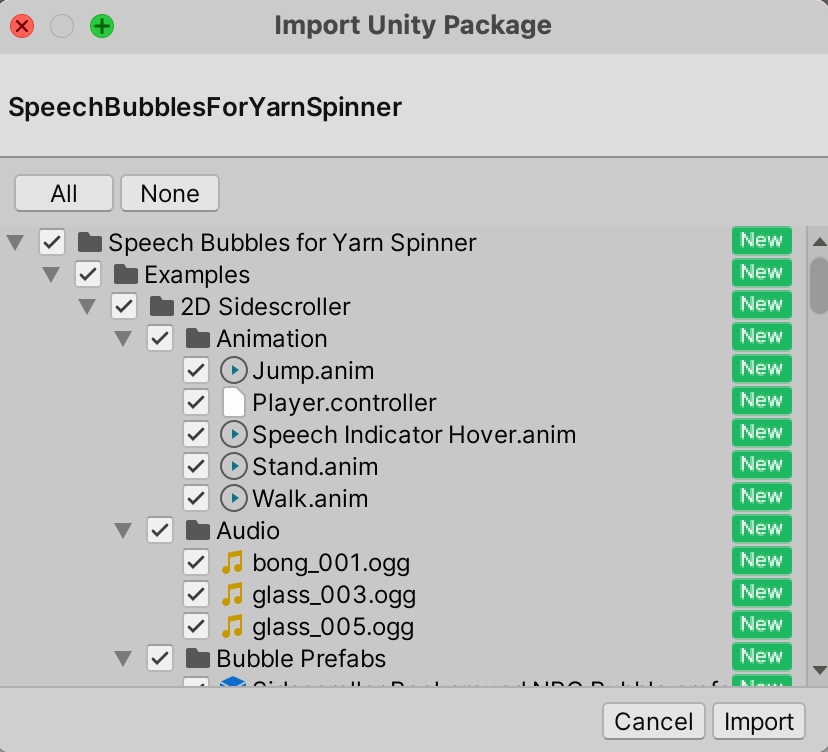
Once you've purchased it, download the package from the store. It will be in the form of a .unitypackage file. To install the package, open the Unity project that you want to add it to, and open the the Assets menu -> Import Package -> Custom Package...
You'll then be able to select the .unitypackage file for Speech Bubbles for Yarn Spinner on your file system, and click Open. This will present the Import Unity Package window:
Click the Import button, and Speech Bubbles for Yarn Spinner will be imported into your project.
A quick look at the examples that ship with Speech Bubbles for Yarn Spinner.
Speech Bubbles for Yarn Spinner ships with two example scenes, showcasing the flexibiltiy of the Speech Bubbles.
The 2D Sidescroller Example showcases the flexibility of the Speech Bubble in a variety of contexts, including both the Formal Bubble, and the Casual Bubble. Once you've installed the package, find this example in Speech Bubbles for Yarn Spinner/Examples/2D Sidescroller.
The 3D Top-Down Example showcases the Speech Bubbles in a 3D environment, with a variety of small customisations. Once you've installed the package, find this example in Speech Bubbles for Yarn Spinner/Examples/3D Top-Down.
Learn how to use the Speech Bubbles, from the Speech Bubbles for Yarn Spinner Add-On Package.
The Speech Bubbles Add-On provides a flexible speech bubble system with a variety of possible customisations. Here, you'll learn how to implement it in a Unity project by looking at a super simple side-scrolling game.
To use Speech Bubbles for Yarn Spinner, you'll need to create a new Unity project and install he Yarn Spinner package, and then install the Speech Bubbles for Yarn Spinner package.
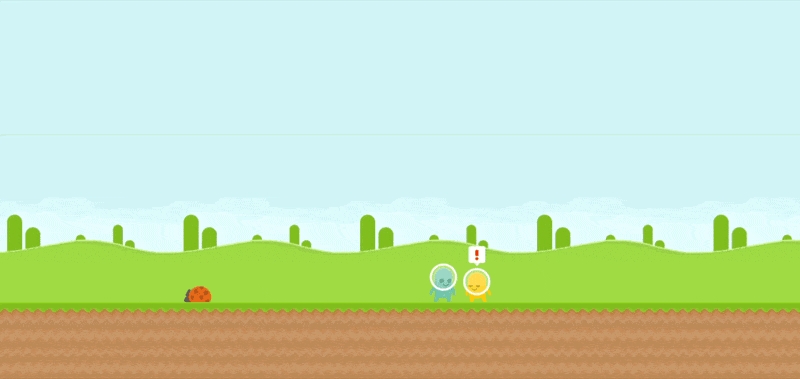
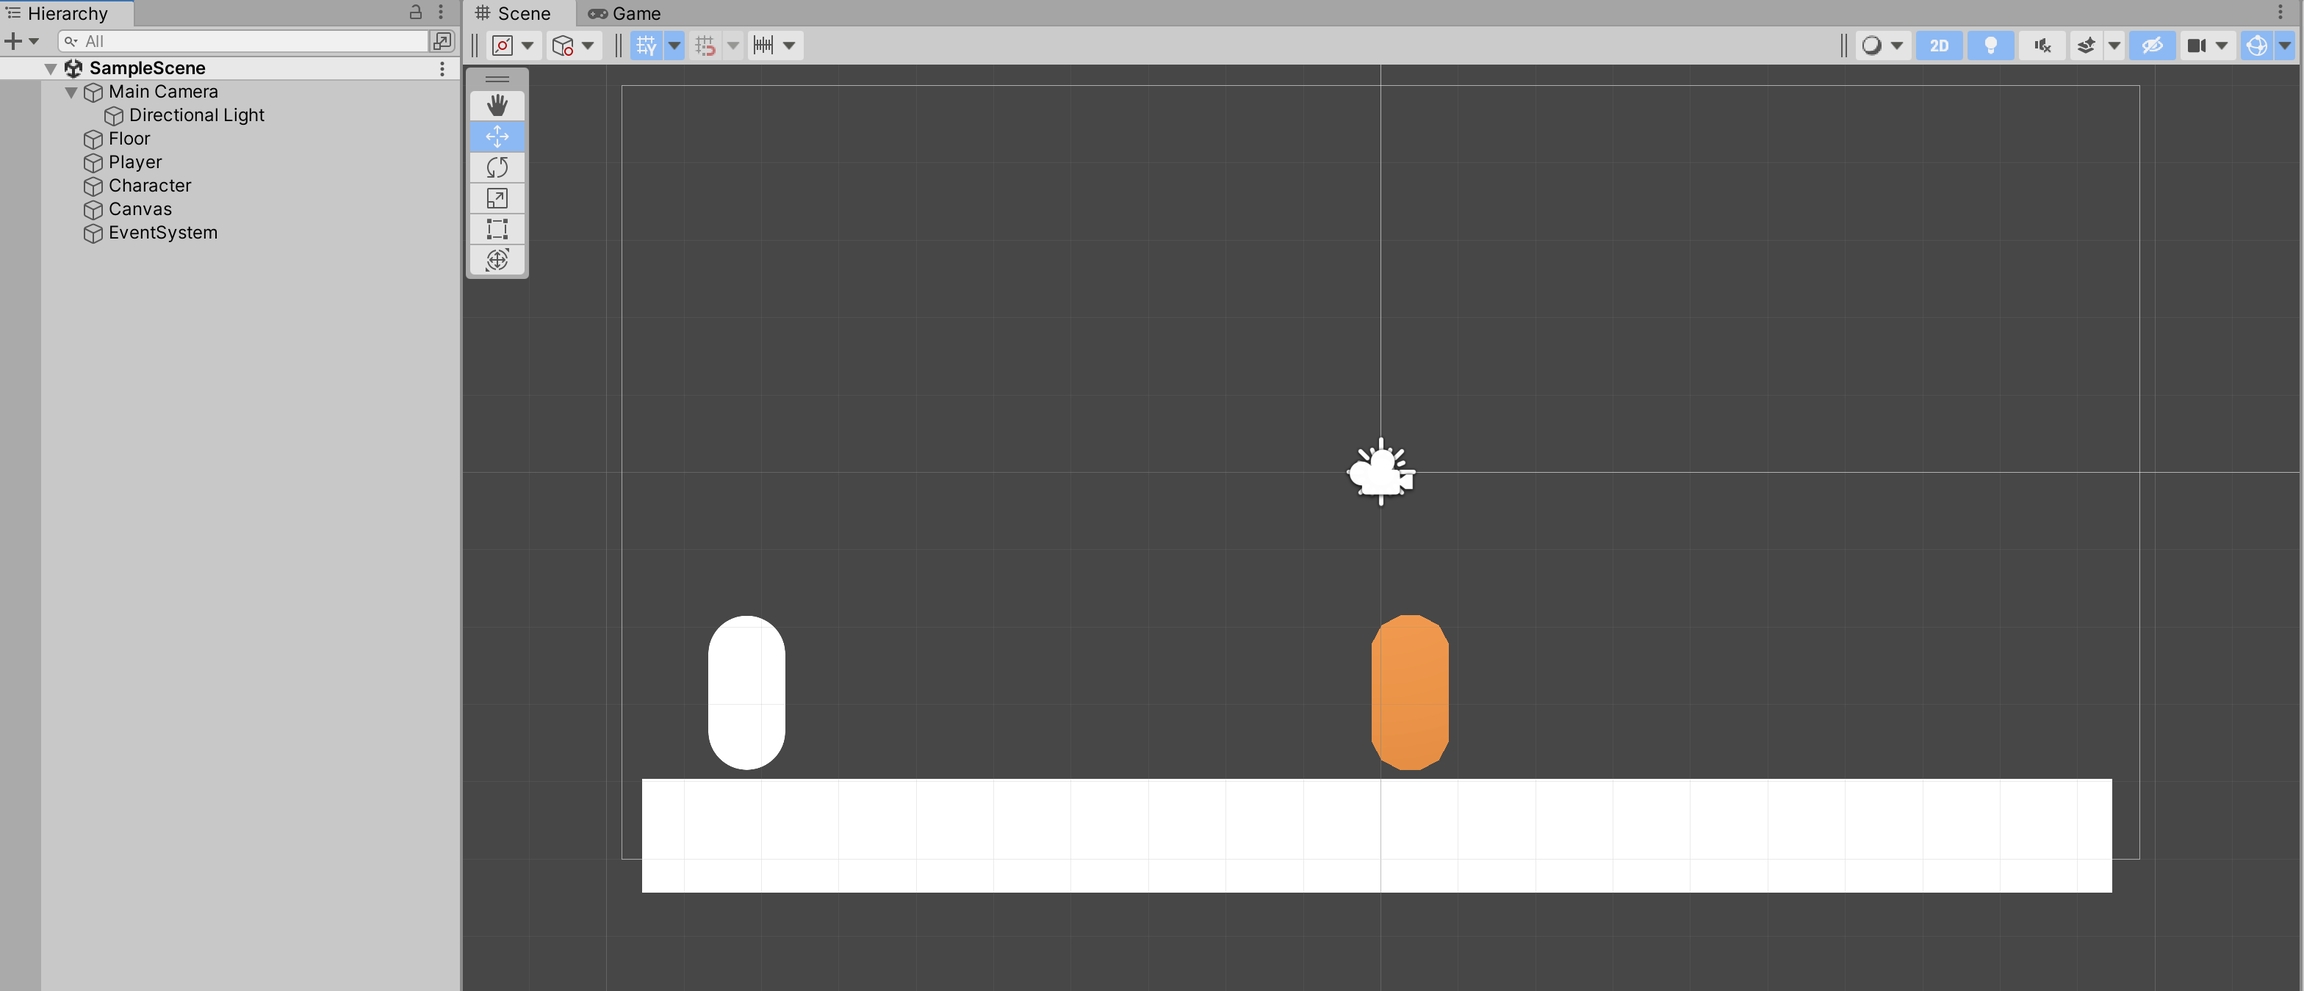
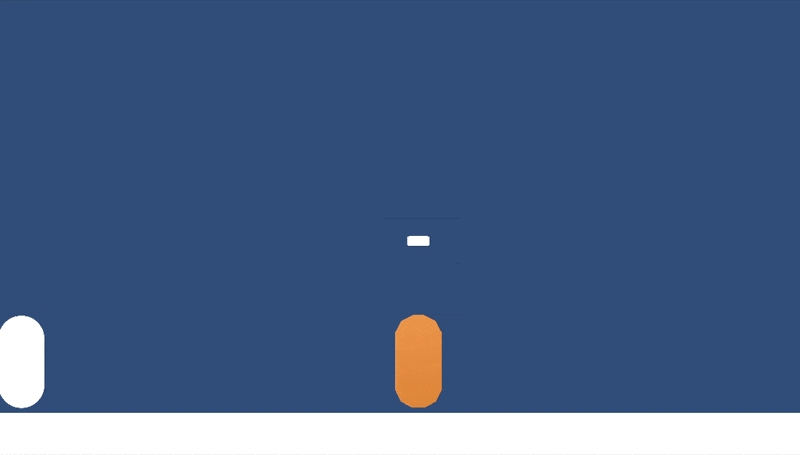
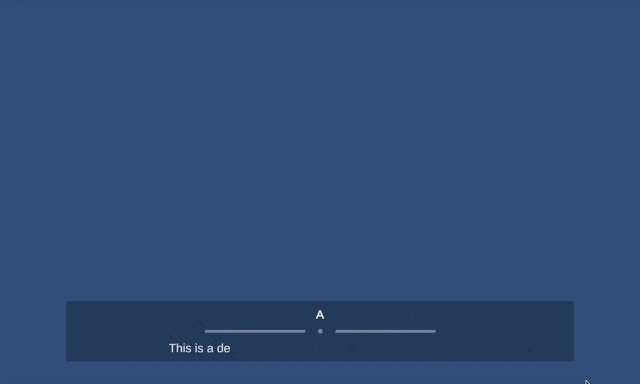
For this guide, we'll assume you've made a simple 2D side-scrolling environment, much like this:
Our environment is nothing more than some sprites (from the GameObject menu -> 2D Object -> Sprites)—a Square, resized to be the floor, and two capsules—and a simple player movement script.
With a project ready, install the Speech Bubbles for Yarn Spinner package, and install TextMesh Pro (TMP) if prompted. You'll also need to install the Unity Input System Package.
You can find the Unity Input System Package in the Unity Package Manager, found in the Window menu -> Package Manager. For further guidance, visit the Unity documentation.
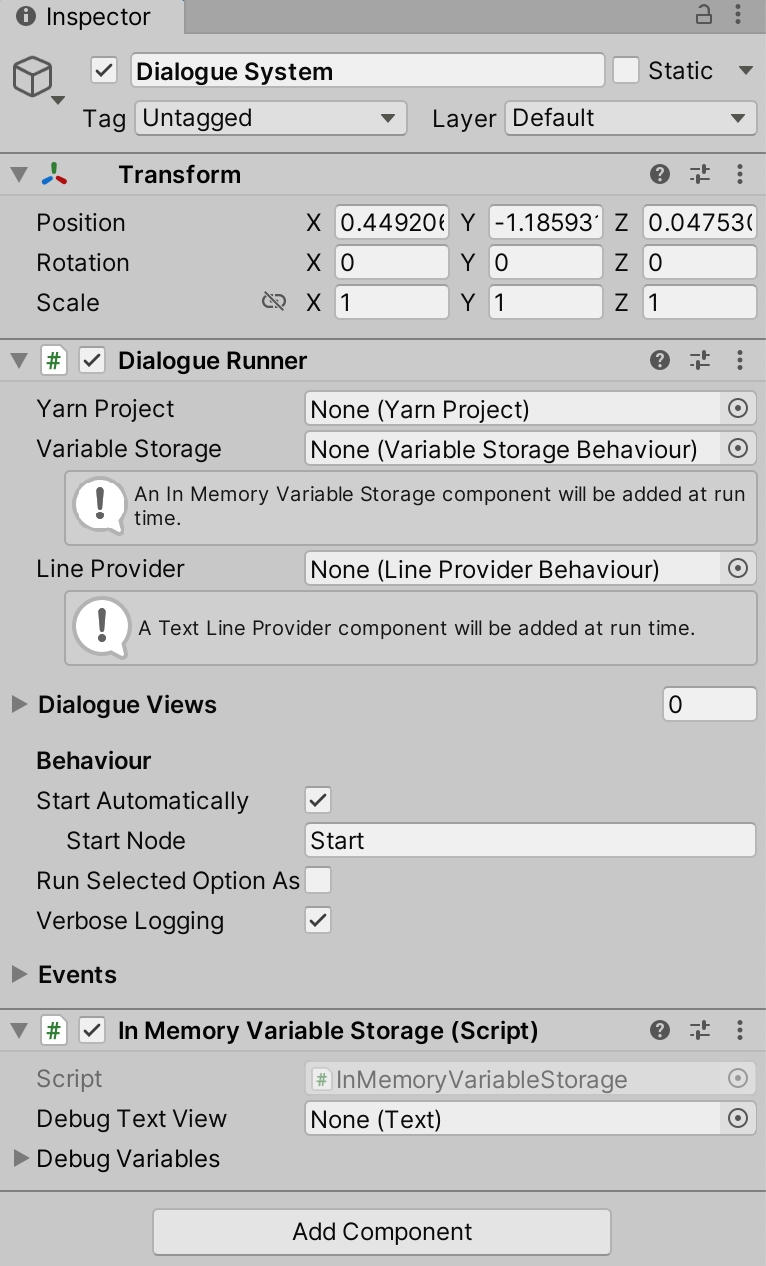
Add an empty GameObject to your Hierarchy, and name it Dialogue System. Use the Add Component button in the Inspector to add a Dialogue Runner component and a In Memory Variable Storage component to it:
Then, in the Hierarchy, add a Canva as a child object, as well as a new empty GameObject named Bubble View. Select the Bubble View and use the Add Component button in its Inspector to add a Bubble Dialogue View component:
Next, make a new Yarn project in the Assets pane, give it a Yarn Script, and add the new project to the Dialogue Runner in the Inspector.
Our demonstration here uses the following .yarn script:
Make sure the Start Node in the Dialogue System's Inspector is set to Start, and that Start Automatically is chosen.
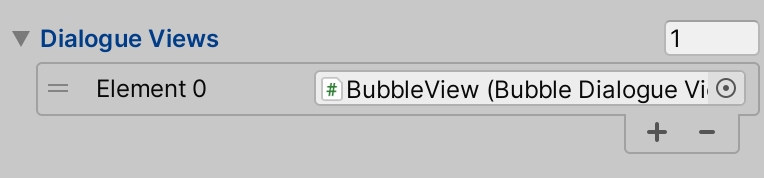
Next, expand the Dialogue Views section of the Dialogue System's Inspector, set the number of Diloague Views to 1, and drag the BubbleView GameObject from the Hierarchy (it should be a child of the Dialogue System) into the slot:
Our simple 2D side-scrolling environment has two characters in it: a Player Character, and a Orange NPC. In this case, we want things that the player can choose from to come out of bubbles attached to the Player Character, and we want the NPCs responses to come out of the NPC.
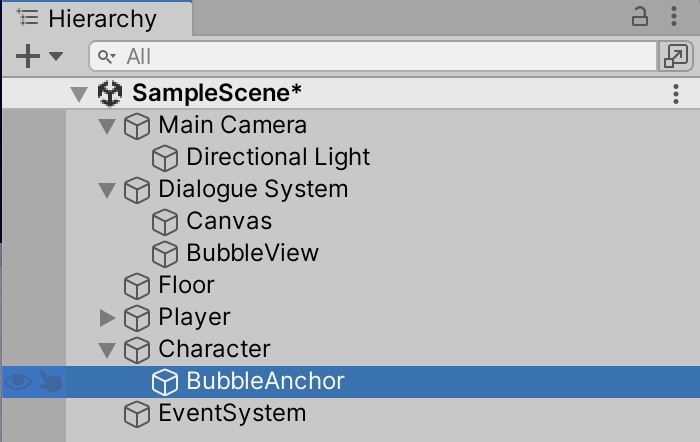
To allow this to happen, we must specify the position that the bubbles will be anchored to, for each character. To do this for the Orange NPC, select them in the Hierarchy, and add an empty GameObject as a child. Name it Bubble Anchor:
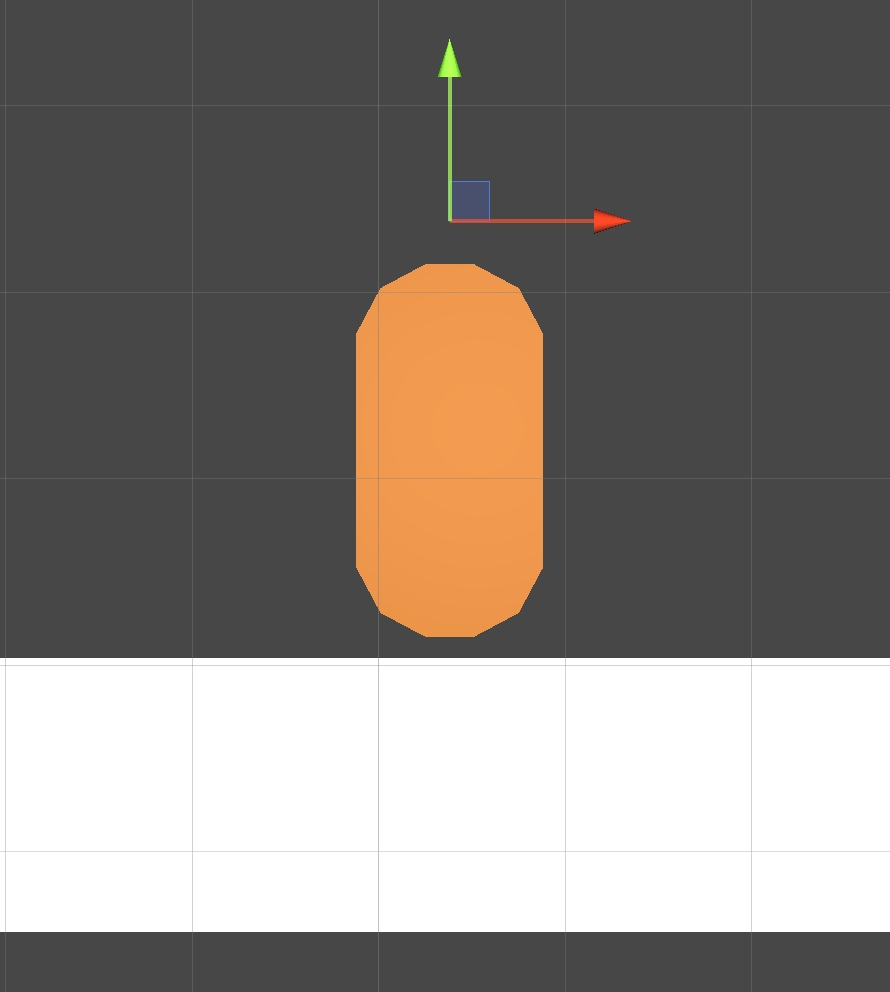
Select the BubbleAnchor in the Hierarchy, and position it above the character, wherever you want the bubble to be anchored:
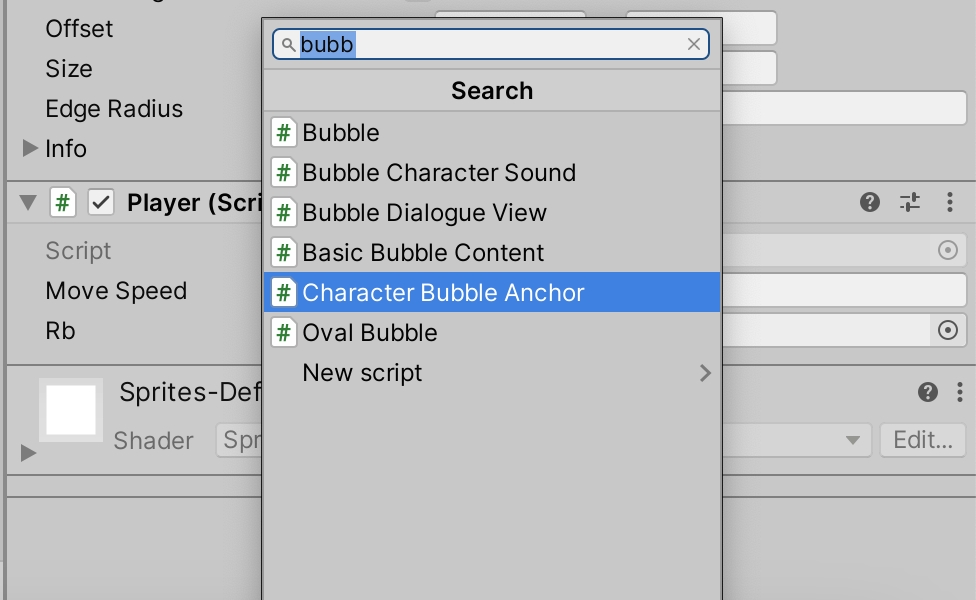
Next, create a new Basic Character Bubble Data asset, in the Project pane:
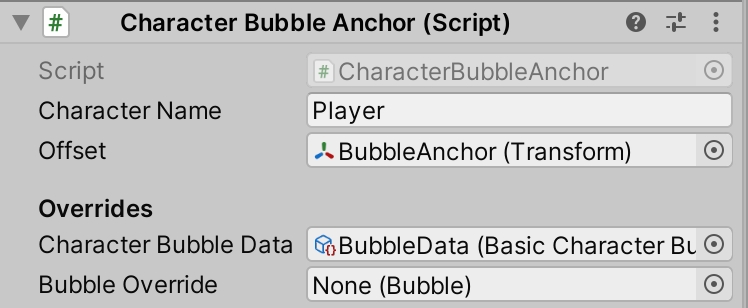
Name the new asset Bubble Data, or similar. Select it, and use the Inspector to set the Text Color to black. Then, select the Character in the Hierarchy and use its Inspector's Add Component button to add a Character Bubble Anchor component:
Use the Inspector on the Orange NPC to set the Character Name (ours is called "Orange"), drag the Bubble Anchor child object from Hierarchy to the Bubble Position slot, and drag the Bubble Data asset from the Project pane to the Character Bubble Data slot:
Add a Bubble Anchor child object to the Player Character as well, and position it appropriately. Then, use the Add Component button in the Player Character's Inspector to add three components: a Character Bubble Anchor component, a Sample Bubble Option Input component, and a Player Input component.
Set the Character Name to something appropriate (in the case of the Player Character, "Player" is a good idea), assign the Player Character's Bubble Anchor to the Bubble Position slot, and assign the same Bubble Data asset you used for the Orange NPC to the Character Bubble Data slot:
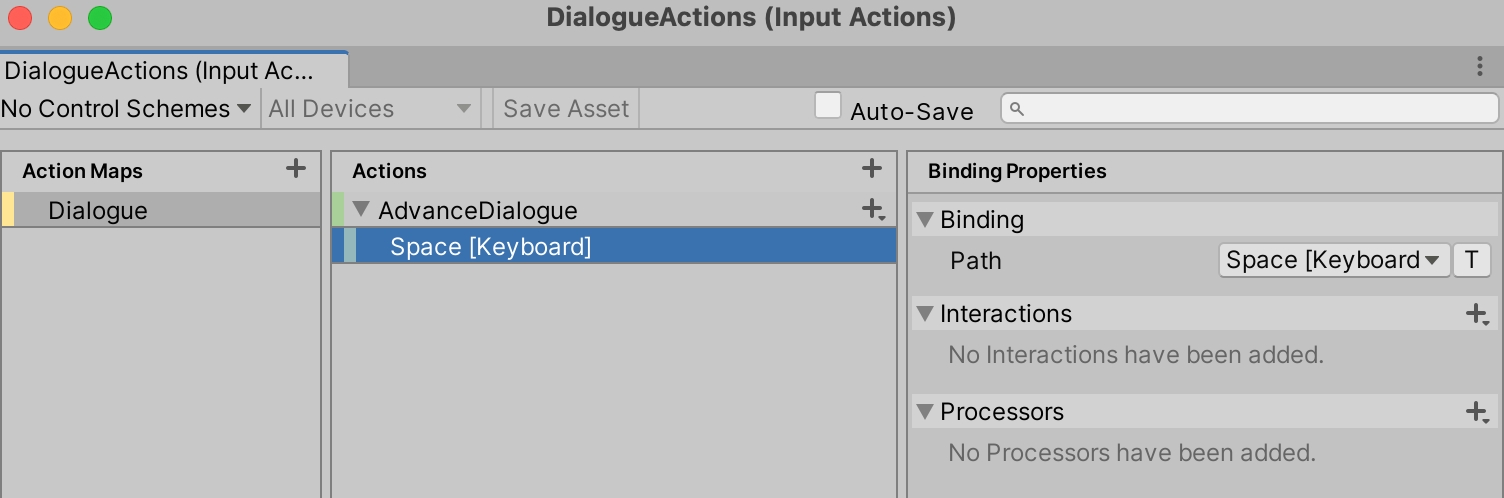
To allow the input to be controlled by the player, create an Input Actions Asset, name it Dialogue Actions, and double-click it to bring up Action Editor. Use the Action Editor to create an Action Map for Dialogue, and then add an Action called ActionDialogue, and bind it to something appropriate (such as the Space key):
You can learn more about Input Actions in the Unity documentation.
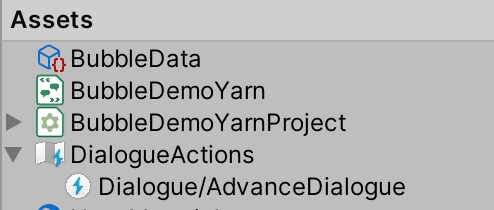
Expand the new asset in the Project pane so you can see the specific action that you just made:
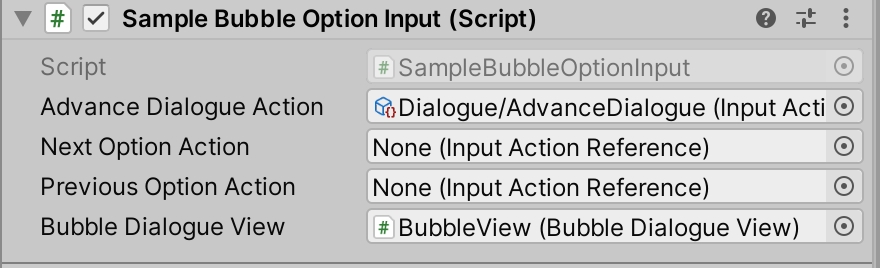
In the Sample Bubble Option Input component, assign the Advance Dialogue action to the Advance Dialogue Action slot (by dragging it from the expanded Input Actions Asset in the Project pane), and drag the Bubble View from the Dialogue System (in the Hiearachy) into the Bubble Dialogue View slot:
The Sample Bubble Option Input script comes with Speech Bubbles for Yarn Spinner. You can find it inSpeech Bubbles for Yarn Spinner/Examples/Shared Example Resources. The script gives you basic input handling to allow the player to select and change options for their dialogue. It's not intended to be used or even subclassed, and is solely provided for samples and examples. In a game, your game's input system should handle this.
In the Player Input component, drag the overall Dialogue Actions asset from the Project pane into the Actions slot, and drag your camera from the Hierarchy into the Camera slot, and set the Behavior dropdown to Invoke C Sharp Events:
The Player Input component needs to have its behavior setting changed to Invoke C Sharp Events because Yarn Spinner uses C# Events, rather than Unity's own event system.
The Player Input component is part of Unity's Input System. You can learn more about it in the Unity documentation.
With that, you can play your project and see the Speech Bubbles in action:
Next check our provided Speech Bubble Examples.
Learn how to use the Six-Segment Dialogue Wheel, from the Dialogue Wheel for Yarn Spinner Add-On Package.
The Six-Segment Dialogue Wheel provides a dialogue wheel with a light sci-fi appearance, and can display up to six responses for your dialogue. You can specify exactly which segment of the wheel each response is located.
To use the Six-Segment Dialogue Wheel make sure your Unity project has the Yarn Spinner package installed, and the install the Dialogue Wheel for Yarn Spinner package.
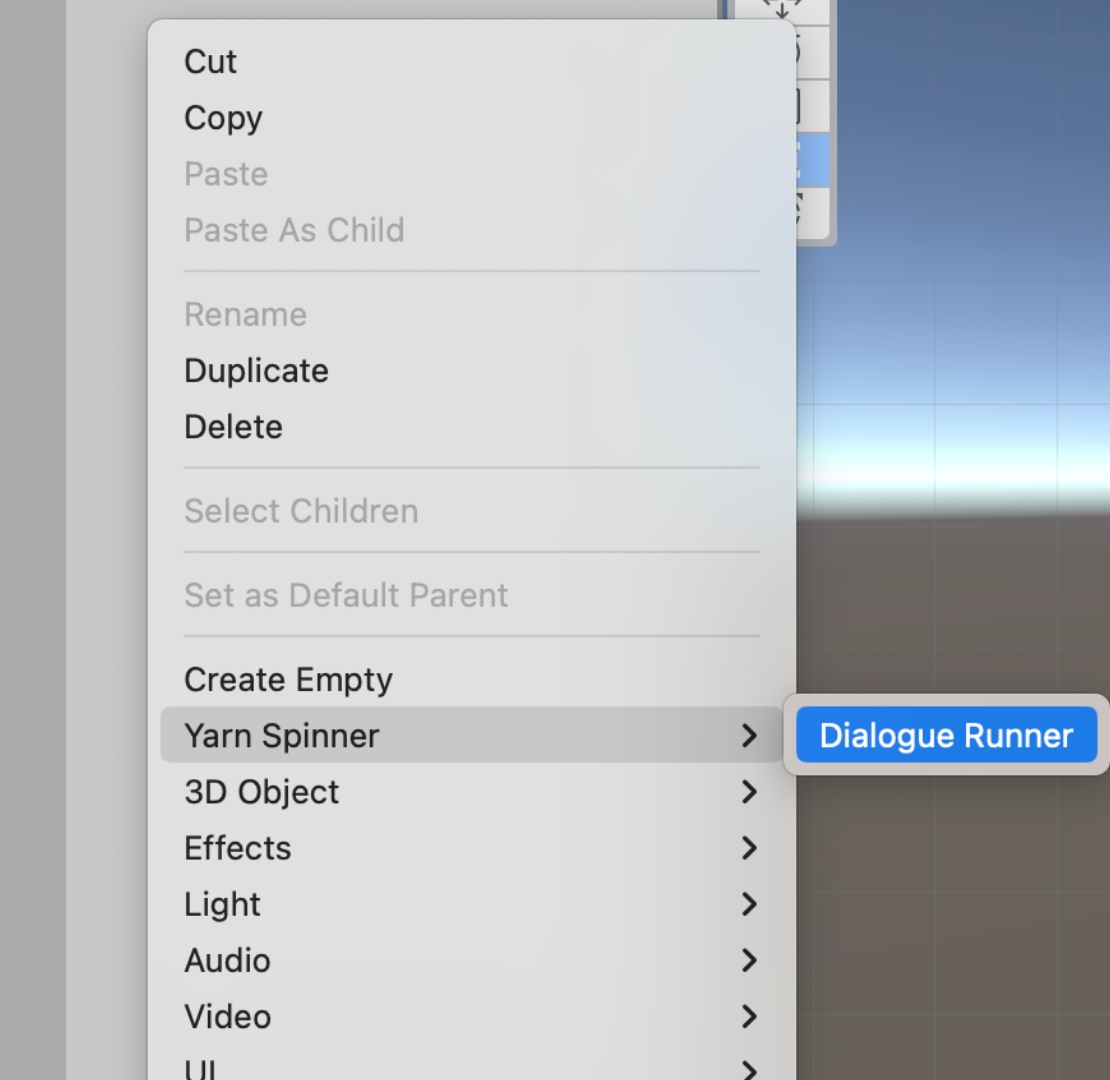
Then, create a new Dialogue Runner in your Hierarchy:
If prompted, click the Install TMP Essentials button to install TeshMesh Pro (TMP).
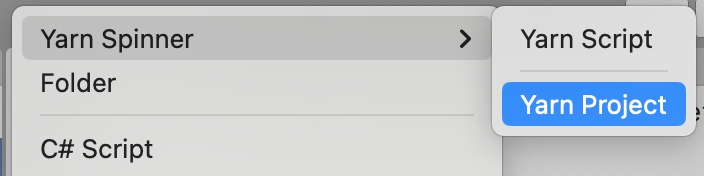
Make a folder to store your Narrative in the Project pane (ours is named Narrative), and then inside that folder, create a new Yarn Project asset:
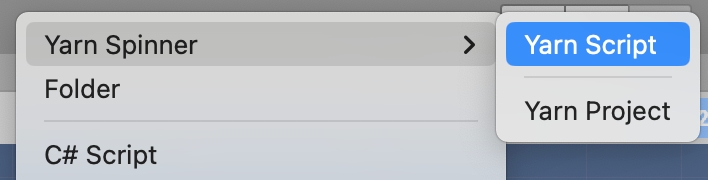
Similarly, also in the Narrative folder, create a new Yarn Script to use:
Name both the Yarn Project and the Yarn Script something appropriate. Open the Yarn script to write your story. Then save the Yarn script and return to Unity.
We've provided an initial sample story here, if you want to test things out.
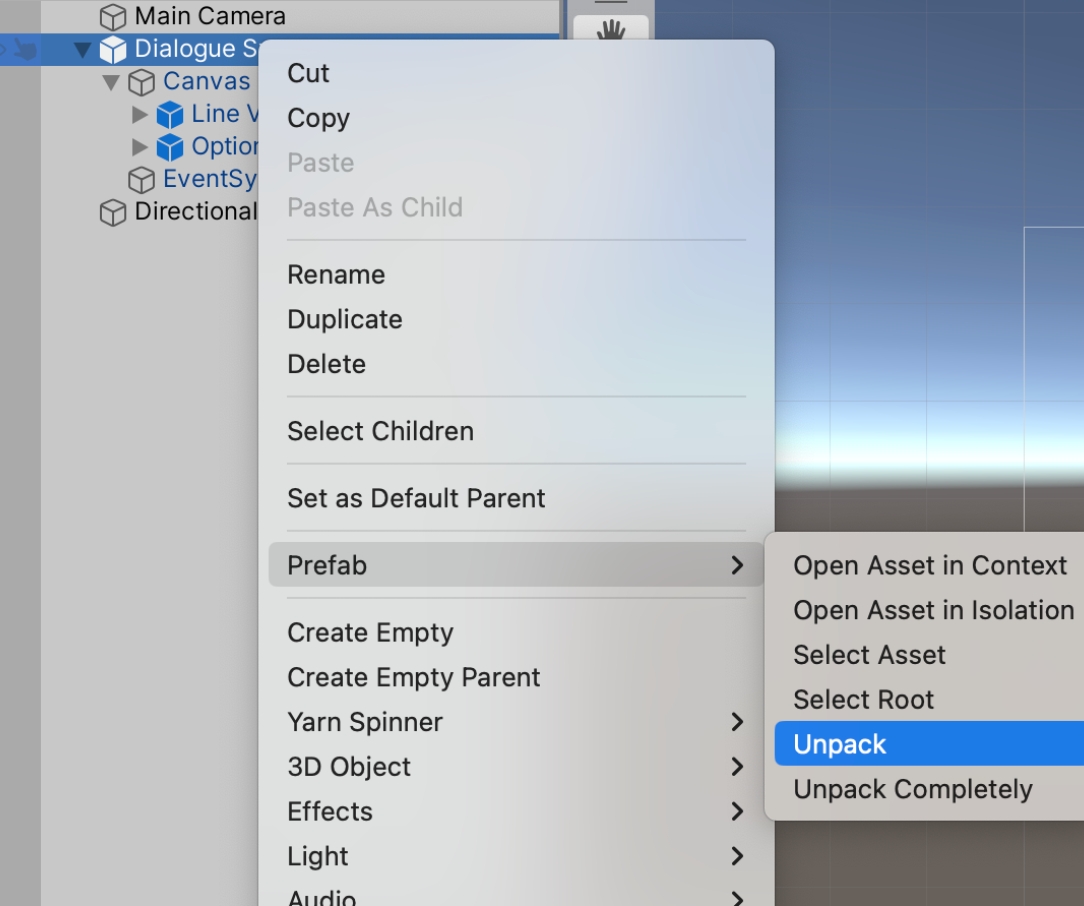
Back in Unity, choose the Dialogue Runner that you added to the Hierarchy, right-click it and choose Prefab -> Unpack.
Unpacking the Dialogue Runner prefab is exactly the same as creating your own empty GameObject and then adding Dialogue Runner and In Memory Variable Storage components to it.
This will allow you to modify the contents of the (former) prefab, in order to add the Six-Segment Dialogue Wheel as a Dialogue View.
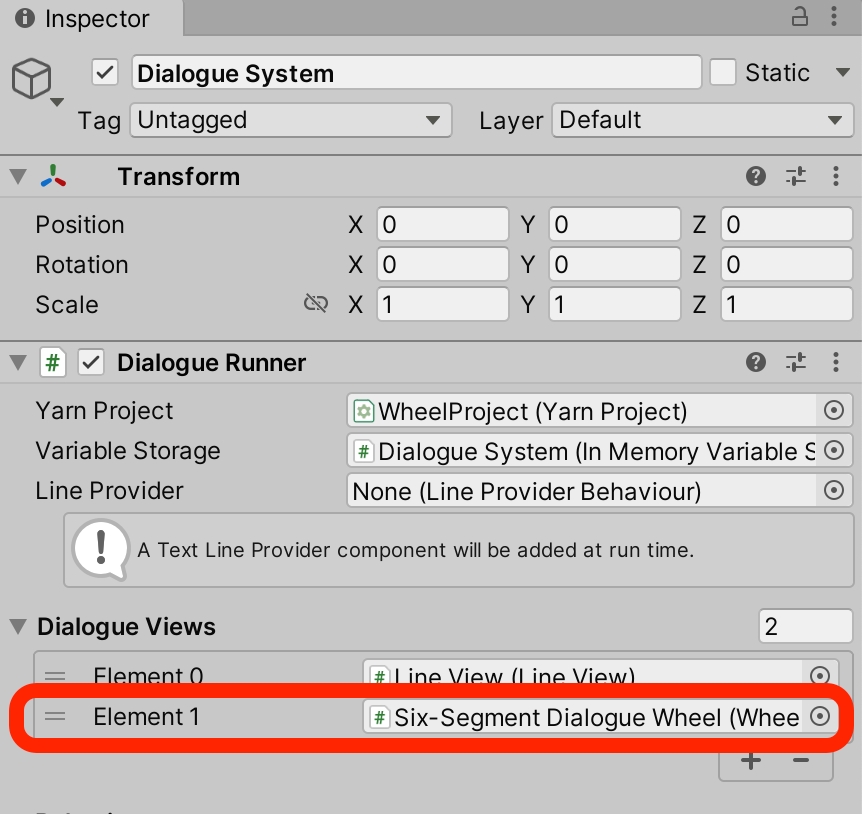
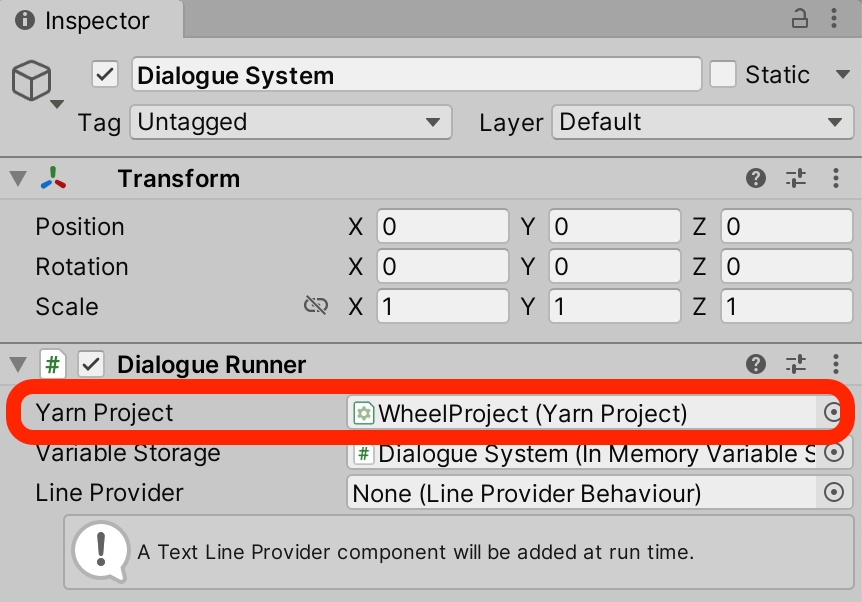
With the Dialogue Runner selected in the Hierarchy, drag the Yarn Project that you created from the Project pane into the Yarn Project slot in the Dialogue System's Inspector:
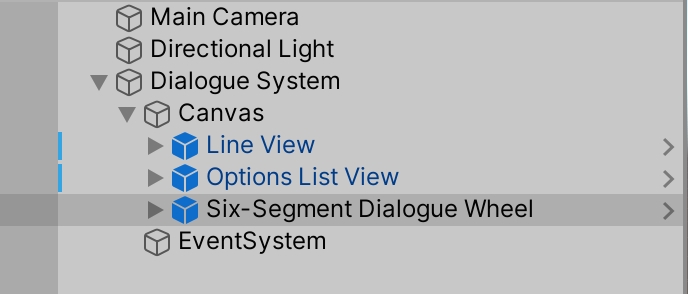
Next, locate the Six-Segment Dialogue Wheel prefab, supplied with this add-on, and drag it from the Project pane, so it's below the Canvas in the Hierarchy:
Right-click on the Options List View in the Hierarchy, and choose Delete. You won't need that view, as you'll be displaying a wheel instead of a list.
To make the Dialogue System aware of the Six-Segment Dialogue Wheel, select it (the Dialogue System) in the Hierarchy, and drag the Six-Segment Dialogue View from the Hierarchy into the Element 1 slot of the Dialogue Views section in the Inspector:
If you save your scene and run it, your Six-Segment Dialogue Wheel should now be working!
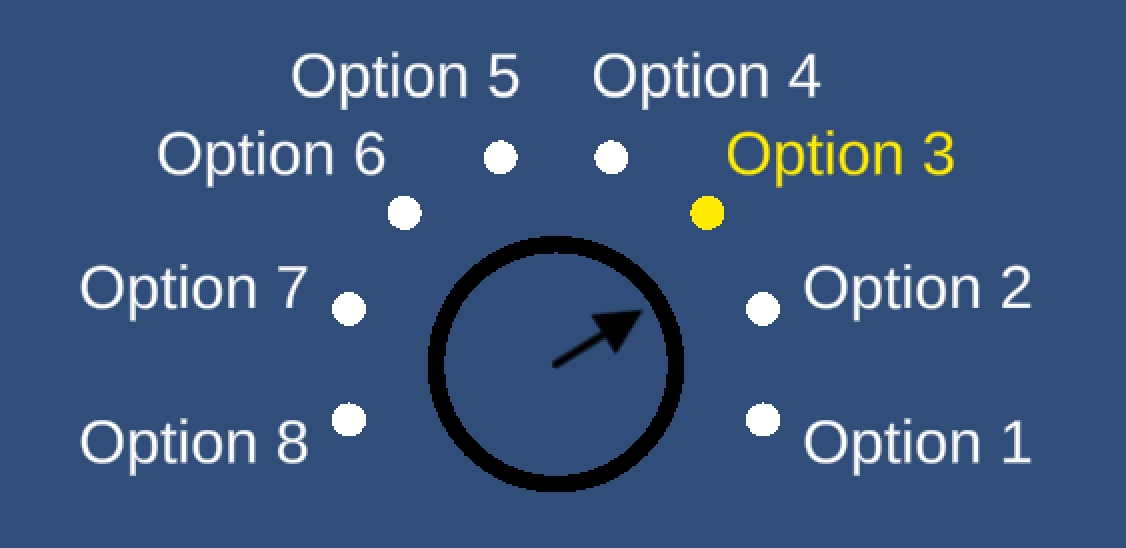
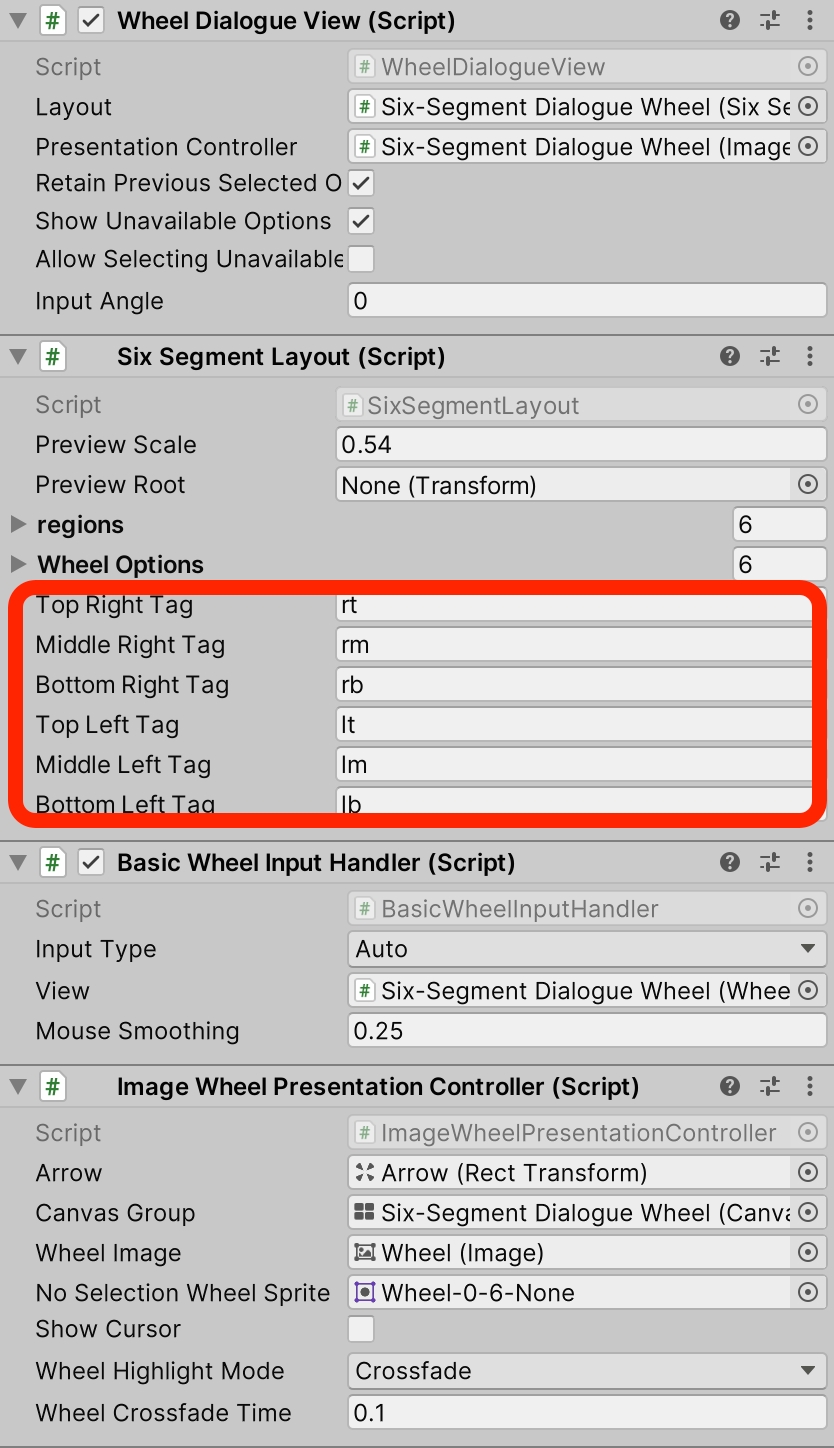
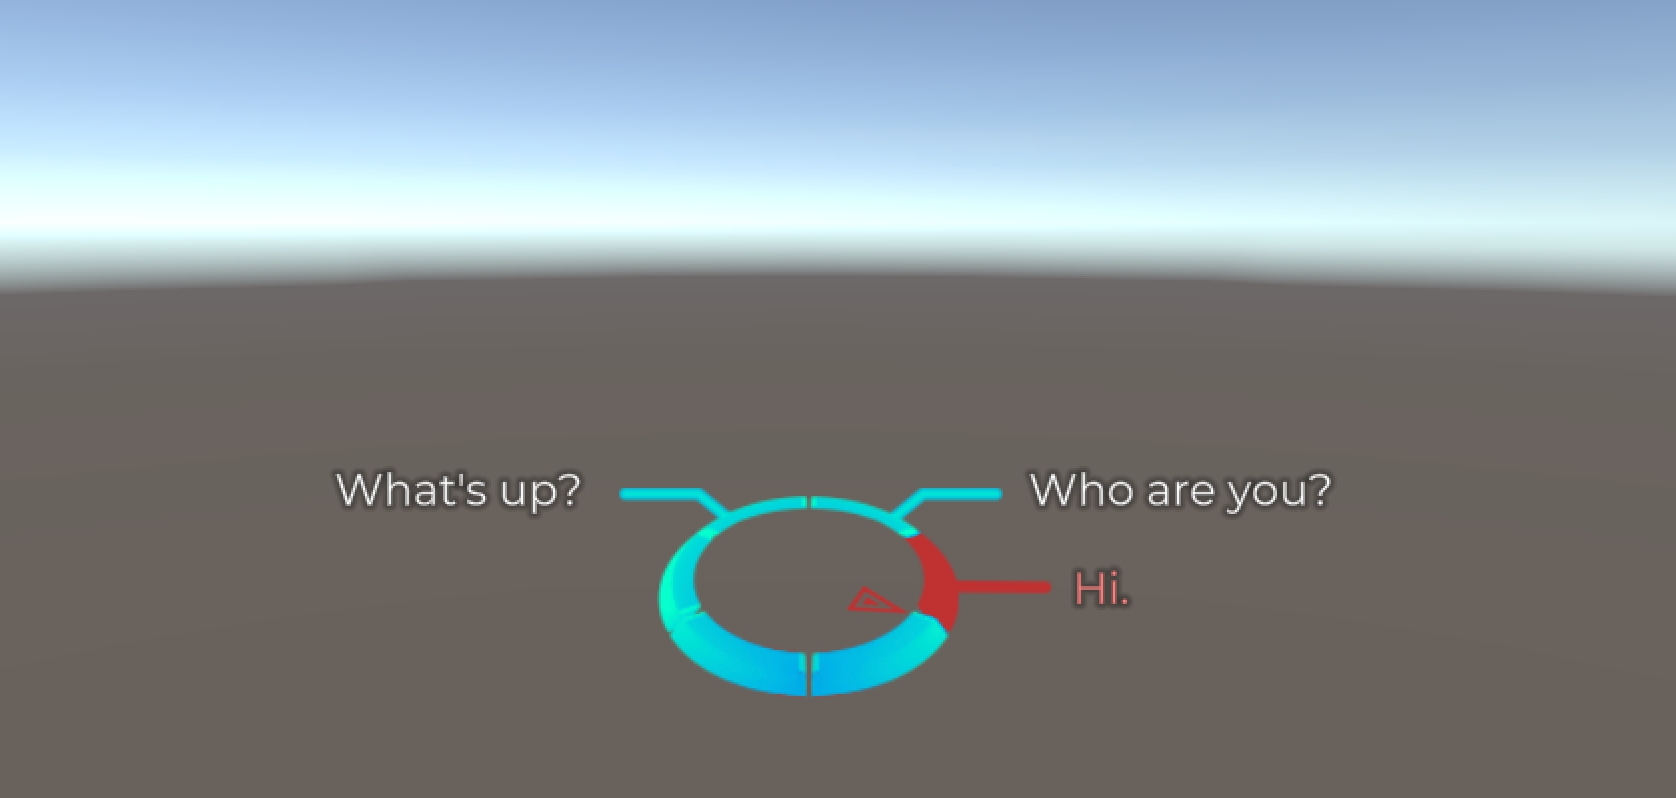
You can specify which position on the wheel your dialogue appears using tags in your Yarn scripts. Specifically, you can add tags to each set of options to specify where in the wheel the option should be placed.
For example, the following Yarn script:
Results in this:
If you select the Six-Segment Dialogue Wheel Prefab in the Hierarchy (under Dialogue System), you can look to the Inspector to customise these tags, among other options:
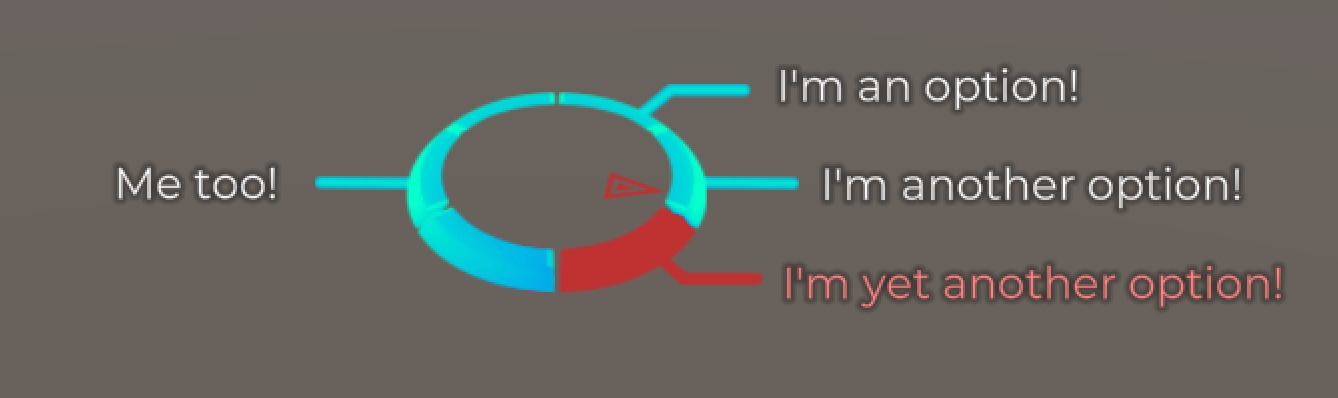
You can also use the Yarn Command <<set-opt>> before each group of options in your Yarn scripts to specify how many options (limited to a maximum of three on either side) should appear in each column (left or right).
For example, the following Yarn Script:
Will result in this:
If you use set-opt to specify more options than the six-segment wheel can handle (i.e. a maximum of 3 options on each side), things may not work as expected
Review the provided Six-Segment Dialogue Wheel Example for more information, or check out the guide on Using Auto-Layout Dialogue Wheel.
Learn how to install the Dialogue Wheel for Yarn Spinner Package.
You can purchase Dialogue Wheel for Yarn Spinner from the Yarn Spinner Itch Store.
To use the Dialogue Wheel for Yarn Spinner package in Unity, you'll also need to make sure you've got the Yarn Spinner for Unity package installed.
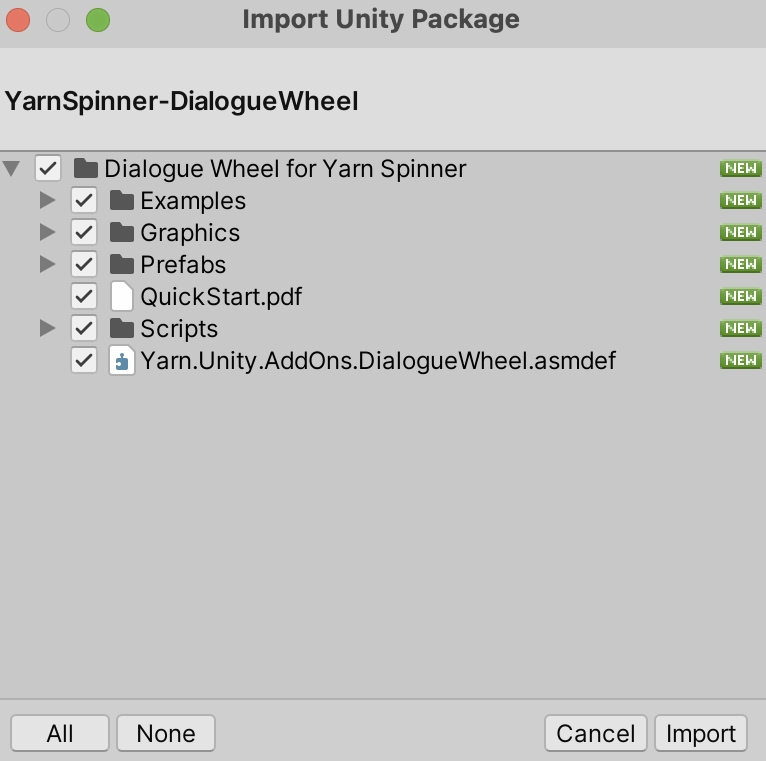
Once you've purchased it, download the package from the store. It will be in the form of a .unitypackage file. To install the package, open the Unity project that you want to add it to, and open the the Assets menu -> Import Package -> Custom Package...
You'll then be able to select the .unitypackage file for Dialogue Wheel for Yarn Spinner on your file system, and click Open. This will present the Import Unity Package window:
Click the Import button, and Dialogue Wheel for Yarn Spinner will be imported into your project.
Next, check out the guides on Using Six-Segment Dialogue Wheel, or Using Auto-Layout Dialogue Wheel, as well as
Dialogue Wheel for Yarn Spinner ships with two example scenes, showcasing the flexibiltiy of the Dialogue Wheel.
This example shows off the Automatic-Layout Dialogue Wheel, with an ever-increasing number of options being displayed. Once you've installed the package, find this example in Dialogue Wheel for Yarn Spinner/Examples/Automatic Layout Example.
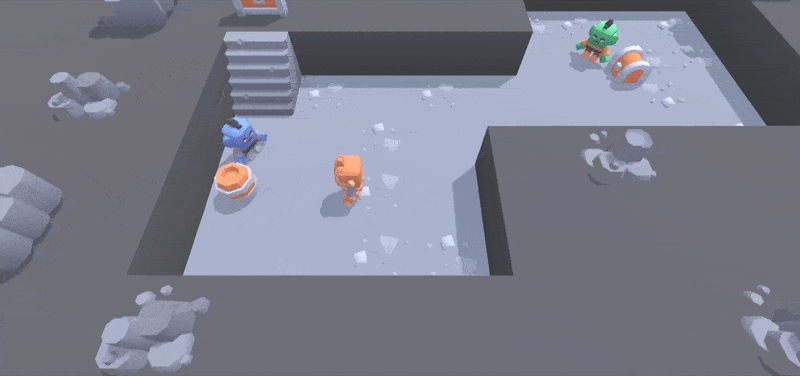
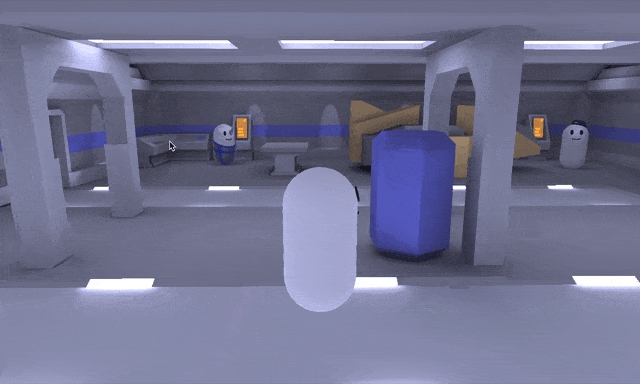
This example shows the Six-Segment Dialogue Wheel in action, with a very simple third-person sci-fi game. Once you've installed the package, find this example in Dialogue Wheel for Yarn Spinner/Examples/Six-Segment Example.
You can purchase these add-ons at the Yarn Spinner Itch Store. Purchasing Yarn Spinner, or a Yarn Spinner Add-on is a fantastic way to help support Yarn Spinner, and the team behind it.
Yarn Spinner is always free and open source. To help offset the costs of designing, building, and supporting Yarn Spinner, we provide a number of add-ons as paid extras to make implementing Yarn Spinner in your games easier for you.
At the moment, these include:
You can purchase both of these on the Yarn Spinner Itch.io Store:
This section of the Yarn Spinner documentation provides guides for the available add-ons.
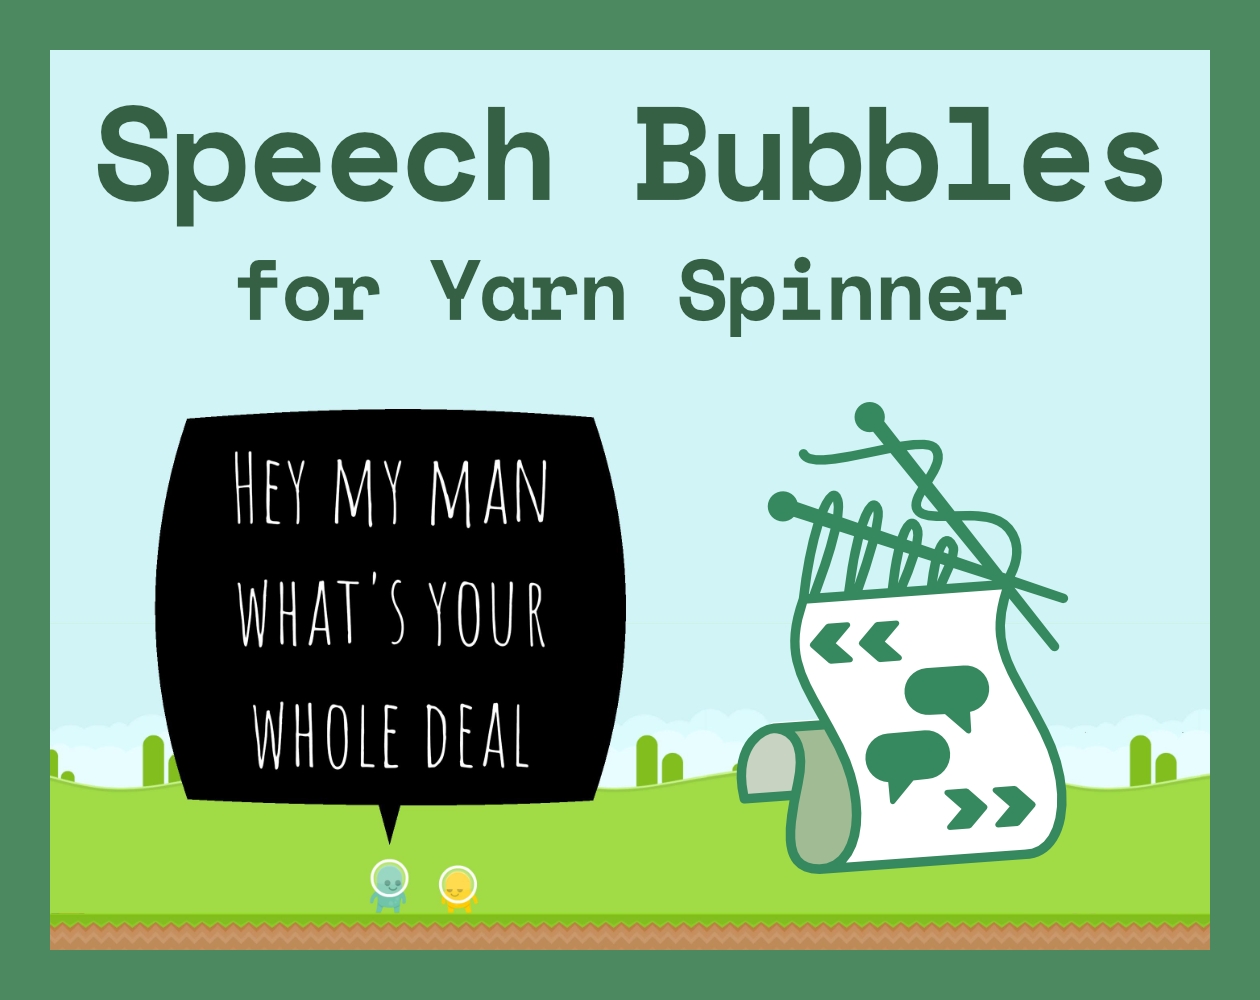
The guide and documentation for the paid Yarn Spinner for Unity add-on, Speech Bubbles for Yarn Spinner.
This Unity package provides two prefabs: Formal Bubble and Casual Bubble. The package requires Yarn Spinner for Unity.
This add-on is not part of the open source Yarn Spinner package, and can be purchased from the Yarn Spinner Itch.io Store:
Speech Bubbles for Yarn Spinner provides a Casual Bubble and a Formal Bubble prefab. Both are customisable, powerful, and extremely flexible:
customise fonts, colours, and styles of bubbles
optional character nameplate
flexible anchor point for bubble stem
lock bubbles to camera, or not, your choice
works for 2D or 3D games
This guide provides documentation on using both prefabs.
The oldest supported version of Unity for the Speech Bubbles is 2021.3.
Learn how to use the Automatic-Layout Dialogue Wheel, from the Dialogue Wheel for Yarn Spinner Add-On Package.
The Automatic-Layout Dialogue Wheel provides a dialogue wheel with a simple graphical appearance, and can—theoretically—support as many options as you'd like, automatically adjusting to display them.
To use the Automatic-Layout Dialogue Wheel make sure your Unity project has the Yarn Spinner package installed, and the install the Dialogue Wheel for Yarn Spinner package.
Then, create a new Dialogue Runner in your Hierarchy:
Then, in the Project pane, create a new Yarn Project asset:
And create a new Yarn Script to use:
Name both the Yarn Project, and the Yarn Script, something appropriate:
Open the Yarn script to write your story. Then save the Yarn script and return to Unity.
We've provided an initial sample story here, if you want to test things out.
Back in Unity, choose the Dialogue Runner that you added to the Hierarchy, right-click it and choose Prefab -> Unpack. This will allow you to modify the contents of the (former) prefab, in order to add the Automatic-Layout Dialogue Wheel as a Dialogue View.
With the Dialogue Runner selected in the Hierarchy, drag the Yarn Project that you created from the Project pane into the Yarn Project slot in the Dialogue System's Inspector:
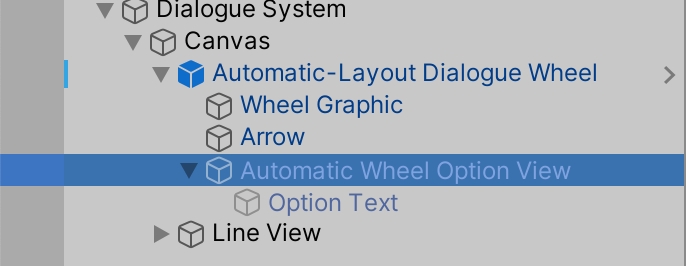
Next, locate the Automatic-Layout Dialogue Wheel prefab, supplied with this add-on, and drag it from the Project pane, so it's below the Canvas in the Hierarchy:
Right-click on the Options List View in the Hierarchy, and choose Delete. You won't need that view, as you'll be displaying a wheel, instead of a list. To make the Dialogue System aware of the Automatic-Layout Dialogue Wheel, select it (the Dialogue System) in the Hierarchy, and drag the Automatic-Layout Dialogue View from the Hierarchy into the Element 1 slot of the Dialogue Views section in the Inspector:
If you save your scene and run it, your Automatic-Layout Dialogue Wheel should now be working!
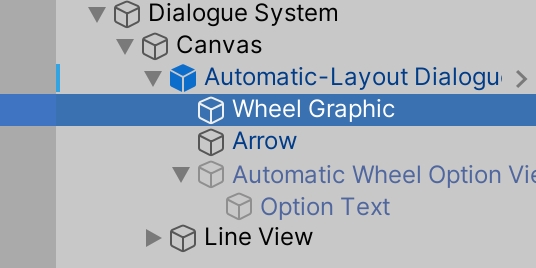
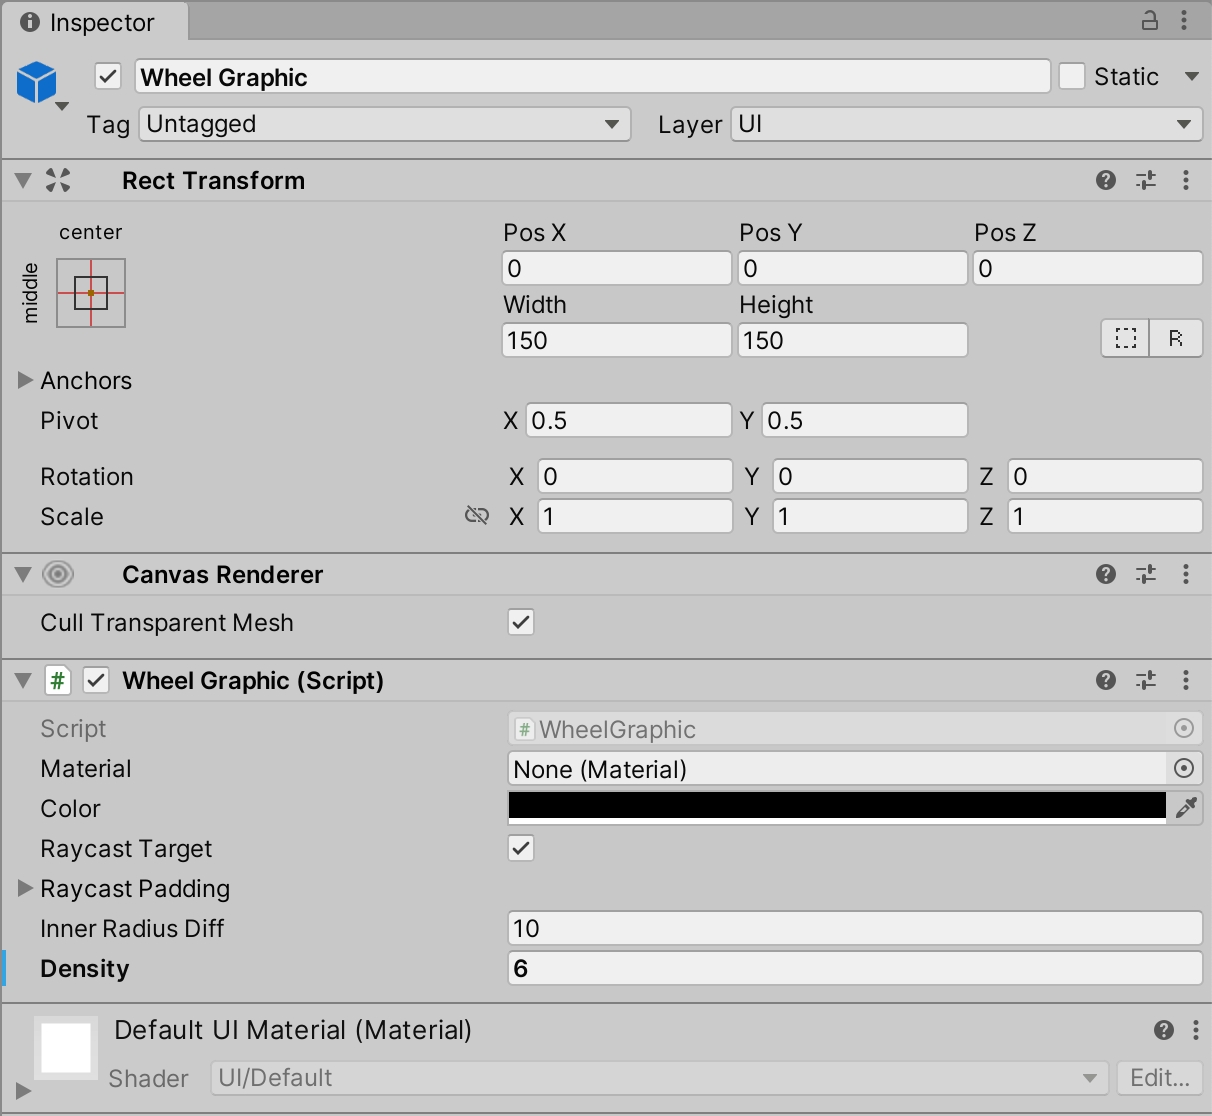
To customise the supplied wheel, select the Wheel Graphic in the Hierarchy:
And look to the Inspector:
Here, on the Wheel Graphic component, you can customise a variety of things, such as the material, color, inner radius, and density of the wheel. For example, if you set the Density field to 6, as we did above, your wheel will become a hexagon:
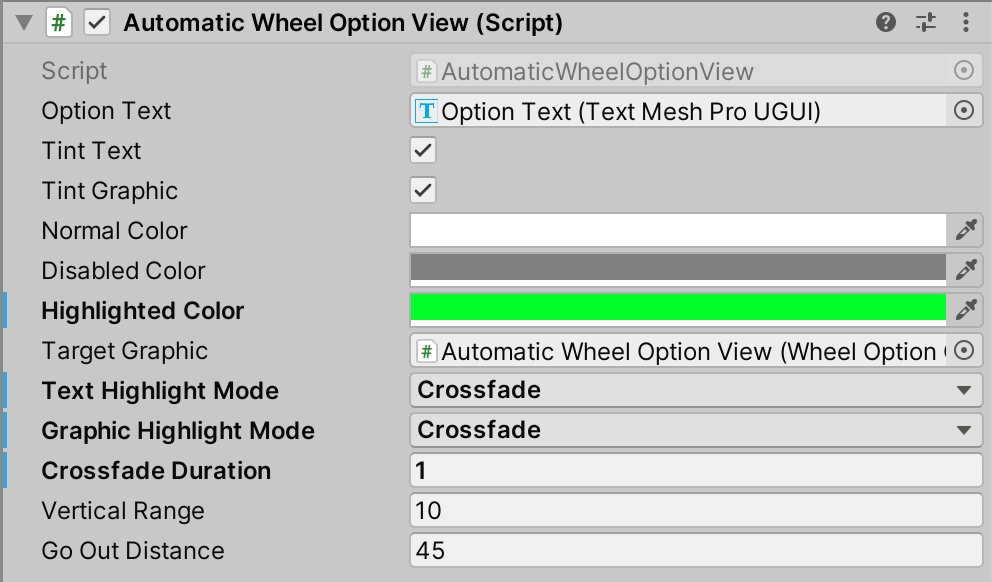
To customise the way each option is displayed around the wheel, select the Automatict Wheel Option View under Automatic-Layout Dialogue Wheel prefab:
And look to the Inspector:
You can tweak some of the fields here to customise the options that are displayed around the wheel. Specifically, you might want to customise the following.
On the Automatic Wheel Option View:
Normal Color — the color of each option that's not currently highlighted or disabled
Disabled Color — the color of each option that's displayed, but cannot be chosen
Highlighted Color — the color of the option that's currently selected (but not yet chosen)
Text/Graphic Highlight Mode — whether each option is immediately highlighted when it's selected, or whether they crossfade between
Crossfade Duration — the duration of the crossfade, if crossfading
On the Wheel Option Graphic:
Material — the Material used for circle graphic displayed near each option
Width — the size of the circle graphic displayed near each option
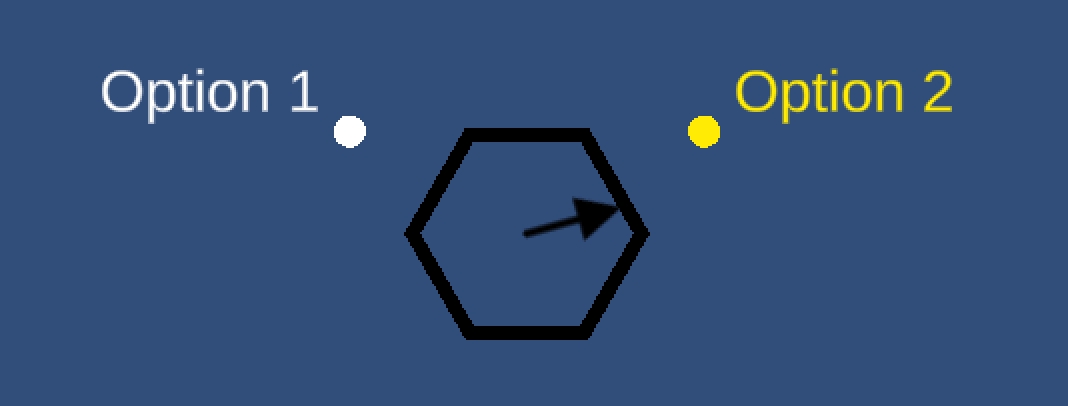
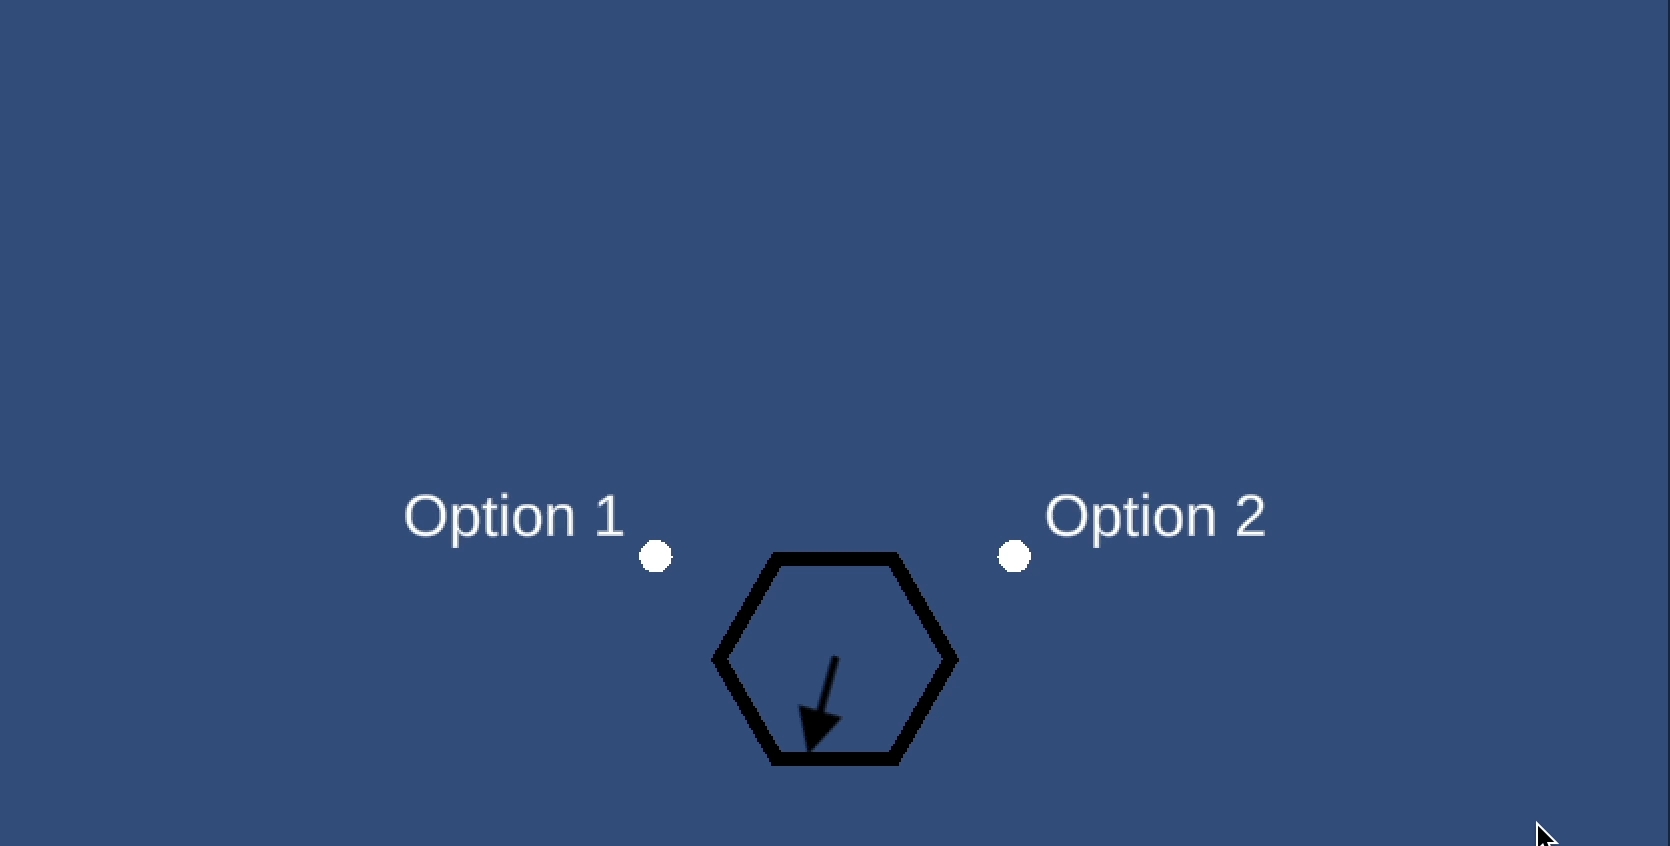
For example, if you wanted to highlight selected options in green, and crossfade between them, you could set the following:
Which would result in something like this:
And that's everything you need to know to use the Automatic-Layout Dialogue Wheel! Review the Dialogue Wheel Examples for more.