Learn how to install Yarn Spinner for Visual Studio Code.
If you're already familiar with VS Code and VS Code extensions, you can just install the extension secretlab.yarn-spinner, or click here and hit the install button, and you'll be ready to go.
Once you've got Visual Studio Code (often abbreviated to "VS Code", or "Code") installed on your system, you'll want to install the Yarn Spinner extension. To install the Yarn Spinner Extension:
Launch Visual Studio Code.
Open the Extensions view. To do this, select the blocks symbol from the left-hand sidebar, or press Command+Shift+K on macOS, or Control+Shift+X on Windows or Linux.
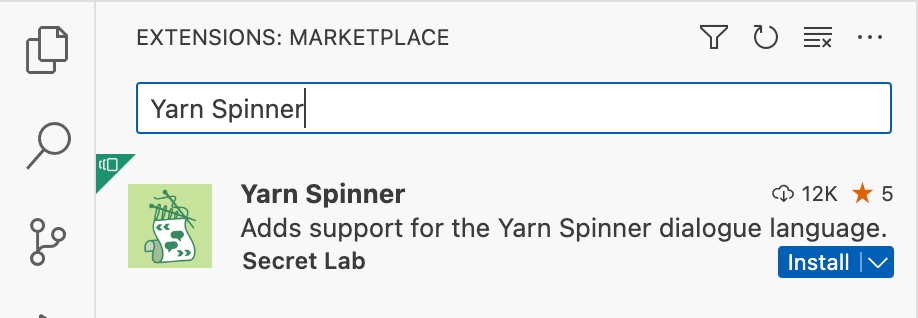
Search for the Yarn Spinner Extension. With the Extensions view open, type "Yarn Spinner" into the search field.
Install the Extension. Once the results have loaded, click "Install" next to the Secret Lab-provided Yarn Spinner Extension.
That's all you need to do to install the extension! You're ready to write and edit Yarn scripts with Visual Studio Code.
Learn how to use Yarn Spinner for Visual Studio Code as your Yarn editor.
With the Yarn Spinner Visual Studio Code Extension installed, you can make new Yarn files, and edit existing ones, right inside the VS Code editor.
You can use the File menu -> New file command to make a new empty file. Simply save the file with a .yarn extension to activate the Yarn Spinner Extension features.
Yarn Spinner for Visual Studio Code is designed to work with a folder, not single files. If you're having trouble, open a folder with your .yarn file or files in it.
You can also open any existing .yarn file, or folder of .yarn files, using VS Code.
Here, we'll walkthrough the process of using Yarn Spinner for Visual Studio Code to write .yarn stories.
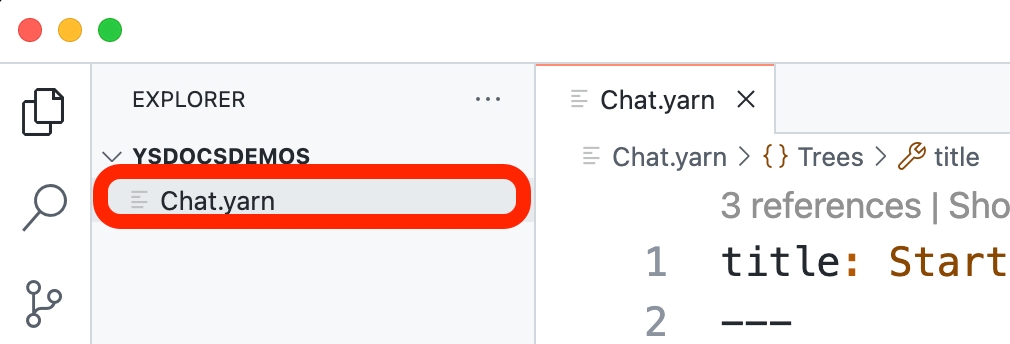
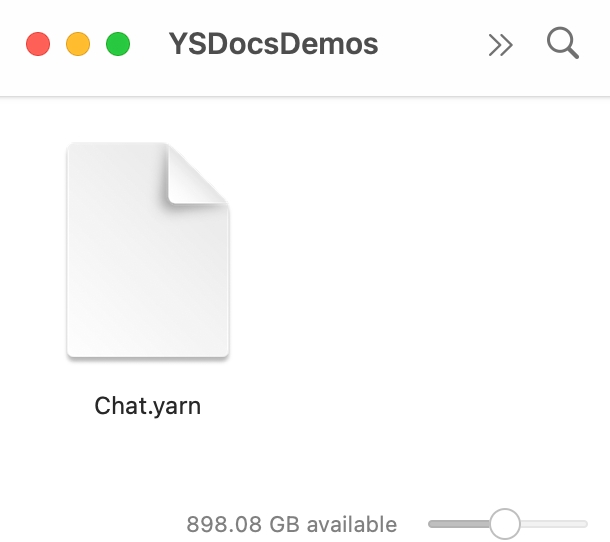
For this example, we'll start with an existing story (Chat.yarn) in a folder (YSDocsDemos):
You can download this folder as a .zip file here, if you want to follow along. TODO LINK.
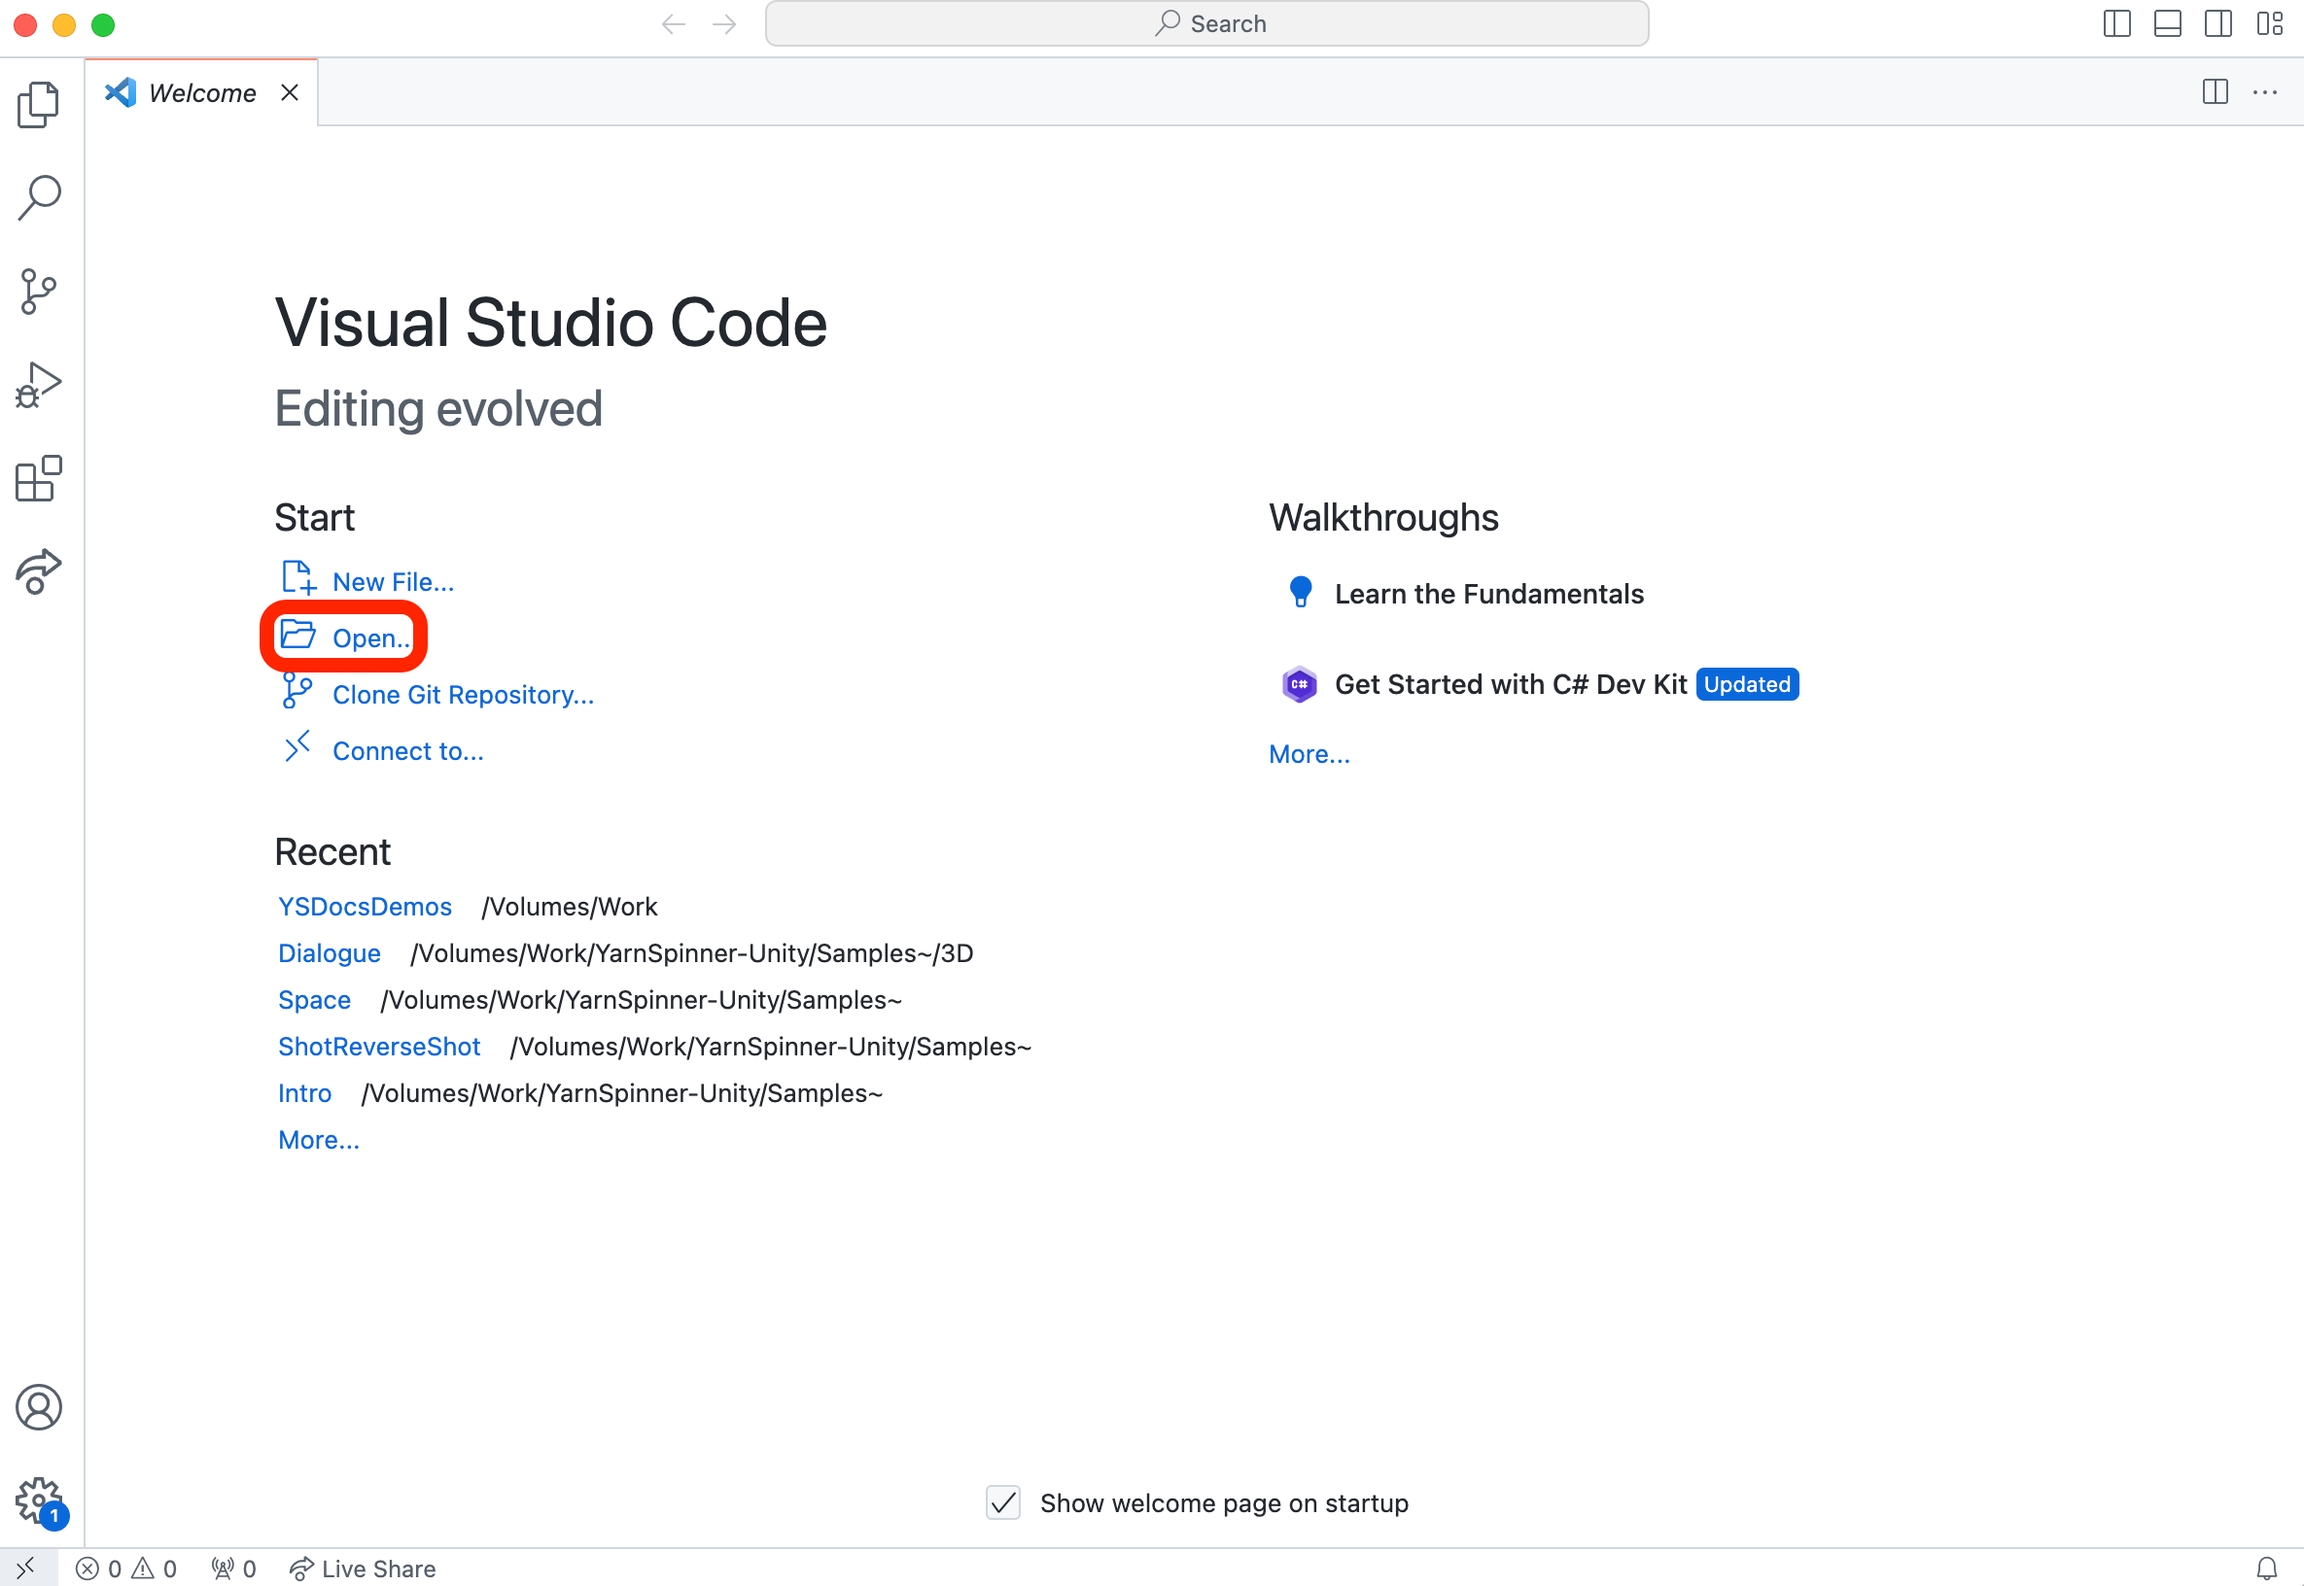
If we open VS Code, the default screen will have an Open button right in the middle.
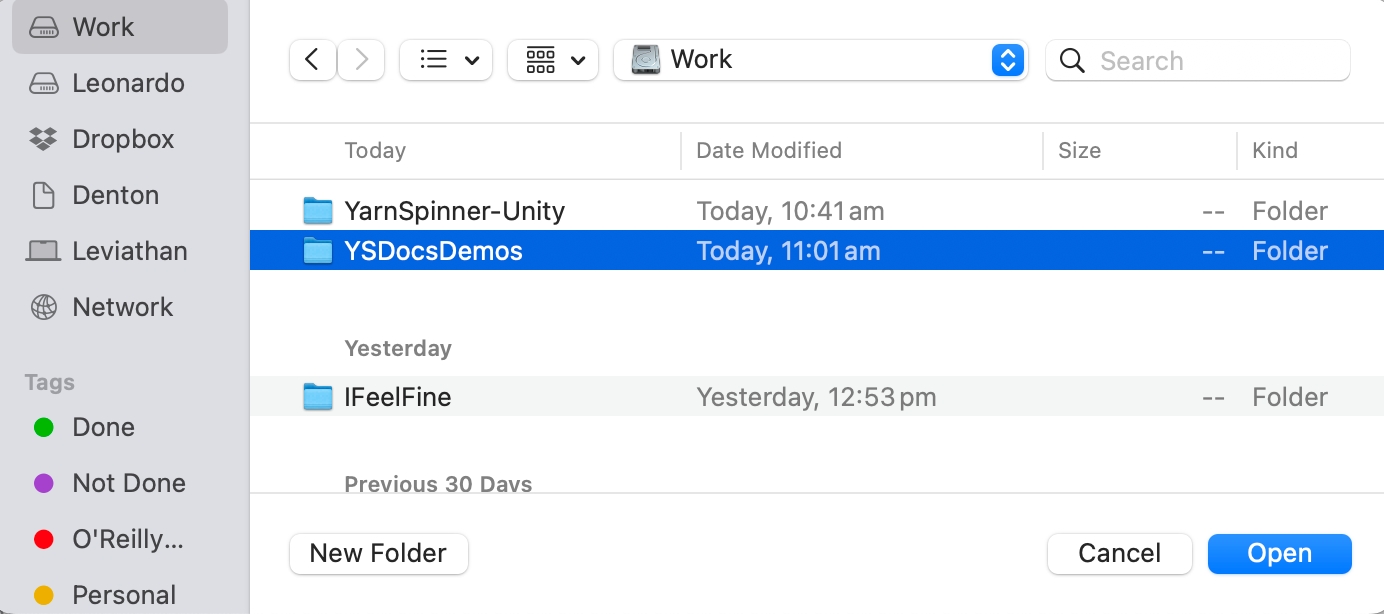
Click this button, or choose the File menu -> Open Folder..., and then open the folder containing your .yarn files:
When the folder opens, you'll see the sidebar of VS Code change to reflect the contents of the folder. You can click on a .yarn file to open it in the text editor:
With a .yarn file open in VS Code, you can verify that the Yarn Spinner for Visual Studio Code Extension is active by looking in the bottom right-hand corner of the screen, and locating the words "Yarn Spinner":
The bottom right-hand corner of Visual Studio Code window will only show "Yarn Spinner" if both the Yarn Spinner for Visual Studio Code extension is installed, and the currently active file is recognised as a .yarn file by its extension.
You can use the text editing view to work with .yarn, and to write your narratives. The Yarn Spinner for Visual Studio Code extension provides all sorts of features to make this process easier.
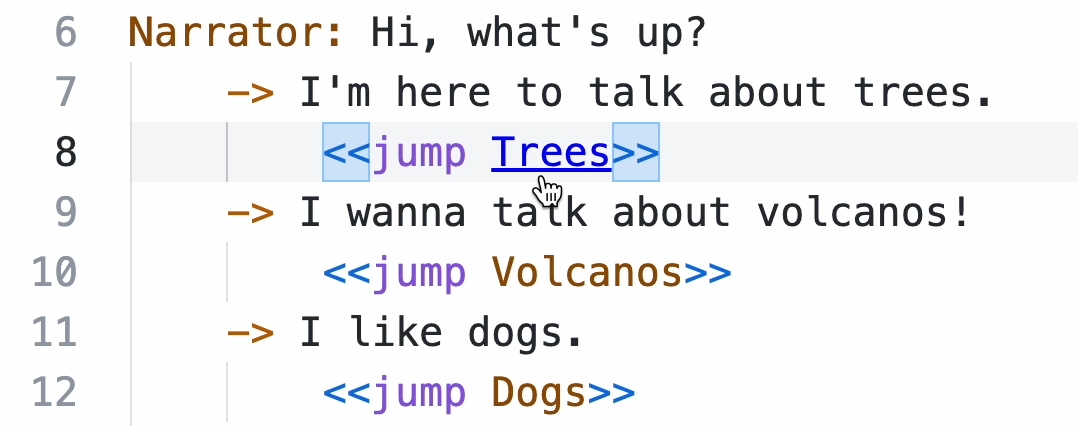
For example, if you hold the Command key (on macOS) or the Control key (on Windows or Linux) and hover over names of nodes in, for example, `<<jump>> statements, you'll be able click on them to move the editor view to the Yarn that represents that node:
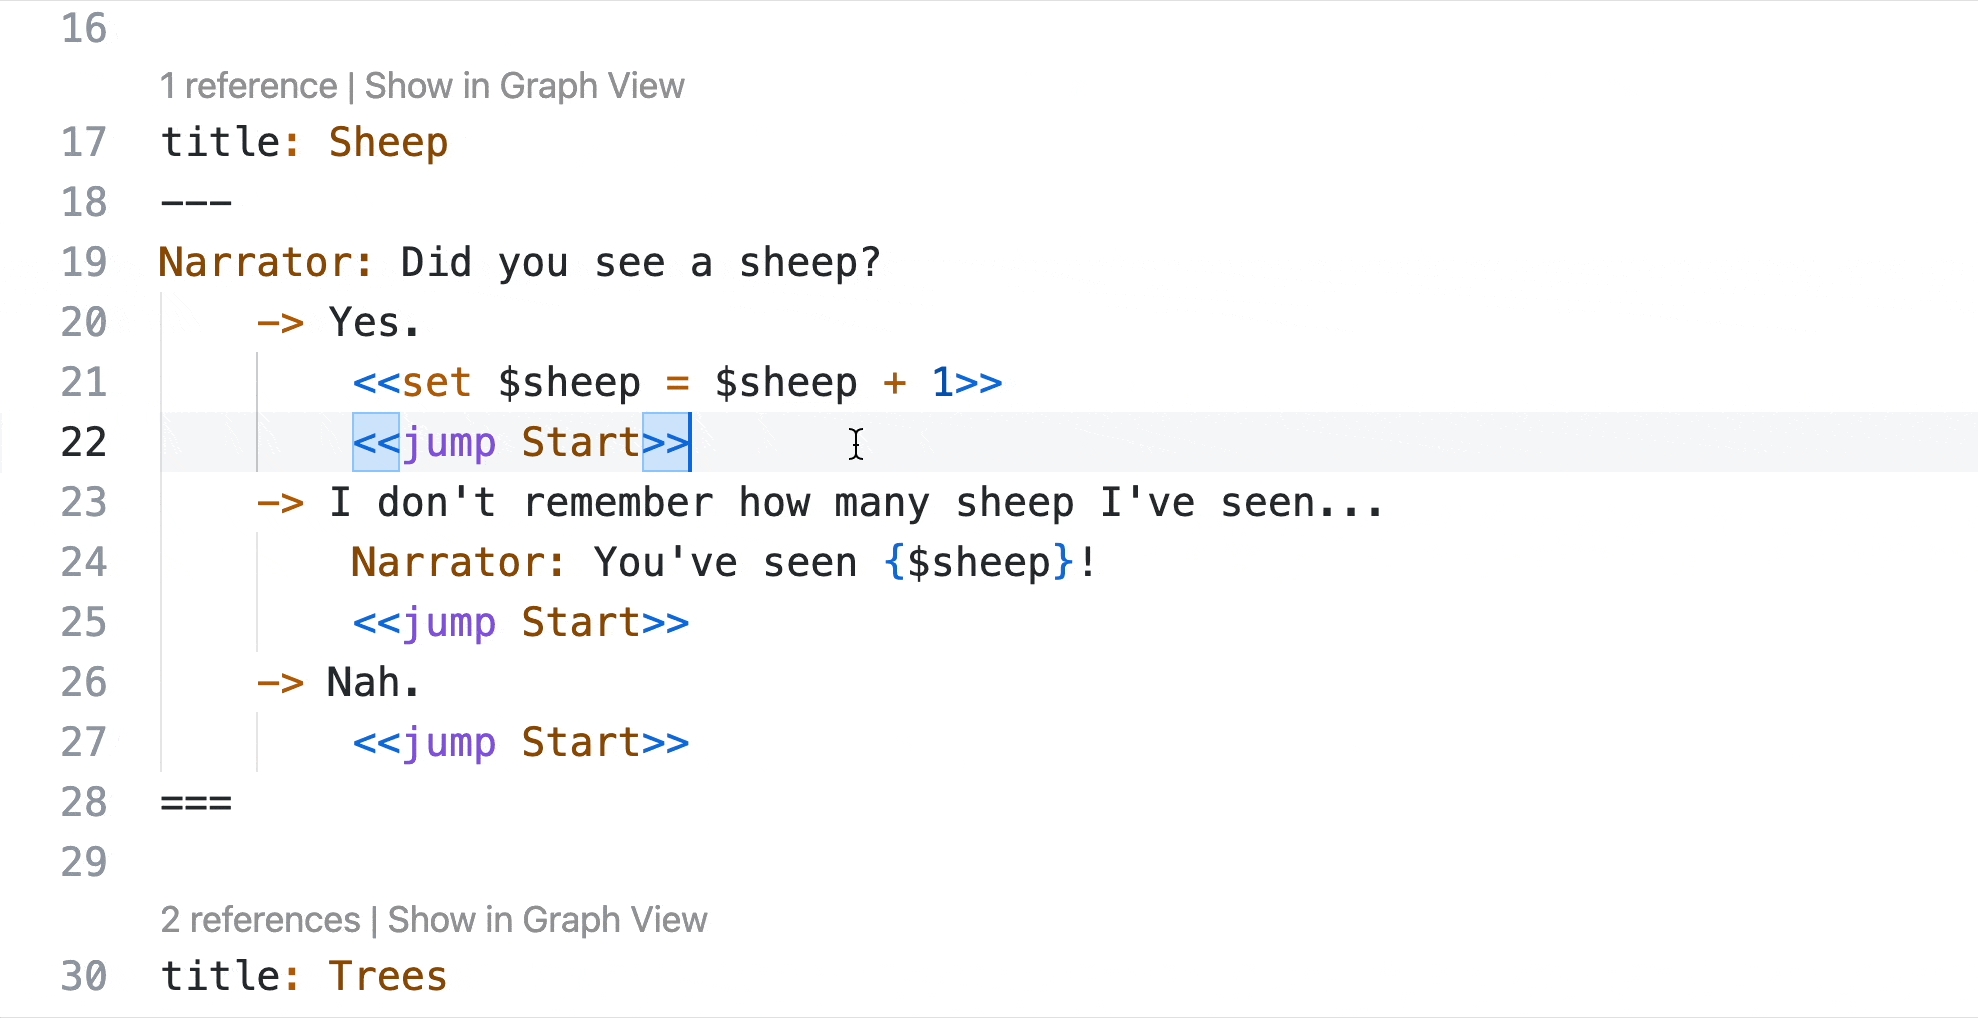
You'll also be offered autocomplete suggestions based on node names that exist in your project. For example, if you create a new <<jump>> statement, you'll be able to pick from your nodes:
If your Yarn projects also use variables, Yarn Spinner for VS Code will help out as well. For example, when you <<declare>> a new variable, you can add a comment with three / in front of it to provide a description of the variable:
Then, when you use the variable, you can hover over it in VS Code for a reminder of its purpose (and its default value):
Variable names will also autocomplete when you try and use them, and errors will be show if there are type isues. So, if you <<declare>> a variable to be a certain type, for example a boolean:
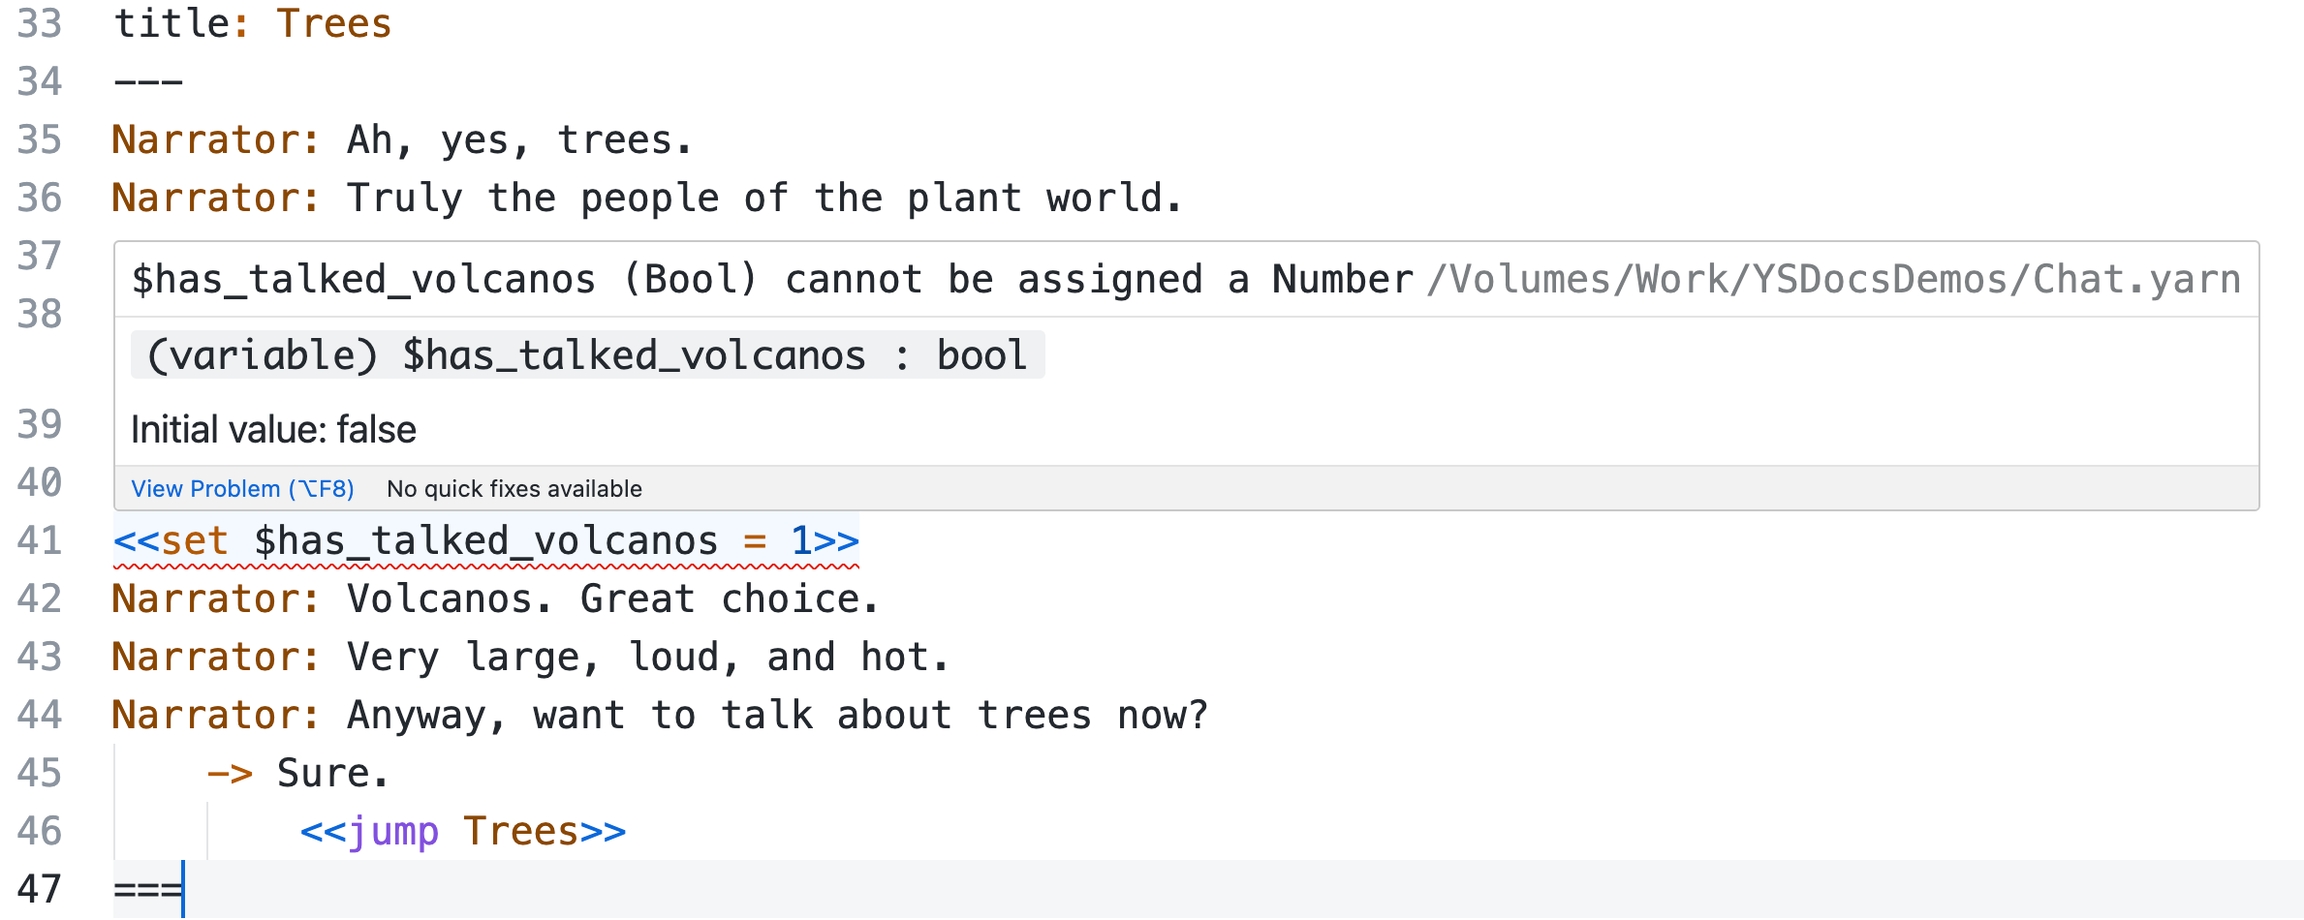
... and then attempt to use that variable in a way that would produce an error. For example, by attempting to assign a number to it, then Yarn Spinner for Visual Studio Code will show an error:
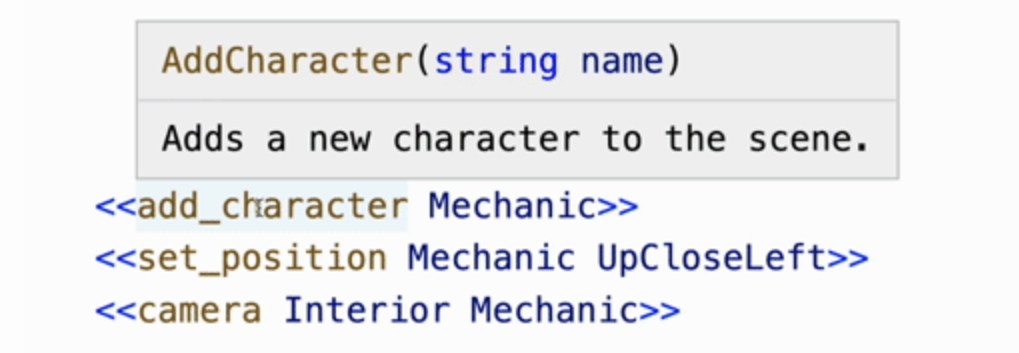
You'll also be able to see documentation comments from commands defined in your game's C# source code:
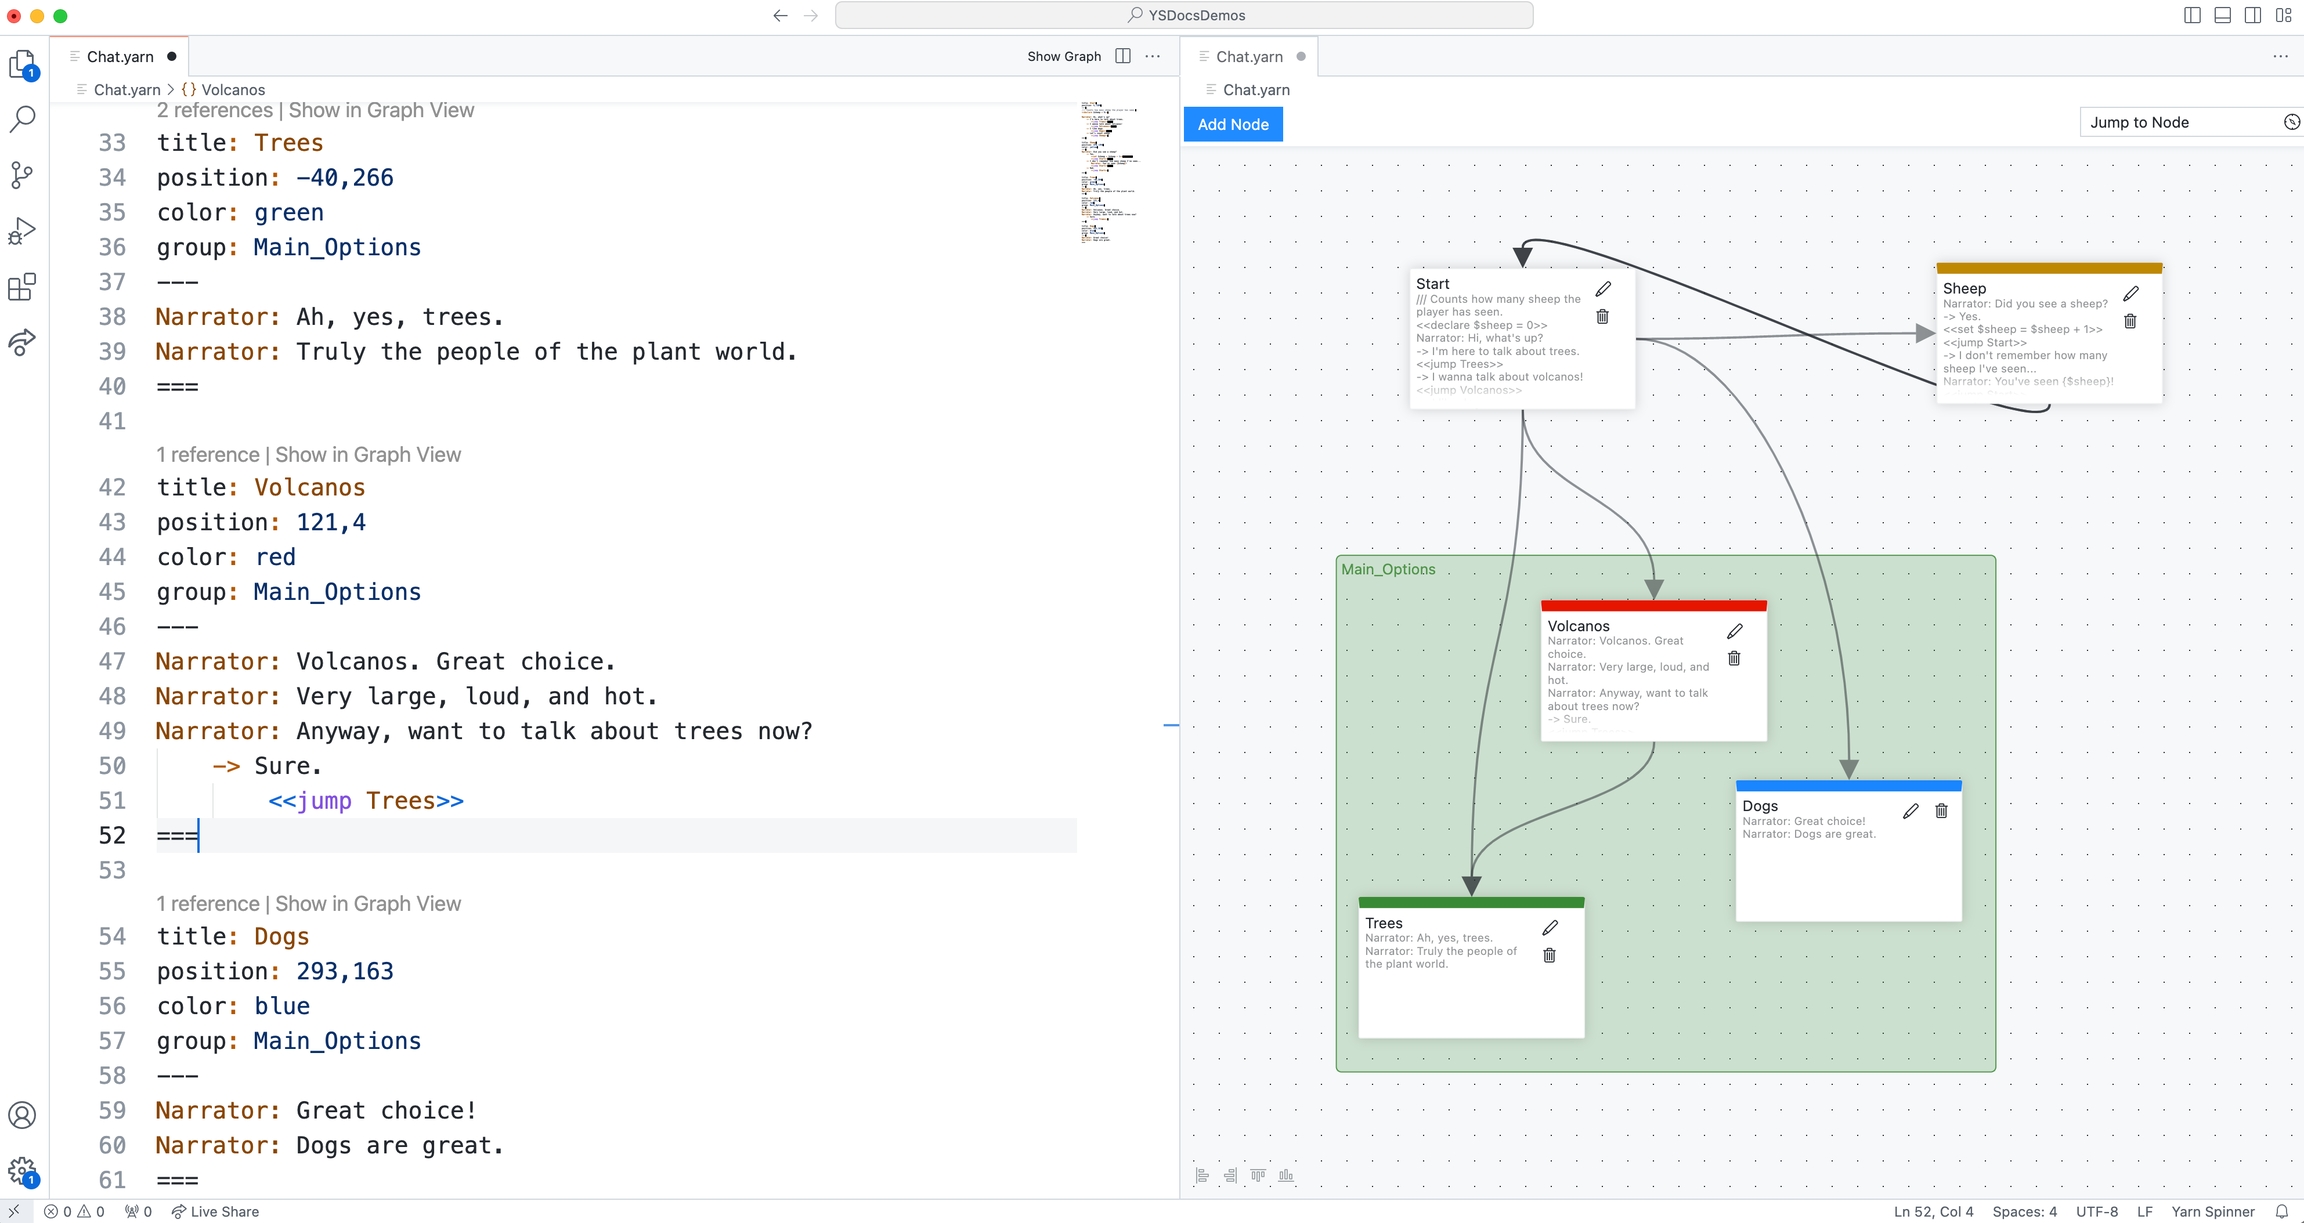
While Yarn is a text based language, our Yarn Spinner for Visual Studio Code extension provides a handy Graph View. You can open the Graph View for whichever .yarn file you're currently working with by clicking the Graph View button in the top right-hand corner:
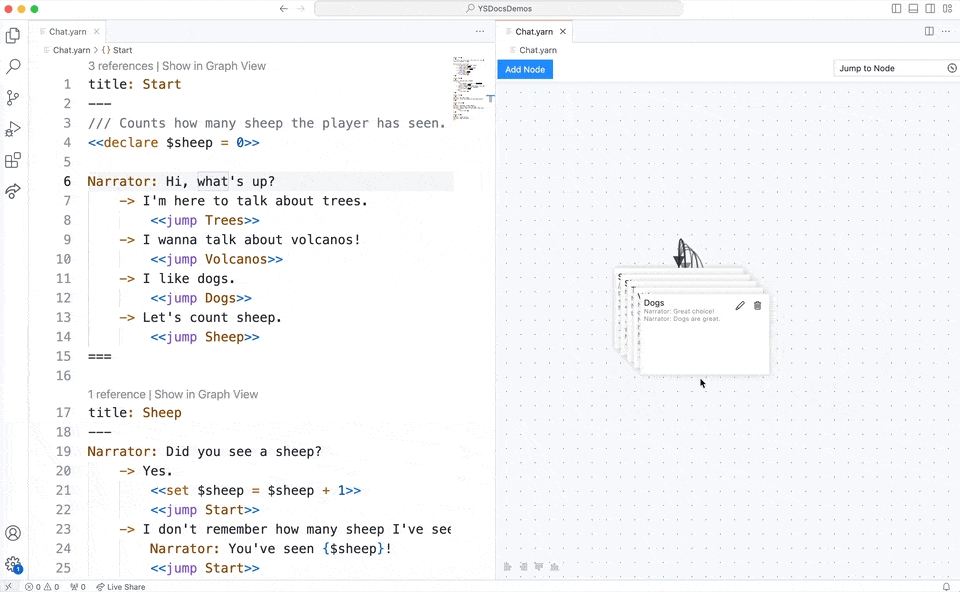
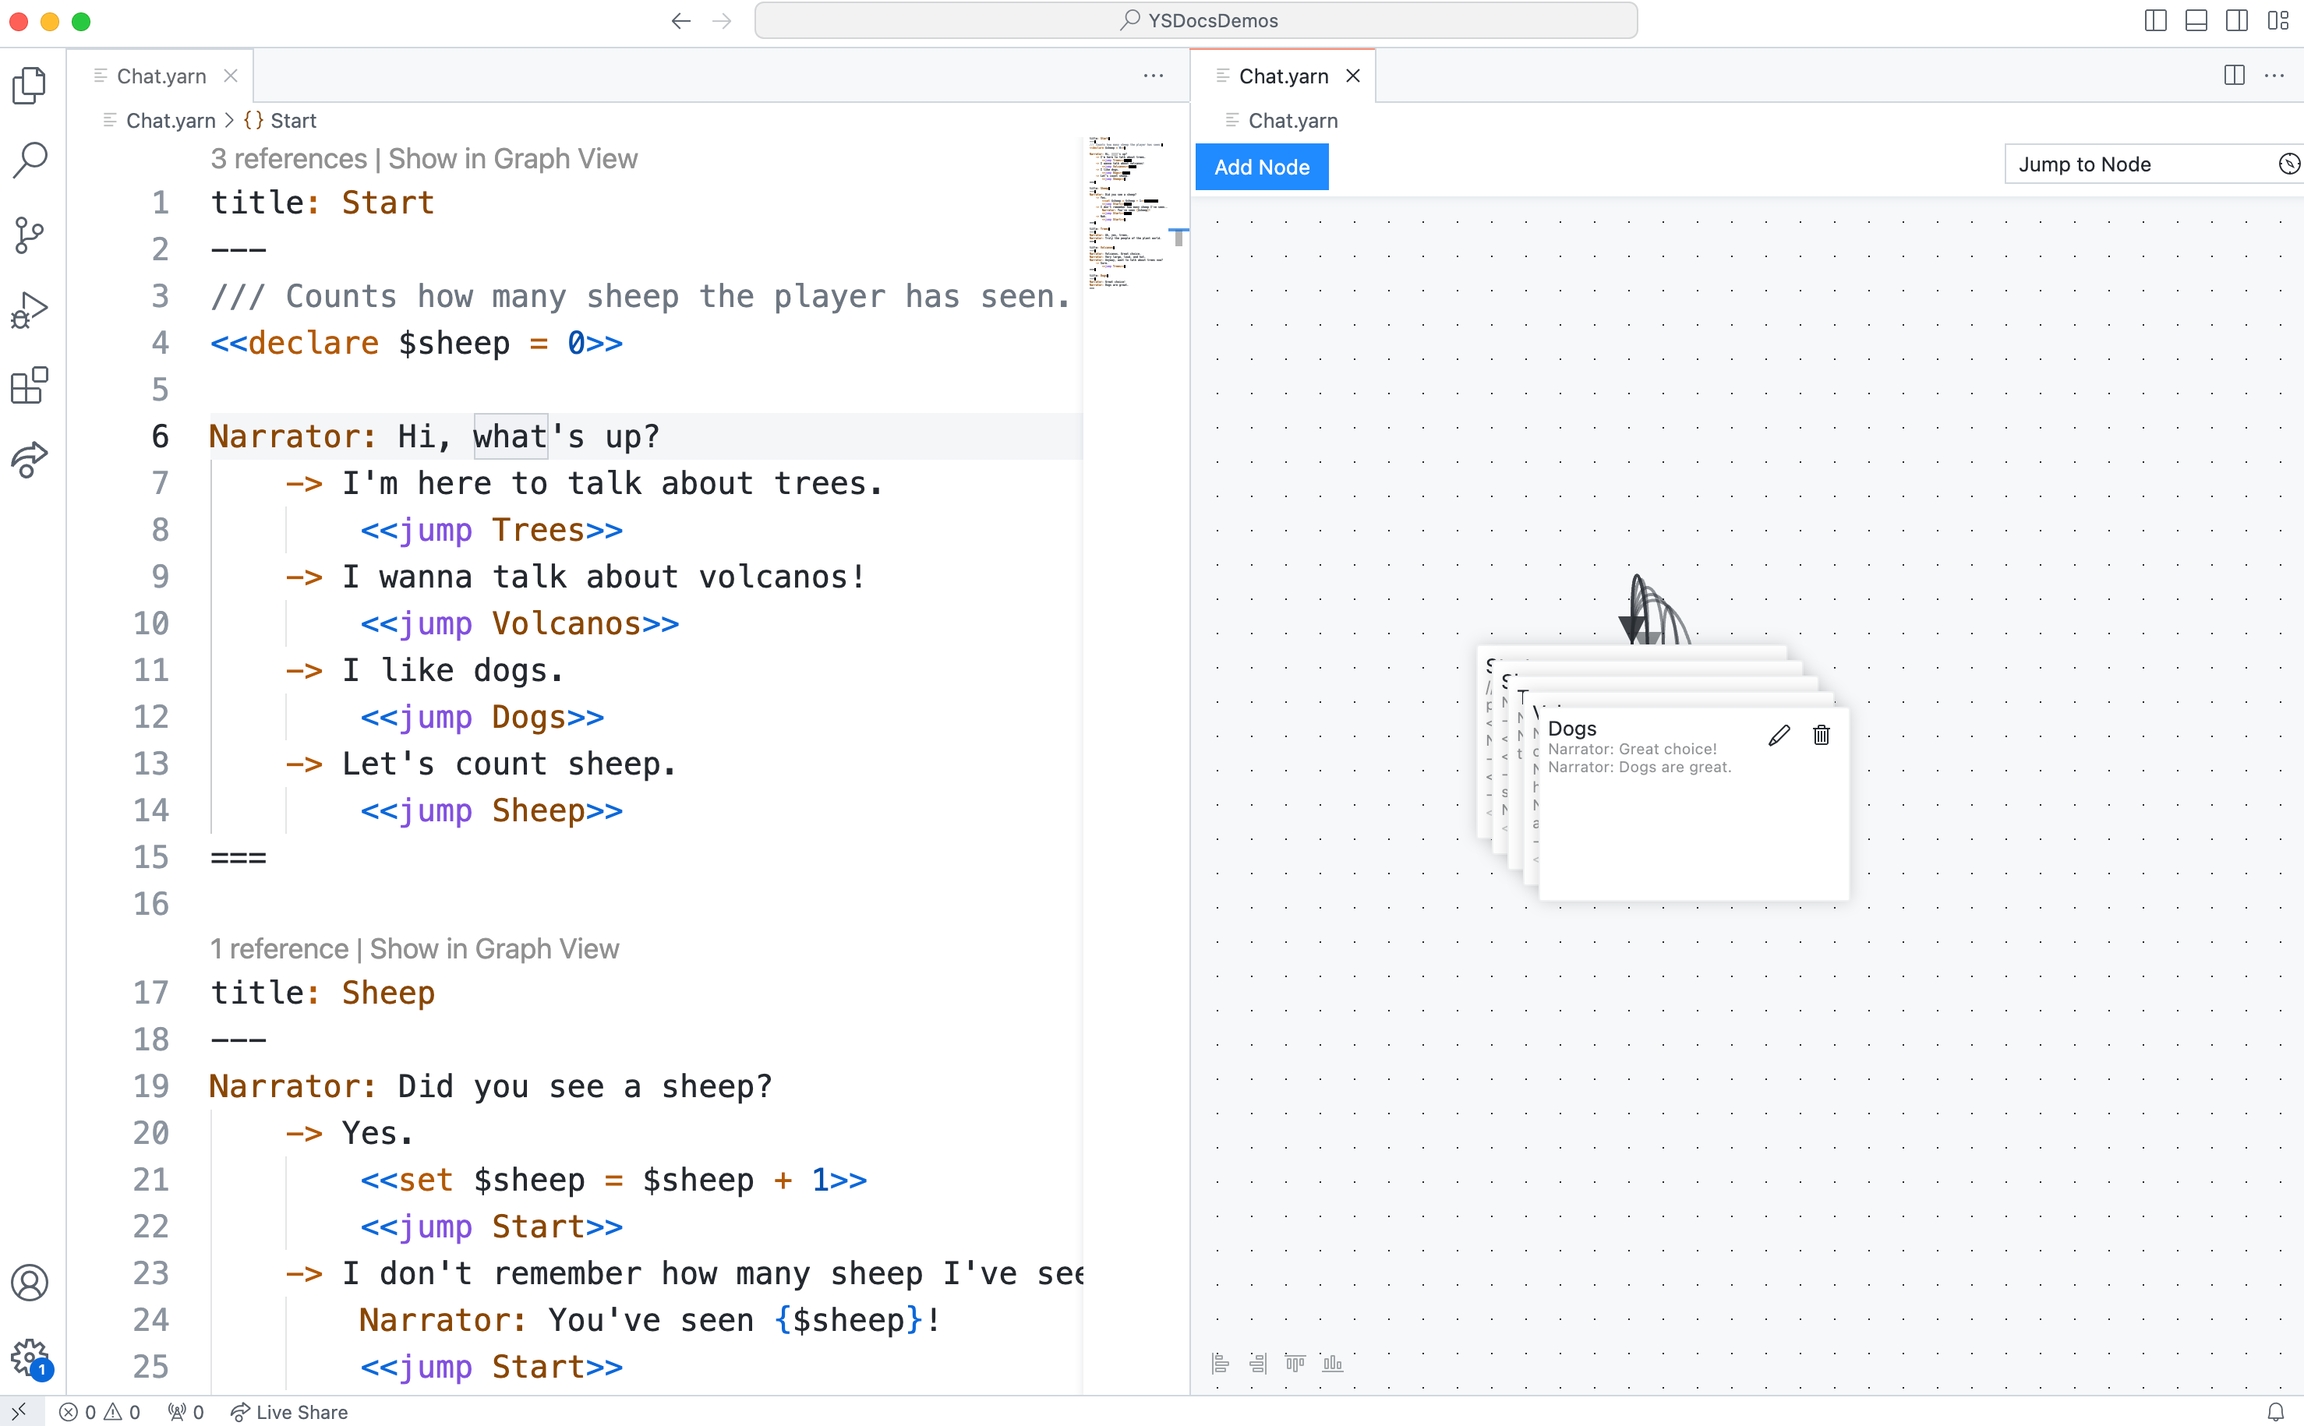
You might notice that, when you first look at the Graph View for a .yarn file, all the nodes appeared stacked on each other, like this:
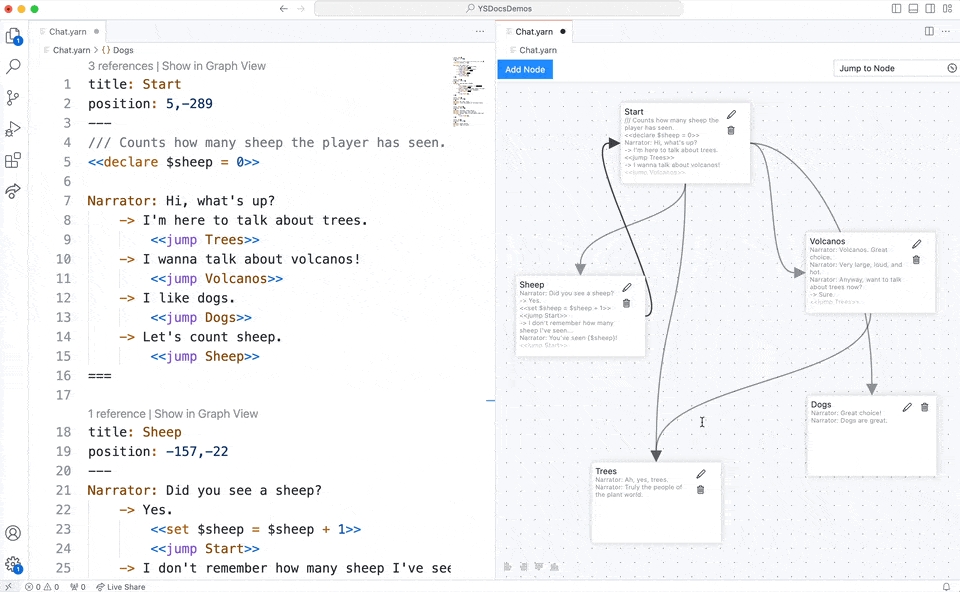
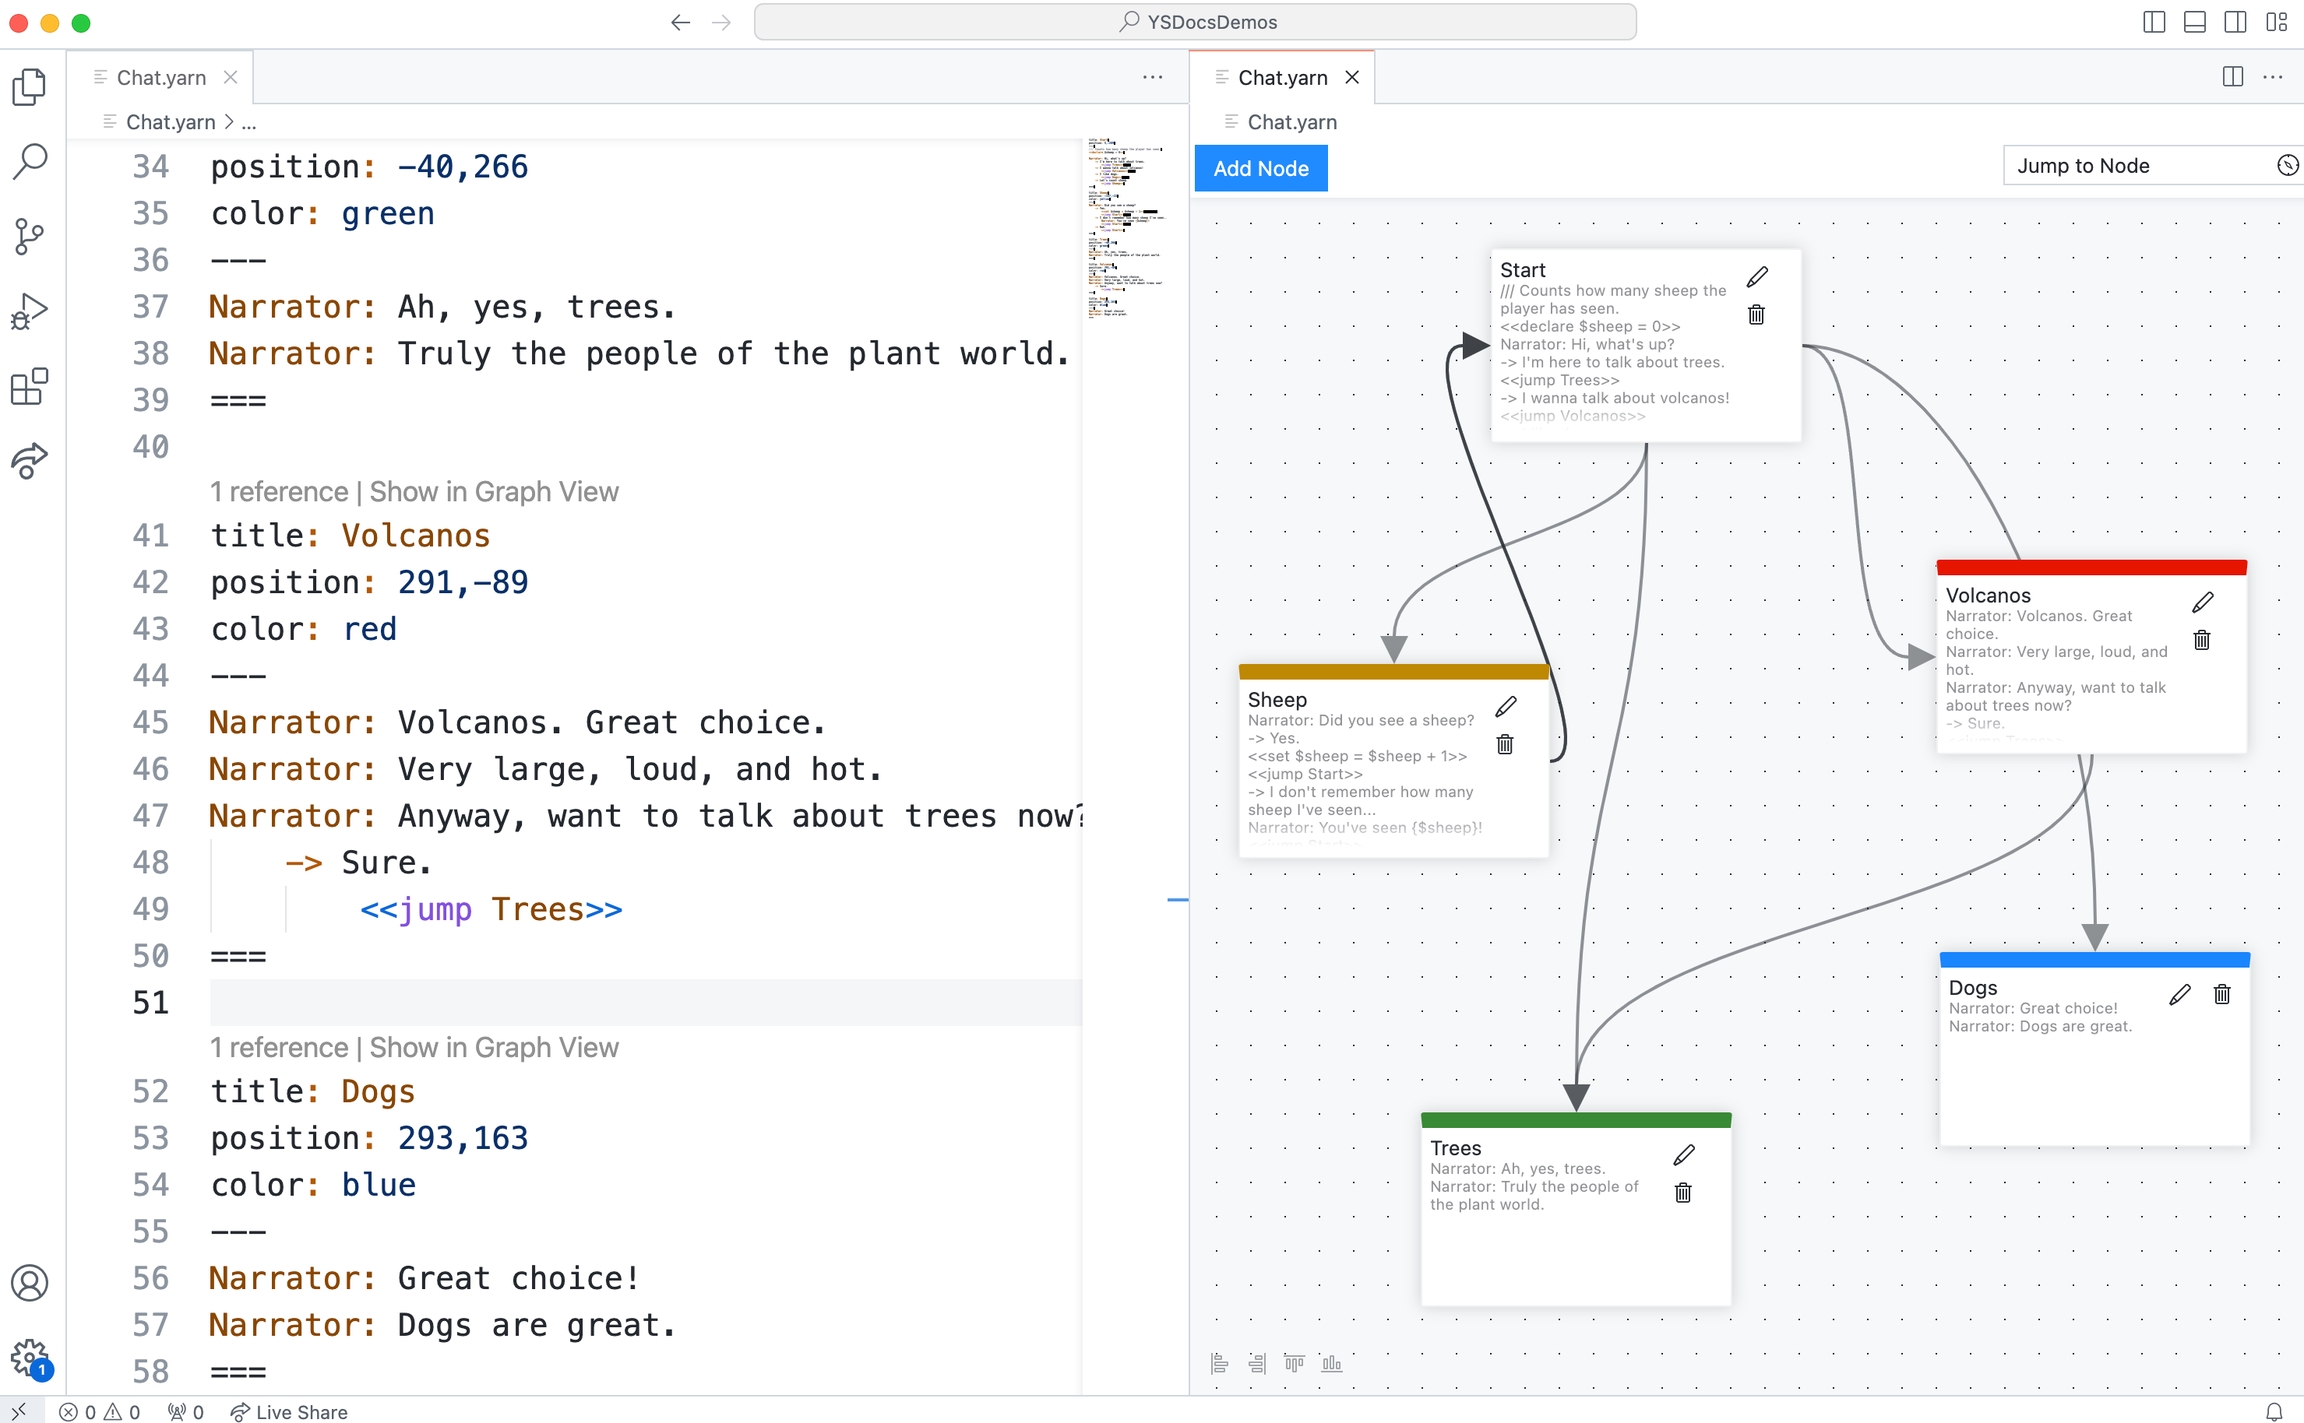
To make sense of things, and better understand the <<jump>> use between nodes, you can rearrange the nodes by clicking and dragging to wherever you want them:
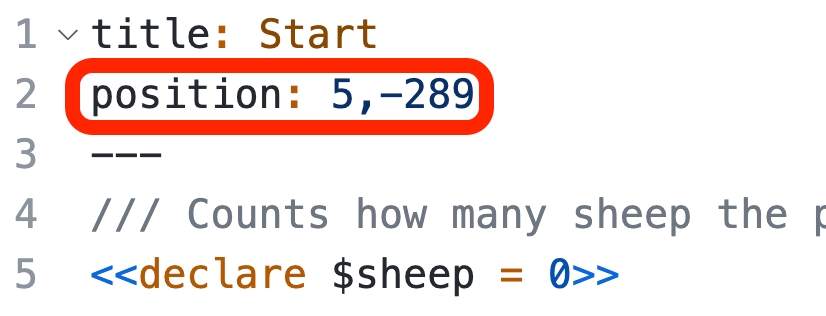
The position of the nodes will be stored in each node's header:
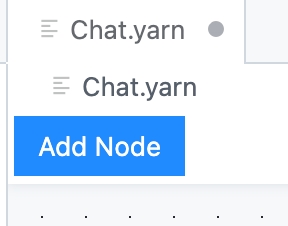
You can use the Add Node button, found at the top of the Graph View, to add new nodes. New nodes will appear in the Graph View, and in the text editor:
Double-clicking a node in the Graph View will jump to that node in the Text View:
If you have a lot of nodes, you can use the Jump to Node menu, in the top right-hand corner of the Graph View, to jump the Graph View to a specific node:
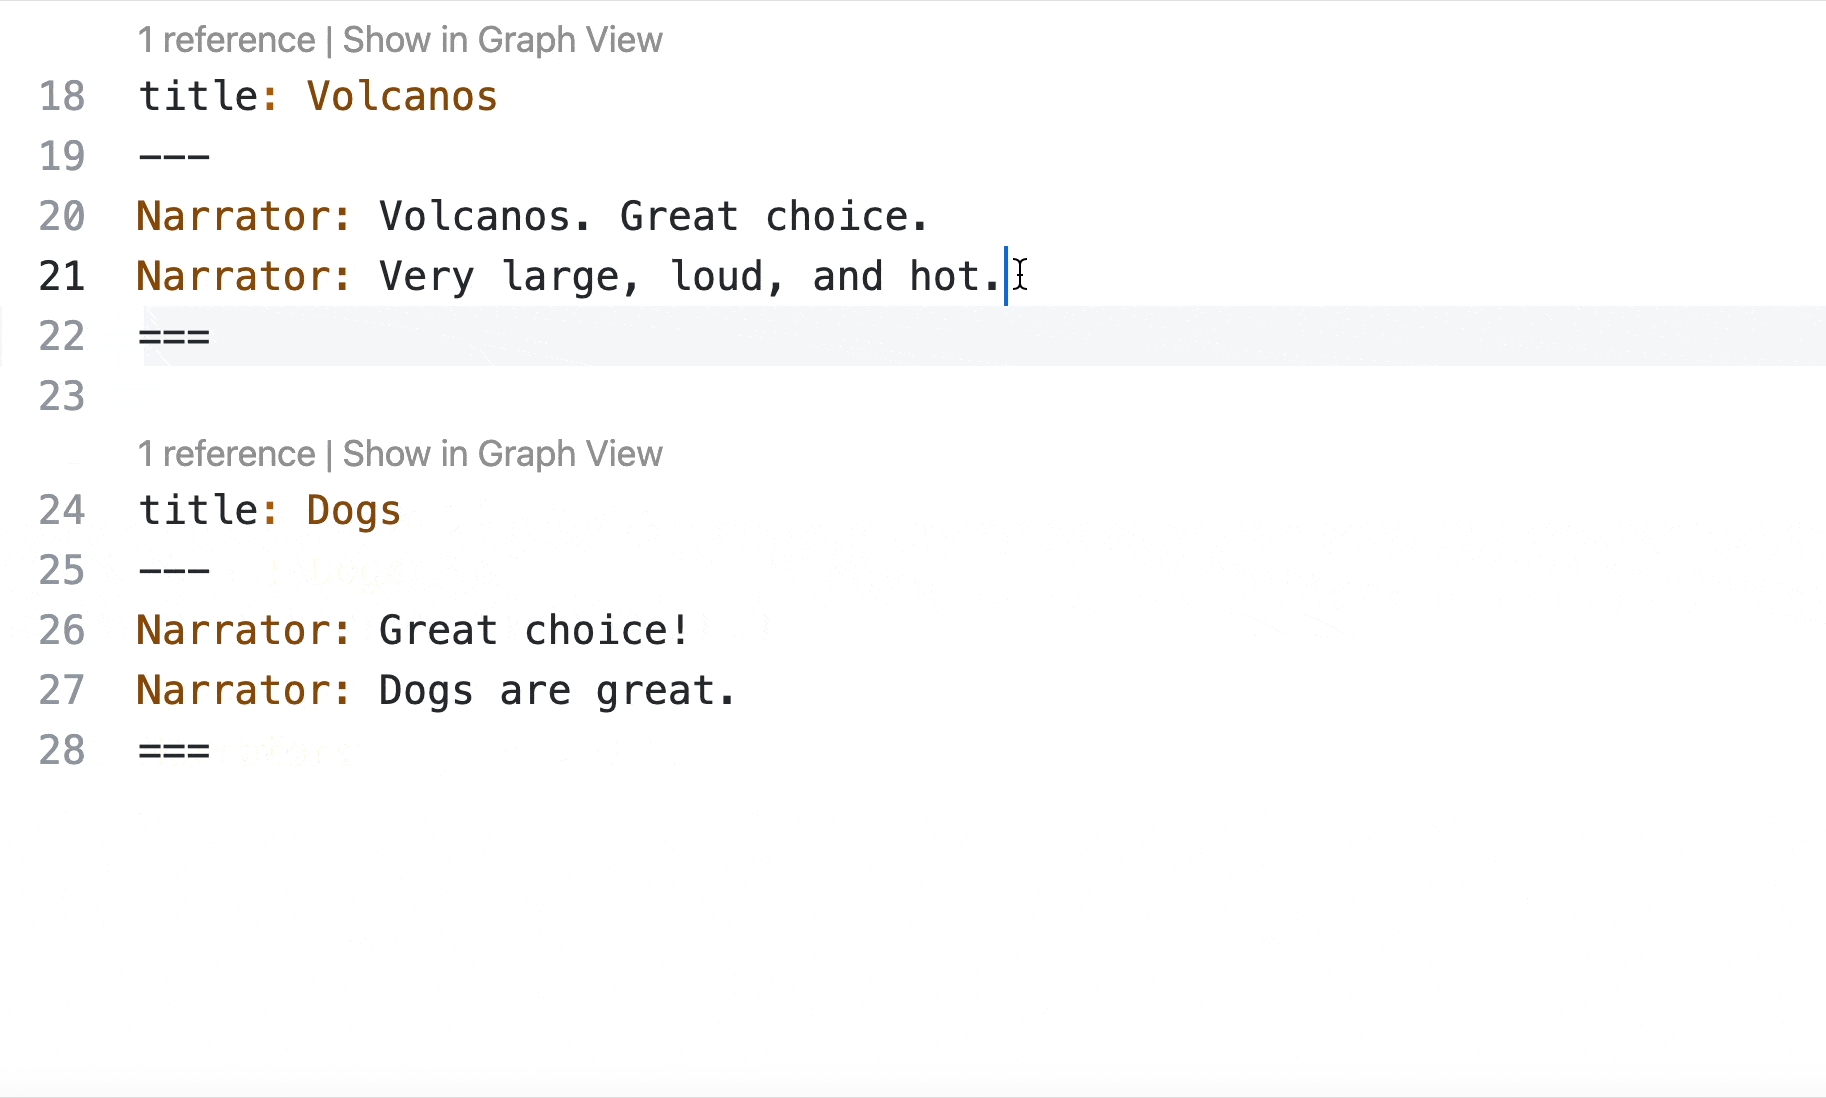
At any point you can also click Show in Graph View, found above each node in the Text View to jump the Graph View to it:
You can add some additional metadata to the headers of each node to customise your Graph View, for ease of understanding the relationships between areas of your script. For example, if you add the color field to the header, you can colour-code your nodes:
You can use red, green, blue, orange, yellow, or purple. The colours that you see may be different, depending on your VS Code theme.
The color field works like any other header element, and goes below the title and above the ---:
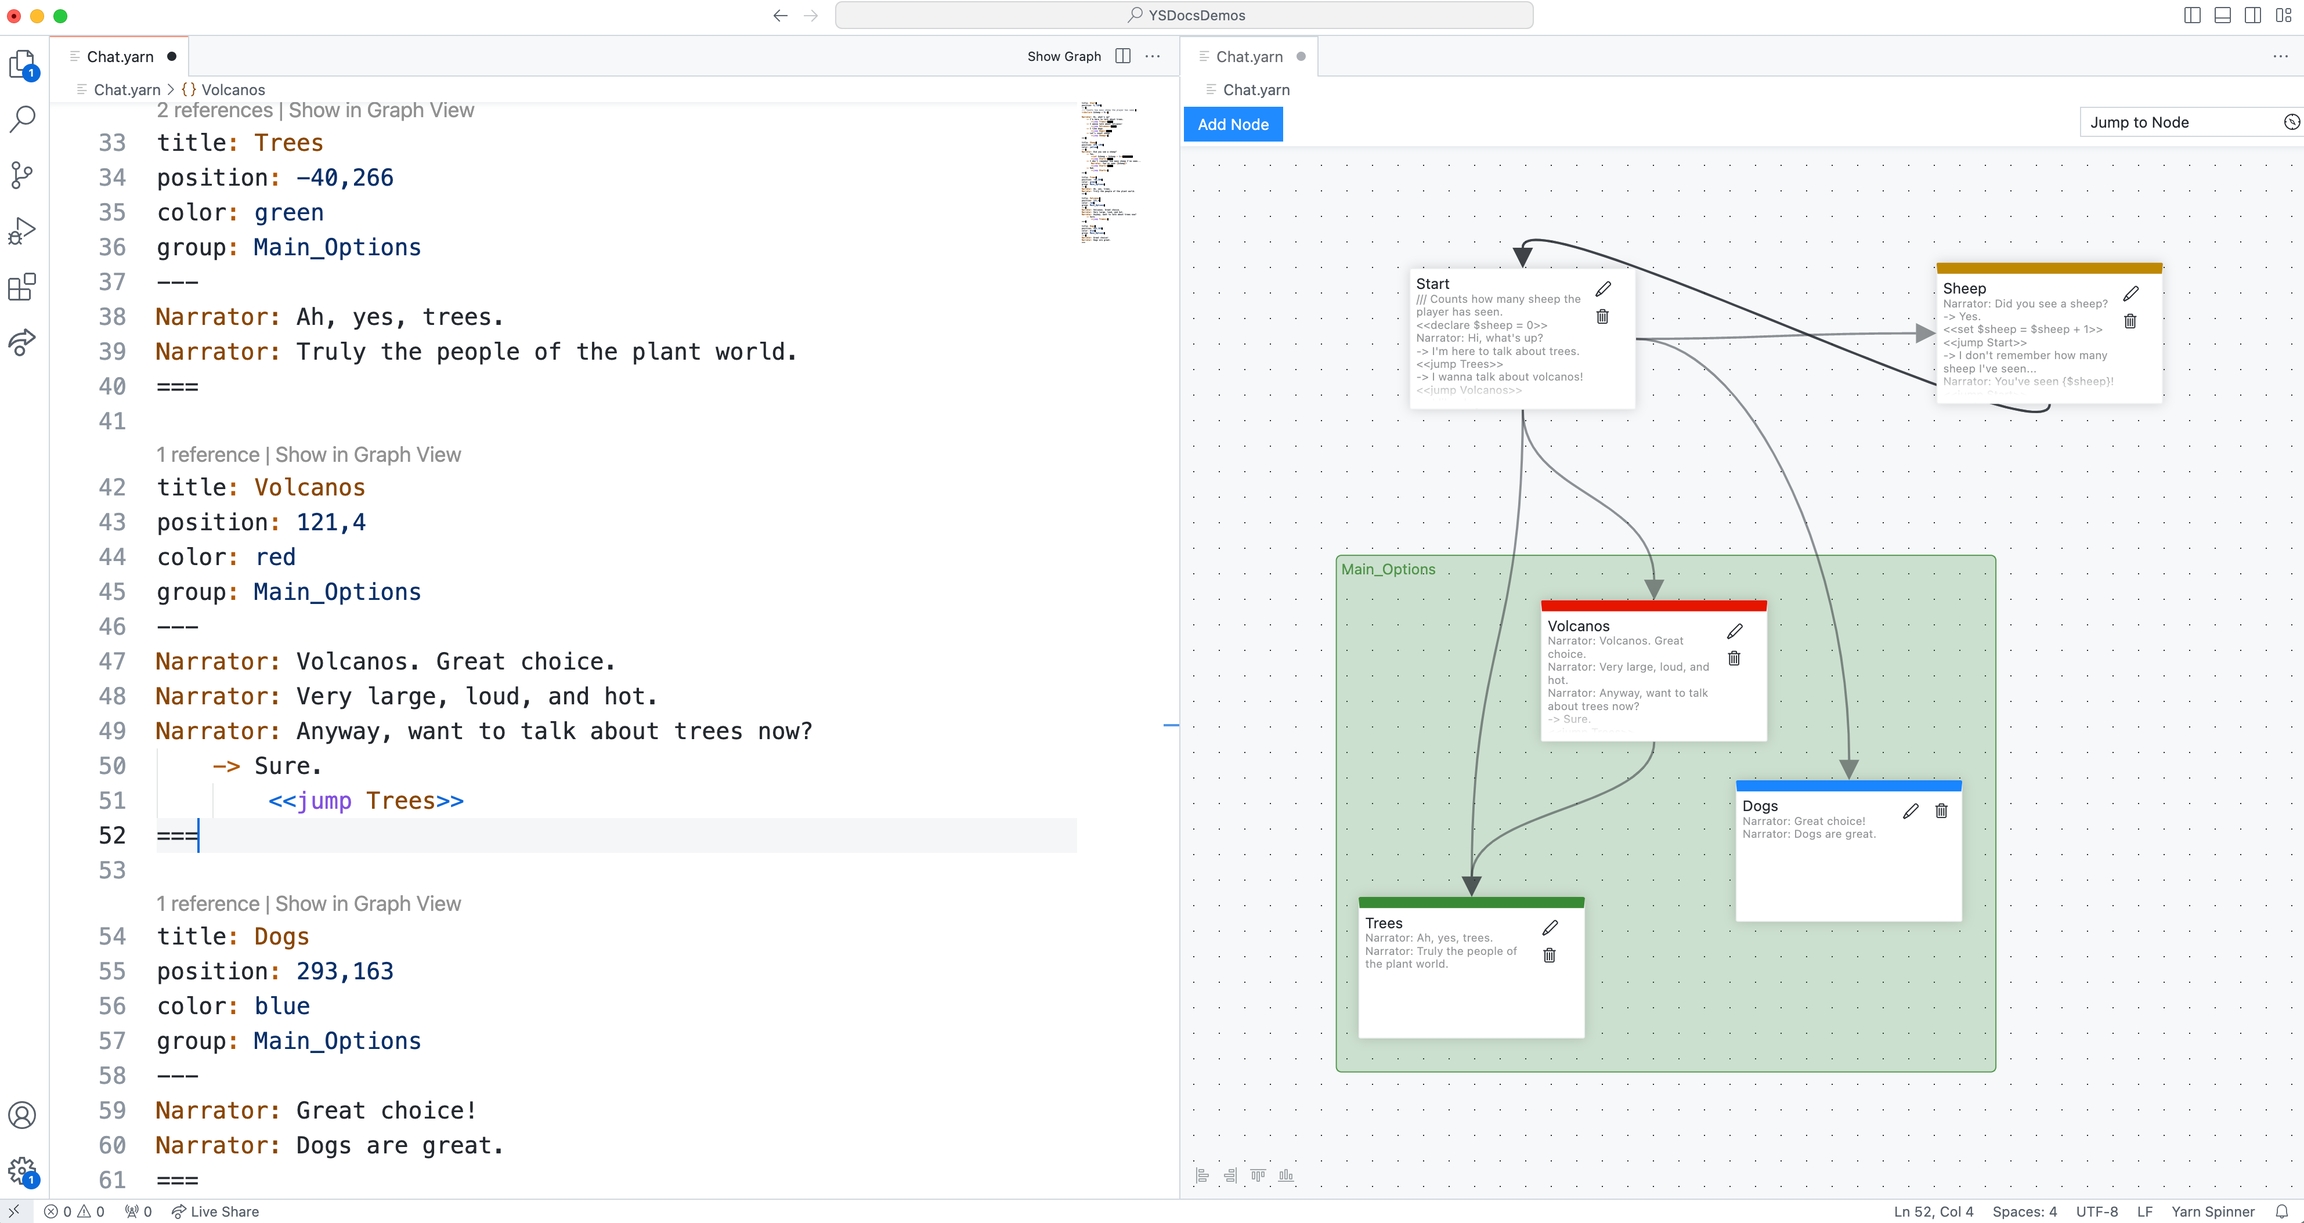
You can also group your nodes by adding the group field to your node headers. For example, if you add group: Main_Options to the header of the Volcanos, Dogs, and Trees nodes, you'd end up with this:
The VS Code Command Palette has a number of useful Yarn Spinner features as well. Summon the Command Palette by pressing Shift + Command + P (Mac) or Ctrl + Shift + P (Windows/Linux), or choosing the View menu -> Command Palette..., and type "Yarn Spinner" to filter the available commands to those provided by the Yarn Spinner for Visual Studio Code Extension:
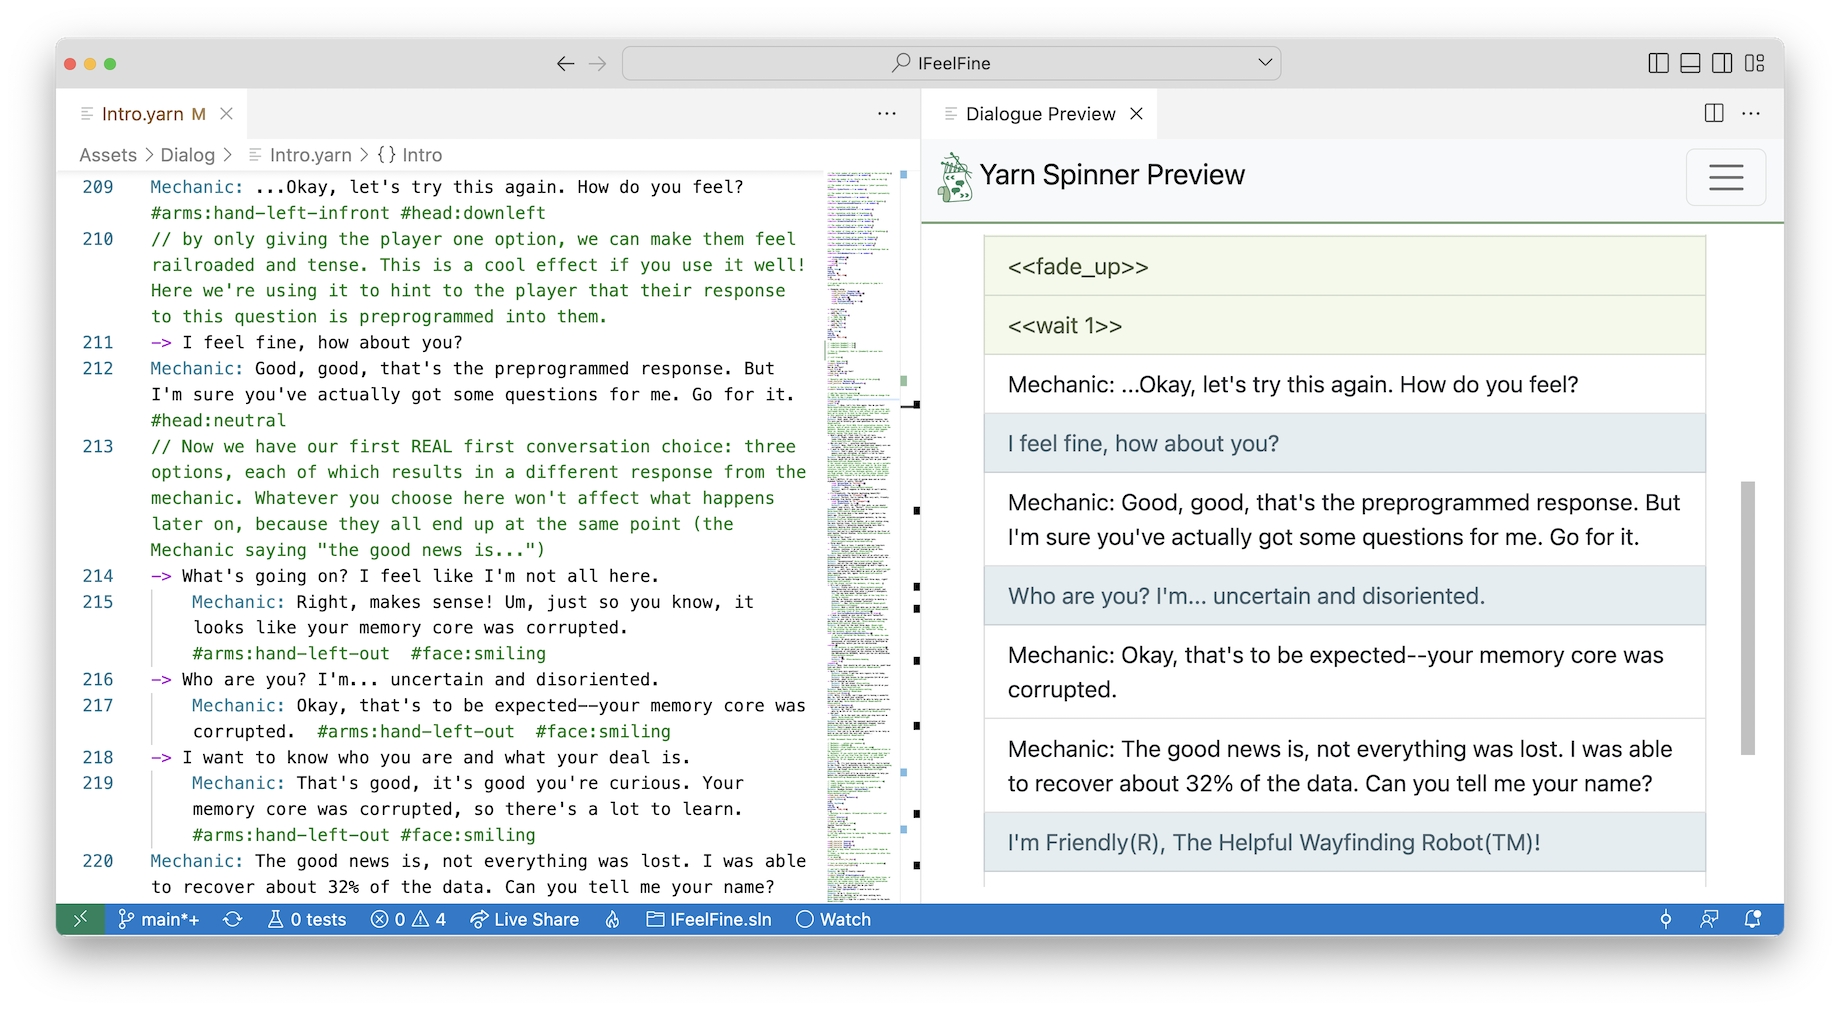
From here you can Preview Dialogue, which will allow you to play through your narrative, right inside Visual Studio Code. To learn more about this, read Previewing Your Dialogue.
The Export Dialogue as HTML... option will export a self-contained playable version of your narrative as an HTML file, which is otherwise the same as the experience your get when previewing.
The Export Dialogue as Graph... option will allow you to export a .dot file of your graph. To learn about .dot files, check out the GraphViz documentation: https://graphviz.org/doc/info/lang.html
And finally, the Export Dialogue as Recording Spreadsheet... option will allow you to export a spreadsheet, which can be useful for voice actors recording dialogue.
.yarn files..yarn file to edit./// comment syntax to describe a variable.<<declare>> to declare a boolean.boolean like an integer.
Learn about writing with the Yarn Spinner Visual Studio Code Extension.
The preferred way of writing your Yarn Spinner code is with the official Yarn Spinner Visual Studio Code Extension.
The official extension adds syntax highlight to VS Code's text editor, as well as a graph view that displays the nodes, and relationships between the nodes.
If you've never used to Visual Studio Code before, head to their official website and install it for your operating system and platform, and then continue to Installing the Extension.
Visual Studio Code is a powerful, flexible, open source code editor for Windows, macOS, and Linux. It supports extensions, which allow it to perform a wide range of useful tasks. The Yarn Spinner Extension is one of these.
Preview your dialogue within the Yarn Spinner for Visual Studio Code Extension.
You can run your Yarn script inside the Visual Studio Code extension, without having to import it into a game. This means that you can write content for your game even if the game isn't yet ready to have dialogue added to it. It's also useful for quickly checking to see if your Yarn script works the way that you want it to before testing it in your game.
This is fundamentally the same preview experience you'll get if you Test your dialogue at https://try.yarnspinner.dev
To preview your dialogue in Visual Studio Code, open the Command Palette by pressing Command-Shift-P (Control-Shift-P on Windows), and type "Preview Dialogue". Your current Yarn project will open to the side, and you can begin playing through your script.
By default, the dialogue preview will begin playing from the node named "Start". If no node named "Start" exists, then the dialogue preview will begin playing from the first node in one of your files. You can choose which node to start playing from in the menu at the top-right of the preview area.
While playing through your dialogue in preview mode, there are several features that can be useful to test out a script.
Changing the starting node: By default, the dialogue preview will start playing from a node named "Start", if one is present in your Yarn files. If you want to play from a different node, open the list of nodes and choose the node you want to start from.
Changing whether lines are shown one at a time, or all at once: By default, the dialogue preview shows each line and command one and a time. You can change this to delivering everything all at once by opening the Settings menu and changing the setting to "Show Lines All At Once".
Showing the contents of variables: You can see the current contents of all variables in your script by opening the Settings menu and choosing "Show Variables". A list of variables will appear, and as you play through your script, they'll update when your script changes their contents.
Changing whether 'unavailable' lines are shown: Options can be marked as 'unavailable' depending on whether or not a test has passed. By default, options that fail this test are not shown in the dialogue preview at all; to change this to showing all options (including ones that the user can't choose), open the Settings menu and choose "Show Unavailable Options".
Restarting the script: When you click the Restart button, the dialogue preview will restart from the currently selected starting node.
You can export a stand-alone HTML file containing a runnable version of your Yarn script, which you can send to other people for them to play. This can be particularly useful for writers who want to get feedback on their scripts before working with other team members to integrate their content.
To export your script, click the Export button, and choose where to save the file. The file can then be sent anywhere you like, and can be opened in all major web browsers.
Learn how to use the Live Share Extension with Yarn Spinner for Visual Studio Code.
The primary editing experience for Yarn Spinner is our Yarn Spinner for Visual Studio Code extension. This provides the majority of features that you'd want in order to effectively write .yarn scripts using VSCode.
This guide shows you how to use Microsoft's free Live Share extension for Visual Studio Code, together with Yarn Spinner for Visual Studio Code, to collaborate live on your narrative.
.yarn files using the Live Share extension and VIsual Studio CodeThe rest of this guide assumes you've followed the steps in Editing with VS Code, and already have the Yarn Spinner for Visual Studio Code extension up and running.
To install Live Share for Visual Studio Code, and use it with Yarn Spinner:
Click this link to open Visual Studio Code, and jump to the Live Share Extension.
Click the install button!
If Step 2 does not work, launch Visual Studio Code and choose the View menu -> Extensions, to open the Extensions Marketplace.
Then, in the search field at the top-left of the window, search for "Live Share", and click the Install button on the extension provided by Microsoft that appears in the results.
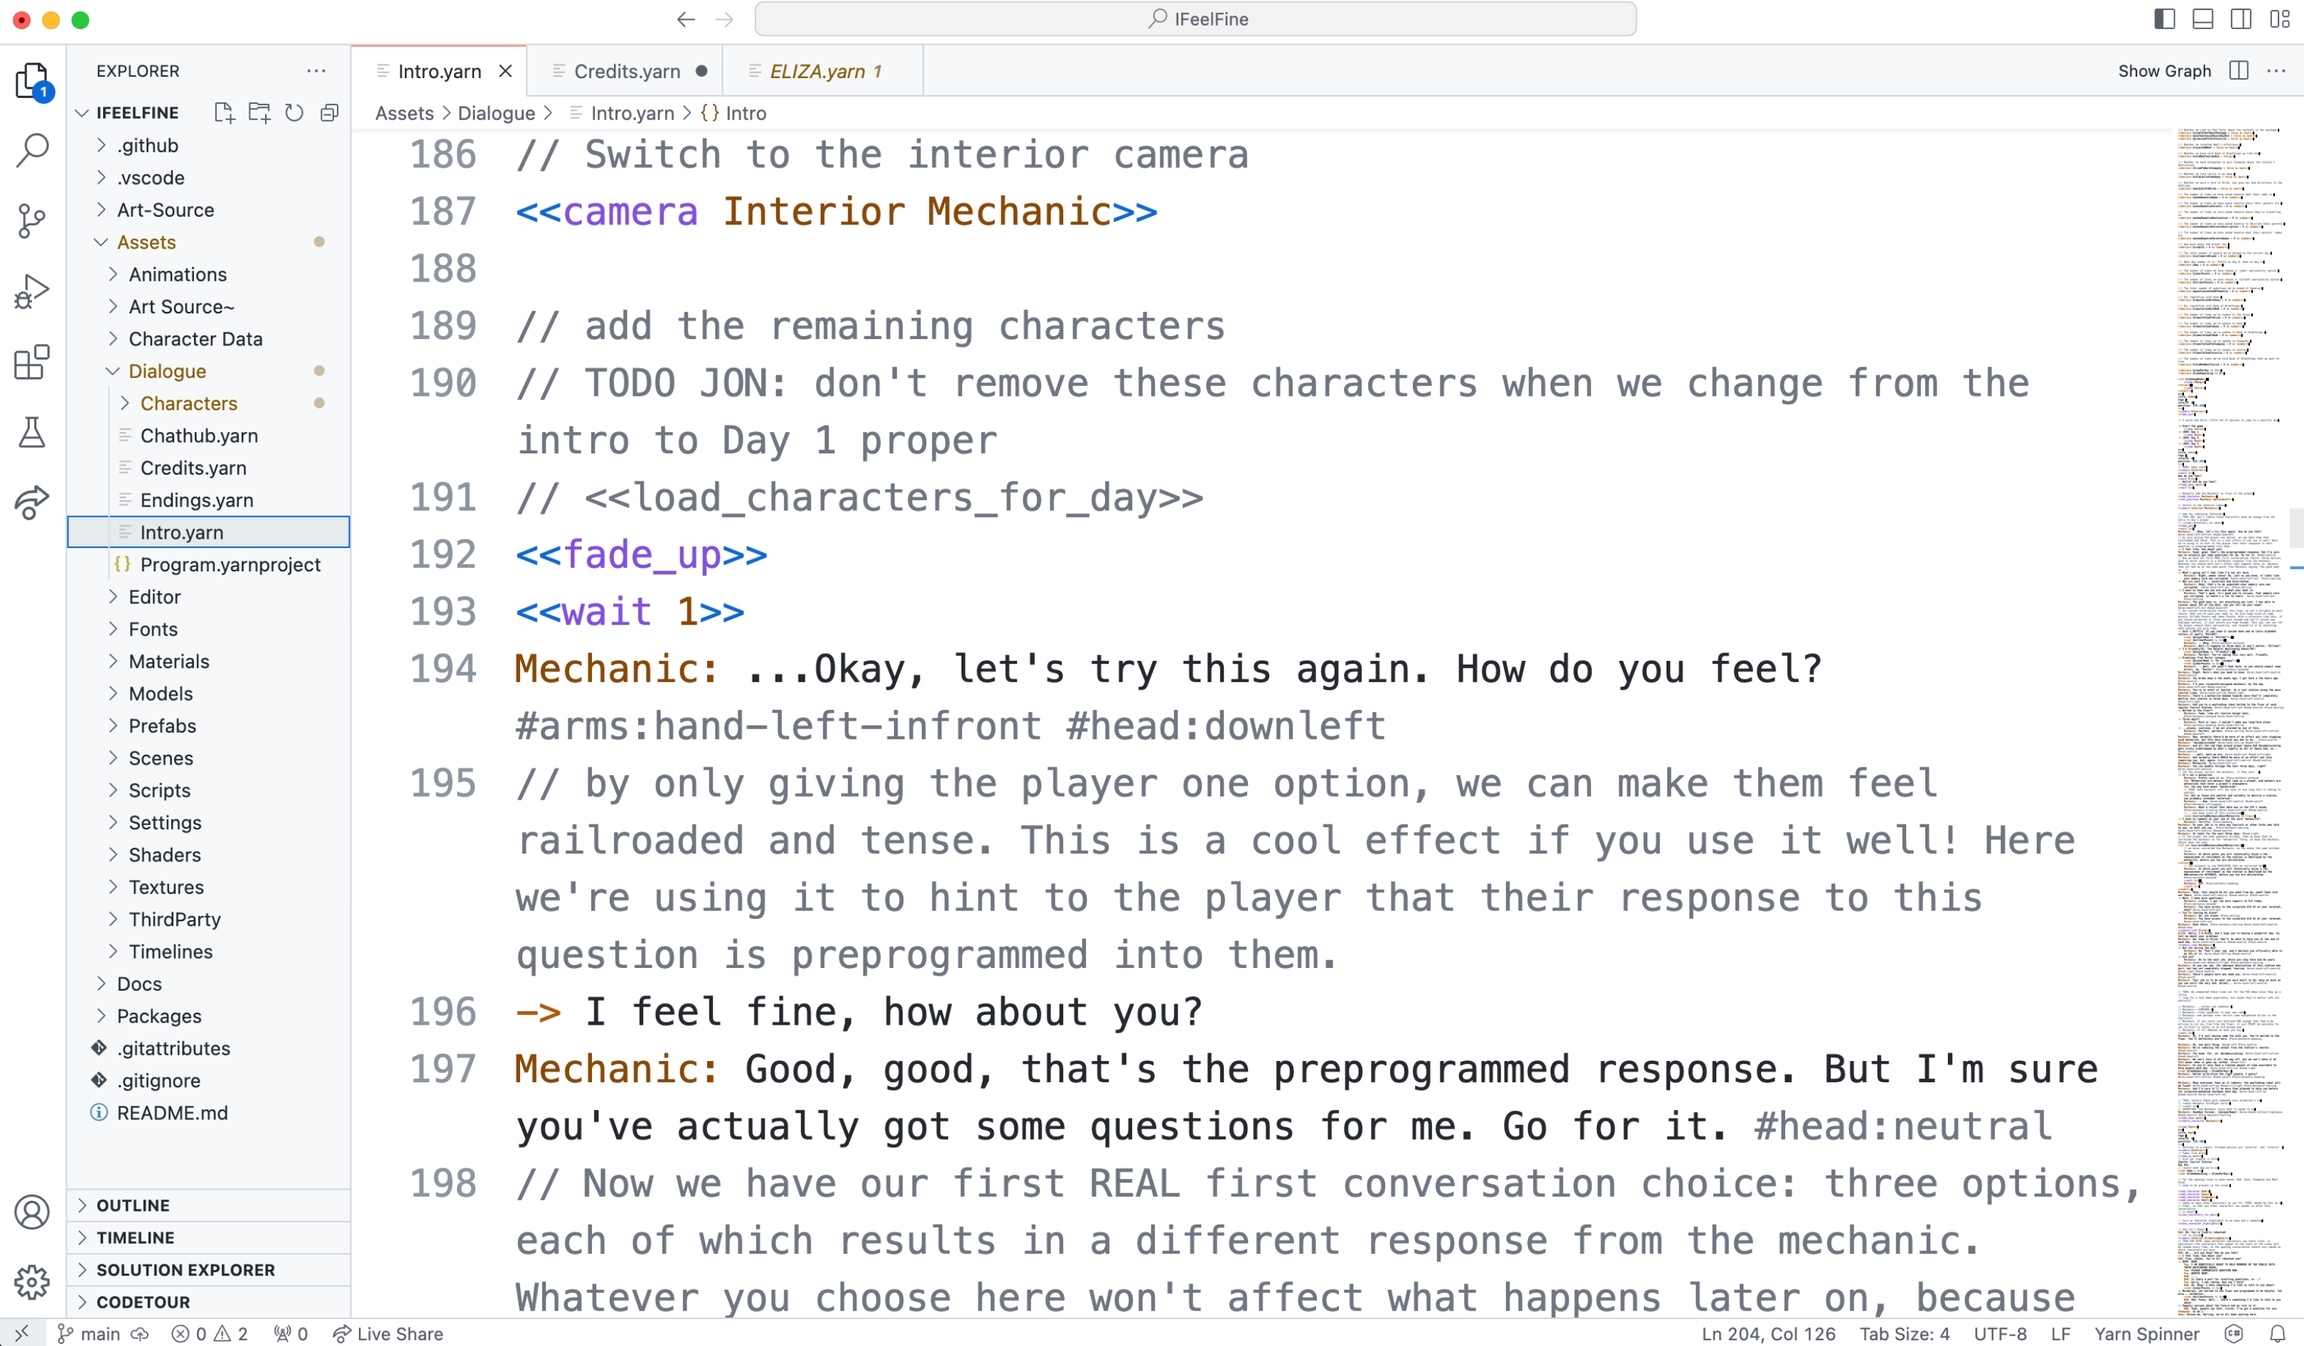
Open your Yarn Spinner project in Visual Studio code. For example, here's I Feel Fine:
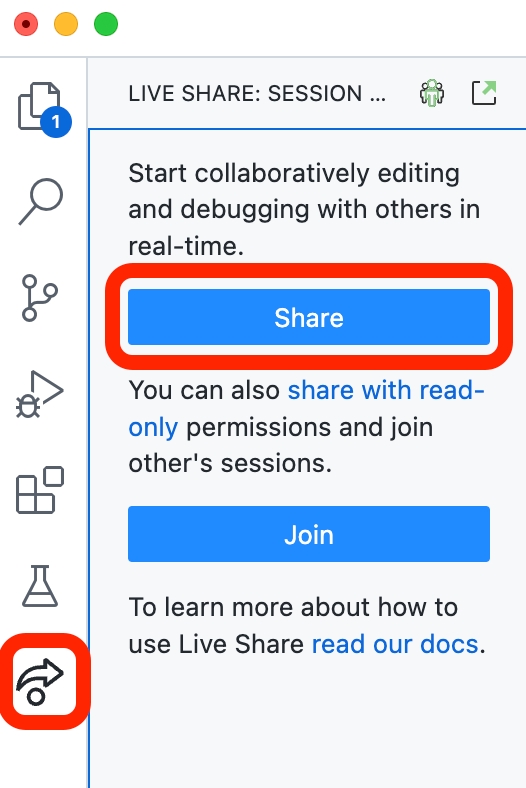
With your project open, choose Live Share in the Activity Bar on the left side of the screen, and in the resulting view that appears, choose the Share button:
You'll be prompted to sign in to either GitHub or your Microsoft account, and after this a notification will appear in the bottom of the screen letting you know a shareable link to collaborate has been copied to the clipboard:
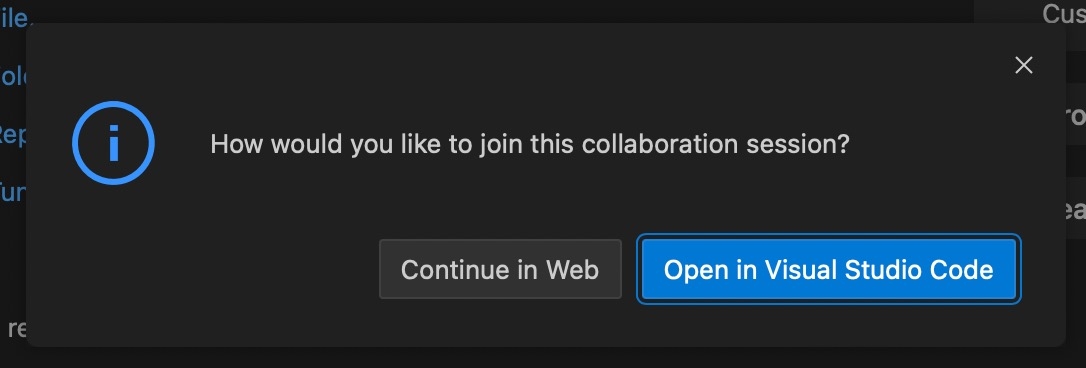
When you receive a collaboration link and visit it, you'll be asked how you'd like to join:
If you choose to Continue in Web, you'll be taken to a web version of VS Code, which will not have the Yarn Spinner extension installed. If you click Open in Visual Studio Code, your local copy of VS Code will be installed, complete with extensions.
This guide assumes that the person you're sharing with also has the Yarn Spinner for Visual Studio Code extension installed.
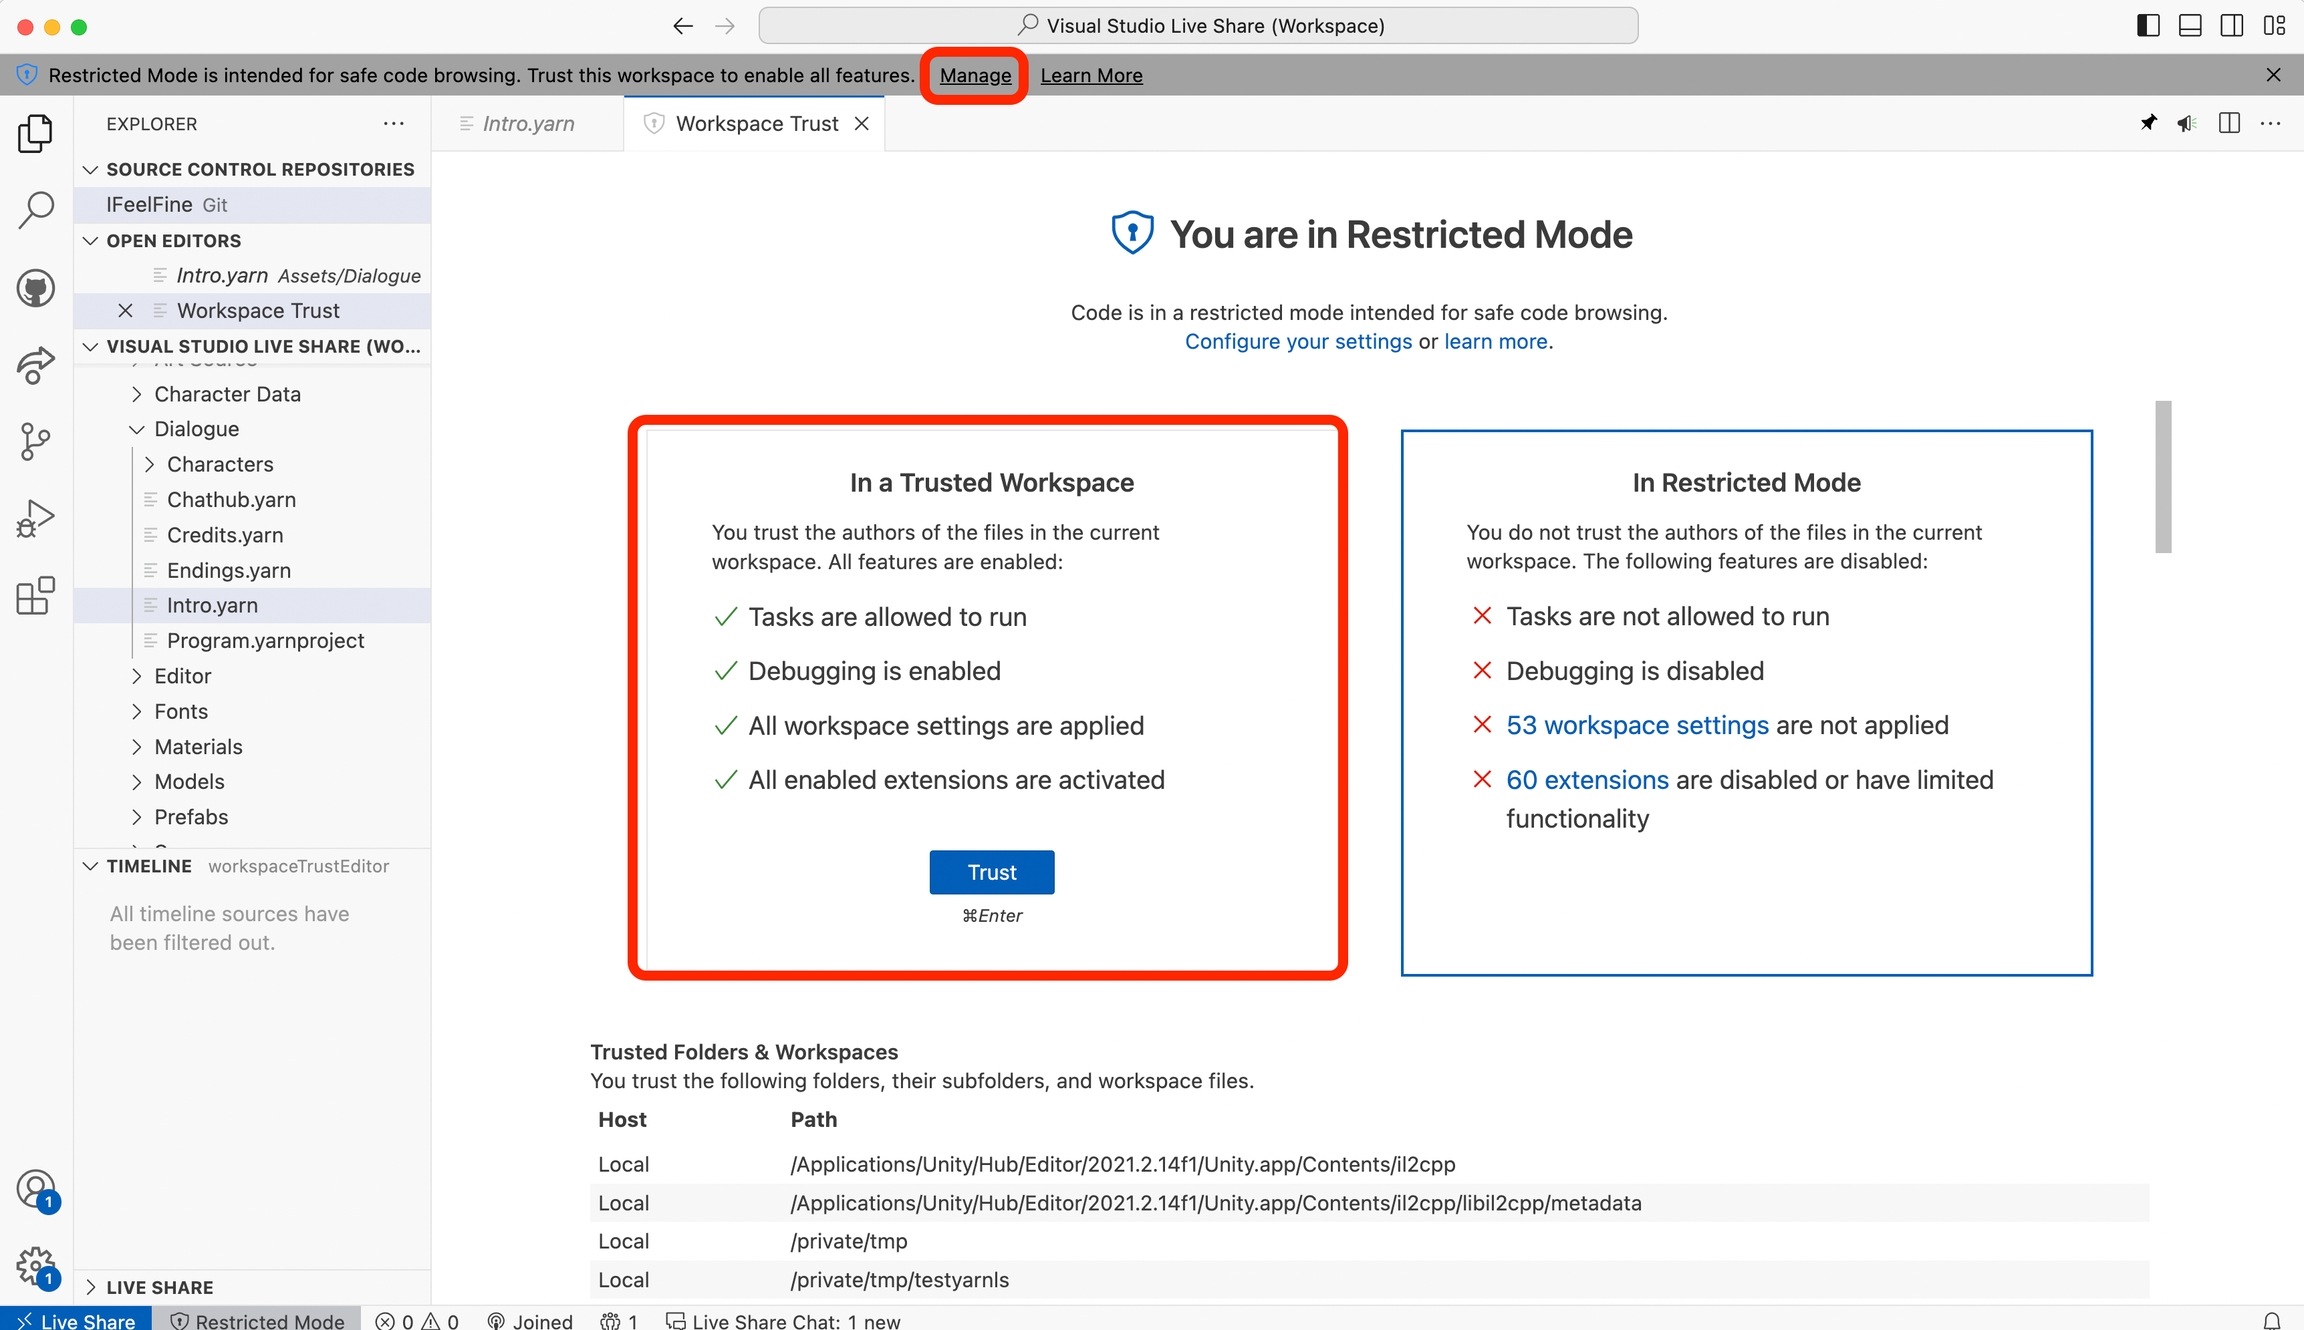
Once the shared workspace opens in your local copy of VS Code, you'll be in an untrusted state, which means the Yarn Spinner extension will not be providing syntax highlighting, To enable this, click Manage, in the grey bar at the top of the window, then click the Trust button in the view that appears:
The person who initially shared the workspace will have full and complete access to the features of the Yarn Spinner for Visual Studio Code extension. Everything, from syntax highlighting to the graph view will work as normal.
Those who are joining the shared session will only have access to the syntax highlighting features of the Yarn Spinner for Visual Studio Code extension, provided they go through the process of trusting the workspace, as noted earlier.
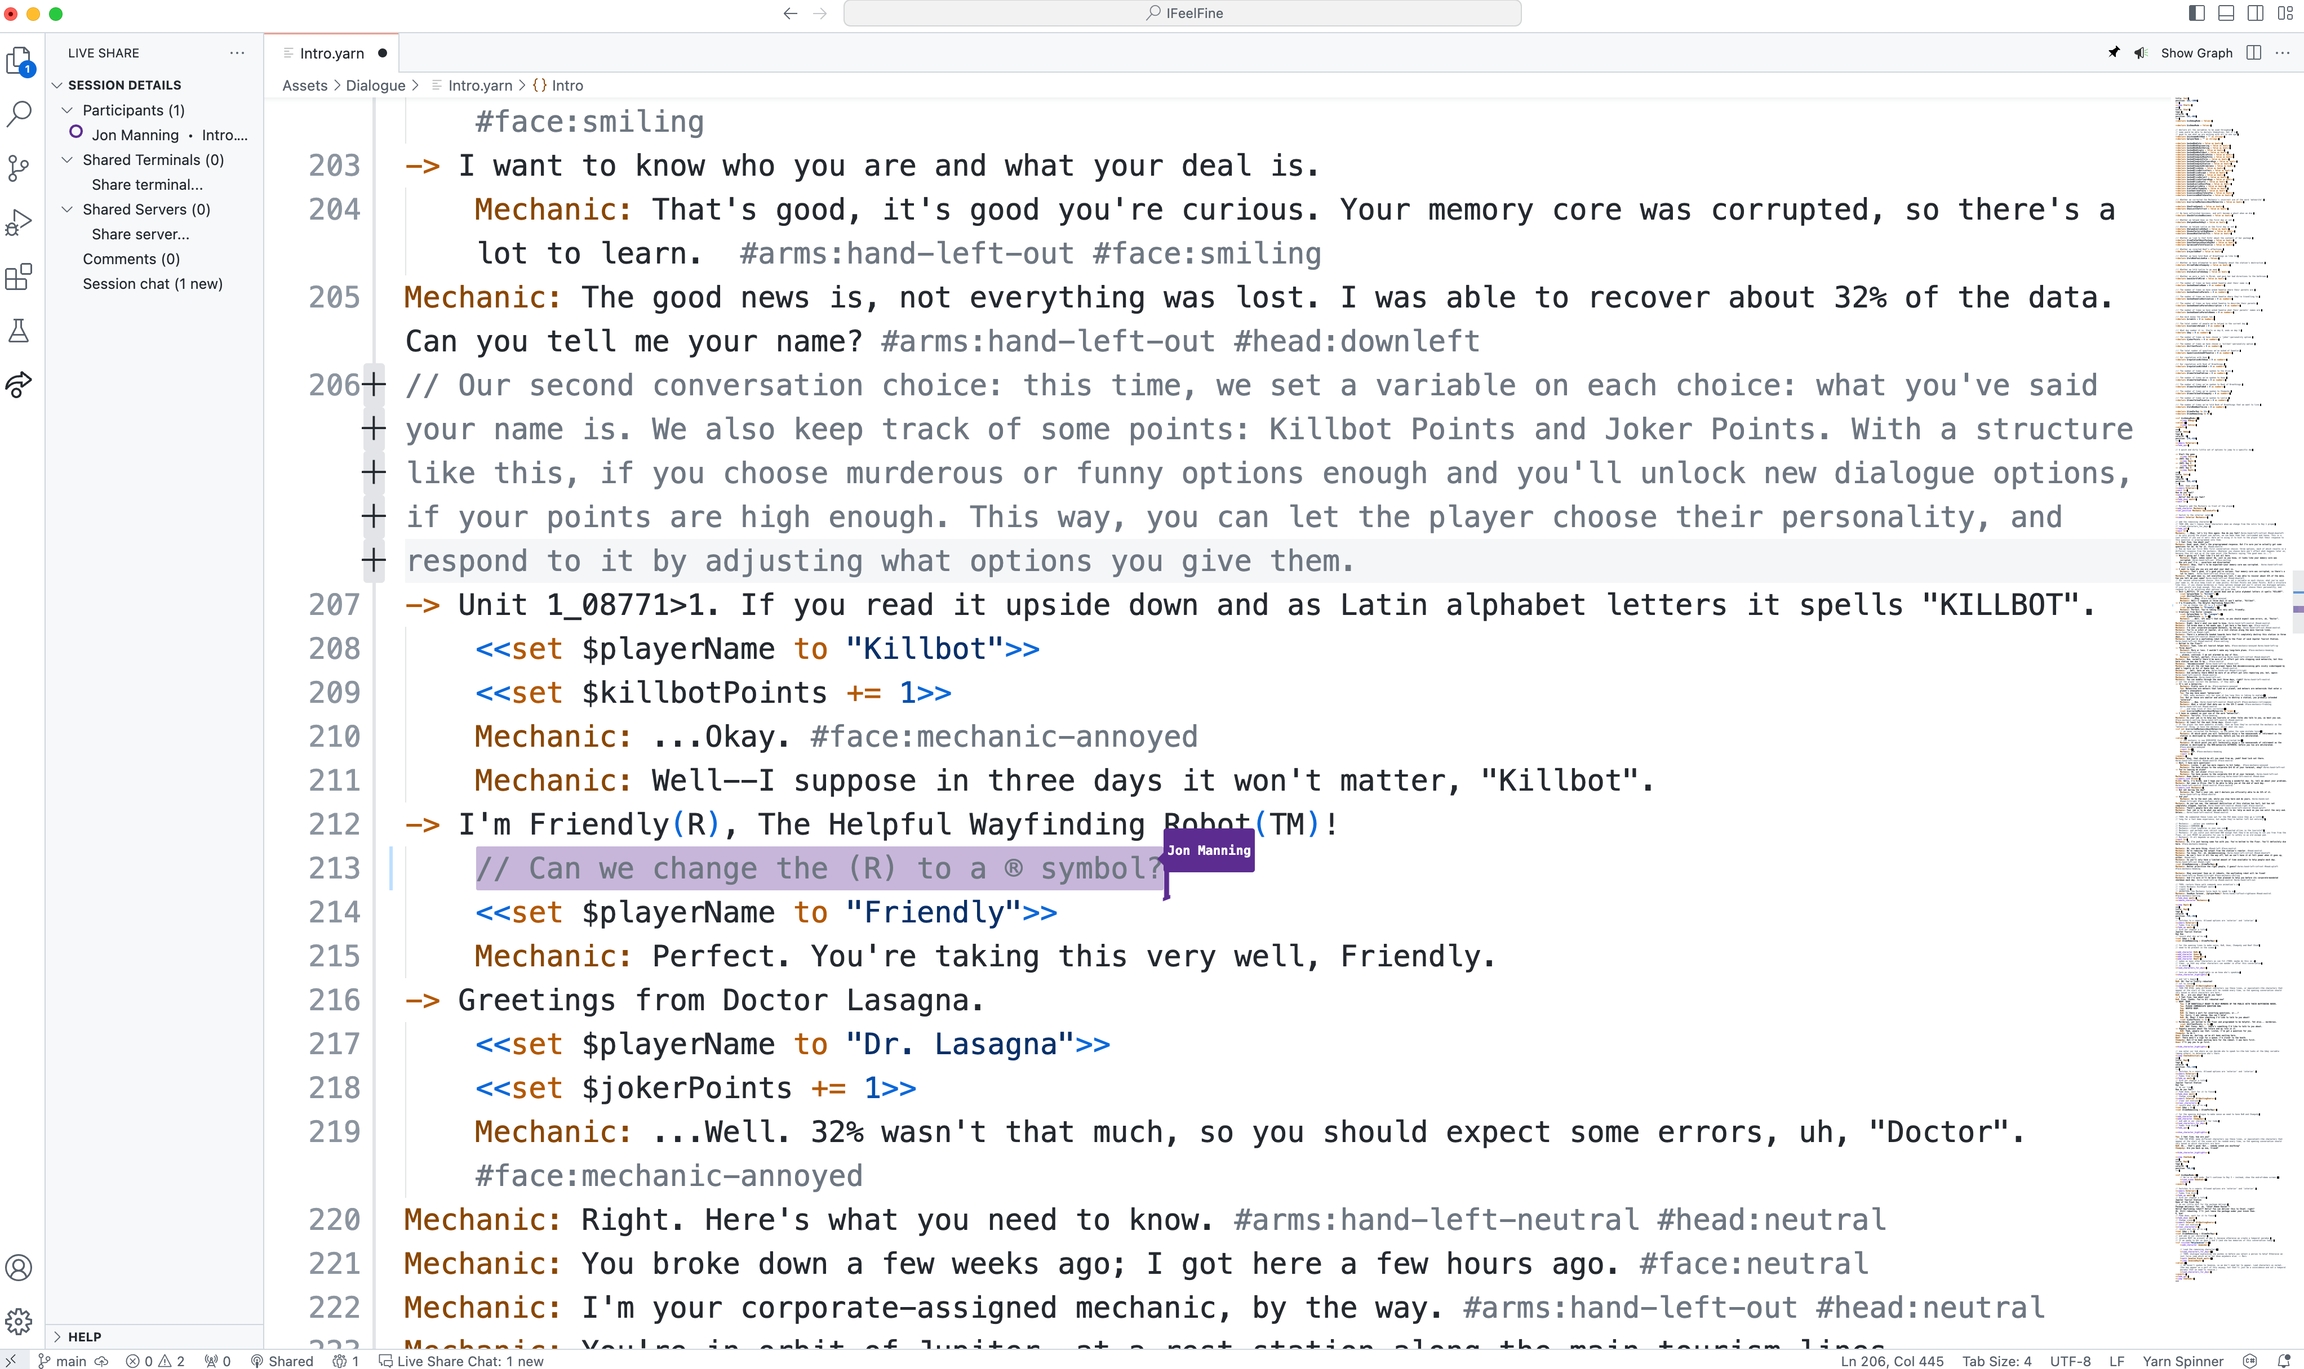
As you edit, you'll be able to see other users in the files, and their work will be briefly highlighted as they write:
For more guidance using the Live Share extension, check out the extension's official page, as well as the Live Share extension's documentation.
We'll be improving the capabilities of Yarn Spinner for Visual Studio Code over time, and will add features that directly support the Live Share extension. Stay tuned!
.yarn files.yarn files together.