Loading...
Loading...
Loading...
Loading...
Loading...
Loading...
Loading...
Loading...
Loading...
Loading...
Loading...
Loading...
Loading...
Loading...
Loading...
Loading...
Loading...
Loading...
Loading...
Loading...
Loading...
Loading...
Loading...
Loading...
Loading...
Loading...
Loading...
Loading...
Loading...
Loading...
Loading...
Loading...
Loading...
Loading...
Loading...
Loading...
Loading...
Loading...
Loading...
Loading...
Loading...
Loading...
Loading...
Loading...
Loading...
Loading...
Loading...
Loading...
Loading...
Loading...
Loading...
Loading...
Loading...
Loading...
Loading...
Loading...
Loading...
Loading...
Loading...
Loading...
Loading...
Loading...
Loading...
Loading...
Loading...
Loading...
Loading...
Loading...
Loading...
Loading...
Loading...
Loading...
Loading...
Loading...
Loading...
Loading...
Loading...
Loading...
Loading...
Loading...
Loading...
Loading...
Loading...
Loading...
Loading...
Loading...
Loading...
Loading...
Loading...
Loading...
Loading...
Loading...
A quick summary of the various projects that make up the various components and experiments of the overall Yarn Spinner project.
Yarn Spinner isn't a single project, but is a collection of projects. Conceptually, we think of Yarn Spinner as having Core Components, some Add-ons, and some Yarn Labs Experiments.
If you're new to Yarn Spinner, you don't necessarily need to understand the components just yet. We strongly recommend starting with our three-step Beginner's Guide.
These are production-ready components, with stable, established, released versions:
Yarn, the language you write your dialogue and narrative in: you write Yarn scripts.
Yarn Spinner for Visual Studio Code, the extension for the popular free text editor, Visual Studio Code, that gives it an understanding of the Yarn language, and helps you to write Yarn scripts.
Yarn Spinner for Unity, the package you use to import and use your Yarn scripts in games you build in Unity.
Try Yarn Spinner, an online tool that allows you to write Yarn scripts and Play them in a web browser. It's useful to write basic Yarn, and test things out. It's just a website you can visit!
⭐️ To learn to use the Core Components, jump into the Beginner's Guide.
Yarn Spinner for Unreal is moving from Yarn Labs to Core Components in early-2024.
These are projects that supply additional features to Yarn Spinner, and exist as add-ons to the free, open source projects that comprise the bulk of Yarn Spinner:
Dialogue Wheel for Yarn Spinner, an add-on package for Yarn Spinner for Unity that provides Mass Effect-style dialogue wheel dialogue views.
Speech Bubbles for Yarn Spinner, an add-on package for Yarn Spinner for Unity that provides customisable speech bubbles as dialogue views.
⭐️ To purchase the Add-ons, visit the Yarn Spinner Itch.io Store, or the Unity Asset Store, or just read the documentation.
These are experimental projects that are likely to eventually be released, but are currently in early, or experimental stages:
Yarn Spinner for Unreal, the package you use to import and use your Yarn scripts in games you build in Unreal.
Yarn Spinner for Godot, the package you use to import and use your Yarn scripts in games you build in Godot.
Yarn Spinner for Rust, the package that you use to import and use your Yarn scripts in games you build using the Rust-based Bevy engine.
If you're new to Yarn Spinner, we recommend that your next step is working through our three-step Beginner's Guide.
The third step in our three-step beginner's guide to Yarn Spinner: making games in a game engine powered by Yarn.
For this final step in the beginner's guide, you can choose your preferred engine:
Yarn Spinner for Unreal (5.1 or newer, coming Late-2023)
We also provide experimental Yarn Labs support for:
Unreal support is currently in testing. Official release, along with tutorials, in late-2023. Join the official Yarn Spinner Discord for news and updates, or support us on Patreon.
The three-step beginner's guide to learning the basics of Yarn Spinner.
The best way to get started with Yarn Spinner, using the Core Components, is to work through our Beginner's Guide, which is a gentle introduction to:
Syntax Basics — Using Try Yarn Spinner to learn the basic syntax for writing Yarn, the language for writing dialogue in Yarn scripts.
Writing Narratives — Moving to Yarn Spinner for Visual Studio Code, and learning how to structure narratives and stories using features of the Yarn language.
Using a Game Engine — Using Yarn Spinner for Unity, Yarn Spinner for Godot, or Yarn Spinner for Rust, and integrating a Yarn script with what’s happening in the game engine, as well as one simple way of nicely displaying your dialogue in-game.
Unreal support is currently in testing. Official release, along with tutorials, in late-2023. Join the official Yarn Spinner Discord for news and updates, or support us on Patreon. Yarn Spinner for Godot and Yarn Spinner for Rust are both experimental Yarn Labs projects.
This beginner's guide complements the rest of the documentation, and provides a starting point that covers all the basics necessary for making the most of the rest of the documentation. We strongly recommend you work your way through this guide.
If you're new to Yarn Spinner, or want a refresher on getting started or navigating the documentation, then this is the place to be.
For a quick overview of the new features in Yarn Spinner 3, visit the New in v3 section!
Yarn Spinner is the friendly tool for writing dialogue in games. It's easy for writers to use, and has powerful features for programmers.
Yarn Spinner is free and open source and has been used in thousands of amazing games, including Night in the Woods, A Short Hike, Lost in Random, Dredge, Frog Detective, Button City, Escape Academy, Baladins, and Unbeatable.
You should start with our Beginner's Guide.
No need to install anything first, just start with the Beginner's Guide, and work your way through three guided tutorials on the syntax of writing Yarn scripts, installing a text editor to write Yarn scripts, and then integrating Yarn scripts with your game, and installing Yarn Spinner as a package into your game engine.
We'd also recommend joining the Yarn Spinner Discord, where you can show off your work, and ask for help.
Yarn Spinner is not just a single project or tool, but is a collection of projects and tools. It consists of a language to write your narratives in—Yarn—and tools to display, and use your Yarn in game engines, like Unity, and tools to translate, localize, and connect voice over to your stories.
To get started, dive into the Beginner's Guide.
Yarn Spinner is provided as free, open source software by the team at Yarn Spinner Pty. Ltd. We want this to continue being our full time jobs. You can help by hiring us to help integrate Yarn Spinner in your games, build specific features you want, or consult, and by backing our Patreon.
The second step in our three-step beginner's guide to Yarn Spinner: writing Yarn scripts using the Yarn Spinner for Visual Studio Code Extension.
To use Yarn Spinner for Visual Studio Code, you’ll need to:
Download Visual Studio Code and install it.
Click this link to open Visual Studio Code, and jump to the Yarn Spinner Extension.
Click the install button!
If Step 2 does not work, launch Visual Studio Code and choose the View menu -> Extensions, to open the Extensions Marketplace.
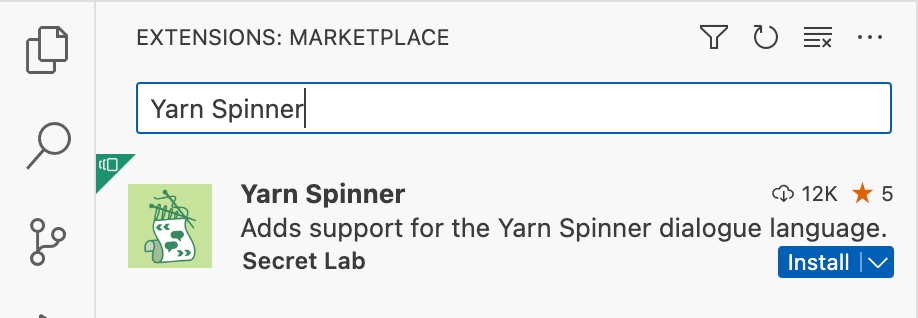
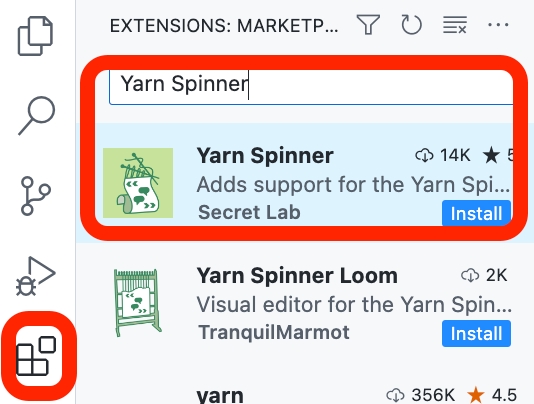
Then, in the search field at the top-left of the window, search for "Yarn Spinner", and click the Install button on the extension provided by Secret Lab that appears in the results:
Create a new, empty file in Visual Studio Code (VS Code), and add something like the following to it (it’s just the Party example, from the end of the previous step):
Save the file somewhere sensible as TestYarn1.yarn (the filename is not important, but the .yarn extension is).
With the new file open, look at the bottom right-hand corner of the VSCode window, and verify that the file is recognised as a Yarn Spinner file:
Yarn Spinner for Visual Studio Code allows you to do a whole bunch of useful things in VSCode, including syntax highlighting, viewing your nodes in a graph, and more. Let’s take a look at some of them.
The most obvious immediate feature is that Yarn’s syntax will be appropriately identified and highlighted in the editor. Very useful. You can see this in action in your TestYarn1.yarn file, showing the Party example.
But, so far, this is pretty similar to the features of Try Yarn Spinner. Let’s go deeper.
Press the Show Graph button in the top right-hand corner of the window, or open the Command Palette and choose Yarn Spinner: Show Graph. A graph view, showing your nodes from the open yarn script will appear!
We’re not here to teach you VS Code, but one thing that’s important to point out is the Command Palette.You can access it by pressing Command+Shift+P or Control+Shift+P on your keyboard:
The Command Palette allows you to type a few characters to filter by all the commands available in VSCode. With Yarn Spinner for Visual Studio Code installed, you’ll have access to a collection of Yarn Spinner-related commands:
Preview Dialogue will open a playable preview of your dialogue inside VSCode/
Show Graph will open the same graph view, showing your nodes, as the Show Graph button does.
The three Export Dialogue as… commands will, unsurprisingly, allow you to export your dialogue in a variety of different formats. These are mostly outside the scope of this workshop, however Export Dialogue as HTML… will give you an entirely self-contained HTML copy of the playable preview of your yarn script. Fun!
Yarn Spinner for Visual Studio code has a few other tricks up its sleeve when it comes to making your Yarn script writing experience better.
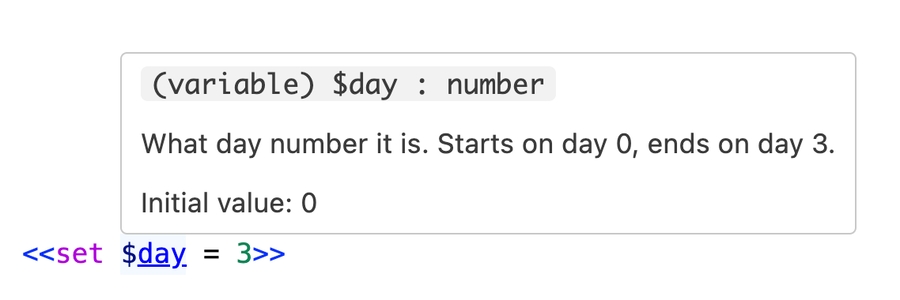
For example, if you add a comment using the triple slash /// you can describe what a variable is for, and Yarn Spinner for Visual Studio will display this description whenever you hover over a variable.
So, if you add a /// comment above the declaration of $partyHats, like this:
You’ll then be able to hover over $partyHats and see the description, like this:
You can also hold Command (on macOS) or Control (on Windows and Linux) and click on the name of a node (for example inside a <<jump>> statement), and the editor will jump to that node. You can also do this from the Graph View.
You can also use Yarn Spinner for Visual Studio Code to easily find out what references a node, by looking above each node’s header. The amount of references to that node will be shown, as well as a shortcut to jump to that node in the Graph View:
Clicking the references will show you all the references to that node.
The Graph View is useful out of the box, but with a few tweaks to your Yarn scripts you can make it even more effective.
For example, you can assign a colour to nodes by adding a color header, like so:
Then, your node will have a colour indicator.
You can also put nodes in groups by adding a group header, like so:
Then, your nodes will be visually grouped in the Graph View:
Neither the colour nor the group will have any impact on your game’s use of the dialogue. It’s just for ease-of-use of the Graph View.
You can also use the tags header, with a space-separated list of tags. This doesn’t impact anything in the editor, but is available to be queried from Yarn Spinner within Unity, for you to do what you want with.
Take what you’ve learned so far, and write a story that makes use of:
nodes
jump statements
variables
if statements (and elseif)
setting variables
options, nested options, and conditional options
built-in functions
… and is nicely laid out in Yarn Spinner for Visual Studio Code, with groups, colours, and a nicely presented Graph View.
You story should be playable using the Preview feature of Yarn Spinner for Visual Studio Code, accessible via the Command Palette.
The third step in our beginner's guide, focusing on getting up and running with Yarn Spinner for Unity.
This step of the beginner's guide helps you move from writing Yarn scripts outside of a game engine, to initial integration steps to turn them into a game with Unity.
First, launch the Unity Hub, and create a new project for Unity 2021.3 or newer. Then, download and install Yarn Spinner.
You can download and install Yarn Spinner for Unity in four different ways:
buy Yarn Spinner for Unity from our Itch.io store, download it, and add the package to your project from the .unitypackage
buy Yarn Spinner from the Unity Asset Store, download it, and install it via Unity
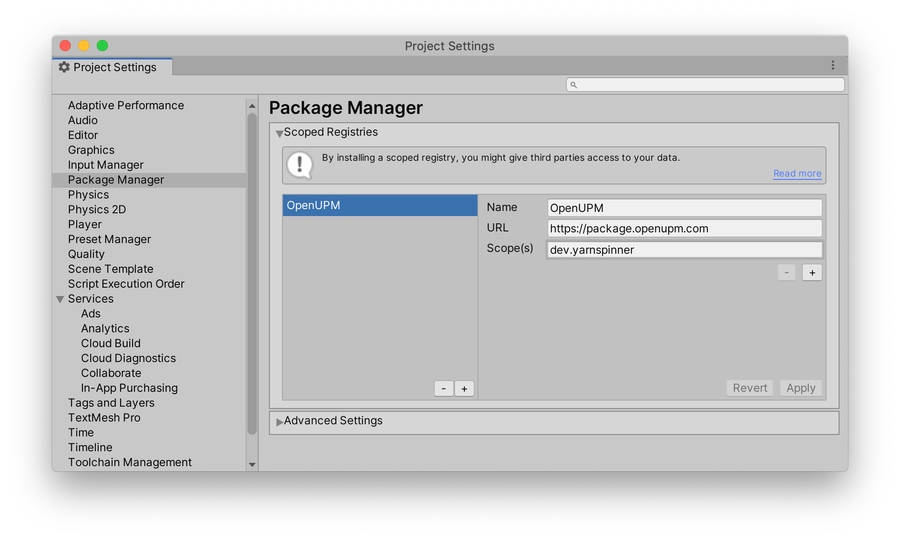
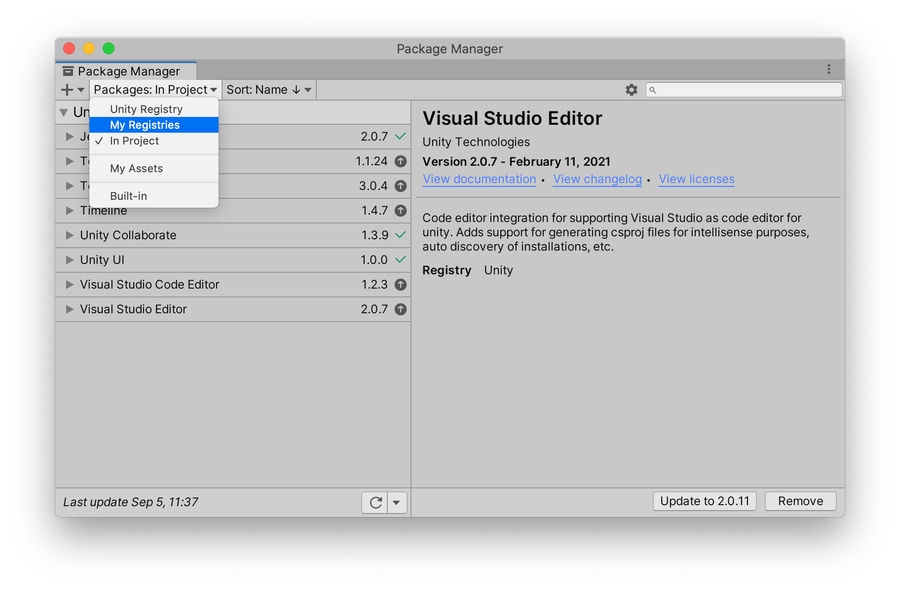
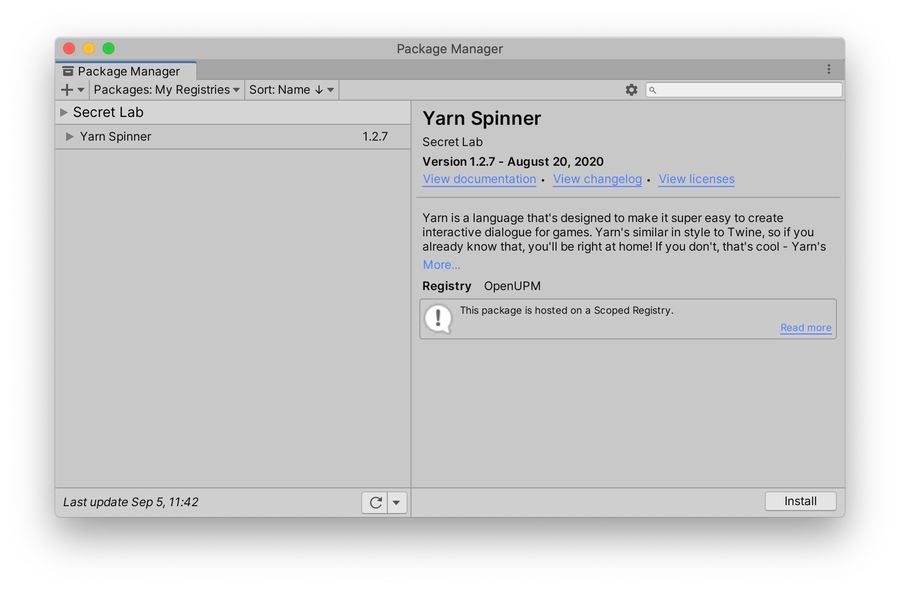
install Yarn Spinner for Unity via the Unity Package Manager
install Yarn Spinner for Unity from GitHub
Yarn Spinner is an open source project. You can directly support the Yarn Spinner Team by purchasing Yarn Spinner from Itch or the Unity Asset Store, but it will always also be available for free. To support the continued development of Yarn Spinner, purchasing Yarn Spinner for Unity from one of the storefronts. This is the best way to directly support the Yarn Spinner team.
First, visit the Yarn Spinner Itch.io Store, and click the Buy Now button, and complete the checkout process.
Once you've purchased Yarn Spinner, you'll find a Download button at the top of the page:
The download button will take you the following page, where you can download the Yarn Spinner for Unity .unitypackage:
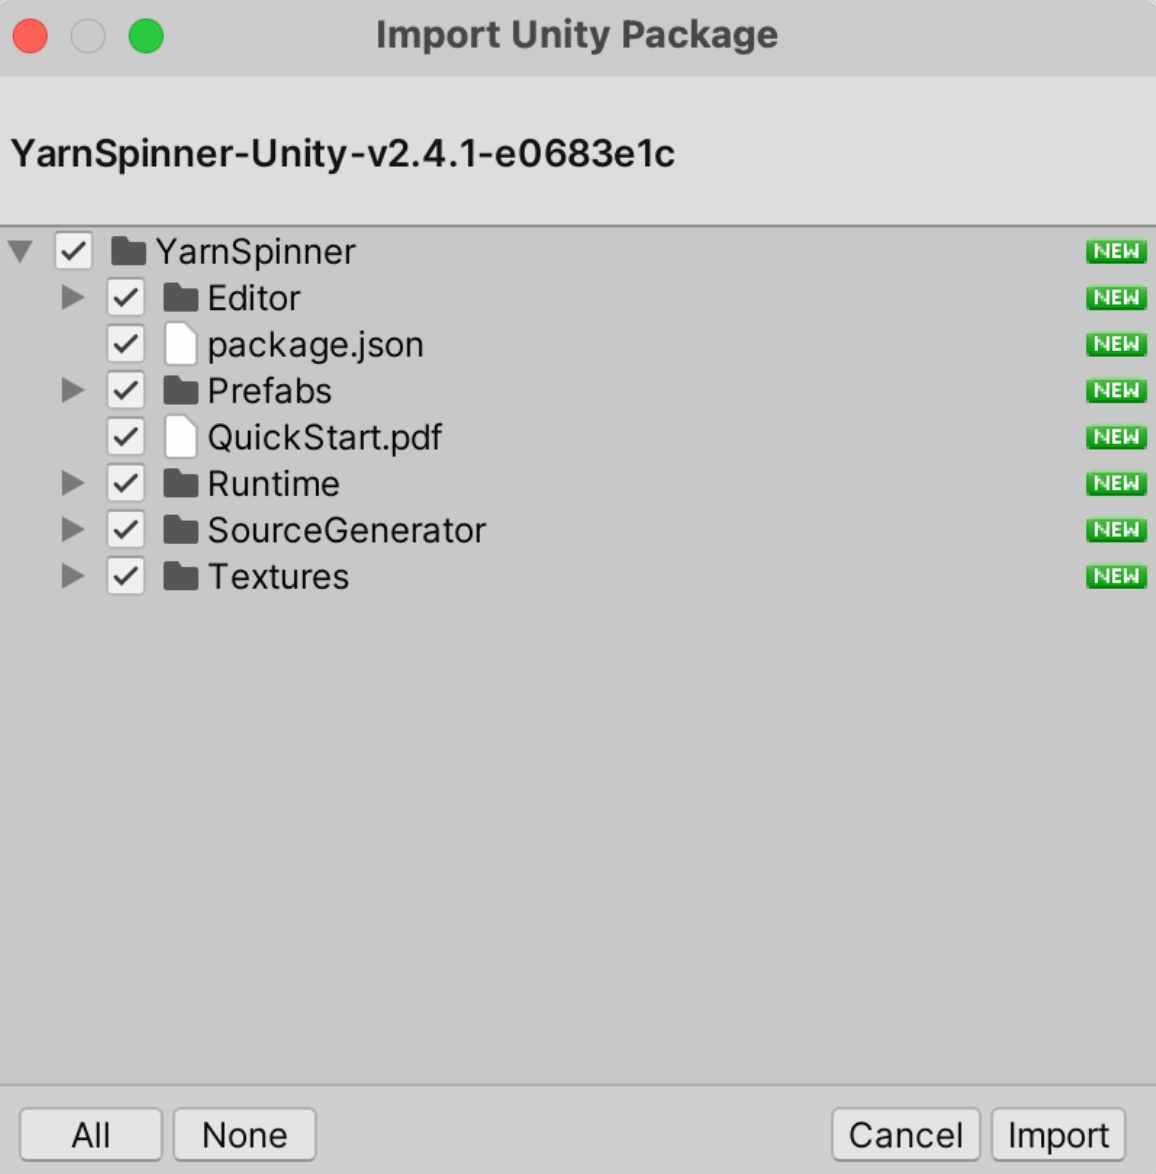
Once you've downloaded the .unitypackage, with the Unity project you want to use it in open and ready to go, double click it. Unity will then allow you to import the package into your project:
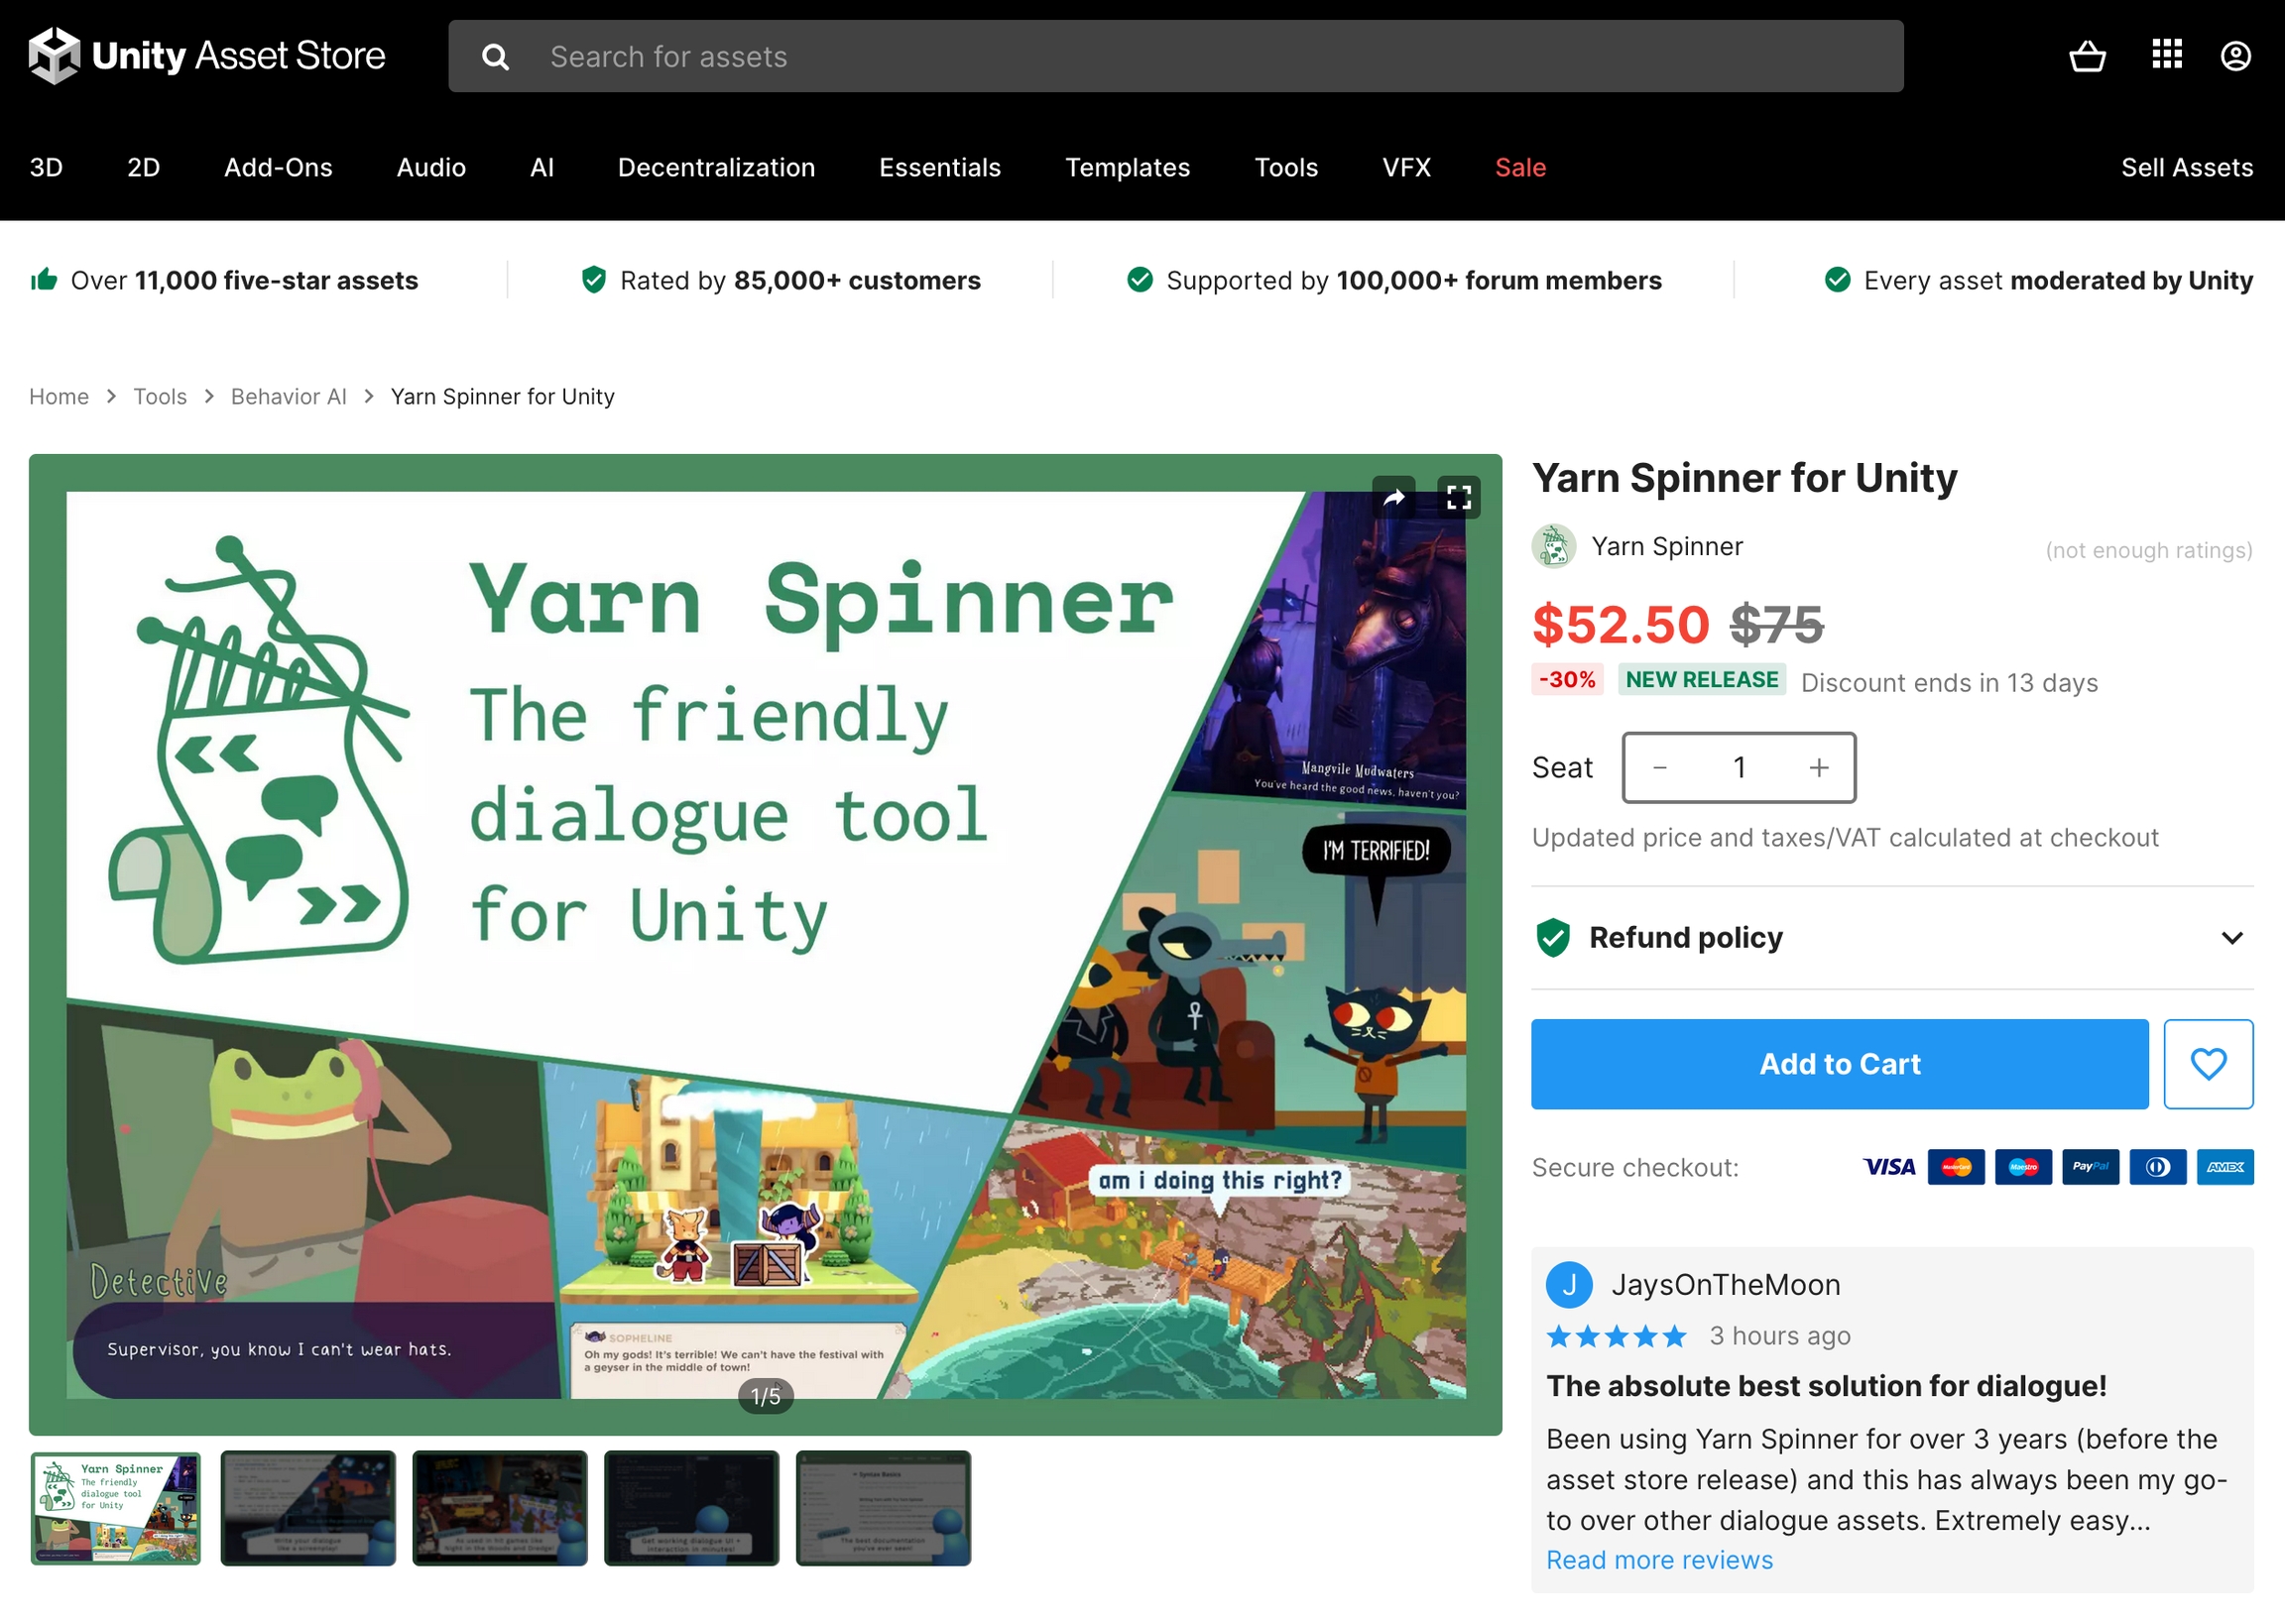
First, visit the Unity Asset Store page for Yarn Spinner for Unity, and add it to your cart, and complete your purchase while logged into the same Unity account you use to activate Unity.
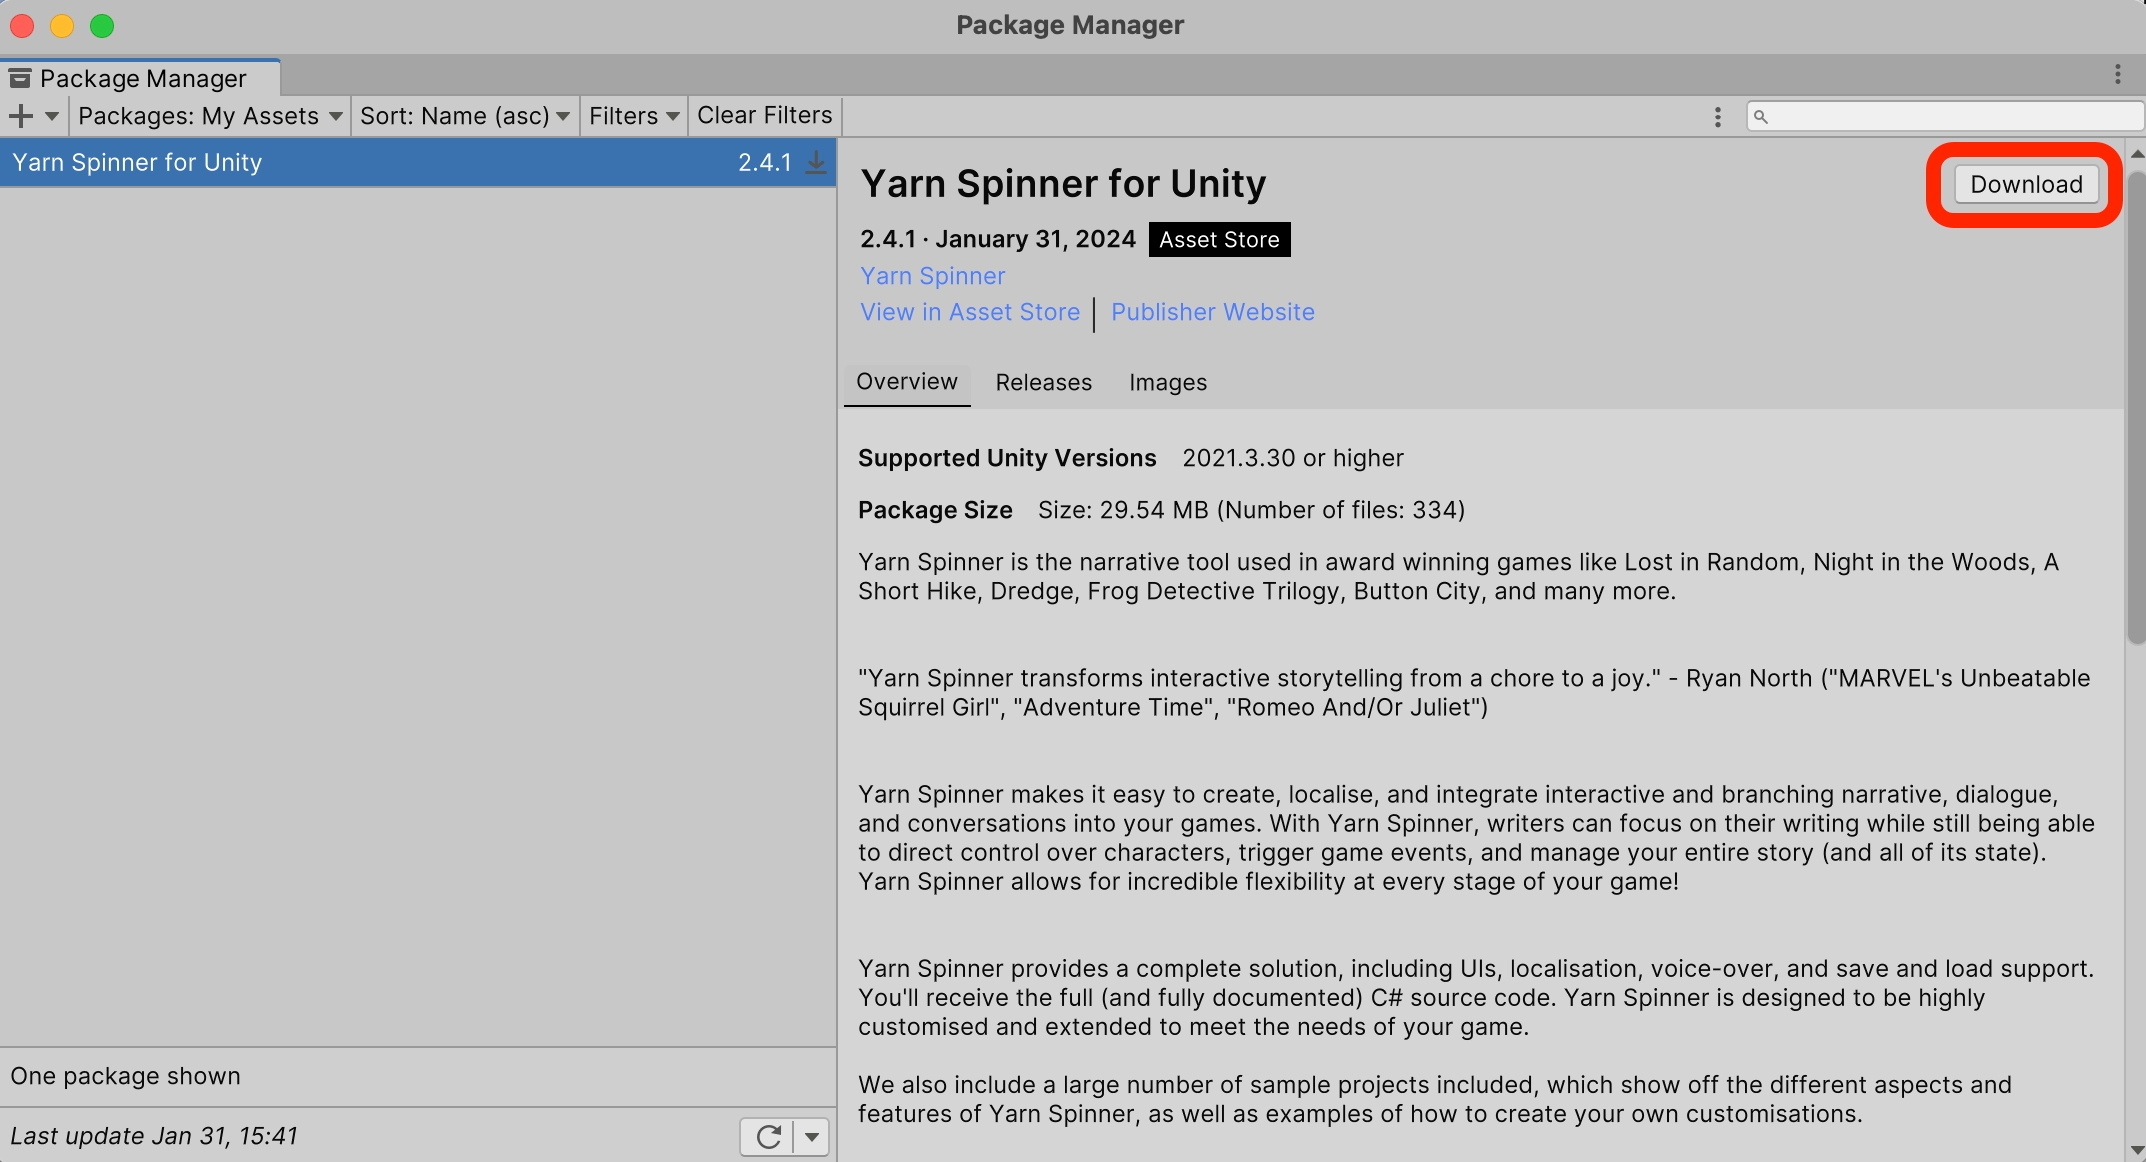
Once you've purchased Yarn Spinner for Unity, you'll find the Add to Cart button replaced by an Open in Unity button. Click this button to launch Unity, and the Package Manager will locate your purchased package:
Once the Package Manager has located the package, you can use the Download button to fetch it:
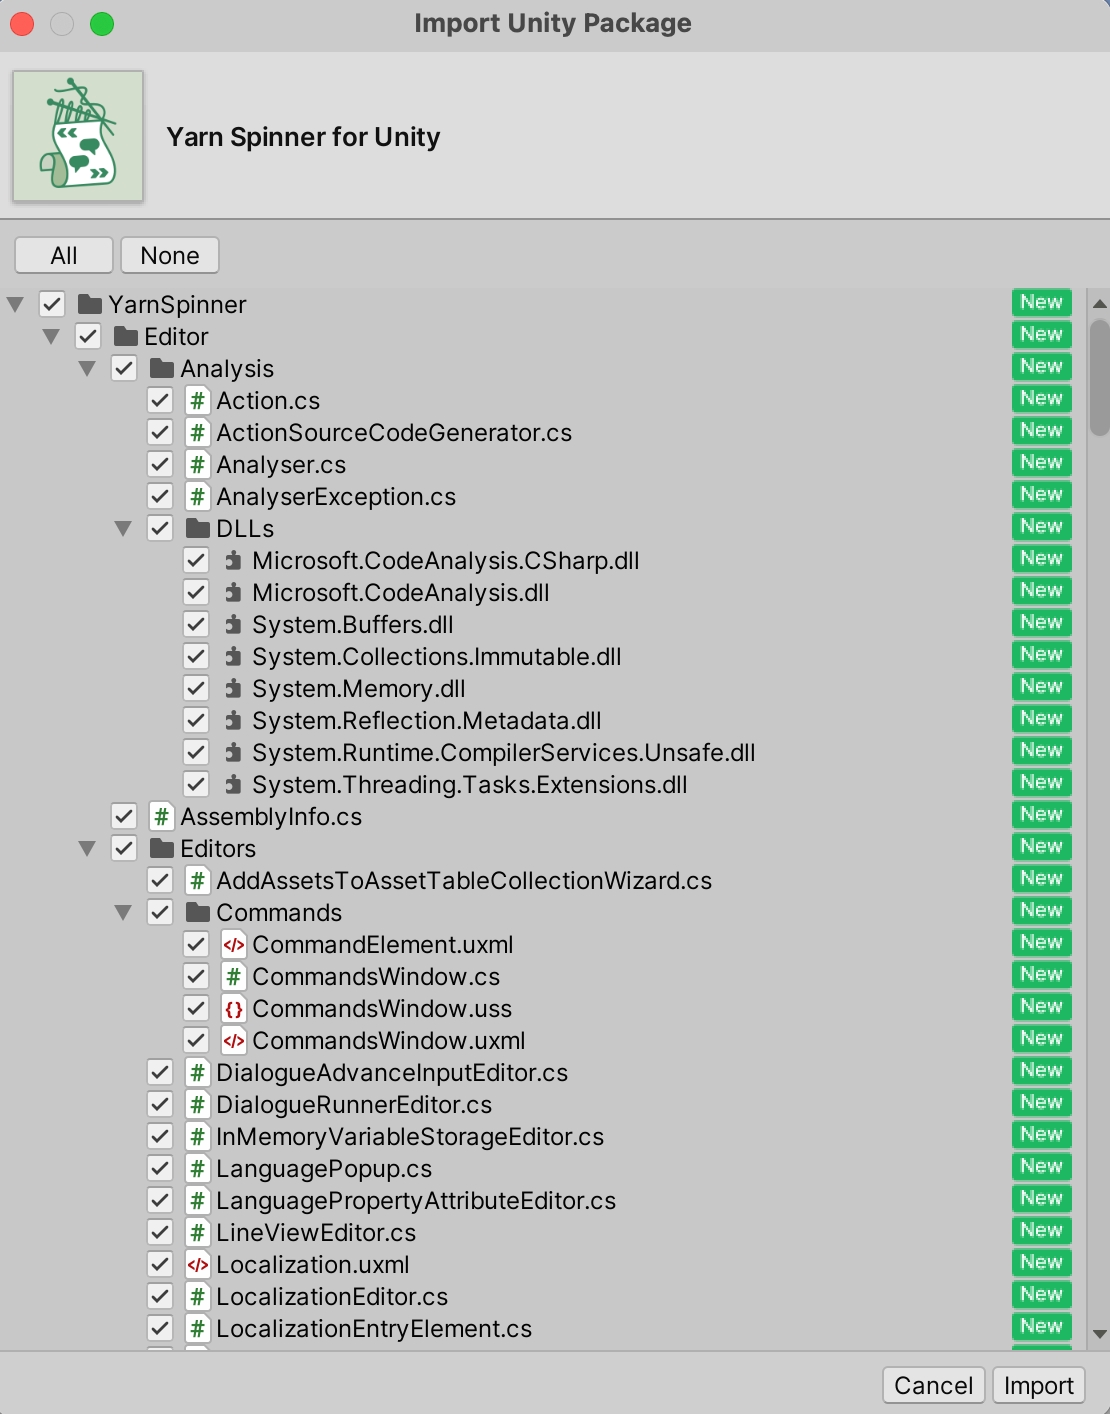
Once Yarn Spinner for Unity has downloaded, you can use the Import button to start the process of adding it to your project:
This will trigger the Import Unity Package workflow, where you can use the Import button to add the Yarn Spinner for Unity package to your project:
And with that, you're ready to use Yarn Spinner! You might also want to download and import the Yarn Spinner for Unity Samples as a .unitypackage, from here.
You can review Unity's documentation for using the Asset Store for further guidance on working with purchased packages.
If you would prefer to download and install Yarn Spinner for Unity outside of Itch or the Unity Asset Store, we provide the following methods:
Once you've installed Yarn Spinner, you're ready to start using it!
Yarn Spinner for Unity provides a way to get the contents of your Yarn scripts into Unity, which allows you to construct a game around your dialogue. This beginner's guide shows guides you through one simple way of using Yarn Spinner for Unity to do this.
The provided Yarn Spinner views use the Unity package TextMesh Pro to display text. This means you will need to install it before using Yarn Spinner. To do this, open the Window menu and choose -> TextMesh Pro -> Import TMP Essential Resources.
If you work with a preexisting game that you're adding Yarn Spinner to, you may already have TextMesh Pro in your project.
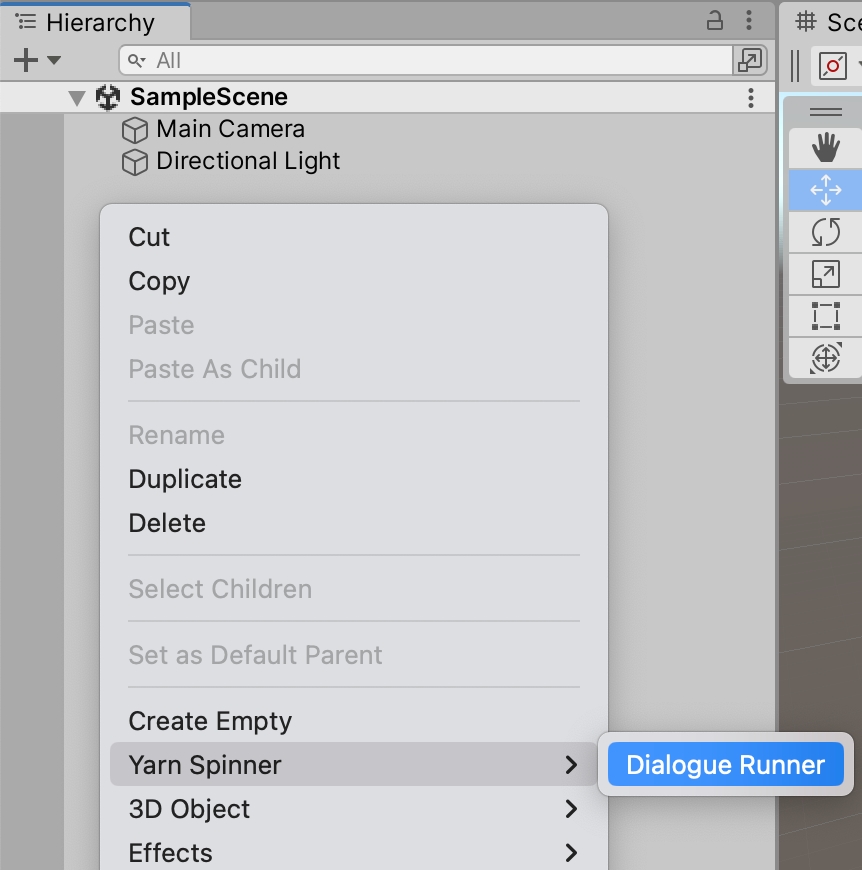
In the empty project that now has the Yarn Spinner for Unity package installed, right click in the Hierarchy and choose Yarn Spinner -> Dialogue Runner. This will add a new Dialogue System prefab to your scene, which we'll be working with in a moment.
Instead of right-clicking in the Hierarchy, you can also use the GameObject menu -> Yarn Spinner -> Dialogue Runner.
The Dialogue Runner that has been added to your scene is a prefab supplied by Yarn Spinner for Unity that acts as a bridge between the dialogue written in your Yarn scripts, and everything that happens in Unity.
Specifically, it works with two different things, which are key concepts when working with Yarn Spinner for Unity:
a Yarn Project
a Dialogue View
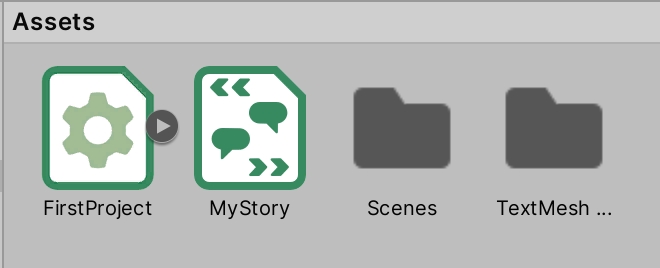
First, we'll look at the Yarn Project. A Yarn Project is a Untiy asset that lives on disk. Create one by right-clicking in the Assets pane and choose Create -> Yarn Spinner -> Yarn Project.
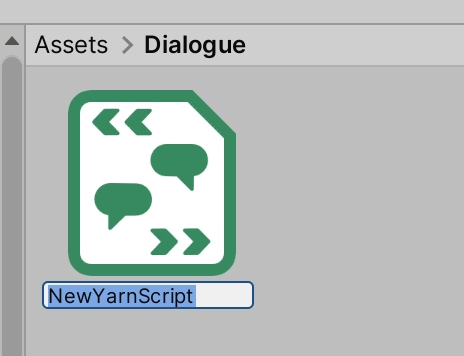
With the new Yarn Project created, name it FirstProject, and then use the same menu to create a Yarn Script. Name the Yarn Script MyStory.
The Yarn Script you've created is actually a .yarn file that's now named MyStory.yarn. Double click it in the Assets pane to open it in Visual Studio Code.
Put the following Yarn script into MyStory.yarn, save the file and return to Unity:
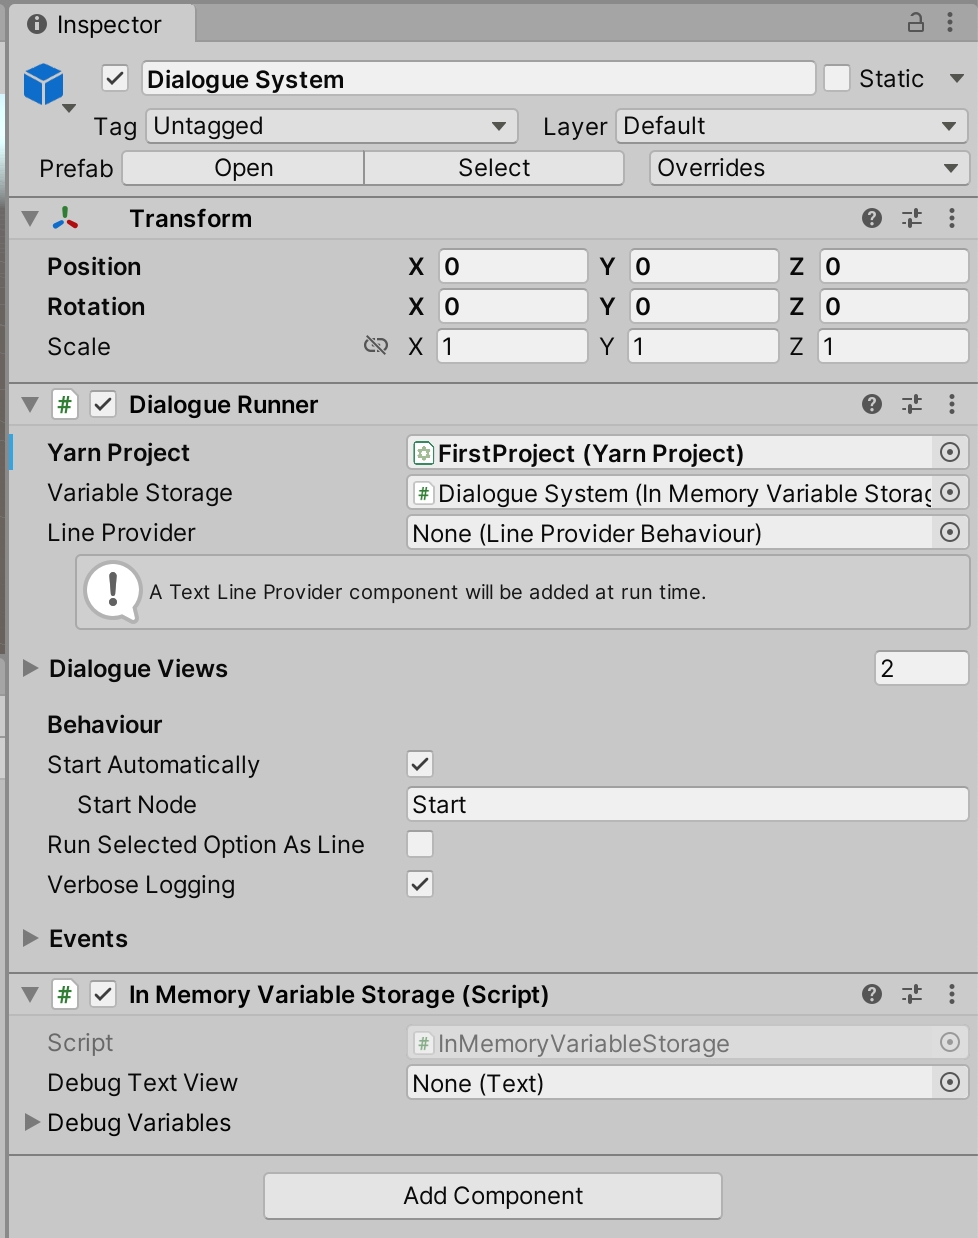
To connect the Yarn Project you created to the Dialogue Runner that's in the scene, select the Dialogue Runner in the Hierarchy and drag the FirstProject from the Assets pane into the Yarn Project slot, as shown here:
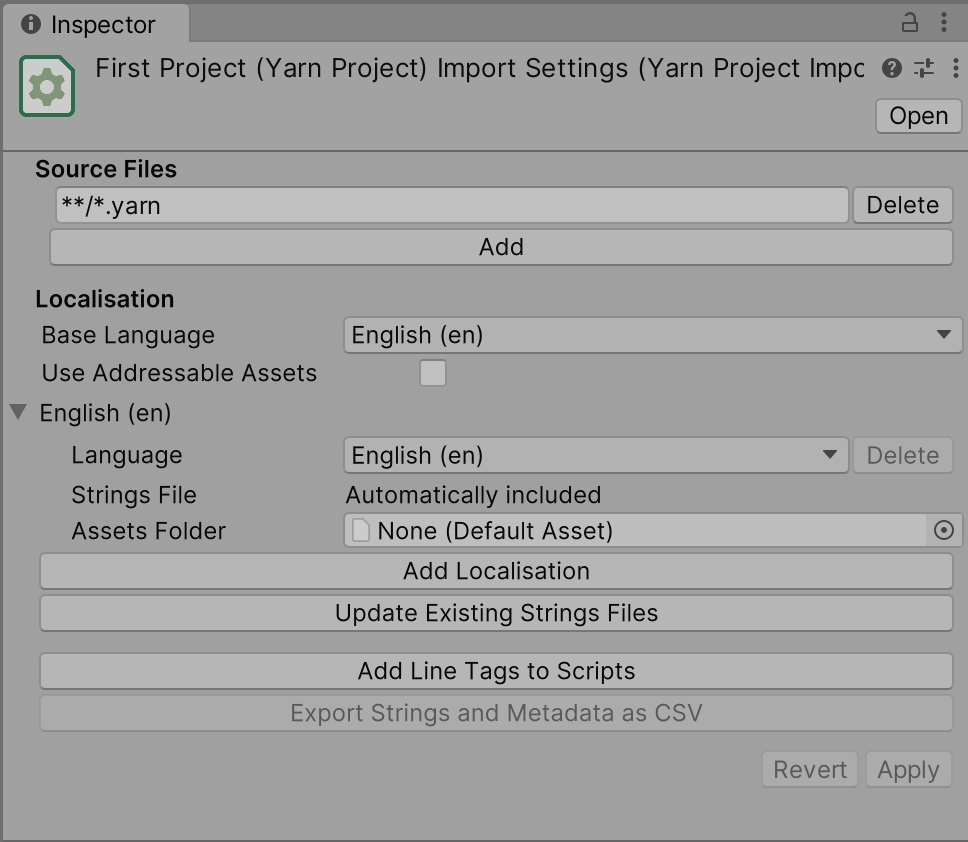
With that done, select the Yarn Project FirstProject in the Assets pane, and look to the Inspector.
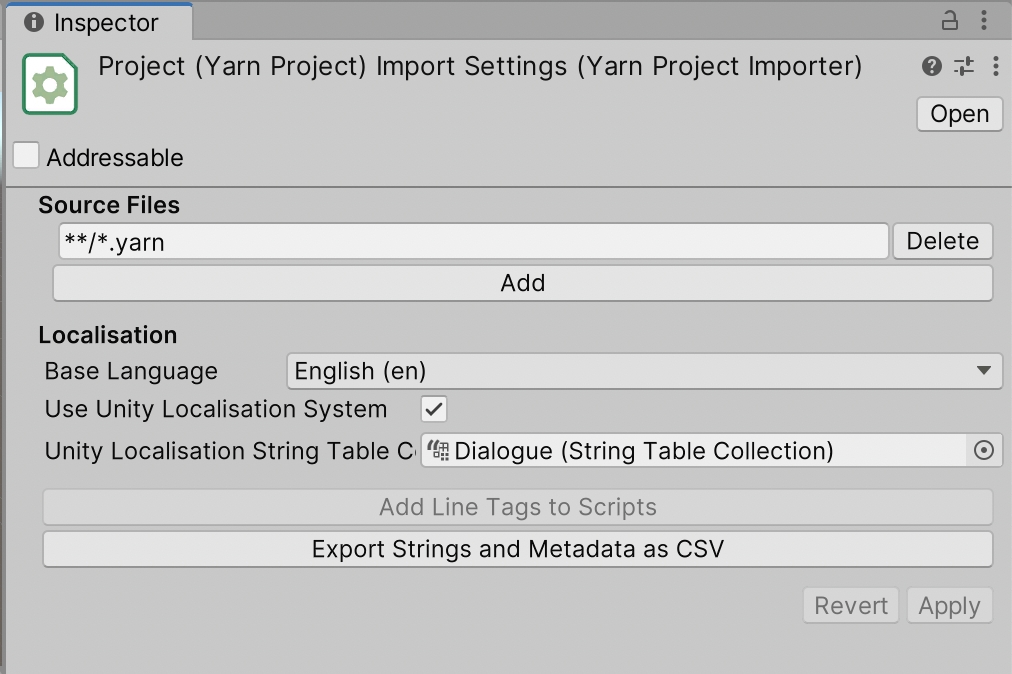
You'll see the Source Files field contains **/*.yarn — this tells this specific Yarn Project to look for all .yarn files in the same folder as the Yarn Project asset, and any subfolders. Thus, any .yarn files next to it will be included as part of the project, which means MyStory.yarn will be found.
At this point, you can play your project, and step through the dialogue in the default Yarn Spinner for Unity Line View and Options List View:
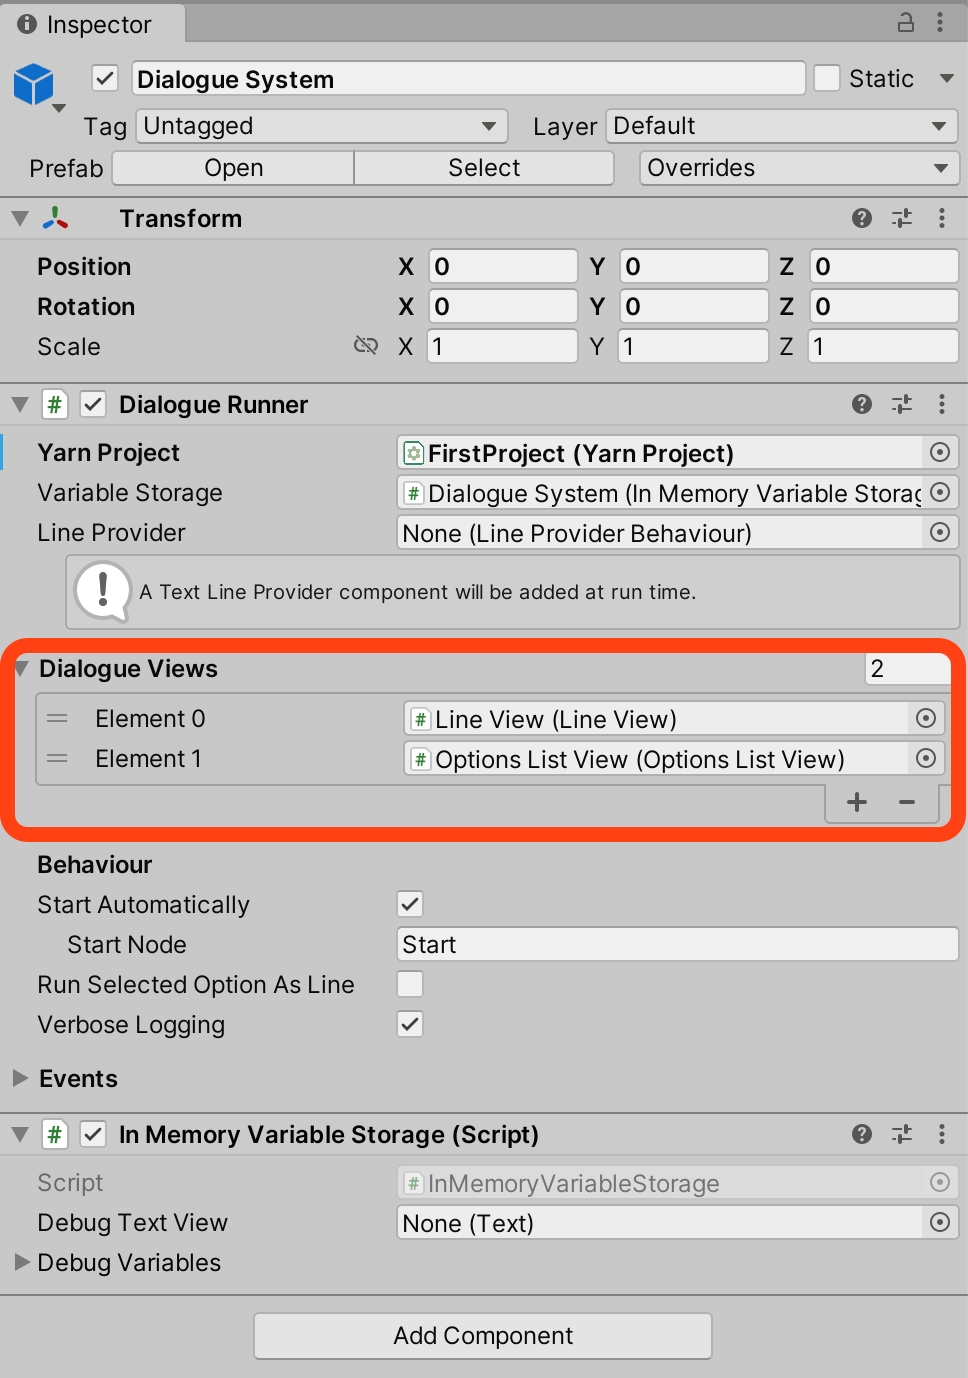
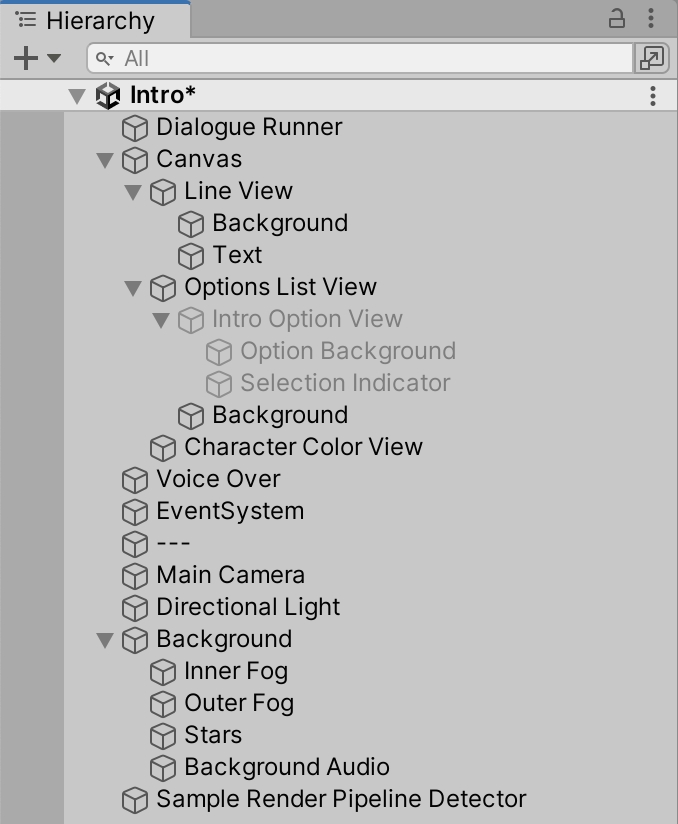
To understand how this is working, it's important to understand the concept of Yarn Spinner Dialogue Views. Select the Dialogue System in the Hierarchy, and expand the Dialogue Views section:
This section is where you specify which DIalogue Views should be used to display the content coming from the Yarn script(s): in other words, how the lines of dialogue, and choices, should be displayed.
A Dialogue Runner can have multiple Dialogue Views. For example, by default the Dialogue System prefab has one Dialogue View that's designed to display lines of dialogue (Line View), and another that's in charge of displaying options to the player (Options List View).
All Dialogue Views receive all lines and options, and it's up to them to handle them appropriately. So the Line View that we supply will only displays lines that are not options, and the Options List View will only display lines that are options.
While Yarn Spinner for Unity supplies some basic Dialogue Views, you can also create your own. To learn about this visit Creating Custom Dialogue Views, but do note that it is a significant step from this Beginner's Guide.
With that, we've reached the end of our beginner's guide. You're ready go forth and build games with Yarn Spinner! You're also equipped to work with the rest of the documentations here! Don't forget to join the Discord, to chat with other Yarn Spinner users, the Yarn Spinner team, seek help, and share your work.
The new Yarn Spinner language features that have arrived in Yarn Spinner 3.
Learn how to install the beta version of Yarn Spinner 3.
Yarn Spinner 3 for Unity requires Unity 2022.3 or newer.
Open the Window menu and choose Package Manager.
Click the + button at the top left, and choose “Add package from Git URL”.
Enter the following text and press enter: https://github.com/YarnSpinnerTool/YarnSpinner-Unity.git#beta
In Visual Studio Code, open the View menu and choose Extensions.
Type yarn spinner in the search box at the top of the pane.
Select Yarn Spinner, and wait for the page to appear.
In the main view, click Switch to Pre-Release Version.
We do not recommend that you use Yarn Spinner 3 for production projects yet.
Yarn Spinner 3 includes a wide range of great new features. Learn about them here.
Yarn Spinner 3 has many new features. While everything that existed in Yarn Spinner 2.x should largely keep working the same way in Yarn Spinner 3, there's so many new things that we thought we'd highlight them separately!
Yarn Spinner 3 is currently only available for Unity and Visual Studio Code. Other platforms and tools to follow, in the full release.
Coming Soon
The third step in our beginner's guide, focusing on getting up and running with Yarn Spinner for Godot.
Yarn Spinner for Godot is a Yarn Labs project. It is not fully, or officially supported, and may break, or change at any time.
This step of the beginner's guide helps you move from writing Yarn scripts outside of a game engine, to initial integration steps to turn them into a game with Godot
First, launch Godot 4.2 (C# version) and create a new project.
Download a from the , or clone the repository somewhere.
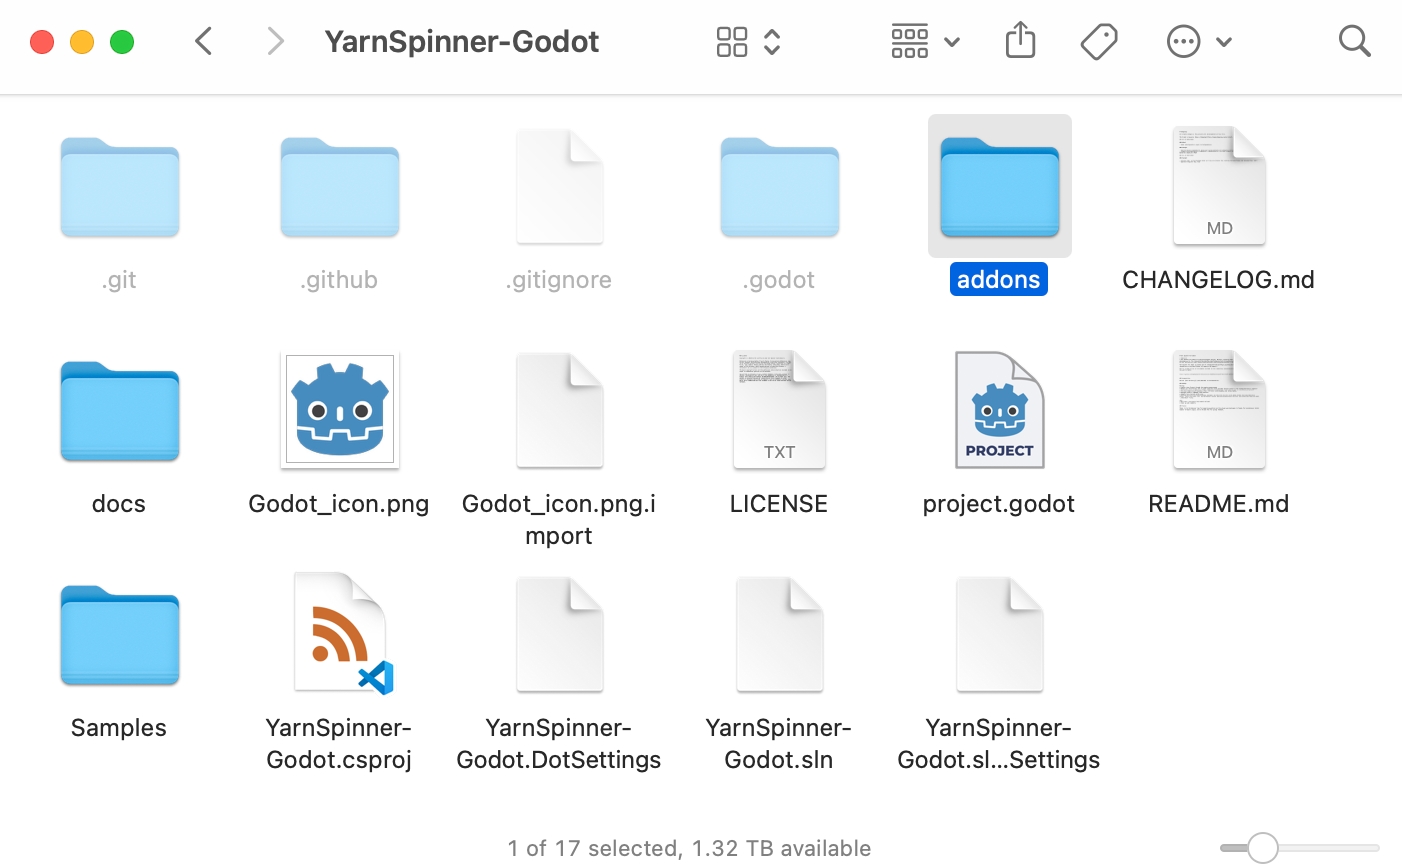
Locate the addons/ directory in your new local copy of Yarn Spinner for Godot:
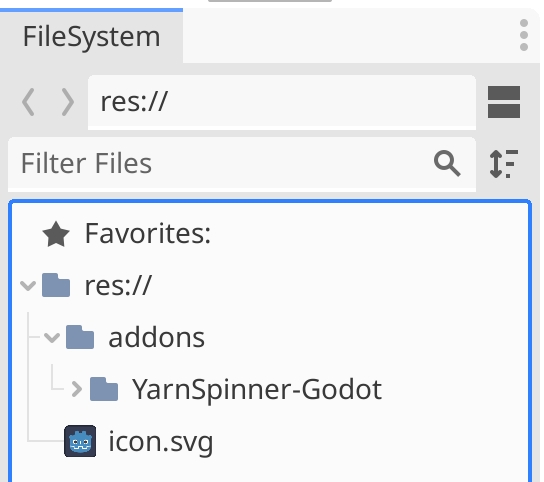
Put a copy of this directory into your new Godot project, either by dragging the folder in your file manager (e.g. Finder or Explorer) into the folder of the Godot project, or by dragging from your file manager into the FileSystem dock of your Godot project:
Next, choose the Project menu -> Tools -> C# -> Create C# solution. This will create a C# project for you. We have to do this to trigger the creation of the .csproj file, which is necessary to let Godot know about the Yarn Spinner plugin.
Next, open the project folder in Visual Studio Code. In the sidebar of VS Code, the .csproj file and add the following line to it, inside the <Project> </Project> tags, but not inside an <ItemGroup> or <PropertyGroup>:
Your brand new project should look something like this in VSCode:
Save the tweaked .csproj file and return to Godot, everything is almost ready to go. Click the Build button in the very top right-hand corner of the Godot window. This will trigger a build of the C# solution for the project, which is required to make Godot aware of Yarn Spinner for Godot.
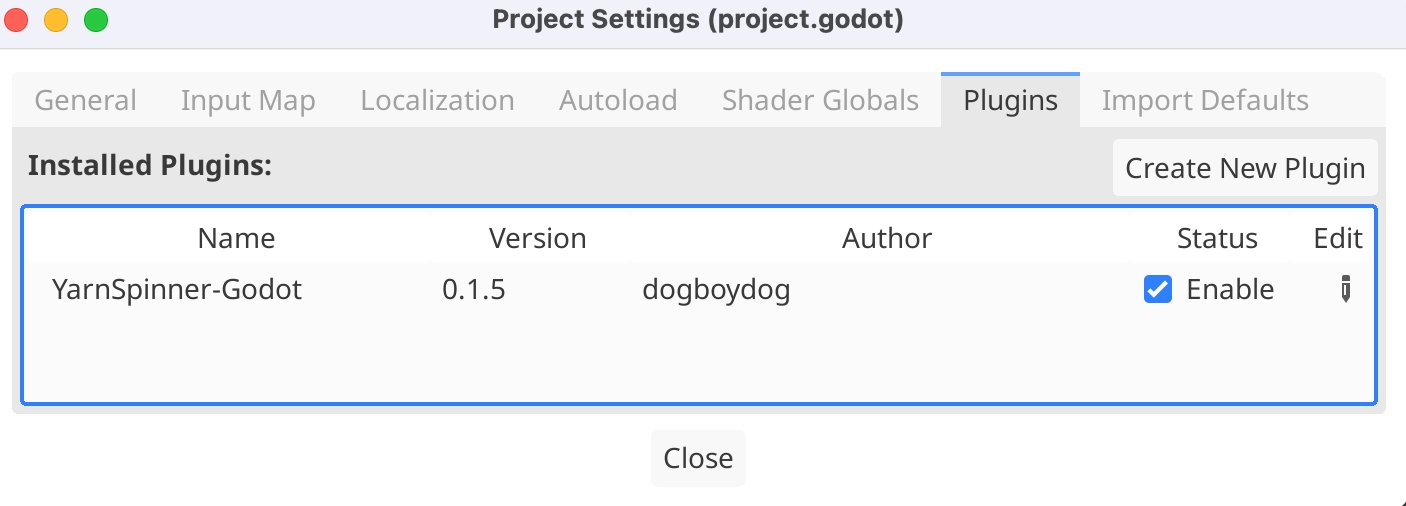
Once the build is complete, open the Project menu -> Project Settings, change to the Plugins tab, and tick the enabled box next to the Yarn Spinner for Godot plugin:
With that, you're ready to go!
In your Godot project, click the Instantiate Child Scene button:
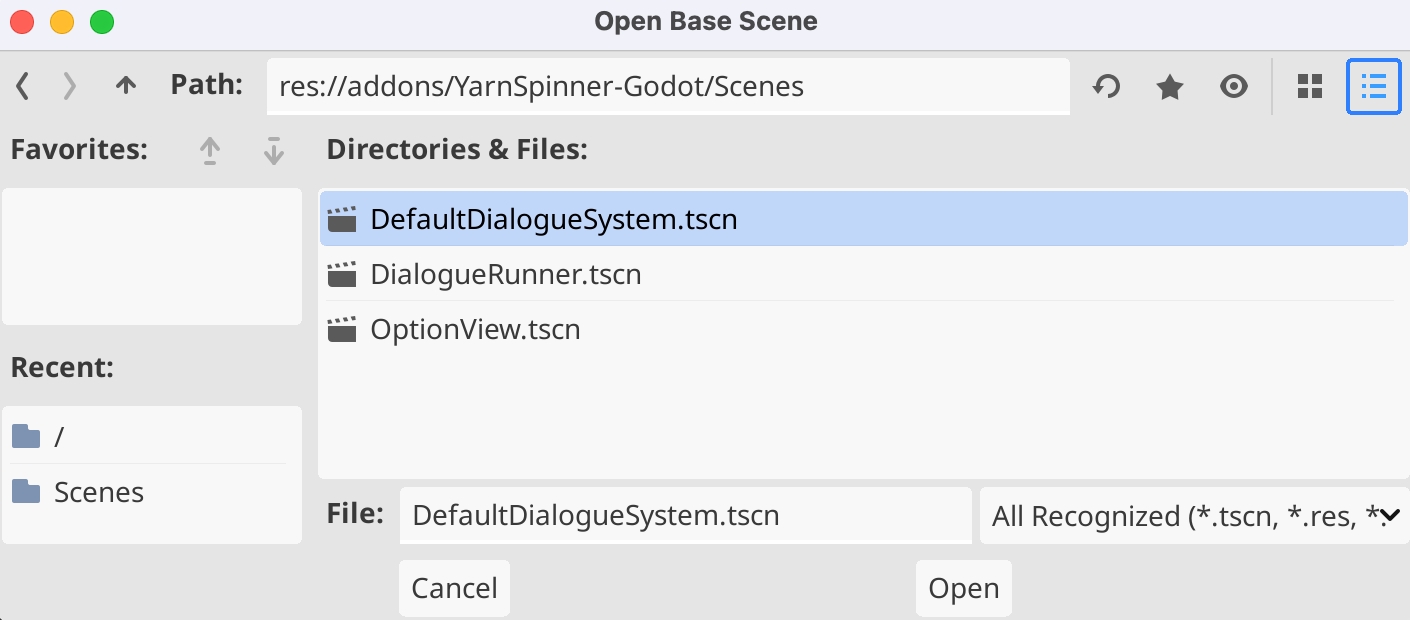
And navigate into the addons/YarnSpinner-Godot/Scenes folder of your project, and choose the DefaultDialogueSystem.tscn file as the scene to instantiate:
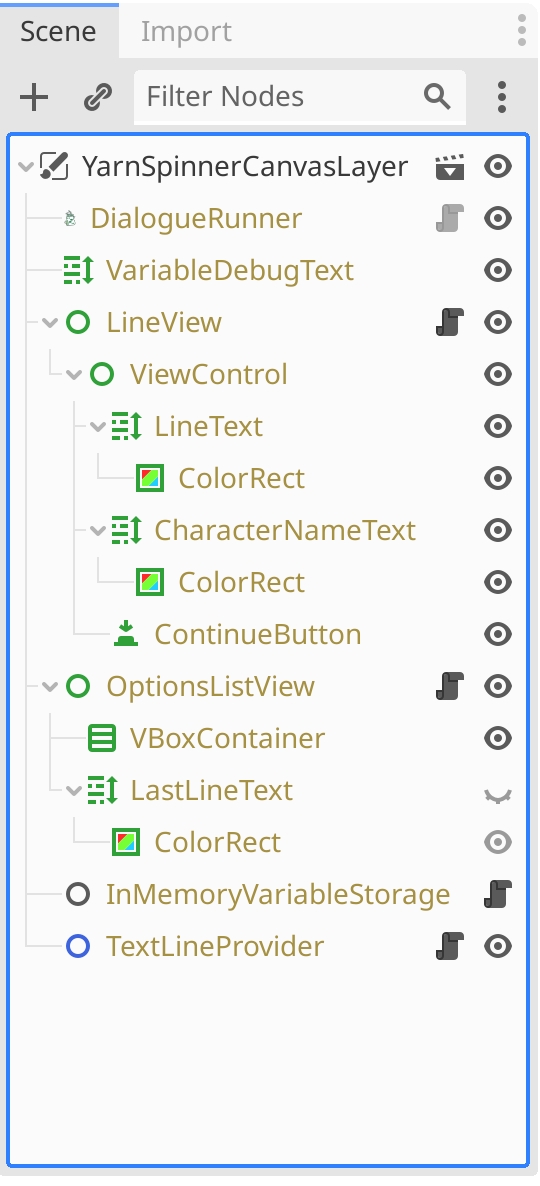
Your Scene dock will look like this showing a node hierarchy that's entirely based on the DefaultDialogueSystem.tscn scene that you instantiated:
You could also instantiate the DefaultDialogueSystem.tscn into your scene at a lower part of the hierarchy, instead of the root node, to display dialogue using the provided default UI, instead.
Next, create a new Yarn Project using the menu Tools > YarnSpinner >Create Yarn Project:
Then choose a directory to save your new YarnProject in. For example, you can save it to the root of your project. Name the new Yarn Project FirstProject.yarnproject:
Next, create a new Yarn script (a file with a .yarn extension) by using the menu Tools > YarnSpinner >Create Yarn Script. In the resulting "Create a new Yarn Script" window, set the File name to MyStory.yarn, and click the Save button::
It may take a moment, but Godot will import your new .yarn file, and it will appear in the FileSystem dock. When it's appeared, double-click on the Yarn Project, FirstProject.yarnproject in the FileSystem dock and look to the Inspector, making sure that res://MyStory.yarn is in the list of Source Scripts, which are the Yarn scripts that compromise the new project:
Next, open the MyStory.yarn file in VS Code, and add the following Yarn script to it, before saving it and returning to Godot:
Select the DialogueRunner node in the Scene dock, and look to the Inspector. Assign the Yarn Project you created to the DialogueRunner by dragging the FirstProject.tres Yarn Project from the FileSystem dock into the Yarn Project slot of the Inspector:
Finally, enter Start as the Start Node, and tick the box next to Starts Automatically:
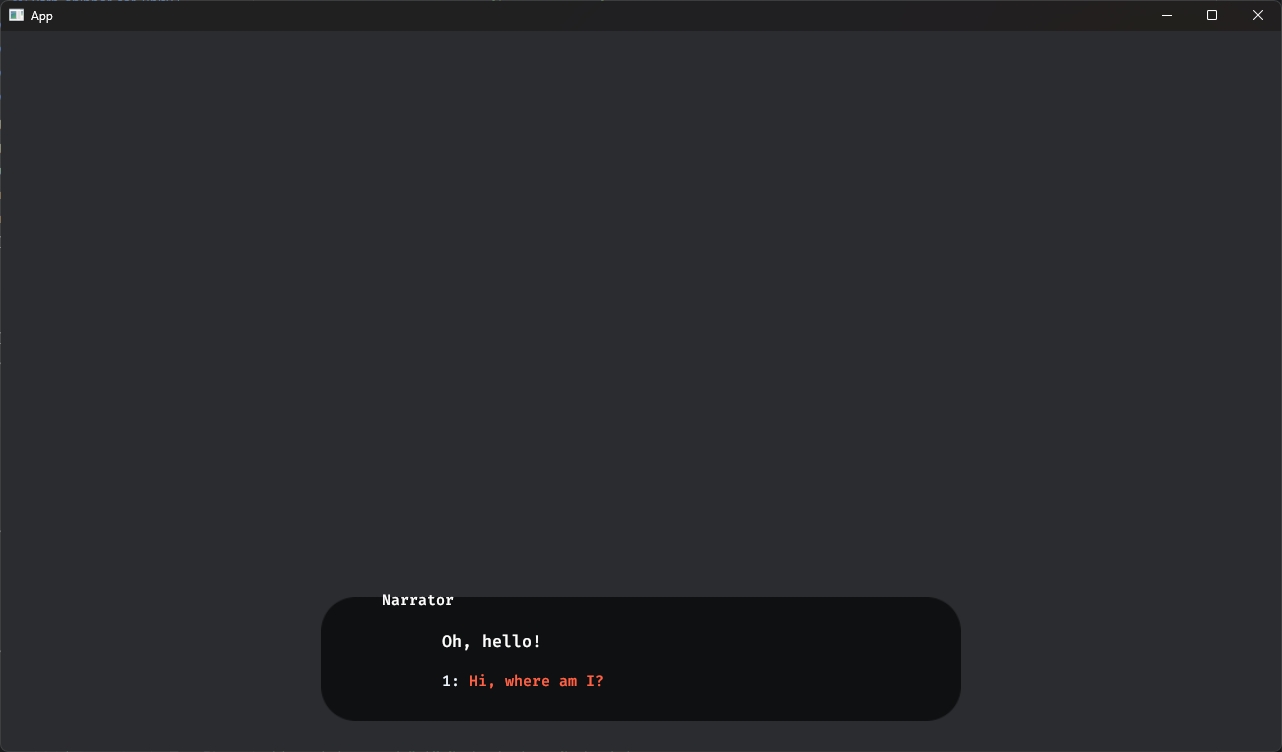
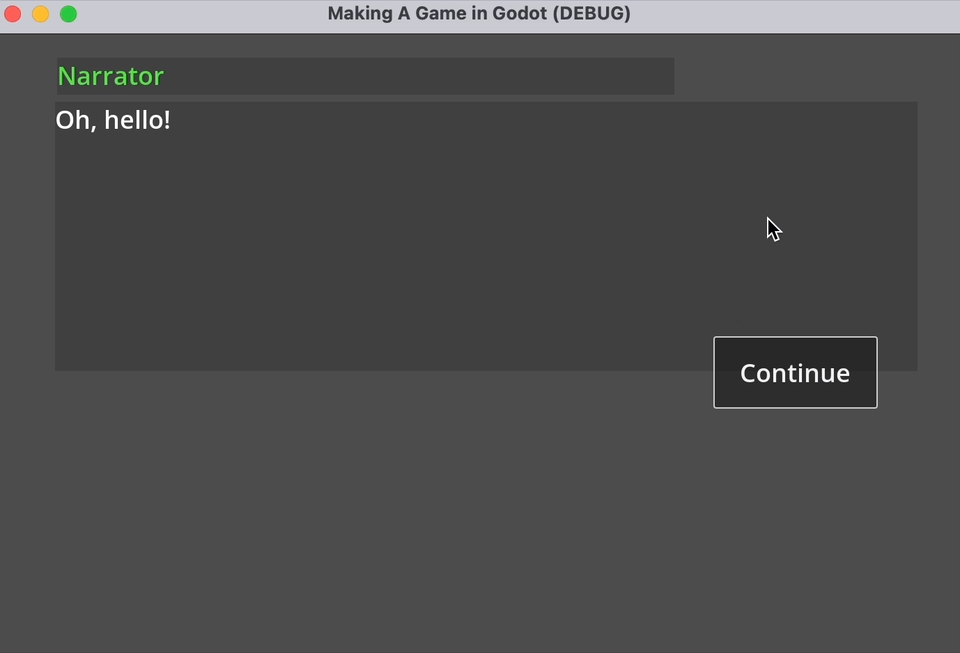
Save your scene as Demo.tscn, and run the game. At this point, you can play your project, and step through the dialogue in the default Yarn Spinner for Godot Line View and Options List View:
The third step in our beginner's guide, focusing on getting up and running with Yarn Spinner for Rust using Bevy.
Yarn Spinner for Rust is a Yarn Labs project. It is not fully, or officially supported, and may break, or change at any time.
While Yarn Spinner for Rust is built to be engine-agnostic, the intended way to use it is through an engine-specific wrapper. The currently only supported engine is . It is a data-oriented game engine using an ECS, which broadly means that you don't look at your game world through the traditional lens of objects mutating the world and each other, but instead see the game as a collection of data attached to various entities that can be queried and manipulated through systems.
This chapter will assume that you are familiar with the basics of Bevy. If you're not there not, try to come back after you've gone through the .
Let's create a new Rust project called hello_yarnspinner. Type the following into your terminal:
Then, let's add our dependencies:
Open up the generated src/main.rs and remove its content. Now let's import our dependencies:
Now on to the main function. Let's start by adding all necessary plugins.
DefaultPlugins is necessary for Bevy to do much at all. YarnSpinnerPlugin sets up all functionality of Yarn Spinner except for any actual graphical interface. In order to see anything on screen, you need a Dialogue View. We are using a simple one provided by the ExampleYarnSpinnerDialogueViewPlugin here.
Now we need the game to actually do something. We will do this by registering some systems and then running the app. Extend your main function with the following code:
In order to see anything at all, we need a camera in our game world. setup_camera does just that when the game starts:
The line added for the Update system set might look a bit confusing, so let's clear it up before defining the spawn_dialogue_runner function.
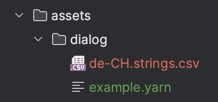
When the YarnSpinnerPlugin starts, it searches for Yarn files in the assets/dialogue/ directory. Along with any localizations or extra assets it might find, it bundles its findings into a YarnProject representing your work. Once this process is finished, a YarnProject resource is injected into the world.
A DialogueRunner is the component that is responsible for actually running any piece of Yarn dialogue found inside a YarnProject. If you want to start, stop or change a dialog, you need to use it. You can guess that this only works once the YarnProject has actually finished loading. This is why we use .run_if(resource_added::<YarnProject>()); to wait exactly with spawning the DialogueRunner until everything is ready.
With that out of the way, let's look at the definition of spawn_dialogue_runner:
This code will not spawn the DialogueRunner, but tells it to immediately run a node called "Start" from a Yarn file.
Create a file inside assets/dialogue/ called my_story.yarn. Open it and fill it like this:
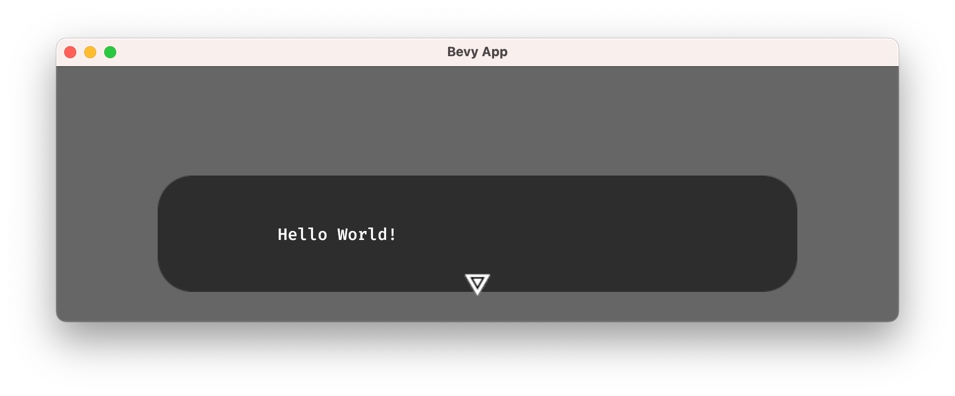
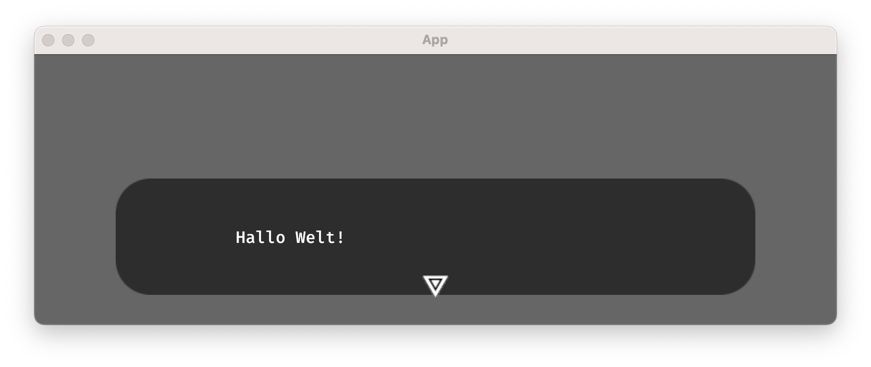
Now you can simply run cargo run in your terminal and enjoy your freshly created dialog:
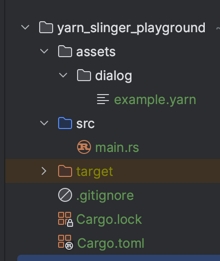
If anything went wrong, make sure that your directories look like this:
Your src/main.rs should look like this:
And your Cargo.toml should look like this:
With that, we've reached the end of our beginner's guide. You're ready go forth and build games with Yarn Spinner! You're also equipped to work with the rest of the documentations here!
Learn about using line groups, which allow Yarn Spinner to choose which content to run, depending on conditions.
In Yarn Spinner 3, you can now create line groups. A line group is collection of lines that Yarn Spinner will choose from.
Line groups are collections of lines that begin with a => symbol:
When Yarn Spinner encounters a line group, it will select one of the lines in the group and run it.
Line groups are great for running ‘barks’ - collections of short lines that need to run in response to an in-game event. It can be useful to think of them like Yarn Spinner’s existing options -> syntax, but instead of the player choosing which content to run, the computer picks it for you:
You can attach conditions to lines in a line group, to ensure that they only run when it’s appropriate to do so. Conditions can be any true or false expression, and can also be combined with the once keyword to ensure that a line can only run once:
A line in a line group can also have additional lines belonging to it, which will run if the item is selected.
Learn about detour and return, which let you temporarily move to another node, then return.
In Yarn Spinner 3, you can use a detour statement to run content from a different node, before returning to the previous node.
Here’s an example of using the detour statement.
If the player replies ‘No?’ to the guard’s question, Yarn Spinner will detour to the Guard_Backstory node and run its contents. When the end of that node is reached, Yarn Spinner will return to the Guard node, and resume from just after the detour statement.
When you detour into a node, Yarn Spinner runs the content from that node just as if you’d used a jump statement. When you reach the end of the node, or reach a return statement, Yarn Spinner will return to just after the detour statement.
You can return early from a detoured node by using the return statement. Doing so will return to just after the detourstatement, as though the end of the node had been reached.
If Yarn Spinner reaches a return statement, and it hasn’t detoured from another node, it will stop the dialogue (that is, it will behave as though you had written a stop command.)
When you detour into a node, that node can itself detour into other nodes.
If a detoured node uses a jump command to run another node, the return stack is cleared. If you detour into a node, and that node jumps to another node, Yarn Spinner won’t return to your original detour site.
Learn about once statements, which let you specify content that only runs once.
In Yarn Spinner 3, you can use a once statement to run content only one time. When the script reaches a once statement, it checks to see if it’s run before. If it has, it skips over it! Magic.
once statements are great for making sure that the player never sees certain content more than once. For example, you might want a character to never introduce themselves to the player twice.
There are two main ways you can use a once statement, which we'll explore below.
<<once>> and <<endonce>>:You can also use an <<else>> clause within the <<once>> statement, which will be run if the relevant <<once>> content has already been seen:
You can also add an if to the once to run content a single time, but only when a certain condition is true. In all other cases, it will be skipped (or the else content will be run, if there is any):
<<once>> to a line, or options:If you add once (or once if) to a line, that line will only appear once, and will be skipped over every other time it’s encountered:
Similarly, if you add it to an option, that option will only be selectable once, and will be marked as unavailable after it’s been selected.
once statements are really useful when you want to show long, detailed content the first time it’s encountered, but you don’t want to show it every time. This means that players don’t need to mash the ‘skip line’ button over and over when they realise that they’re starting to see a long run of lines they’ve already seen:
once statements keep the information about whether they’ve been run or not in a variable that’s stored in your Dialogue Runner’s Variable Storage, just like any other variable. The variable isn’t directly accessible from your Yarn scripts.
The first step in our three-step beginner's guide to Yarn Spinner: learning the syntax of Yarn with Try Yarn Spinner.
When you first start learning Yarn, the best tool to work with is , so fire up your web browser—no installation necessary!
Open your web browser, and navigate to Try Yarn Spinner at
In Yarn, everything you write is text. Yarn files are just plain text files with a .yarn extension.
Everything inside a Yarn file is structured around nodes and lines.
In Try Yarn Spinner, the first node to run is always called Start, so we’ll write that now.
Copy and paste, or write, the above Yarn script into Try Yarn Spinner!
The title of a node is important, because your game uses node titles to tell Yarn Spinner which node to start running. You also use the title of a node when you want to jump to another node.
So this node is titled “Start”.
Node titles are not shown to the player and must start with a letter, and can contain any letters, numbers and underscores, but cannot contain a period or other symbols.
Node headers can actually contain any number of lines with the structure key: value. This can be used to store additional information, such as the in-game location the conversation is taking place.
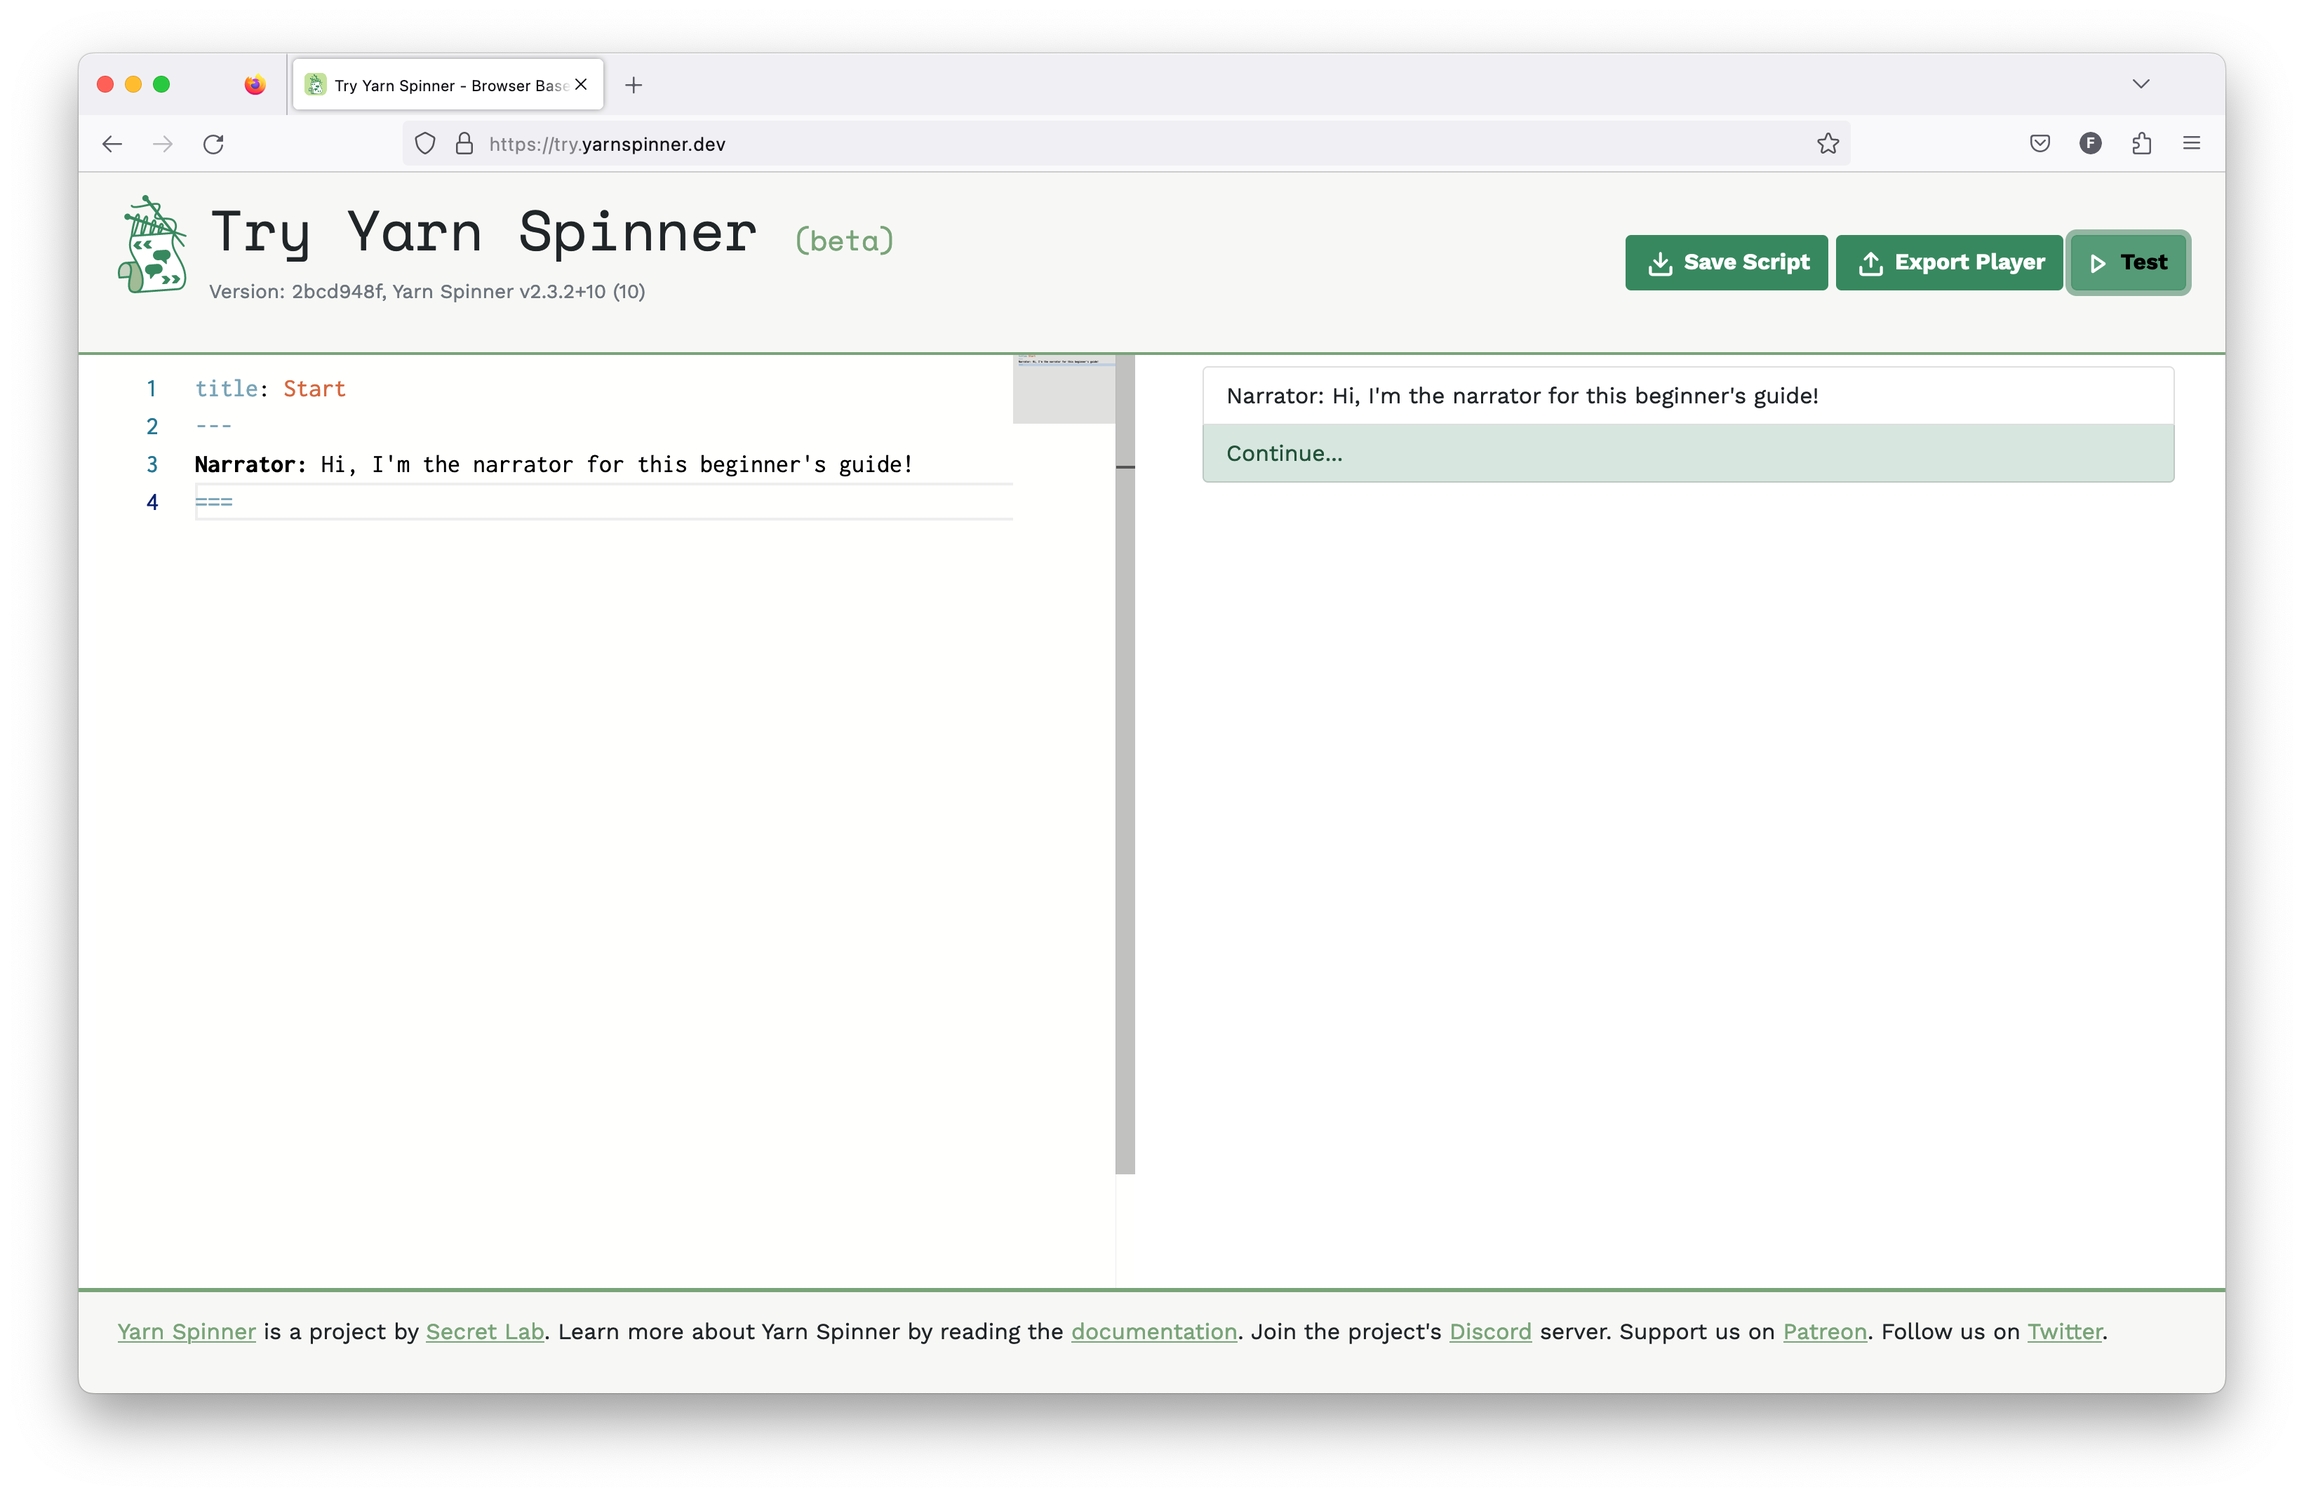
If you put the above Yarn, or something very similar, into and click the Test button, you’ll see the dialogue appear in the right side of the screen.
Let’s make it a bit more complex. Update the Yarn to look like the following:
Update the script in Try Yarn Spinner to the above Yarn and try running it.
In this node, there are the following elements:
the header, with the node’s title
the --- marker, which indicates where the body of a node begins
some lines, representing a Narrator speaking…
and the === marker, which indicates the end of a node
Let’s chat about lines…
Almost everything is a line When you write Yarn Spinner dialogue, just about every line of text that you write in a node is a line.
When a node is run, Yarn Spinner runs each line, one at a time, and sends it to your game.
A line of dialogue is just the thing you want some entity or character to say, usually beginning with the name of the entity speaking.
Yarn Spinner sends each of these lines, one at a time, to the game. The game is responsible for taking the text, and presenting it to the player; in the case of Night in the Woods, this means drawing the speech bubble, animating each letter in, and waiting for the user to press a key to advance to the next line.
Lines of dialogue can contain just about any text, except for some special characters that Yarn Spinner uses to add extra information to a line.
If there is a set of characters without spaces before a colon (:) at the beginning of the line, Yarn Spinner will mark that as the name of the character. This information will then be passed to your game, so that you can change the way that lines are shown based on the character who's saying them. For example:
After the lines of the Narrator speaking you’ll notice some lines that are indented, and start with a -> interspersed amongst other lines from the Narrator:
These lines are called options, and they are how you let the player decide what to say. Options let you show multiple potential lines of dialogue to the player, who is then able to choose one.
As you might’ve guessed, an option line is denoted by starting the line with a ->
After that, the content of the line is like any other line.
Depending on the choice of option, one set of lines from the Narrator, reacting to the player’s choice, will be displayed.
You can also nest options inside other options:
Put the above script in Try Yarn Spinner, and click Test to run it!
The only new thing that’s happening here is that options are inside other options. If you play this, inside Try Yarn Spinner, then you’ll be able to interact with the options based on the choices you make.
Have lots of options can get complex, so it’s often a good opportunity to break your story up into nodes and jump between them. We’ll do that next.
You might have noticed that it’s a bit hard for you, the writer, to follow what’s going on, when you start nesting too many options, have lots and lots of lines of dialogue, or a combination thereof.
When things start to become too much for a single node, you can break things into multiple nodes and use the <<jump>>statement to, you guessed it… jump to another node.
Here’s an example of the <<jump>> statement in action:
Put the above script in Try Yarn Spinner, and click Test to run it, and observe how the jumps work.
By now, hopefully, you’re seeing what’s going on here, but let’s go through it to make sure.
In this yarn script there are three nodes: Start, Alright, and Love and, depending on the choice made by the player inside the Start node, the conversation will jump to Alright (if they’re a bit rude) or Love (if they’re somewhat polite).
The jump statement is used to move the narrative to a different node, and takes a single parameter, which is the full title of the node you want to jump to, and you can see it in use in our Start node:
Separating dialogue segments into nodes can aid in writing neater files that are easier to edit as they grow.
Sometimes it makes sense for the options presented or the outcomes of selecting different options to vary based on other things the player has done or said up until this point. This requires the use of logic and variables, which we'll discuss next.
Of course, Yarn is actually a full programming language, which means it has support for writing code that stores information in variables.
Yarn has three types of variables, numbers, strings, and booleans:
Variables can be declared, set, and checked.
A variable is declared using a declare statement. It looks like this:
This declare statement declares a new variable named $characterName and stores the value "Shadowheart" inside it. When you first declare a variable, that sets its type.
So this variable, $characterName, will always be of type string, because we declared it with a string, "Shadowheart".
Here’s an example of declaring two more variables, one of type number, and one of type boolean:
Every variable you use must have a name; in Yarn, all variable names start with a dollar sign ($).
As with node titles, variable names must not contain spaces. While they can contain a range of different characters the first character must be a letter.
Your variable names will be made up of only letters, numbers and underscores.
Of course, it’s not much use to declare a variable, if you can’t update it later. We call updating the contents of a variable setting. A variable is set using the set statement.
Here’s how we’d update the $characterName variable to a new name:
Because $characterName was declared as type string, you cannot then set it to a number, or a boolean, so the following will not work:
A variable must always have a value. There is no concept of null, or an empty variable in Yarn.
You can work with the values inside variables. For example, numbers can be multiplied, strings can be added together, and boolean values can have logical operations (like and and or) applied to them.
When values are used together like this, it's called an expression:
An expression needs to be a single type. You can't work with values of different types in a single expression. For example, the following code will not work:
Yarn Spinner supports the following logical operators. Most of these have multiple ways being written:
Equality: eq or is or ==
Inequality: neq or !
Greater than: gt or >
Less than: lt or <
Less than or equal to: lte or <=
Greater than or equal to: gte or >=
Boolean 'or'': or or ||
Boolean 'xor': xor or ^
Boolean 'not': not or !
Boolean 'and': and or &&
Maths operators
Addition: +
Subtraction: -
Multiplication: *
Division: /
Truncating Remainder Division: %
Brackets: ( to open the brackets and ) to close them.
Order of operations
Yarn Spinner follows a fairly standard order of operations, and falls back to using left to right when operators are of equivalent priority.
The order of operations is as follows:
Brackets
Boolean Negation
Multiplication, Division, and Truncating Remainder Division
Addition, Subtraction
Less than or equals, Greater than or equals, Less than, Greater than
Equality, Inequality
Boolean AND, Boolean OR, Boolean XOR
Variables by themselves aren’t much good if they cannot have some sort of impact on your narrative. So, of course, they can!
The most straightforward way to use a variable is to show the contents of it in a line. To do this we refer to the variable by name inside a line, and put it inside braces, like this: {$characterName}.
For example:
Put the above script in Try Yarn Spinner, and click Test to run it.
In addition to storing information, variables are useful for controlling what's shown to the player. To do this, you use ifstatements, elseif statements, else, endif, statements.
An if statement allows you to control whether a collection of lines is shown or not. When you write an if statement, you provide an expression, which is checked.
The if, elseif, else, and endif statements look much like all the other statements we’ve been using: <<if>>, <<elseif>>, <<else>>, and <<endif>>.
Here’s an example:
Put the above script in Try Yarn Spinner, and click Test to run it.
In this example, after the Narrator meets the character, and says it’s nice to meet them, greeting them by name, we use <<if $charName is "Bruce">> to check if the variable $charName is set to the value "Bruce".
If it is, then we have some nice lines about the Narrator also being named that, otherwise we use <<elseif $charName is "Notbruce">> to check if the variable $charName is set to the value "Notbruce", and provide some lines from the Narrator if it is.
If $charName is set to neither of those values, then we hit the <<else>> statement, which catches all other possible values, and we provide some lines that say their name—whatever it is—is a lazy one. Then we hit the <<endif>> statement, which ends the entire if statement.
When presenting options to the player using the -> syntax, you may want to make some options not available. You can do this by adding a condition to the option, making it a conditional option.
For example, if you have a variable that tracks your player's "reputation points", called $reputation, you might want to make certain options only available if the value of $reputation is high enough.
Conditions on options are done by adding an if statement to the end of the option. They look like this:
When Yarn Spinner runs this collection of options, it will check the expression inside the if statement. If the expression is false, then the option will be marked as unavailable.
It’s important to remember that Yarn Spinner always delivers _every_** option in an option group to the game**; it's up to the game to decide what to do with options that are marked as unavailable.
For example, an unavailable option might be shown to the user, but not selectable, so that the user can see that they _could_have been able to say that if circumstances had been different.
You can see this in action in Try Yarn Spinner, where unavailable options will be displayed with a strike though!
Update the following example to use a conditional option at some point:
A function is a block of code that provides a value to your Yarn scripts, which you can use in if statements, or store in variables.
In Yarn scripts, functions perform two main kinds of task:
Functions let you get values that change over time, or that depend on other values. For example, the randomfunction returns a different random number every time you call it.
Functions let you get data from your game back into your scripts.
Yarn Spinner provides the following built-in functions:
visited(string node_name)
visited returns a boolean value of true if the node with the title of node_name has been entered and exited at least once before, otherwise returns false. Will return false if node_name doesn't match a node in project.
visited_count(string node_name)
visted_count returns a number value of the number of times the node with the title of node_name has been entered and exited, otherwise returns 0. Will return 0 if node_name doesn't match a node in project.
random()
random returns a random number between 0 and 1 each time you call it.
random_range(number a, number b)
random_range returns a random integer between a and b, inclusive.
dice(number sides)
dice returns a random integer between 1 and sides, inclusive. For example, dice(6) returns a number between 1 and 6, just like rolling a six-sided die.
round(number n)
round rounds n to the nearest integer.
round_places(number n, number places)
round_places rounds n to the nearest number with places decimal points.
floor(number n)
floor rounds n down to the nearest integer, towards negative infinity.
ceil(number n)
ceil rounds n up to the nearest integer, towards positive infinity.
inc(number n)
inc rounds n up to the nearest integer. If n is already an integer, inc returns n+1.
dec(number n)
dec rounds n down to the nearest integer. If n is already an integer, dec returns n-1.
decimal(number n)
decimal returns the decimal portion of n. This will always be a number between 0 and 1. For example, decimal(4.51)will return 0.51.
int(number n)
int rounds n down to the nearest integer, towards zero.
For example, you can use functions inside if statements, and in regular lines, as they largely behave like variables. For example:
Write some yarn using functions! We recommend the dice function, the random_range function, and the visited and visited_count functions.
So far, you’ve learned that Yarn scripts are plaintext files (stored outside of Try Yarn Spinner, they have the .yarn extension). Let’s do a quick recap…
Yarn scripts are composed of nodes, which must always start with at least a title header followed by a ---, and end with a ===:
Inside each node are lines, which are simple lines of dialogue that are delivered to the player, and often have a character name at the beginning:
Lines can also be options, which provide choices to the player:
These options can be nested:
You can also have multiple nodes, and jump between them using the jump statement:
And you can declare variables of three different types—numbers, strings, and booleans—and use them in lines, and for flow control. You’ve also learned about conditional options and built-in functions.
The next example recaps everything you’ve learned so far, so build it up slowly, piece by piece, in a new Try Yarn Spinner tab, so you understand how it’s working. Try to improve it, or make it longer by adding conditional options and use of built-in functions.
With that all said, in the next part, we’ll take things further and start using Yarn Spinner for Visual Studio Code.
To use Yarn Spinner 3 for Unity and Yarn Spinner 3 for Visual Studio Code, you'll need to
If you love what we're doing, the best way to support us is to or the , or join . ❤️
With that, we've reached the end of our beginner's guide. You're ready go forth and build games with Yarn Spinner! You're also equipped to work with the rest of the documentations here! Don't forget to to chat with other Yarn Spinner users, the Yarn Spinner team, seek help, and share your work. \
While we are using a simple example dialogue view we created for you, you can also create your own. To learn about this visit , but do note that it is a significant step from this Beginner's Guide.
Don't forget to , to chat with other Yarn Spinner users, the Yarn Spinner team, seek help, and share your work. It might also be worthwhile (unaffiliated with Yarn Spinner).
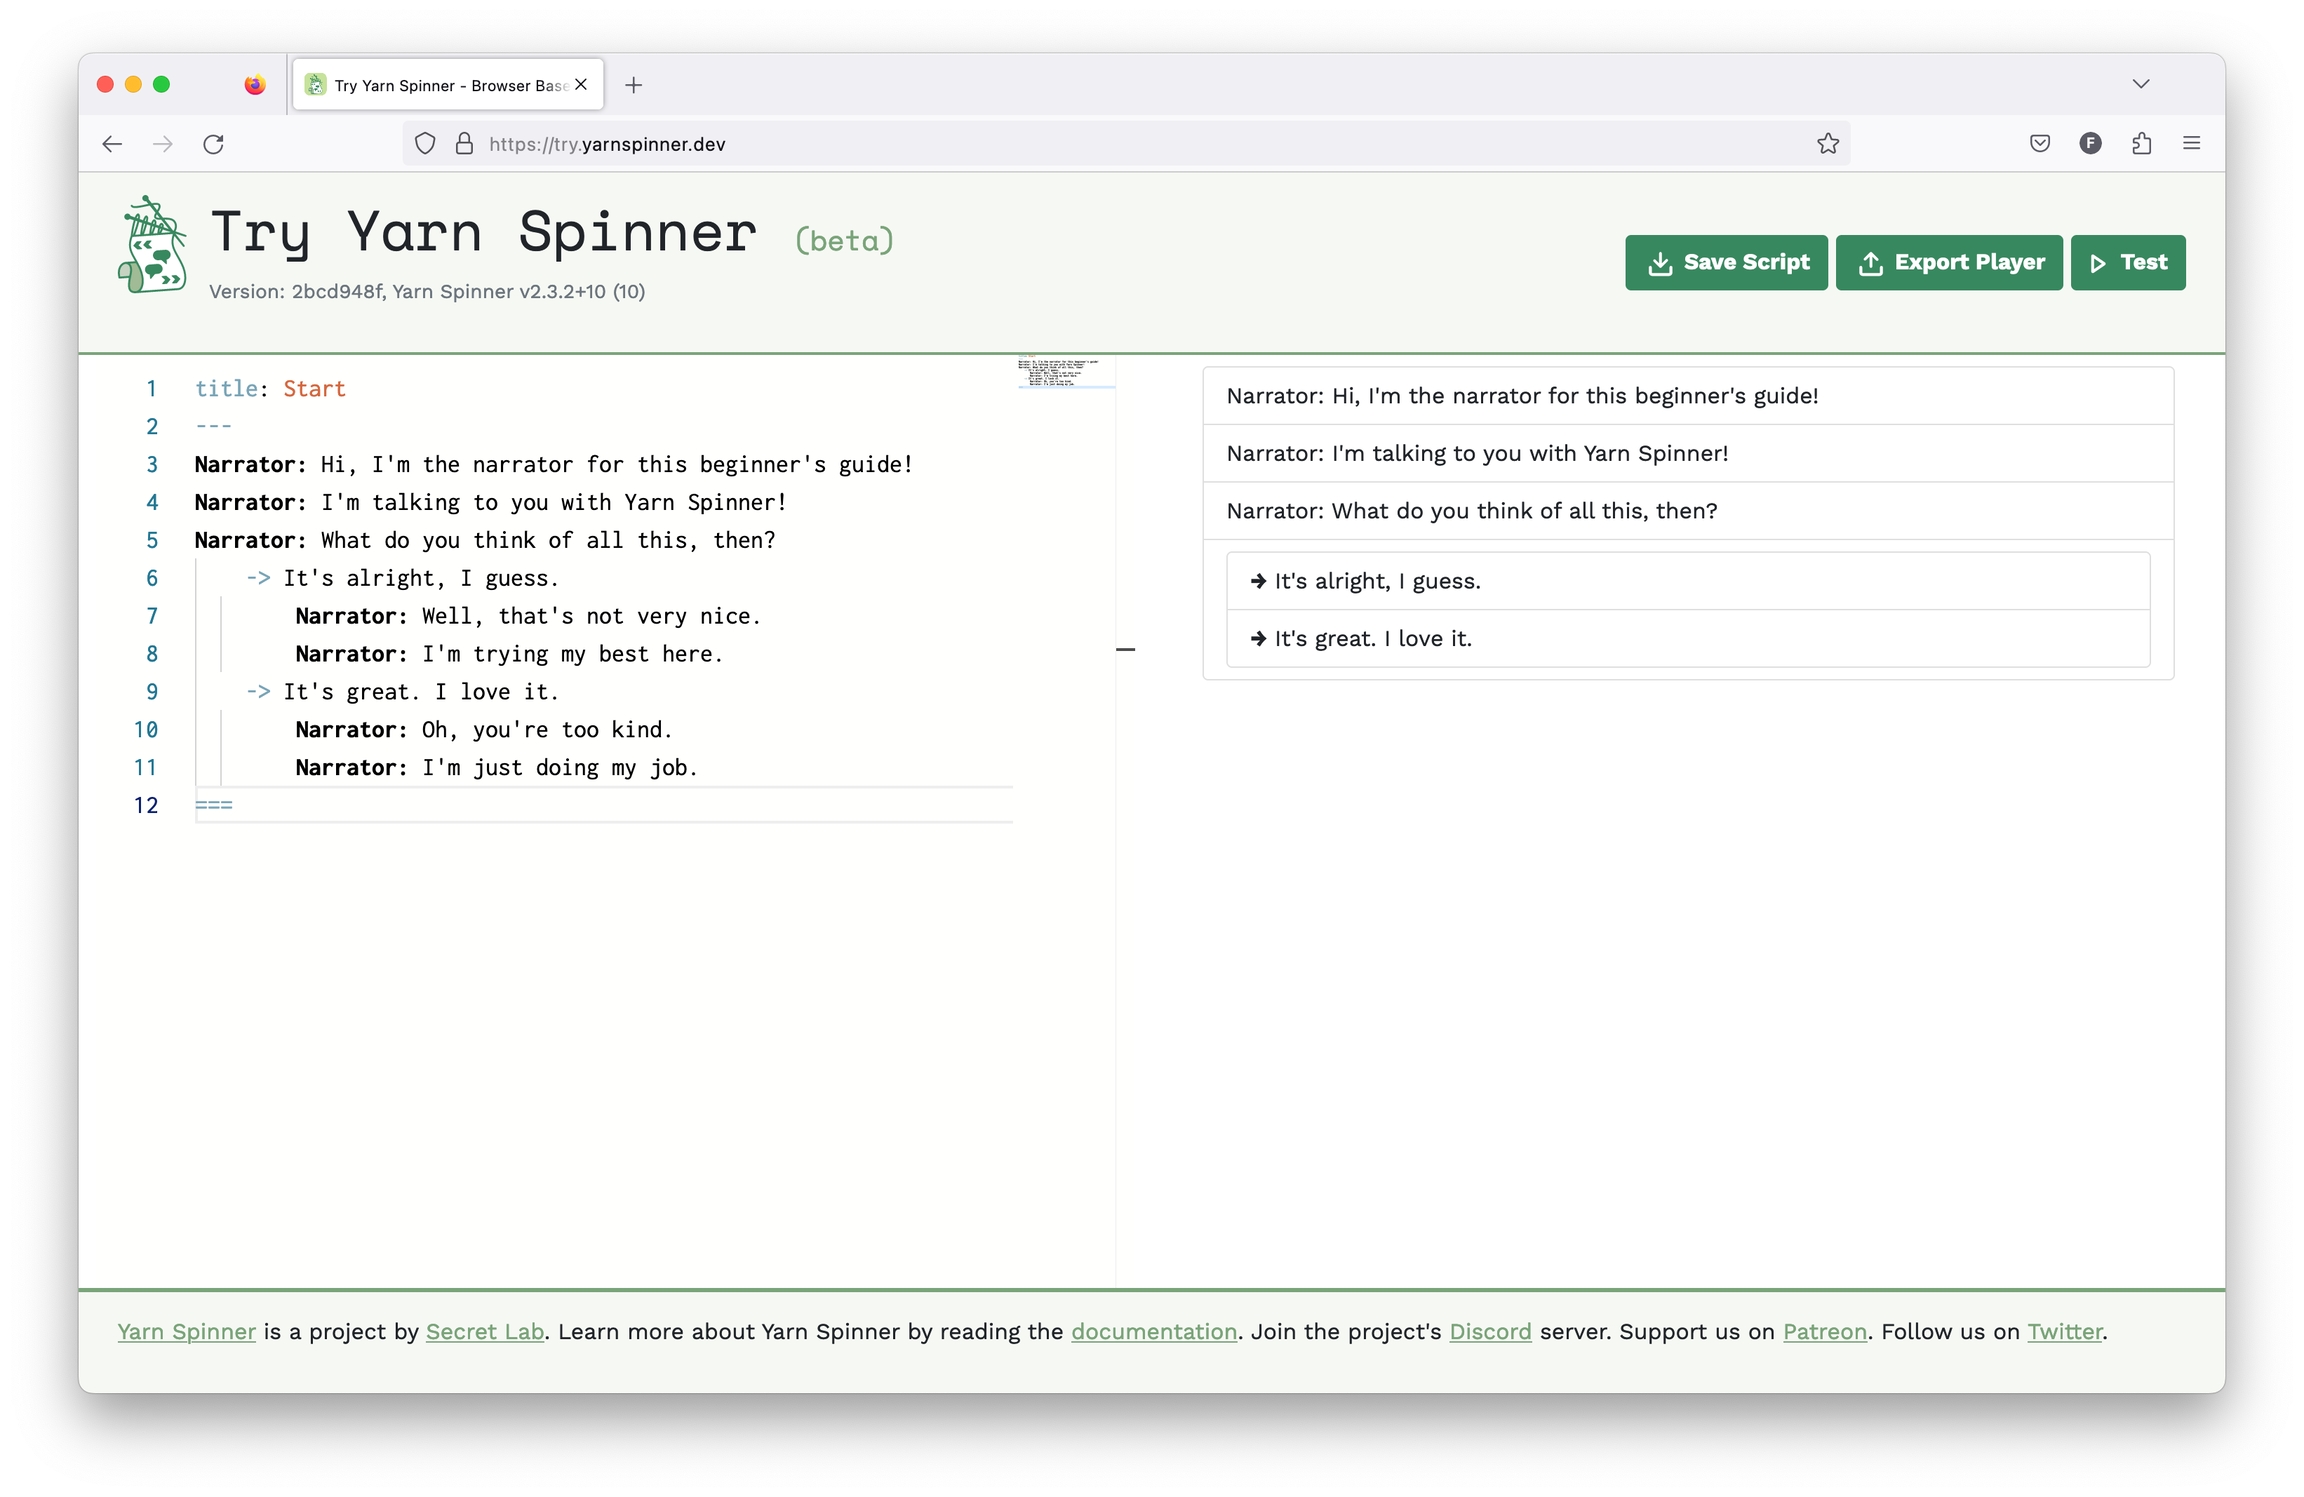
If you put the above, updated Yarn, or something very similar, into and click the Test button, you’ll see the dialogue appear in the right side of the screen, and as you progress through it, eventually you’ll hit some options, which are presented to the player:
You can learn more about this in the guide. We recommend finishing this Beginner's Guide first, though.
Number
Any whole or decimal number
1, 2.5, 3468900, -500
String
Any sequence of letters, numbers and other characters, enclosed in quotes.
"Hello", "✓", "A whole sentence."
Boolean
Either the value true or the value false.
true, false
Coming soon.
Learn about saliency and saliency strategies, which let you control how line groups and node groups select which content to run.
In Yarn Spinner 3, saliency lets you control how line groups and node groups select which content to run.
When a line group or node group needs to run content, it needs to make a decision about which item in the group to choose. The method for making this decision is called a saliency strategy.
Saliency strategies are provided with the following information about each item:
How many of its conditions passed (that is, the when: clauses on a node group, or the single condition on a line group)
How many of its conditions failed
The total complexity of all of its conditions
Complexity is calculated as the total number of boolean operators (and, or, not, xor) present in a condition, plus 1 if the condition is a once condition. The always condition has a complexity of zero.
A unique key that identifies the content.
You can either use one of Yarn Spinner's built-in saliency stragegies, or create your own custom saliency strategy.
First: The first item in the group that has not failed any of its conditions is selected.
If the items of a node group are all in the same file, the ordering of the group is the order in which they appear in the file. If a node group’s nodes are split up across more than one file, the ordering of the nodes is not defined. the node that is considered ‘first’ is not defined.
Best: The items that have not failed any conditions are sorted by their total complexity score, and the first item that has the highest score is selected.
Best Least Recently Viewed: The items that have not failed any conditions are sorted by score, and then by how many times they have been selected by this strategy. If there is more than one best item remaining, the first of these is selected.
Random Best Least Recently Viewed: The items that have not failed any conditions are sorted by score, and then by how many times they have been selected by this strategy. If there is more than one best item remaining, a random one of these is selected.
A saliency strategy is given a collection of possible options, and returns either one of them that should be run, or null to indicate that none of them should run.
Your C# code can create custom saliency strategies. To do so, create a type that implements the IContentSaliencyStrategy interface, and assign it to your Dialogue object’s ContentSaliencyStrategy property.
IContentSaliencyStrategy has two required methods.
ContentSaliencyOption? QueryBestContent(IEnumerable<ContentSaliencyOption> content) determines which of a collection of options, if any, should run. It should return the best content from the available options, or null if none of them should run. This is the main method in which you write the specific logic for your custom strategy.
Calling this method does not indicate that the content has been selected; rather, it is a query to determine what should be selected. Your implementation of this method should not change any state, and should be read-only. The content returned by this method is not guaranteed to actually be run.
void ContentWasSelected(ContentSaliencyOption content) is called to indicate that a specific piece of content returned by a previous call to QueryBestContent has been selected. This method should update any appropriate state to represent this fact, such as by updating the total number of times the content has been selected.
You can use a node group to check to see if any of its items can run, This can be useful when determining whether to show if a character should be marked as ready to talk, or whether any of its nodes have a special tag (for example, if a character has important information to discuss, as opposed to more general conversation.)
Learn about reusing the same line in multiple places, using shadow lines.
In Yarn Spinner 3, shadow lines let you reuse the same line in multiple places, without having to create duplicate copies.
Shadow lines are copies of other lines, but don’t create a duplicate entry in the string table. This can be useful if you want to re-use an existing line in more than one place, which can be important when each line has in-game assets like voice-over recording.
Shadow lines are marked using the #shadow: hashtag. When you use the #shadow: tag, you specify the line ID of another line, which is called the source line. The source line must have an explicit #line: hashtag to identify it.
Here’s a simple example of using shadow lines:
The script contains six lines, but only 5 string table entries will be created, because the line “I should go” is shadowed.
Shadow lines are required to have the same text in the Yarn script as their source line, but are allowed to have different hashtags (in addition to the #shadow: and #line: hashtags).
Try Yarn Spinner is our online tool for learning, exploring, and experimenting with Yarn Spinner.
As you learn to write dialogue and game scripts with Yarn, you'll eventually need to use our editor, which is a Visual Studio Code Extension. Before you get to that stage, the best place to experiment with, and explore Yarn Spinner, is Try Yarn Spinner.
.csproj for your project.Learn about using node groups, which allow Yarn Spinner to choose which content to run, depending on conditions.
In Yarn Spinner 3, you can now create node groups. A node group is collection of nodes that share the same name that Yarn Spinner will choose from.
To create a node group, you create multiple nodes that all share the same name, and ensure that each of the nodes have at least one when: header.
The when:header tells Yarn Spinner about the conditions that must be met in order to run the node:
Node groups are combined into a single node that performs the appropriate checks and then runs one of the node group’s members. You start dialogue with a node group using its name. You can also use the jump or detour statements to run a node group from somewhere else in your Yarn scripts.
Node groups are similar to line groups in their behaviour, but give you more room to create longer passages of content. Your C# code can also check to see how many (if any) nodes can run, which is covered in the Saliency section.
You can have
Learn about using smart variables that determine their value at run-time.
In Yarn Spinner 3, smart variables let you create variables whose value is determined at run-time, rather than setting and retrieving a value from storage.
Smart variables give you a simple way to create more complex expressions, and re-use them across your project.
To create a smart variable, declare it like any other variable using the declare statement and provide an expression, rather than a single value:
Smart variables can be accessed anywhere a regular variable would be used:
Learn about creating enums, which allow you to create variables that are constrained to a specific set of values.
In Yarn Spinner 3, enums let you create variables whose value is constrained to a pre-defined list of possibilities.
An enum (short for ‘enumeration’) is useful when you have a variable that needs to have a wider range of possible values than simply true or false, but needs to be more specific than a number or string.
To define an enum you must provide a name, and some cases for it. Here's a new enum called Food with the cases Apple, Orange, and Pear:
Once you've created an enum, you can use it just like any other variable:
Learn how to install Yarn Spinner for Visual Studio Code.
If you're already familiar with VS Code and VS Code extensions, you can just install the extension secretlab.yarn-spinner, or click here and hit the install button, and you'll be ready to go.
Once you've got Visual Studio Code (often abbreviated to "VS Code", or "Code") installed on your system, you'll want to install the Yarn Spinner extension. To install the Yarn Spinner Extension:
Launch Visual Studio Code.
Open the Extensions view. To do this, select the blocks symbol from the left-hand sidebar, or press Command+Shift+K on macOS, or Control+Shift+X on Windows or Linux.
Search for the Yarn Spinner Extension. With the Extensions view open, type "Yarn Spinner" into the search field.
Install the Extension. Once the results have loaded, click "Install" next to the Secret Lab-provided Yarn Spinner Extension.
That's all you need to do to install the extension! You're ready to write and edit Yarn scripts with Visual Studio Code.
Learn about writing with the Yarn Spinner Visual Studio Code Extension.
The preferred way of writing your Yarn Spinner code is with the official Yarn Spinner Visual Studio Code Extension.
The official extension adds syntax highlight to VS Code's text editor, as well as a graph view that displays the nodes, and relationships between the nodes.
If you've never used to Visual Studio Code before, head to their official website and install it for your operating system and platform, and then continue to Installing the Extension.
Visual Studio Code is a powerful, flexible, open source code editor for Windows, macOS, and Linux. It supports extensions, which allow it to perform a wide range of useful tasks. The Yarn Spinner Extension is one of these.
Learn how to use Yarn Spinner for Visual Studio Code as your Yarn editor.
With the Yarn Spinner Visual Studio Code Extension installed, you can make new Yarn files, and edit existing ones, right inside the VS Code editor.
You can use the File menu -> New file command to make a new empty file. Simply save the file with a .yarn extension to activate the Yarn Spinner Extension features.
Yarn Spinner for Visual Studio Code is designed to work with a folder, not single files. If you're having trouble, open a folder with your .yarn file or files in it.
You can also open any existing .yarn file, or folder of .yarn files, using VS Code.
Here, we'll walkthrough the process of using Yarn Spinner for Visual Studio Code to write .yarn stories.
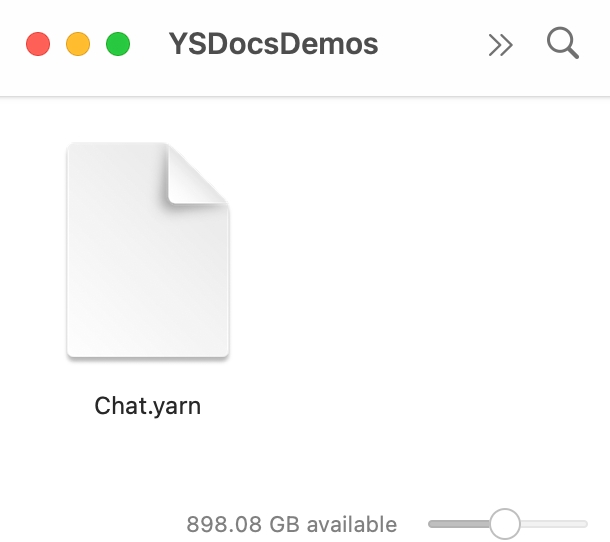
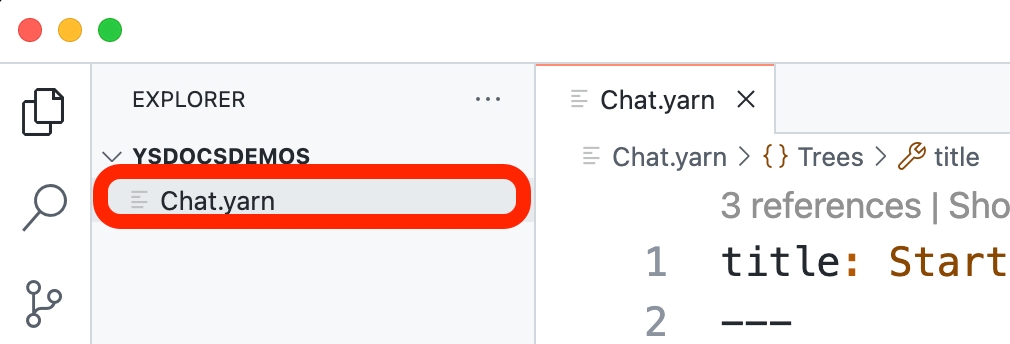
For this example, we'll start with an existing story (Chat.yarn) in a folder (YSDocsDemos):
You can download this folder as a .zip file here, if you want to follow along. TODO LINK.
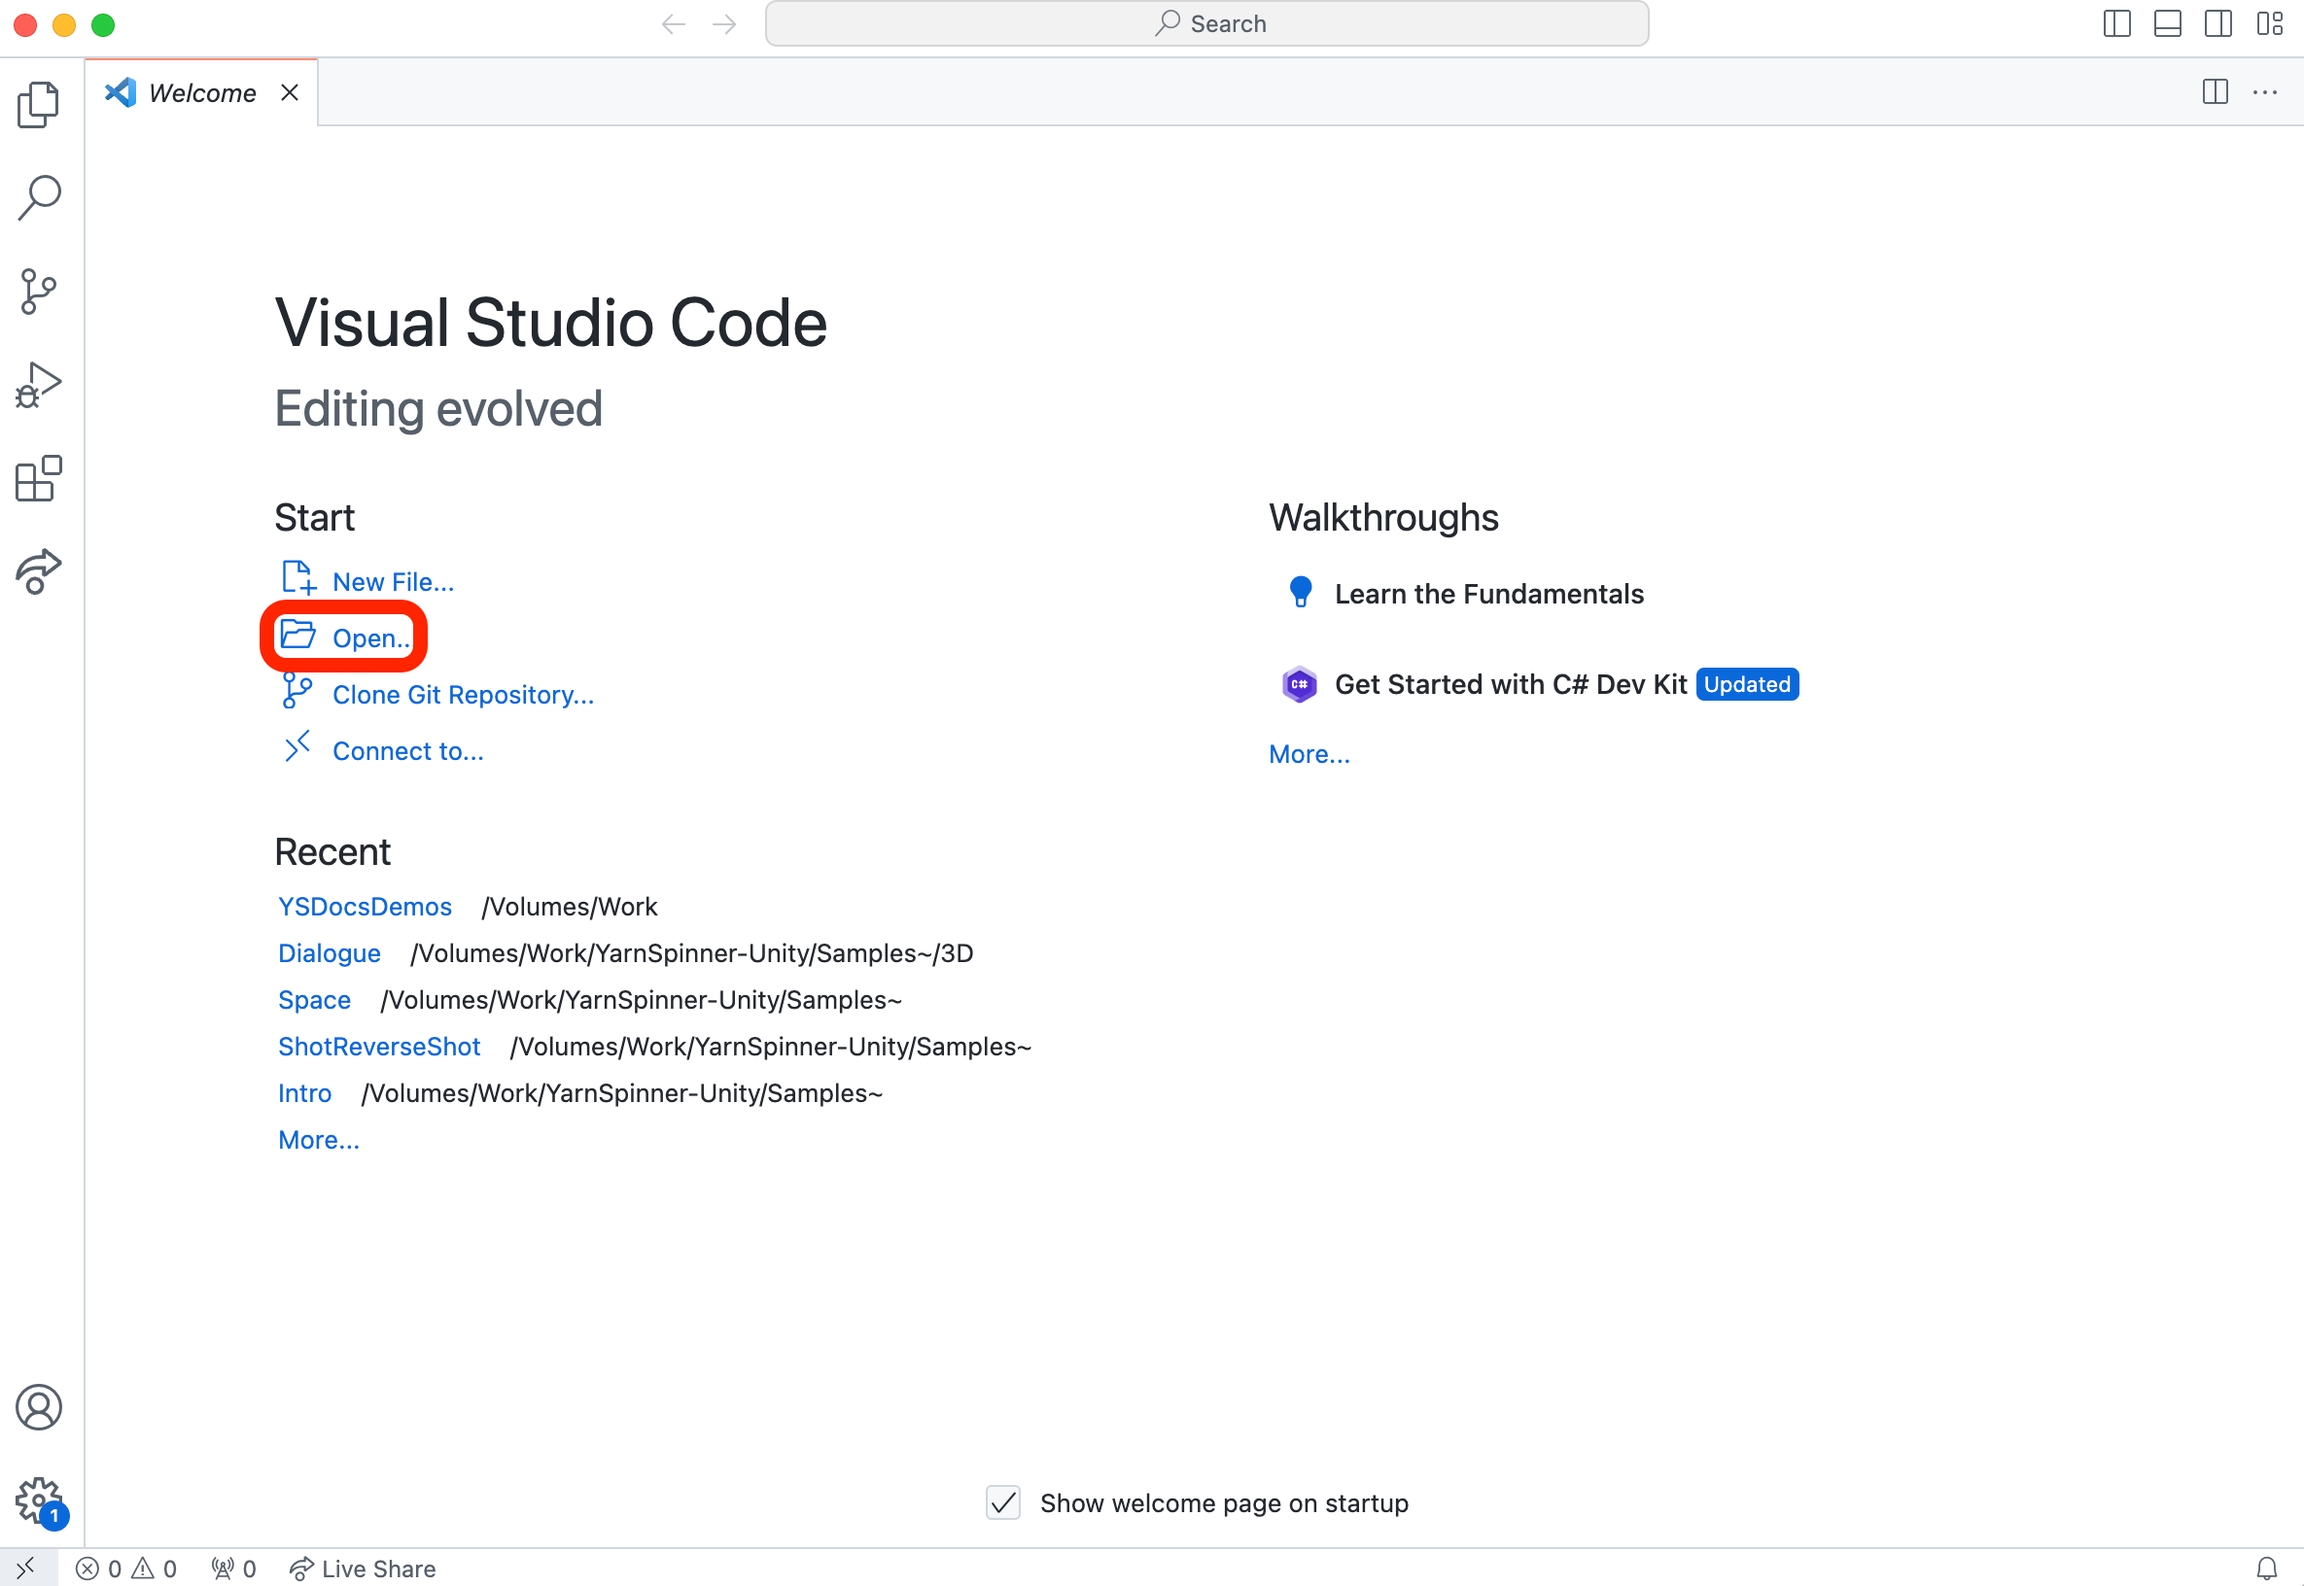
If we open VS Code, the default screen will have an Open button right in the middle.
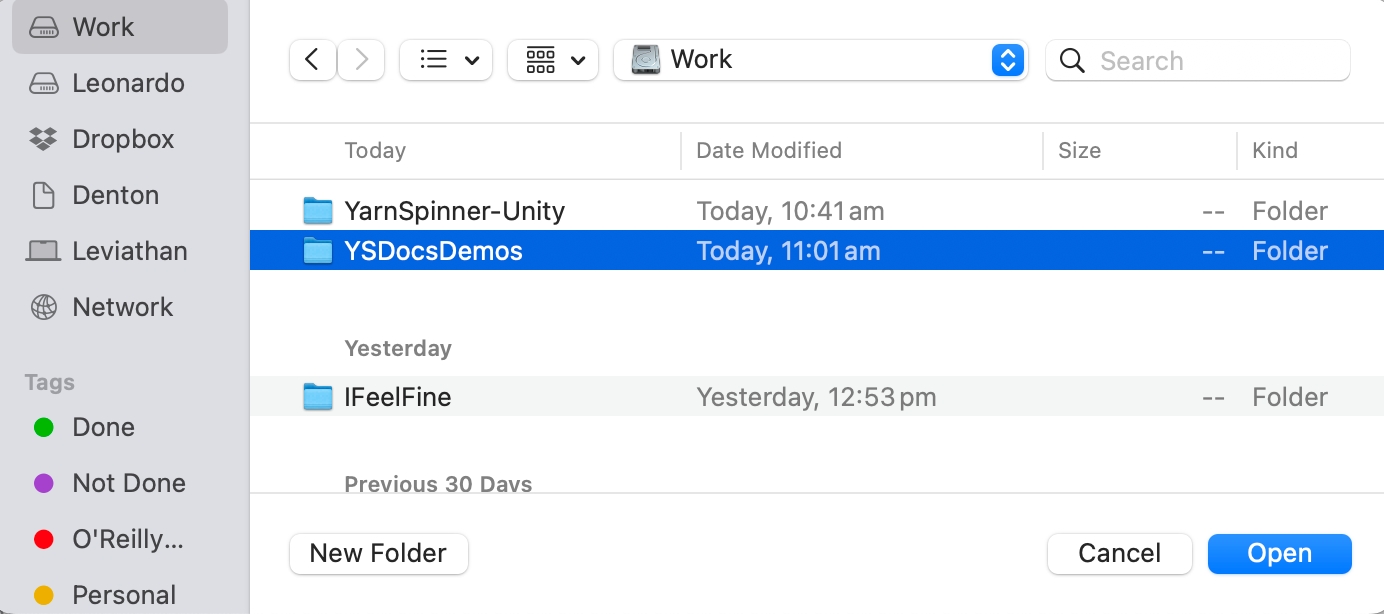
Click this button, or choose the File menu -> Open Folder..., and then open the folder containing your .yarn files:
When the folder opens, you'll see the sidebar of VS Code change to reflect the contents of the folder. You can click on a .yarn file to open it in the text editor:
With a .yarn file open in VS Code, you can verify that the Yarn Spinner for Visual Studio Code Extension is active by looking in the bottom right-hand corner of the screen, and locating the words "Yarn Spinner":
The bottom right-hand corner of Visual Studio Code window will only show "Yarn Spinner" if both the Yarn Spinner for Visual Studio Code extension is installed, and the currently active file is recognised as a .yarn file by its extension.
You can use the text editing view to work with .yarn, and to write your narratives. The Yarn Spinner for Visual Studio Code extension provides all sorts of features to make this process easier.
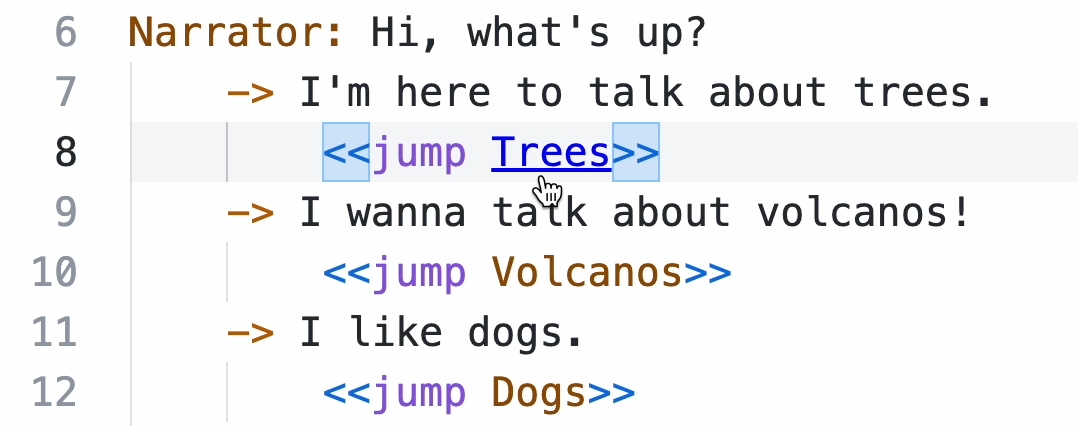
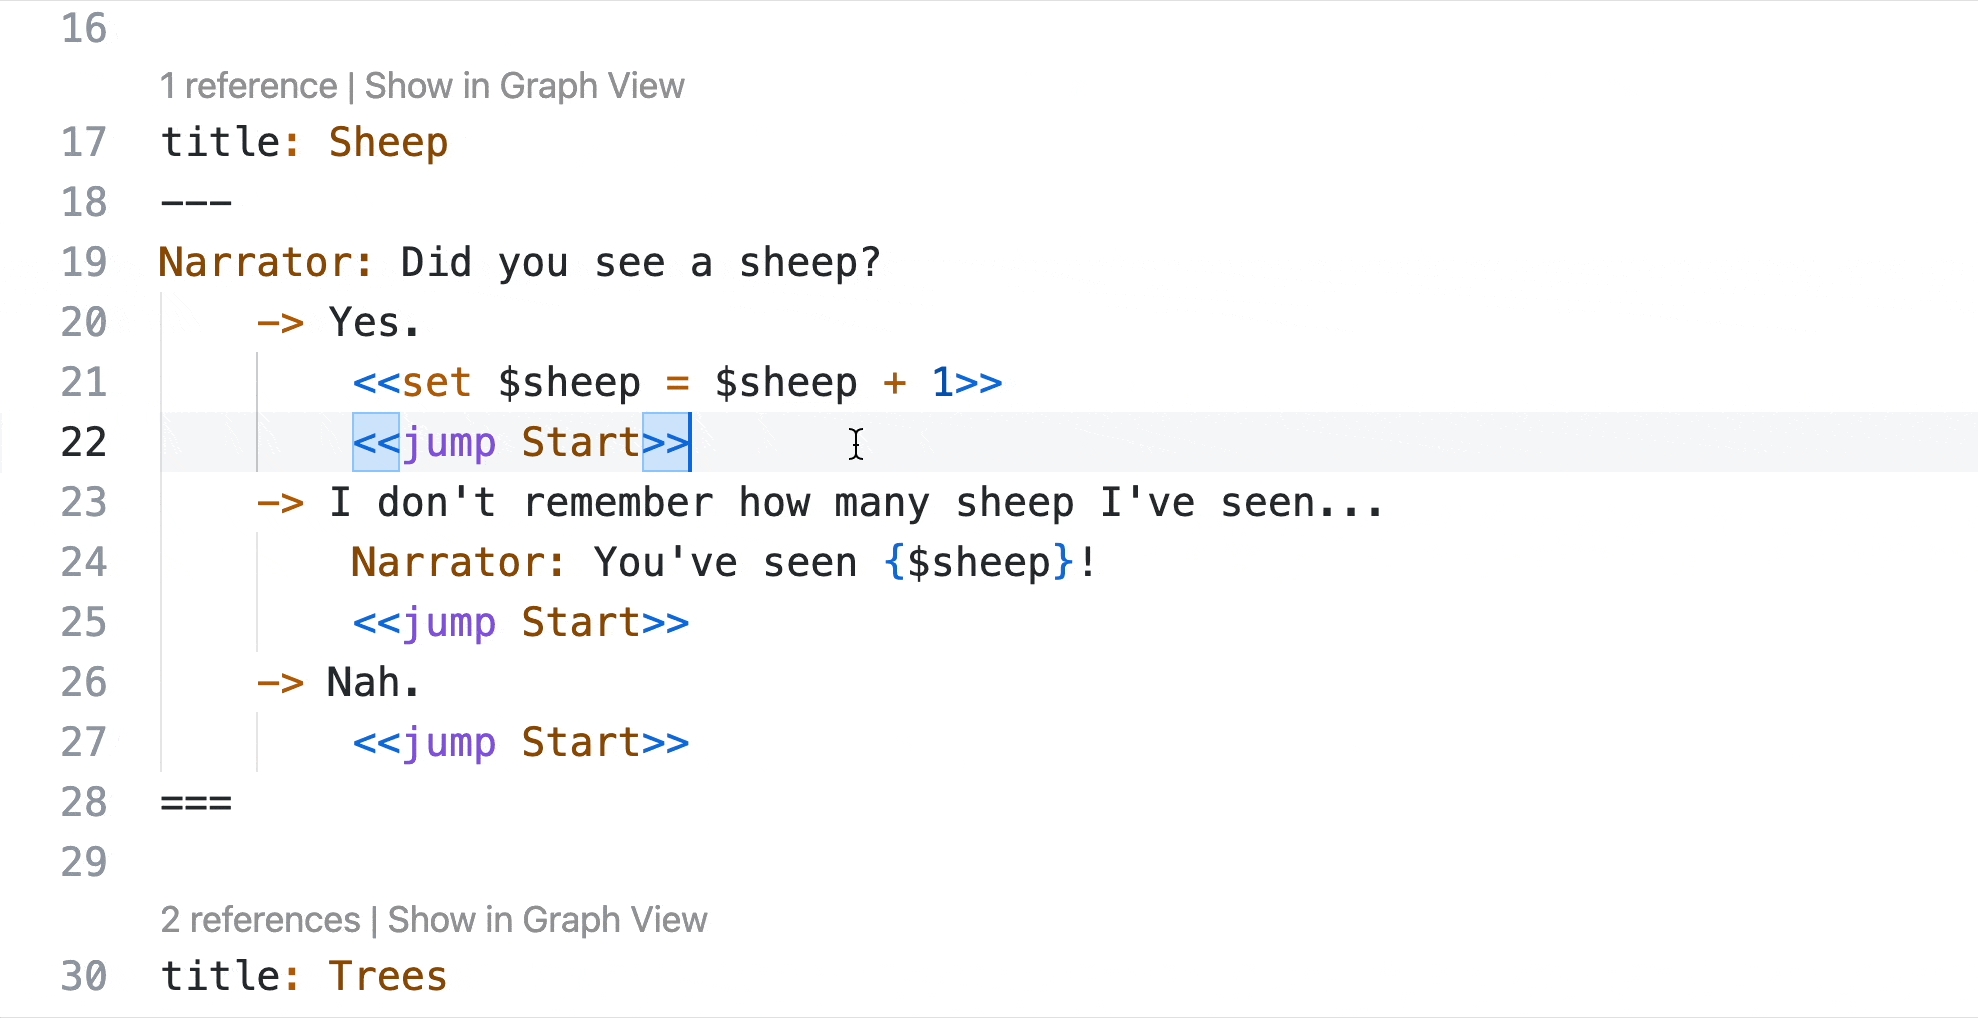
For example, if you hold the Command key (on macOS) or the Control key (on Windows or Linux) and hover over names of nodes in, for example, `<<jump>> statements, you'll be able click on them to move the editor view to the Yarn that represents that node:
You'll also be offered autocomplete suggestions based on node names that exist in your project. For example, if you create a new <<jump>> statement, you'll be able to pick from your nodes:
If your Yarn projects also use variables, Yarn Spinner for VS Code will help out as well. For example, when you <<declare>> a new variable, you can add a comment with three / in front of it to provide a description of the variable:
Then, when you use the variable, you can hover over it in VS Code for a reminder of its purpose (and its default value):
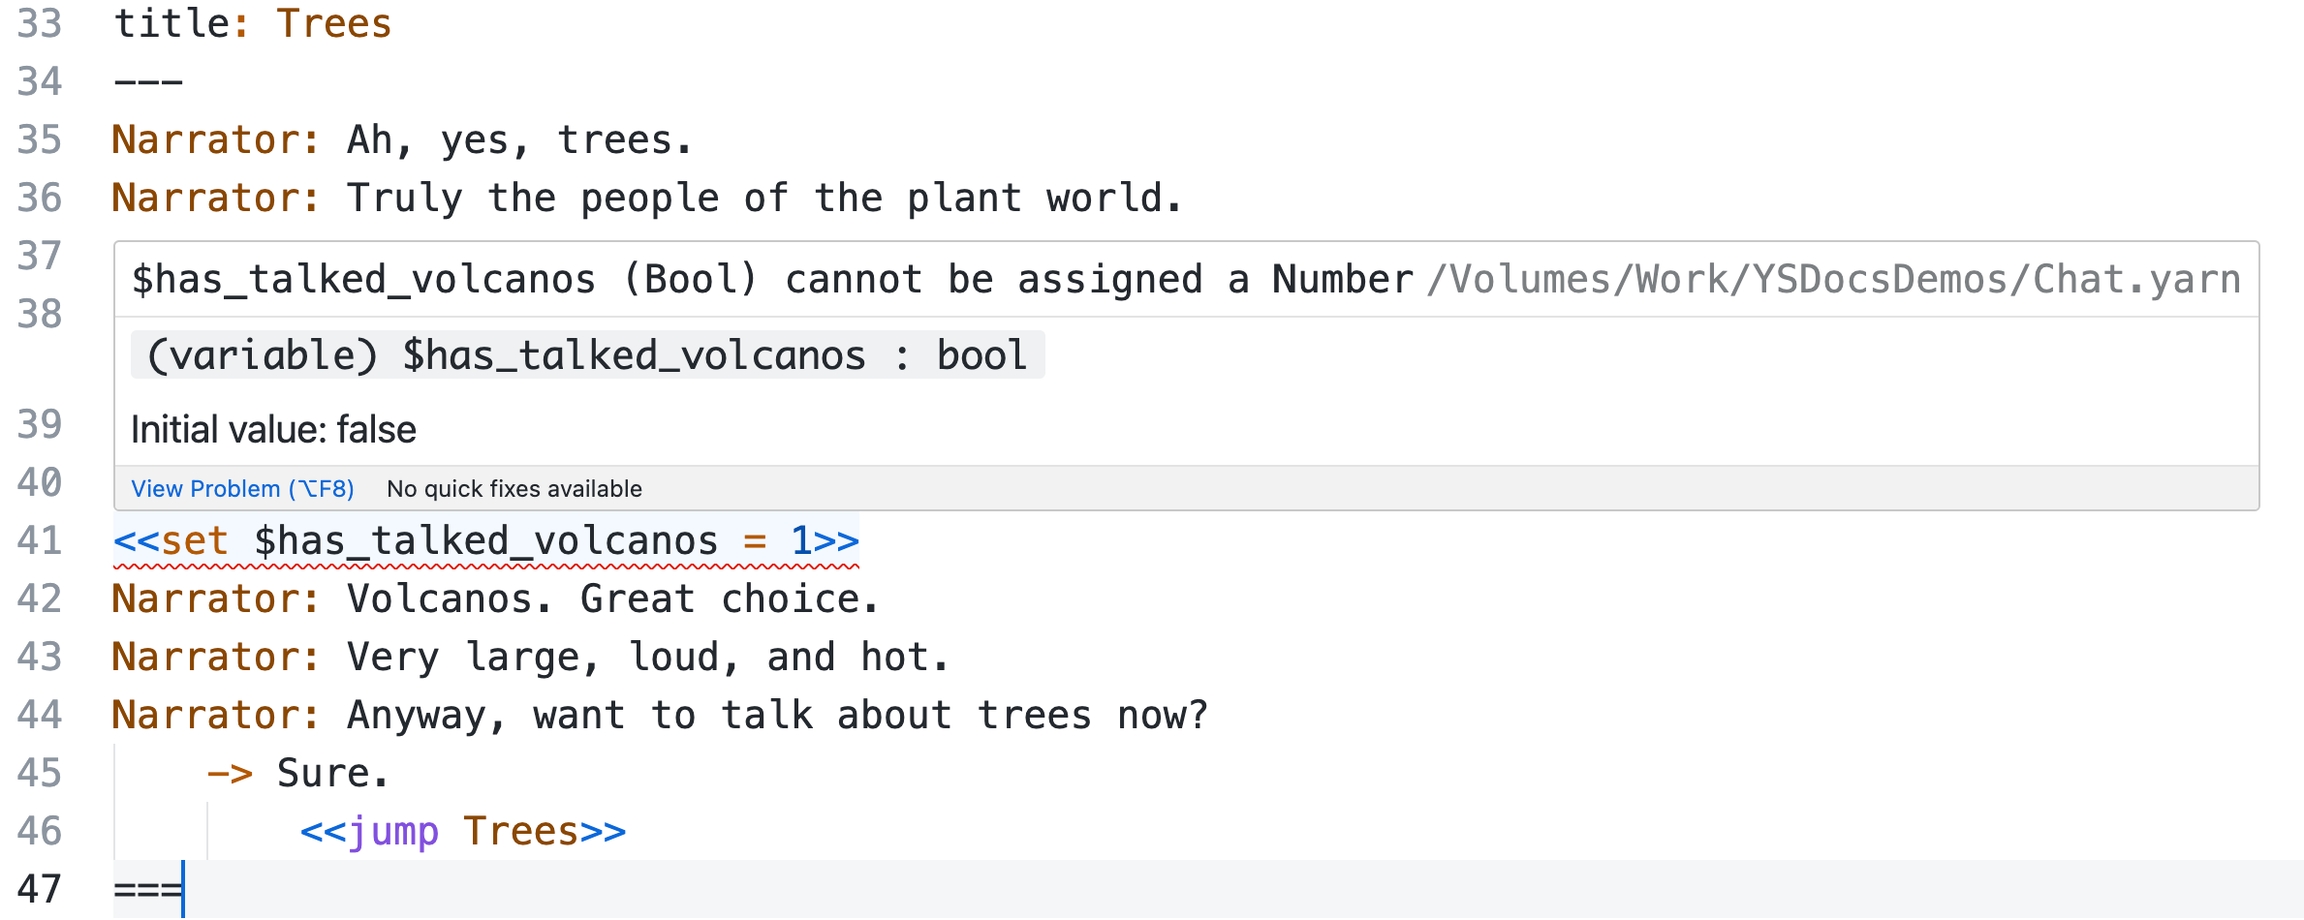
Variable names will also autocomplete when you try and use them, and errors will be show if there are type isues. So, if you <<declare>> a variable to be a certain type, for example a boolean:
... and then attempt to use that variable in a way that would produce an error. For example, by attempting to assign a number to it, then Yarn Spinner for Visual Studio Code will show an error:
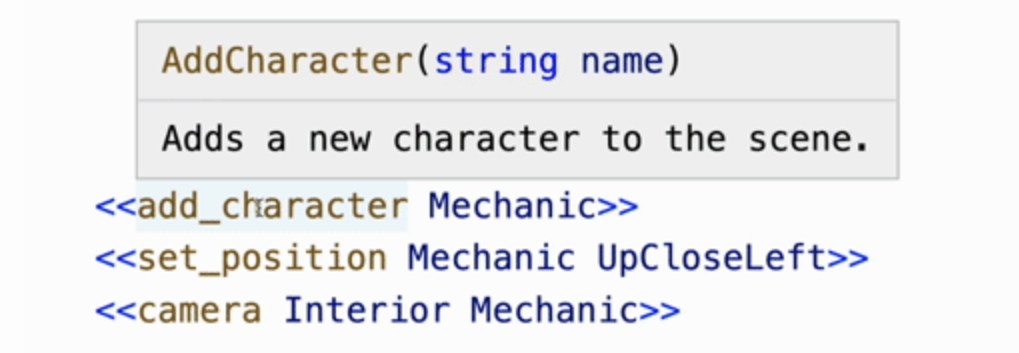
You'll also be able to see documentation comments from commands defined in your game's C# source code:
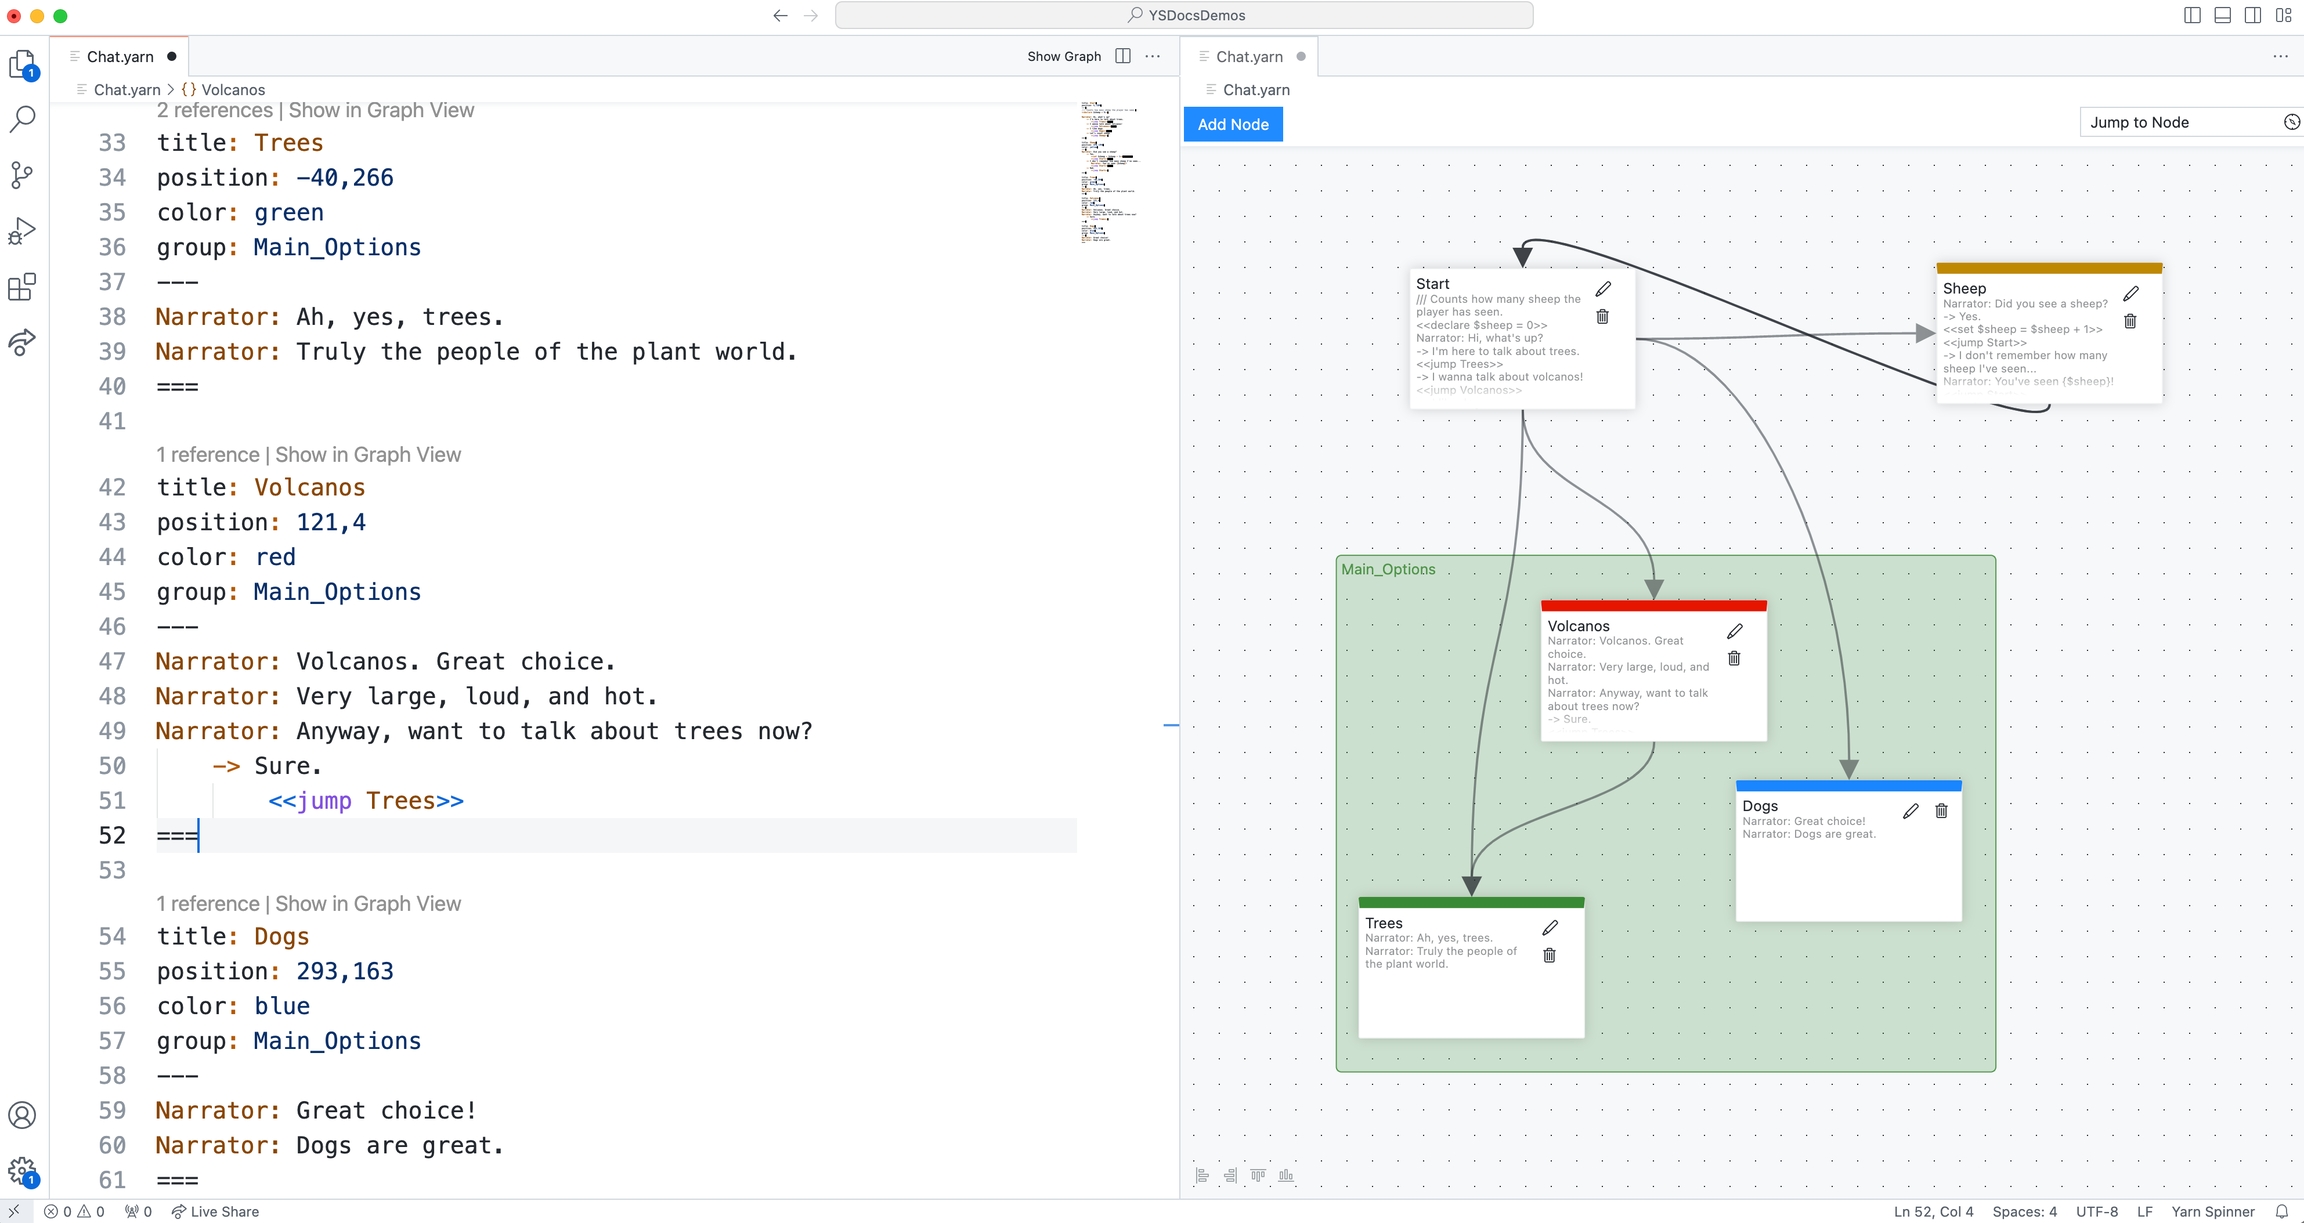
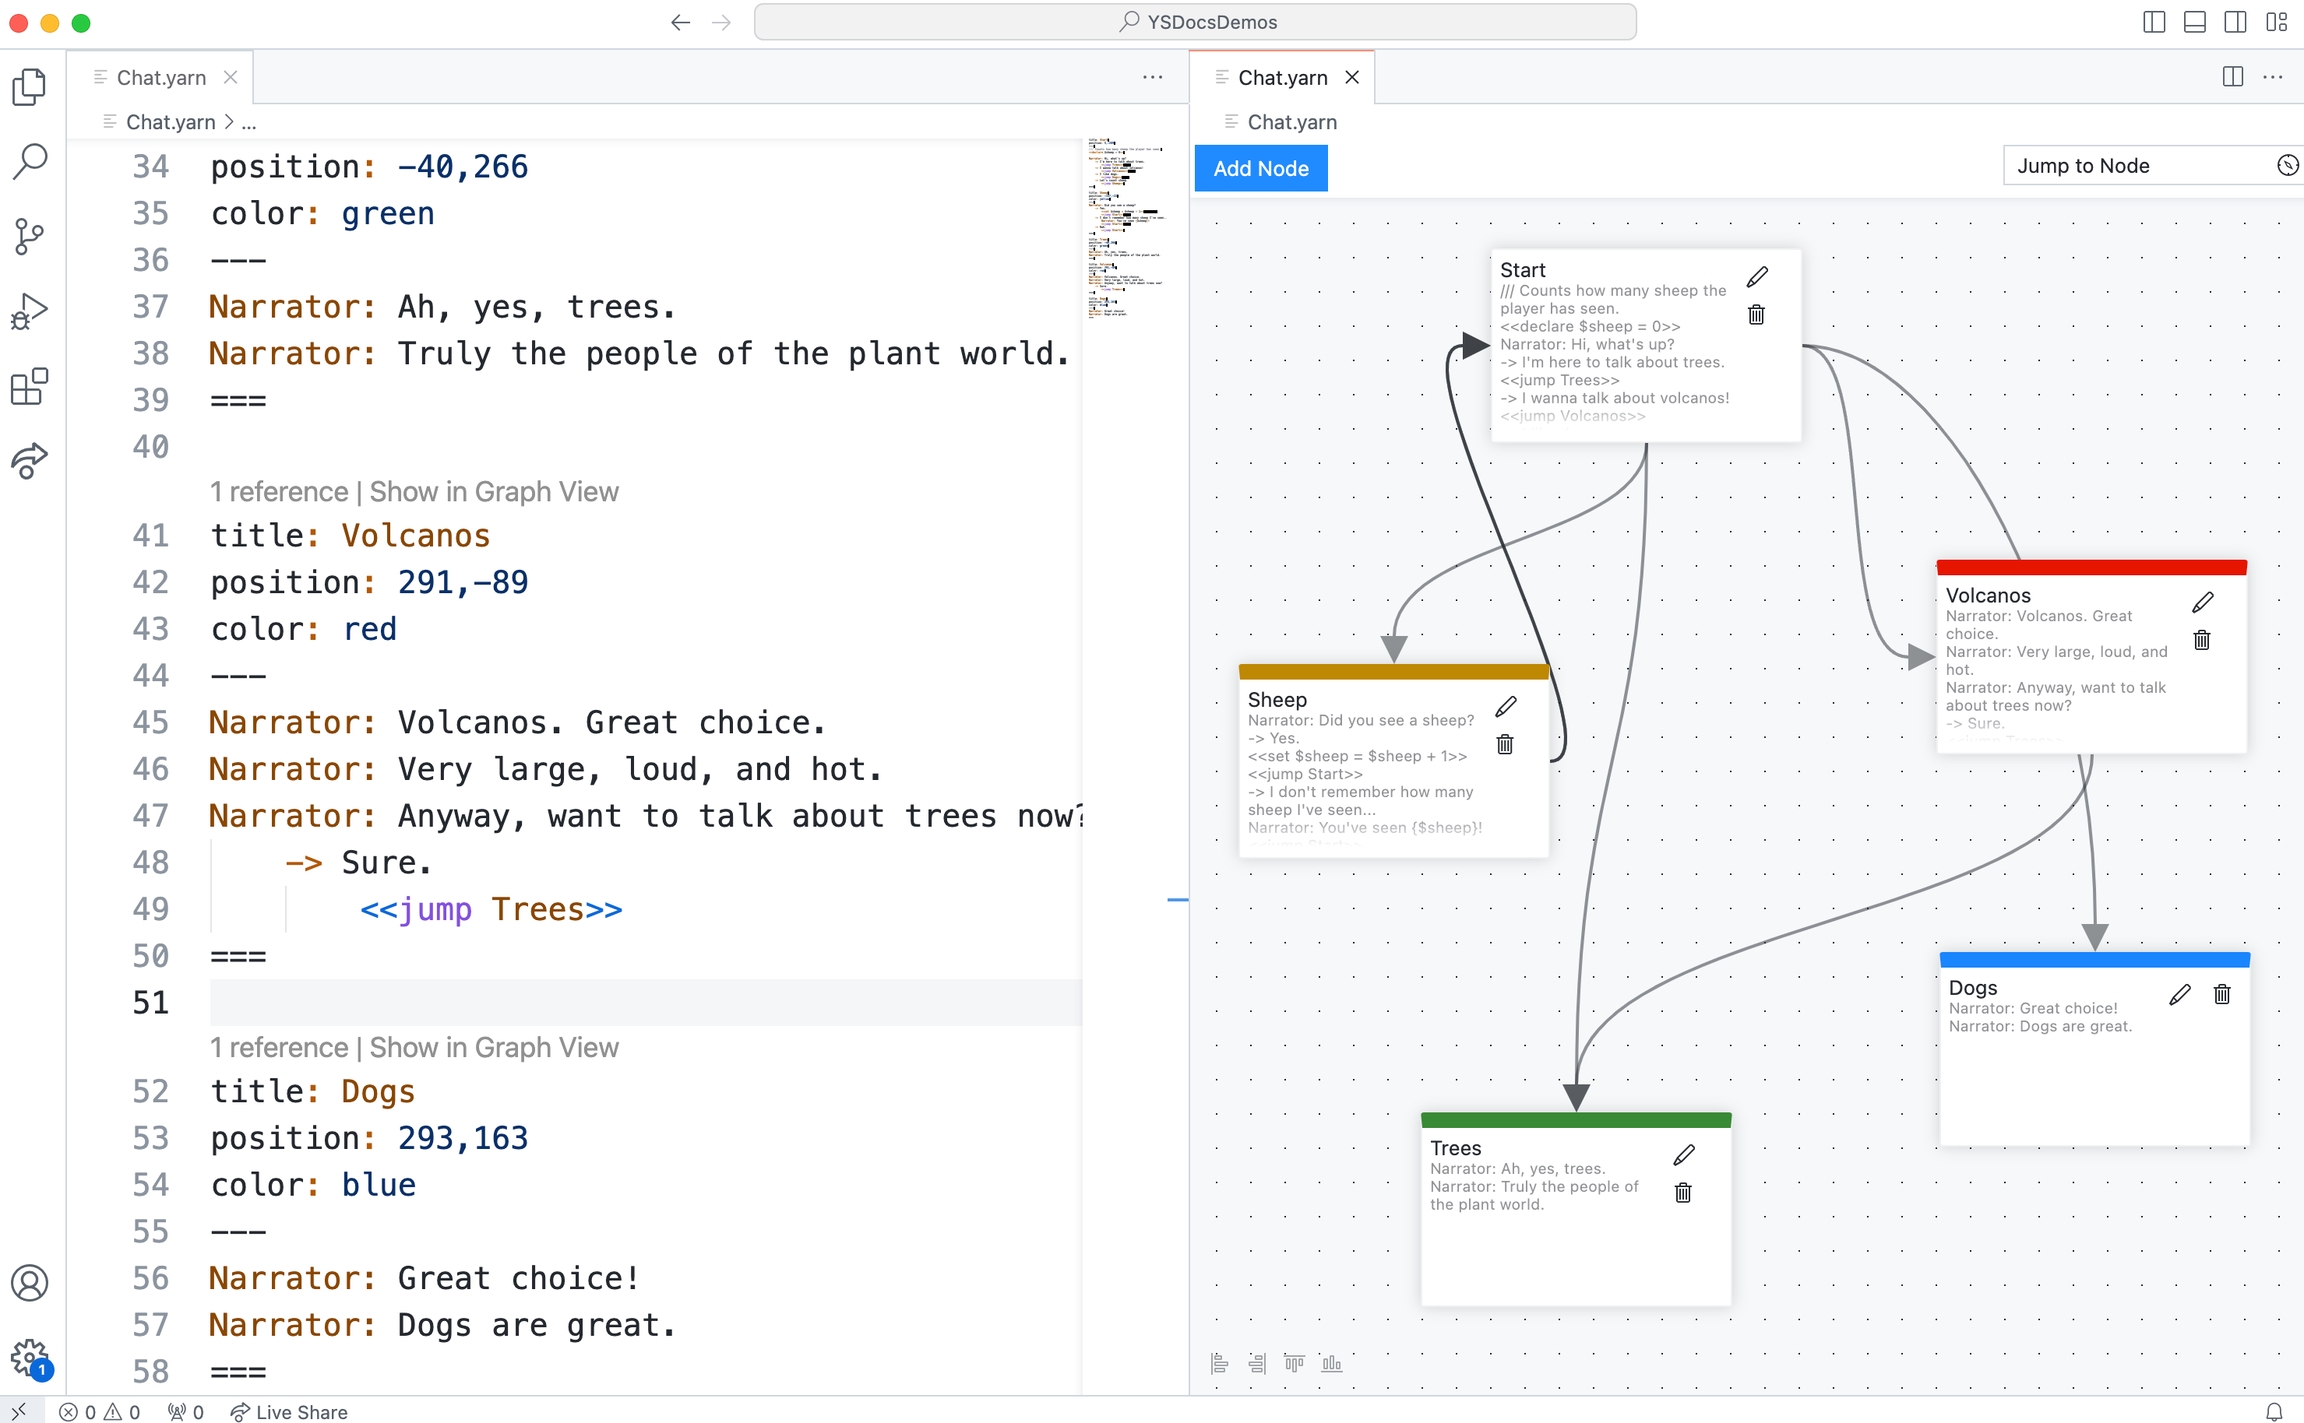
While Yarn is a text based language, our Yarn Spinner for Visual Studio Code extension provides a handy Graph View. You can open the Graph View for whichever .yarn file you're currently working with by clicking the Graph View button in the top right-hand corner:
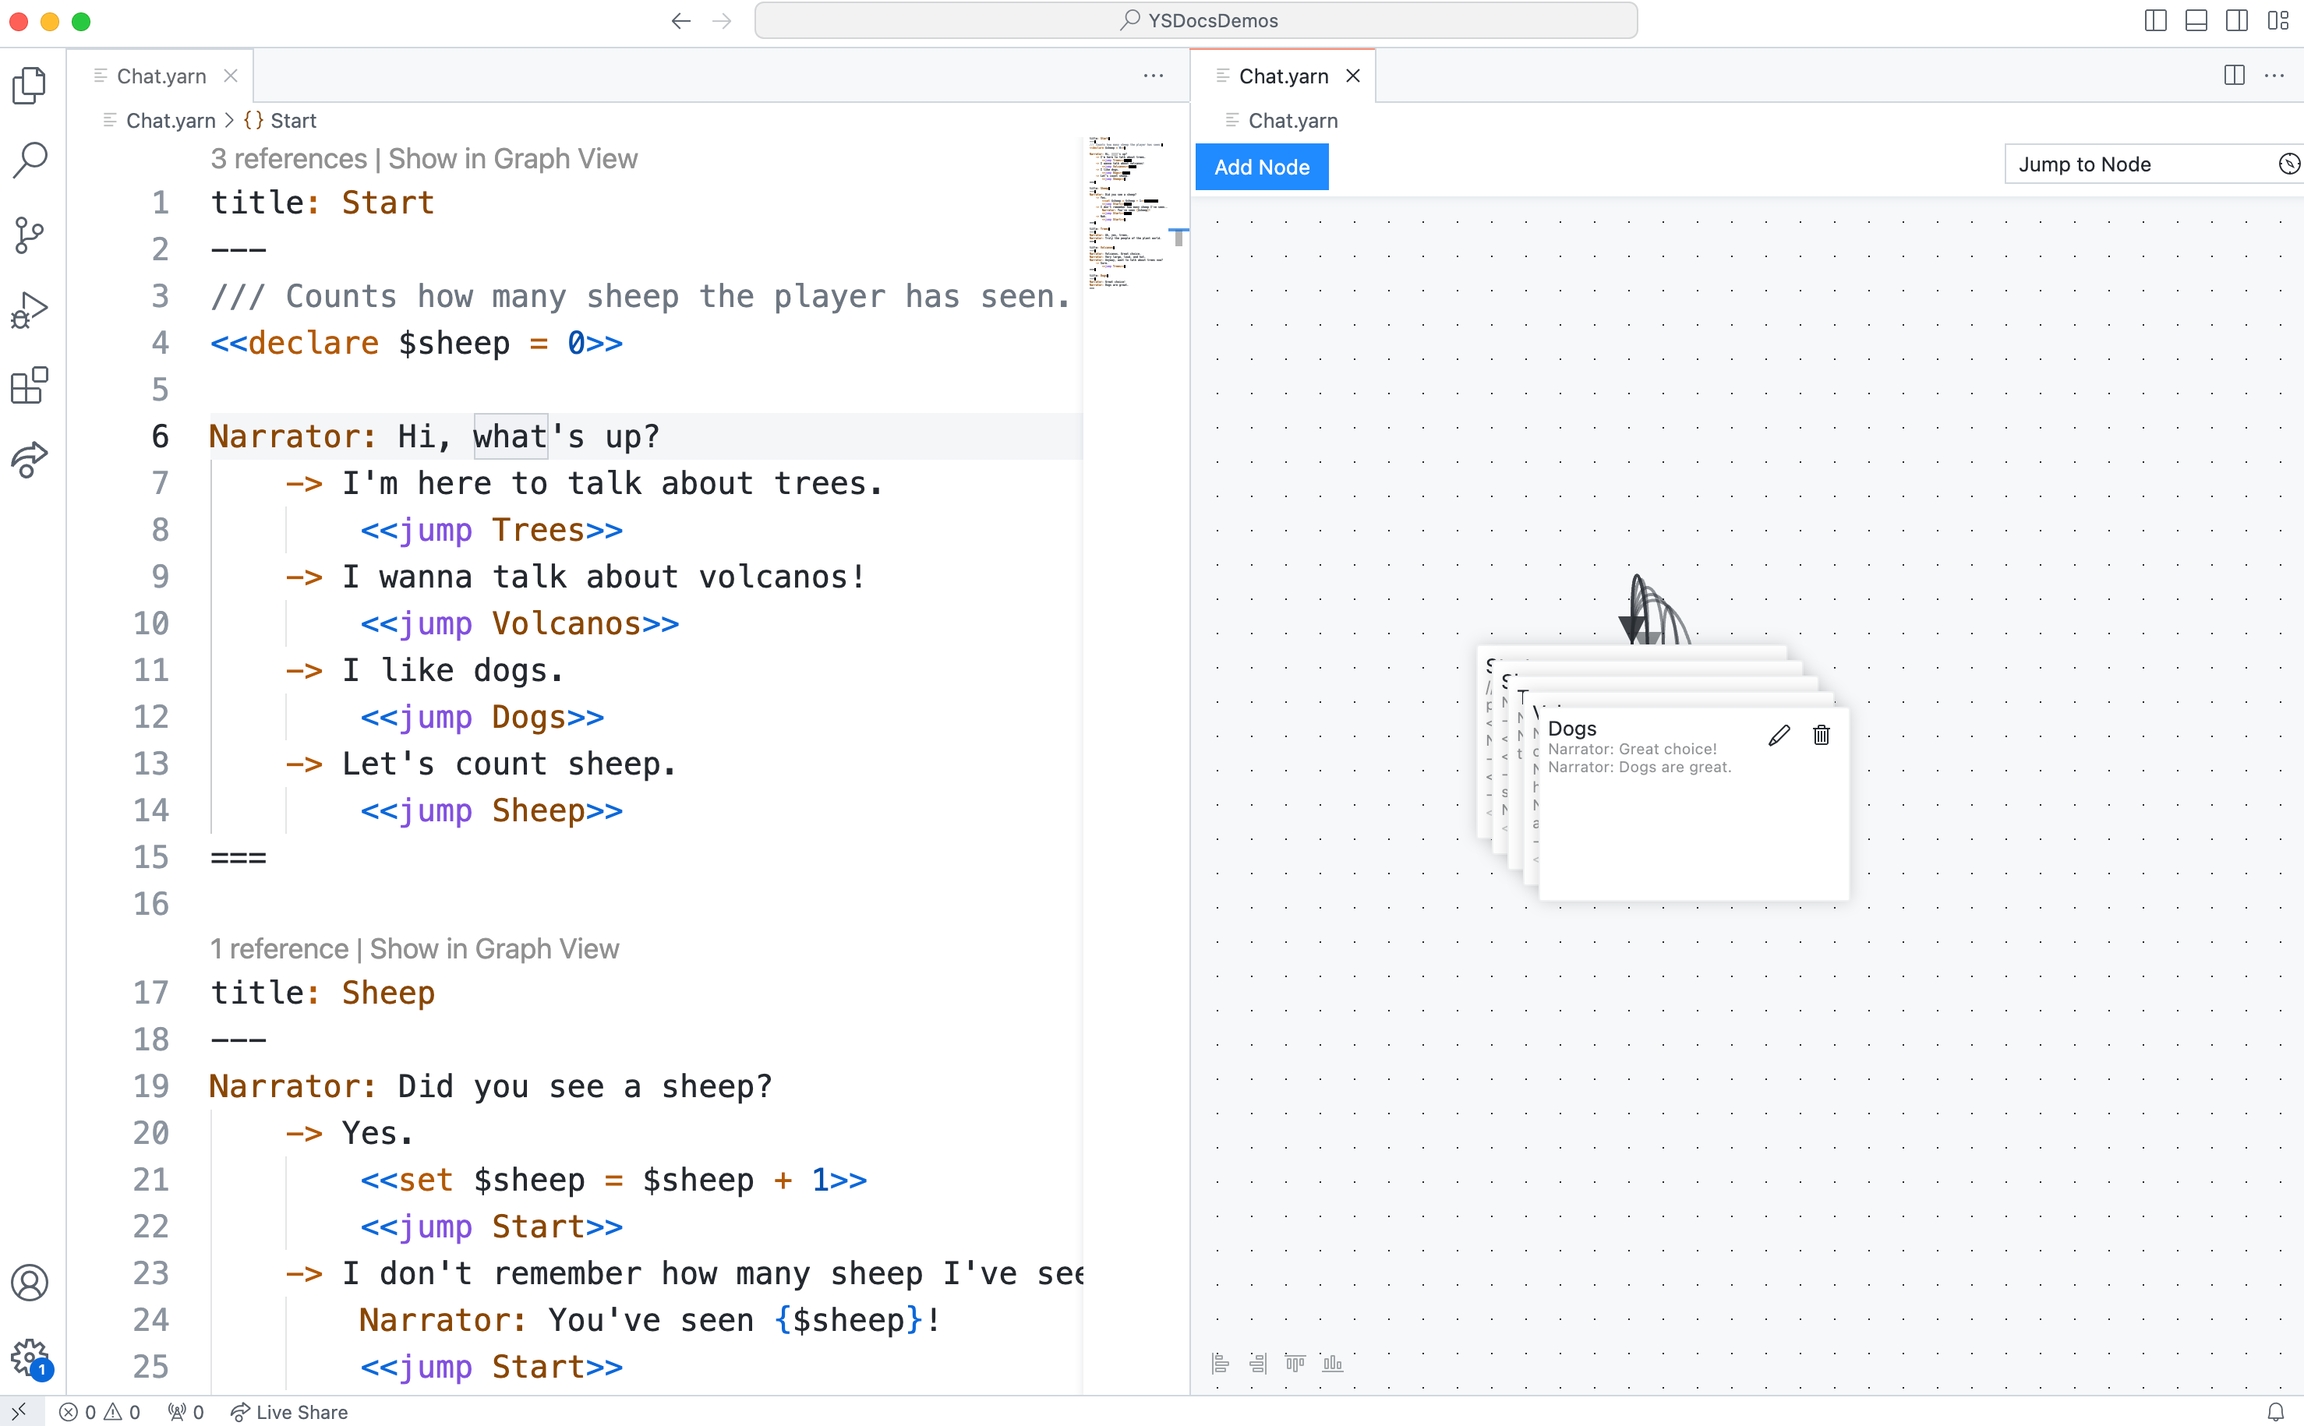
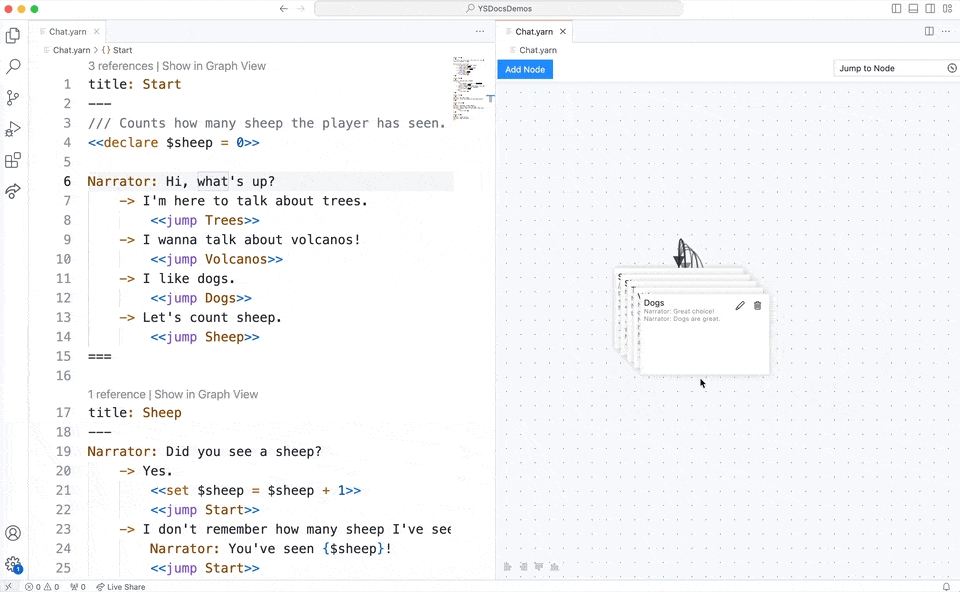
You might notice that, when you first look at the Graph View for a .yarn file, all the nodes appeared stacked on each other, like this:
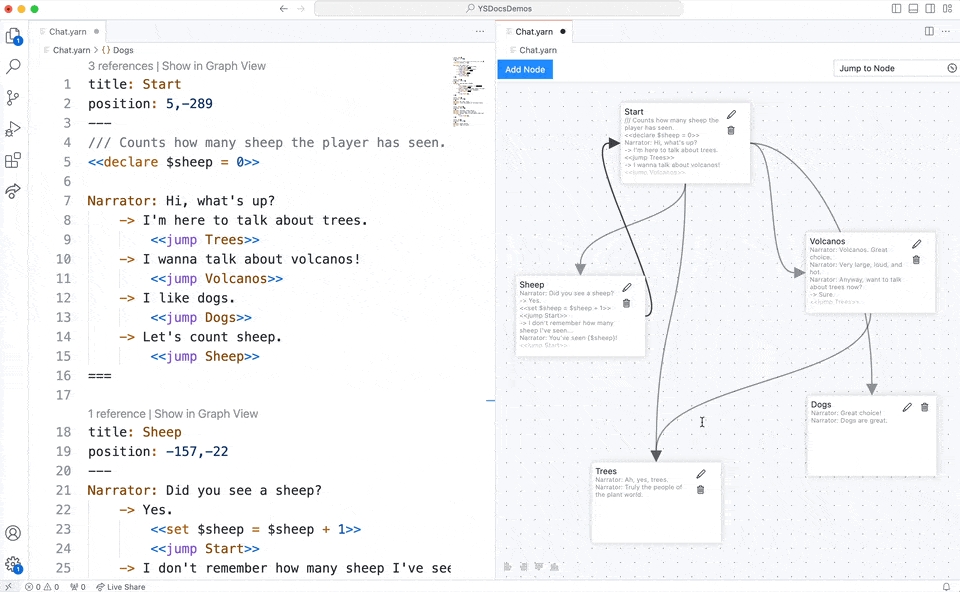
To make sense of things, and better understand the <<jump>> use between nodes, you can rearrange the nodes by clicking and dragging to wherever you want them:
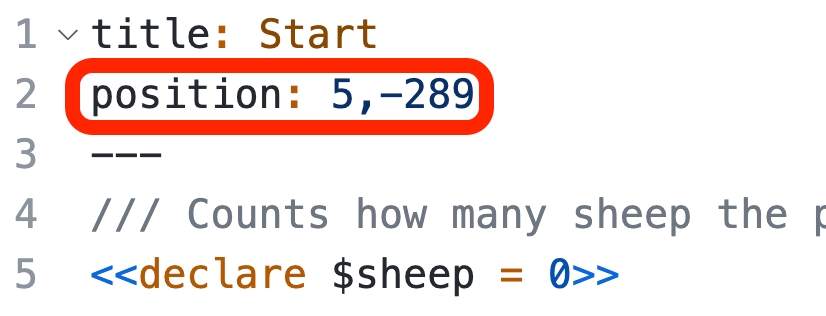
The position of the nodes will be stored in each node's header:
You can use the Add Node button, found at the top of the Graph View, to add new nodes. New nodes will appear in the Graph View, and in the text editor:
Double-clicking a node in the Graph View will jump to that node in the Text View:
If you have a lot of nodes, you can use the Jump to Node menu, in the top right-hand corner of the Graph View, to jump the Graph View to a specific node:
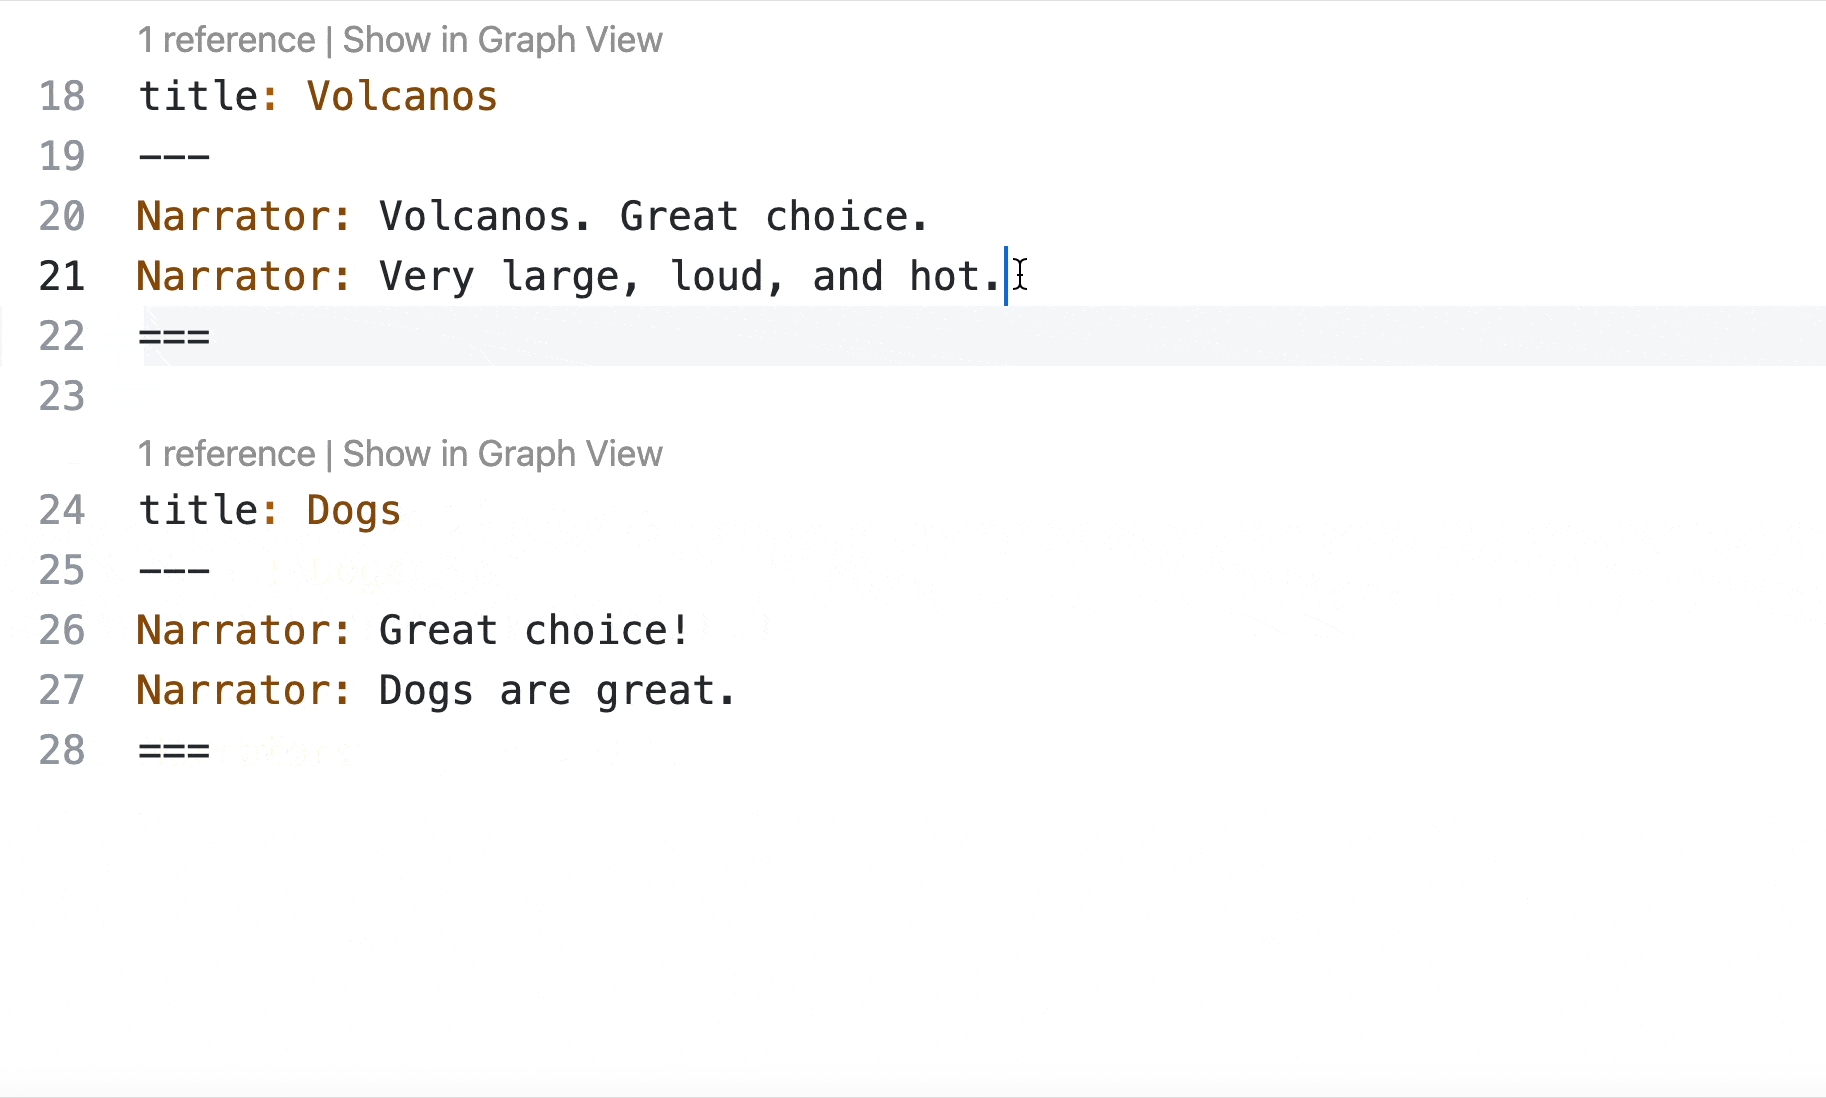
At any point you can also click Show in Graph View, found above each node in the Text View to jump the Graph View to it:
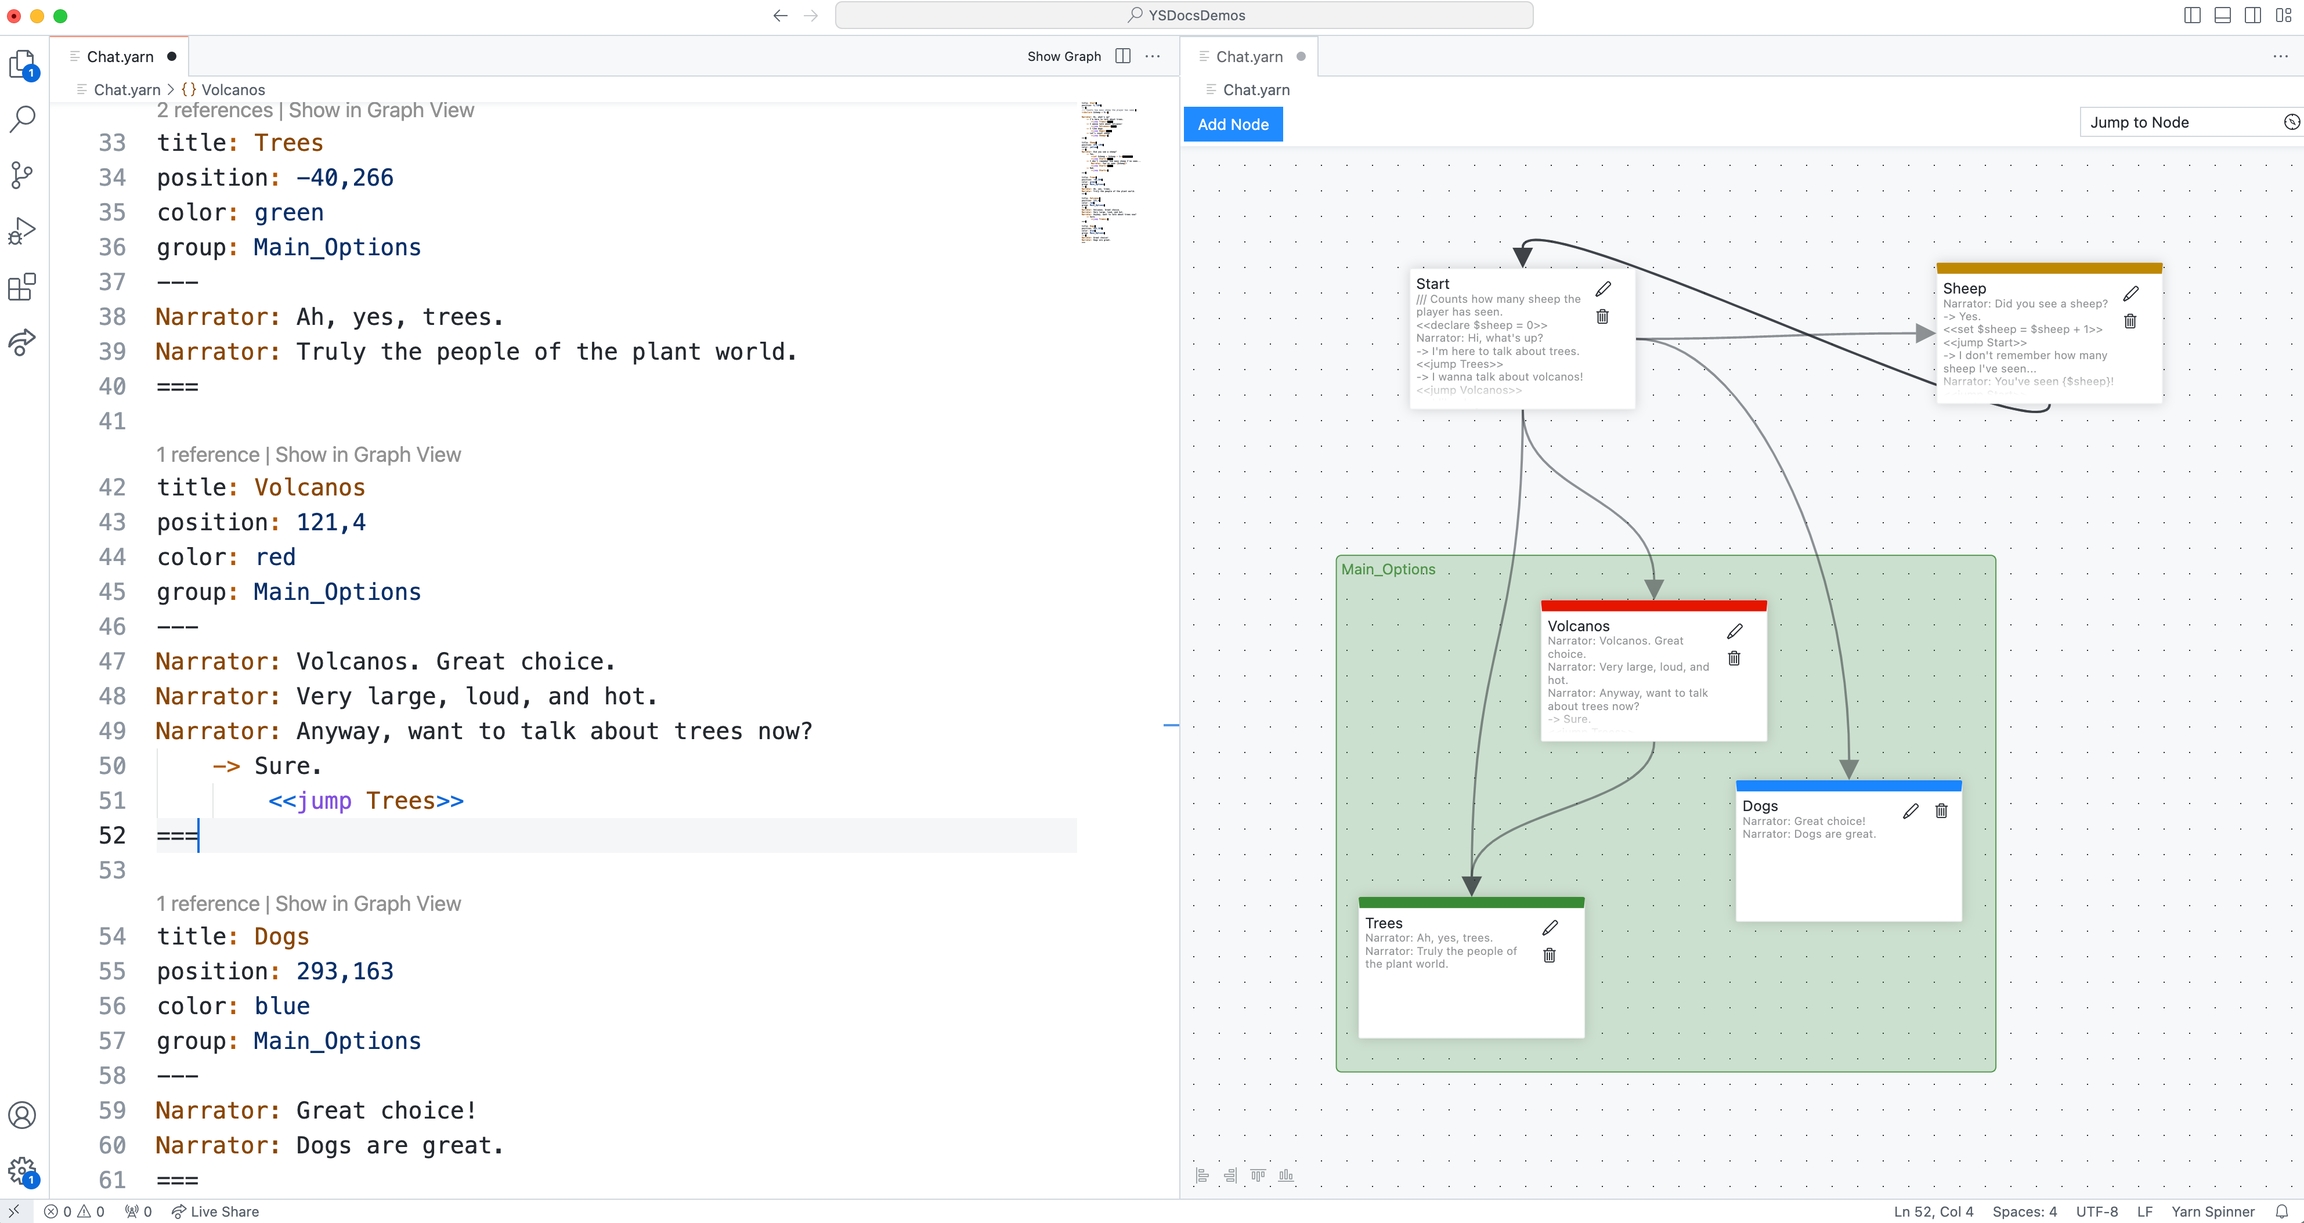
You can add some additional metadata to the headers of each node to customise your Graph View, for ease of understanding the relationships between areas of your script. For example, if you add the color field to the header, you can colour-code your nodes:
You can use red, green, blue, orange, yellow, or purple. The colours that you see may be different, depending on your VS Code theme.
The color field works like any other header element, and goes below the title and above the ---:
You can also group your nodes by adding the group field to your node headers. For example, if you add group: Main_Options to the header of the Volcanos, Dogs, and Trees nodes, you'd end up with this:
The VS Code Command Palette has a number of useful Yarn Spinner features as well. Summon the Command Palette by pressing Shift + Command + P (Mac) or Ctrl + Shift + P (Windows/Linux), or choosing the View menu -> Command Palette..., and type "Yarn Spinner" to filter the available commands to those provided by the Yarn Spinner for Visual Studio Code Extension:
From here you can Preview Dialogue, which will allow you to play through your narrative, right inside Visual Studio Code. To learn more about this, read Previewing Your Dialogue.
The Export Dialogue as HTML... option will export a self-contained playable version of your narrative as an HTML file, which is otherwise the same as the experience your get when previewing.
The Export Dialogue as Graph... option will allow you to export a .dot file of your graph. To learn about .dot files, check out the GraphViz documentation: https://graphviz.org/doc/info/lang.html
And finally, the Export Dialogue as Recording Spreadsheet... option will allow you to export a spreadsheet, which can be useful for voice actors recording dialogue.
Learn how to use the Live Share Extension with Yarn Spinner for Visual Studio Code.
The primary editing experience for Yarn Spinner is our Yarn Spinner for Visual Studio Code extension. This provides the majority of features that you'd want in order to effectively write .yarn scripts using VSCode.
This guide shows you how to use Microsoft's free Live Share extension for Visual Studio Code, together with Yarn Spinner for Visual Studio Code, to collaborate live on your narrative.
The rest of this guide assumes you've followed the steps in Editing with VS Code, and already have the Yarn Spinner for Visual Studio Code extension up and running.
To install Live Share for Visual Studio Code, and use it with Yarn Spinner:
Click this link to open Visual Studio Code, and jump to the Live Share Extension.
Click the install button!
If Step 2 does not work, launch Visual Studio Code and choose the View menu -> Extensions, to open the Extensions Marketplace.
Then, in the search field at the top-left of the window, search for "Live Share", and click the Install button on the extension provided by Microsoft that appears in the results.
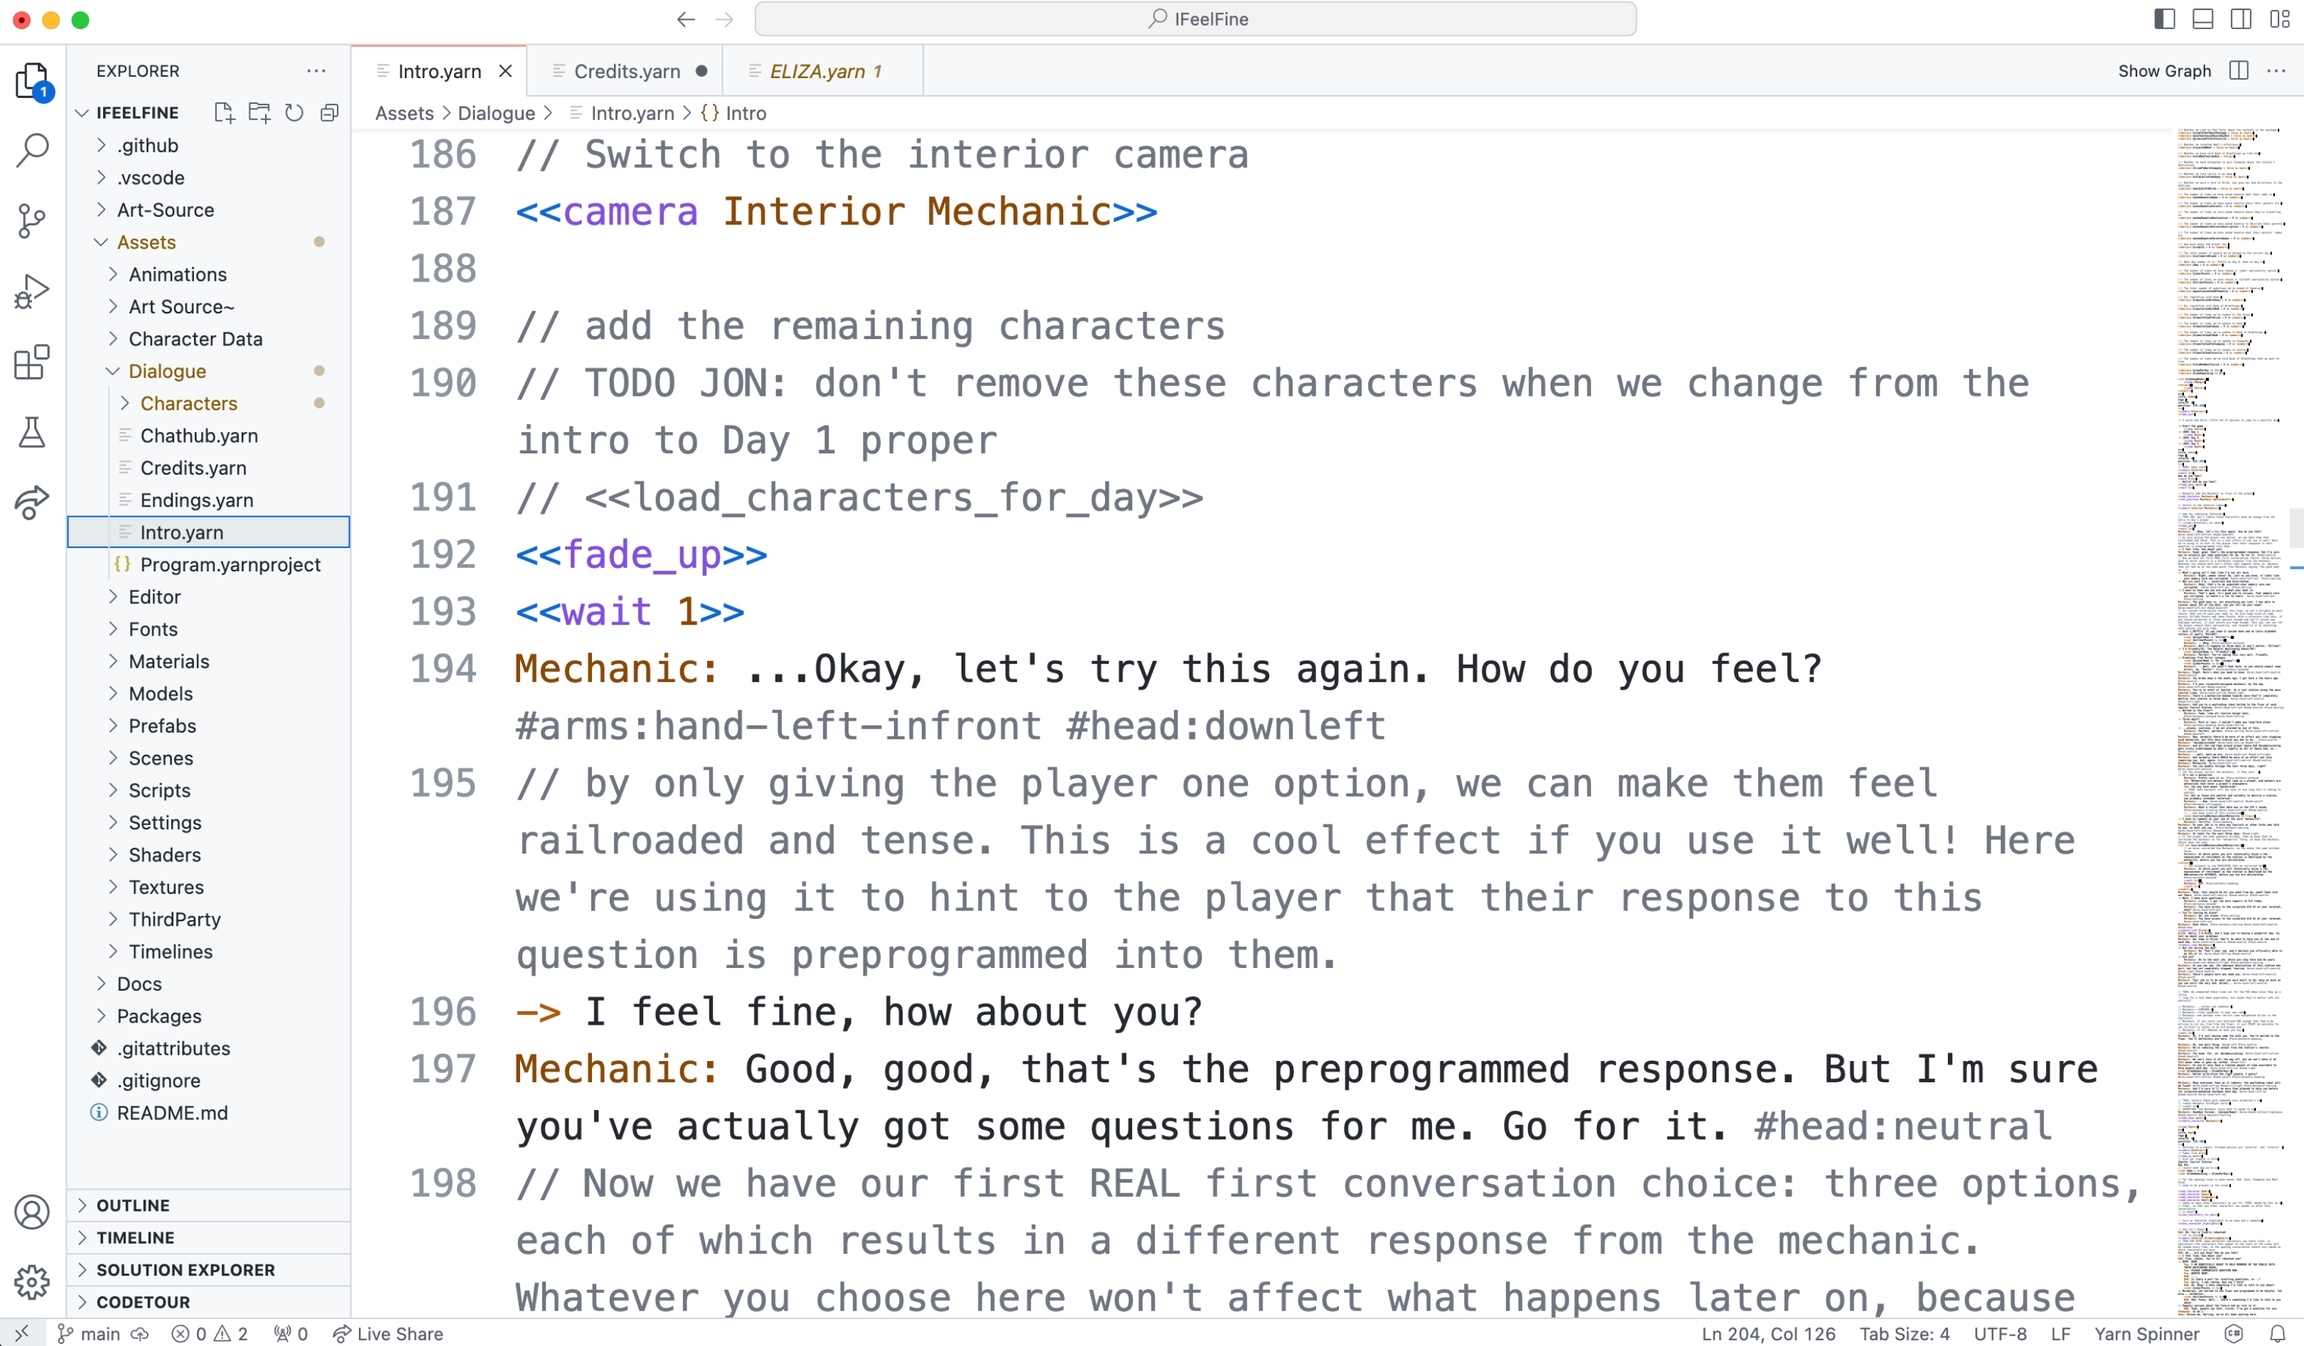
Open your Yarn Spinner project in Visual Studio code. For example, here's I Feel Fine:
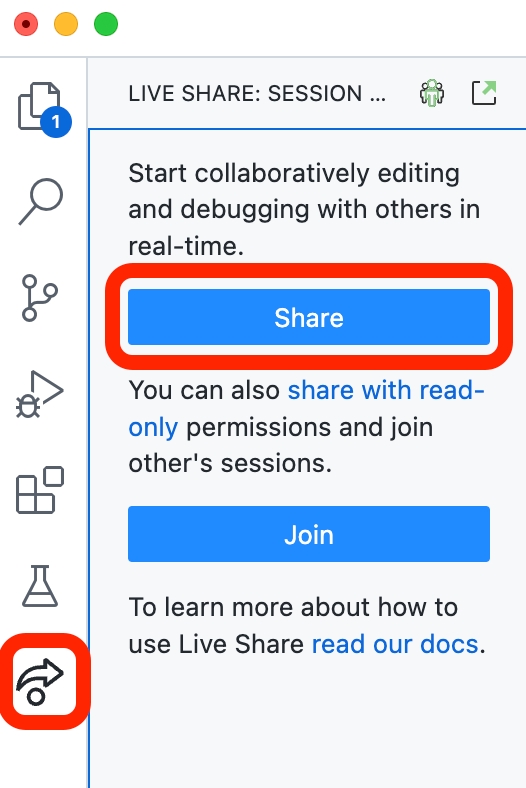
With your project open, choose Live Share in the Activity Bar on the left side of the screen, and in the resulting view that appears, choose the Share button:
You'll be prompted to sign in to either GitHub or your Microsoft account, and after this a notification will appear in the bottom of the screen letting you know a shareable link to collaborate has been copied to the clipboard:
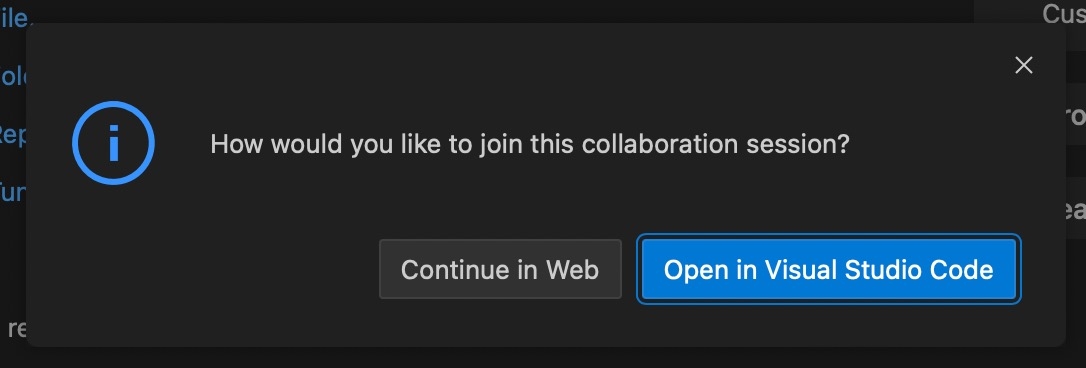
When you receive a collaboration link and visit it, you'll be asked how you'd like to join:
If you choose to Continue in Web, you'll be taken to a web version of VS Code, which will not have the Yarn Spinner extension installed. If you click Open in Visual Studio Code, your local copy of VS Code will be installed, complete with extensions.
This guide assumes that the person you're sharing with also has the Yarn Spinner for Visual Studio Code extension installed.
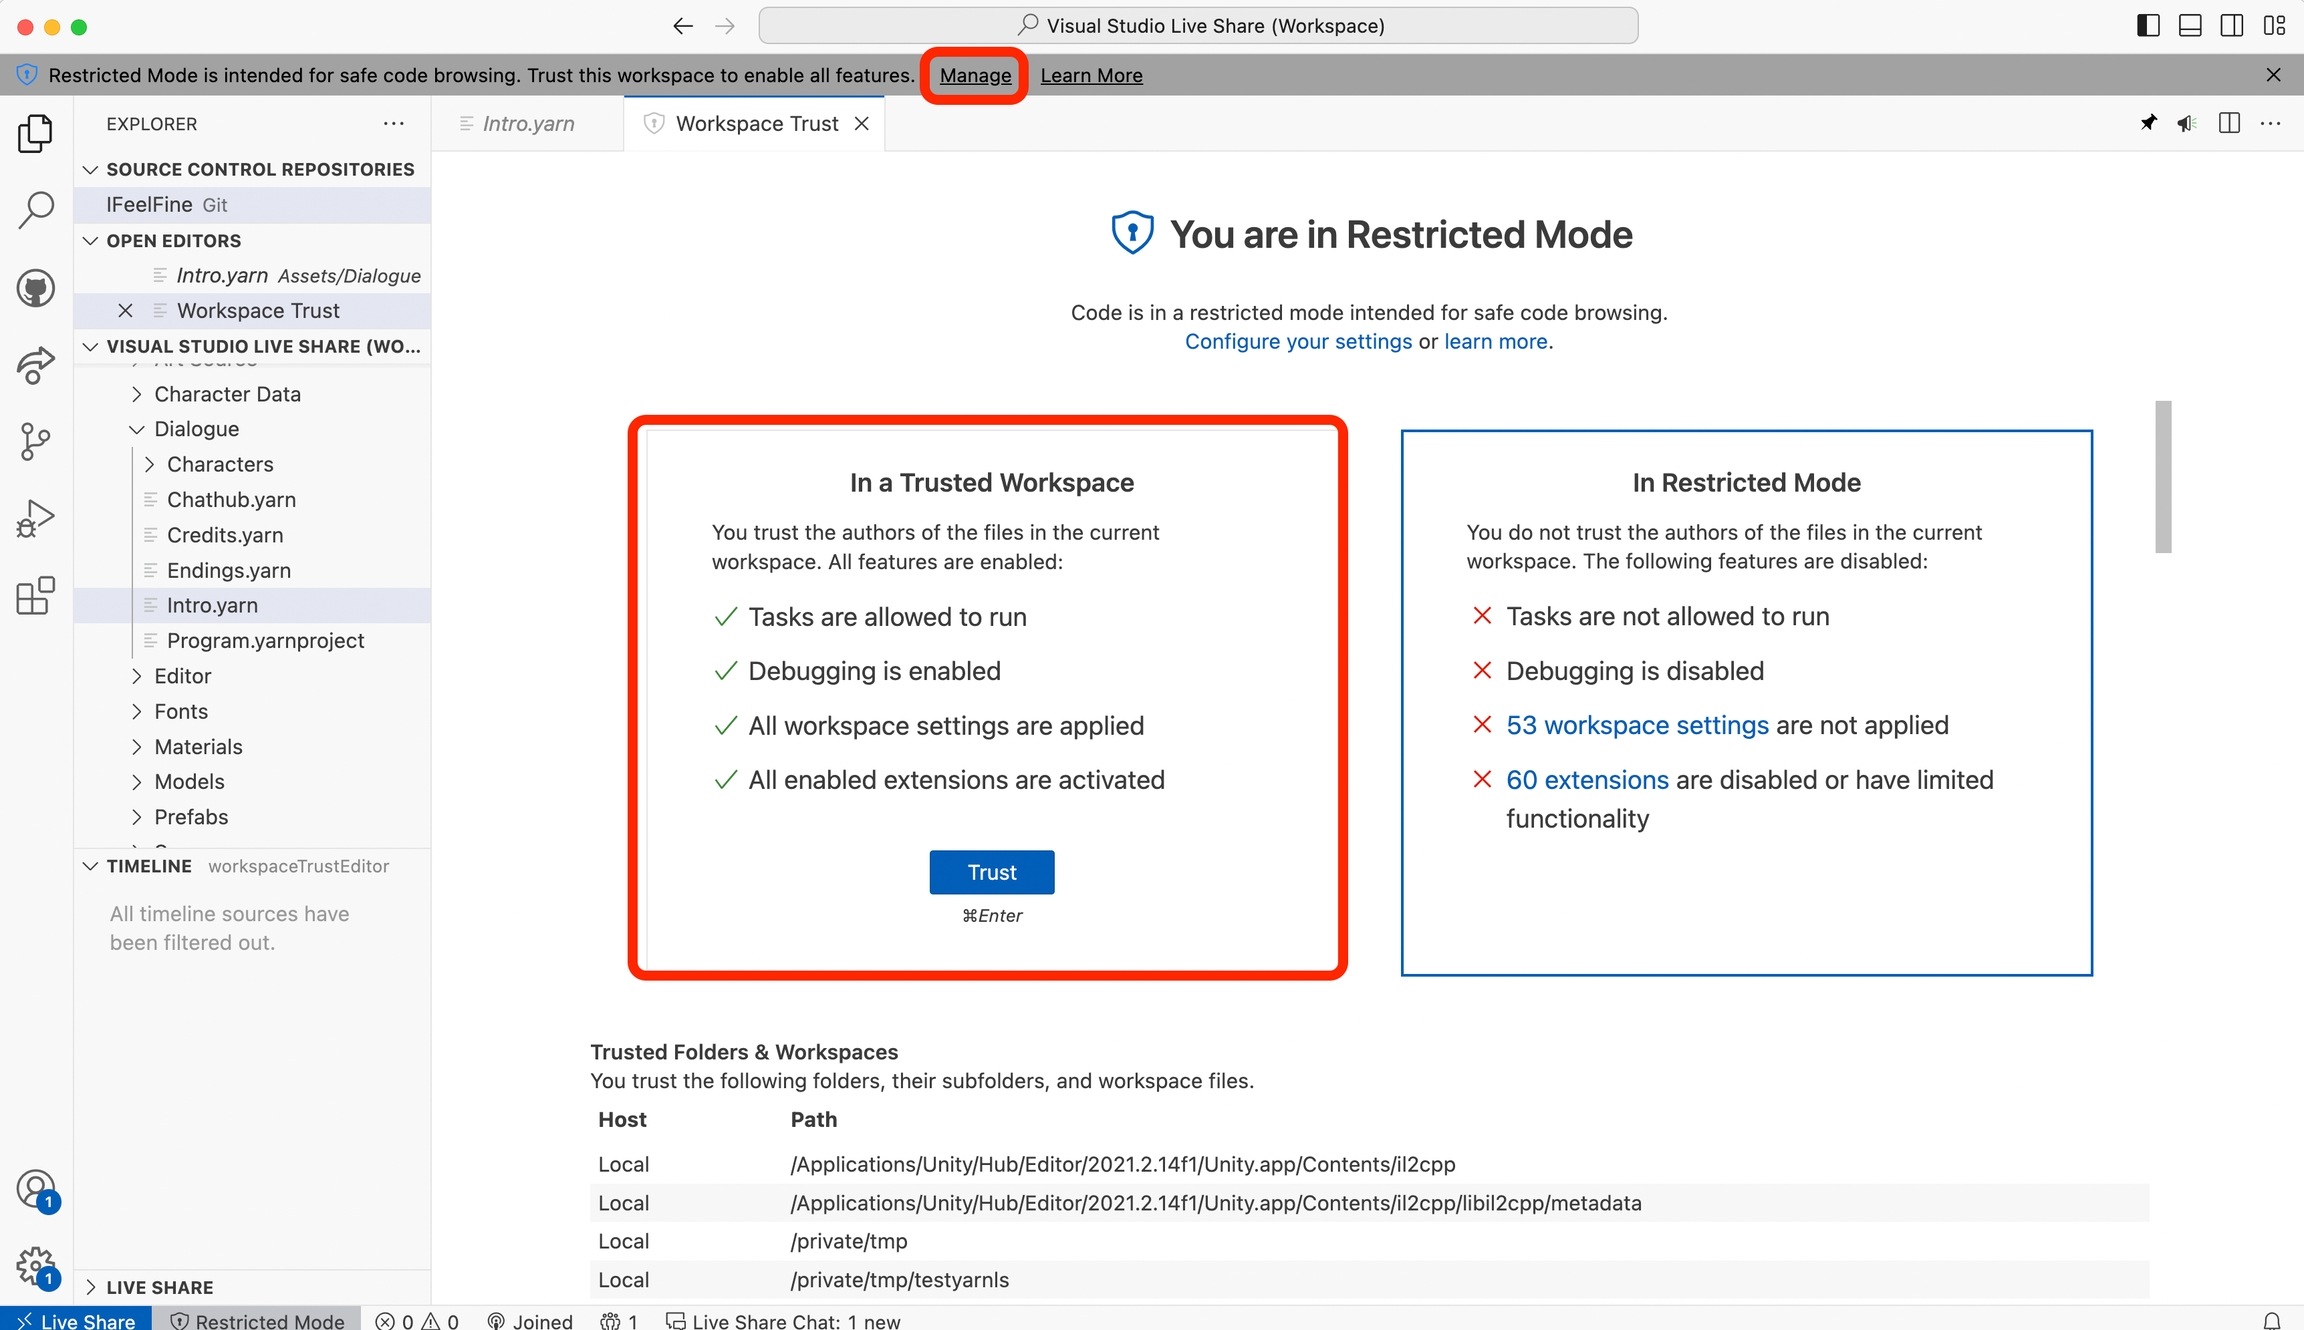
Once the shared workspace opens in your local copy of VS Code, you'll be in an untrusted state, which means the Yarn Spinner extension will not be providing syntax highlighting, To enable this, click Manage, in the grey bar at the top of the window, then click the Trust button in the view that appears:
The person who initially shared the workspace will have full and complete access to the features of the Yarn Spinner for Visual Studio Code extension. Everything, from syntax highlighting to the graph view will work as normal.
Those who are joining the shared session will only have access to the syntax highlighting features of the Yarn Spinner for Visual Studio Code extension, provided they go through the process of trusting the workspace, as noted earlier.
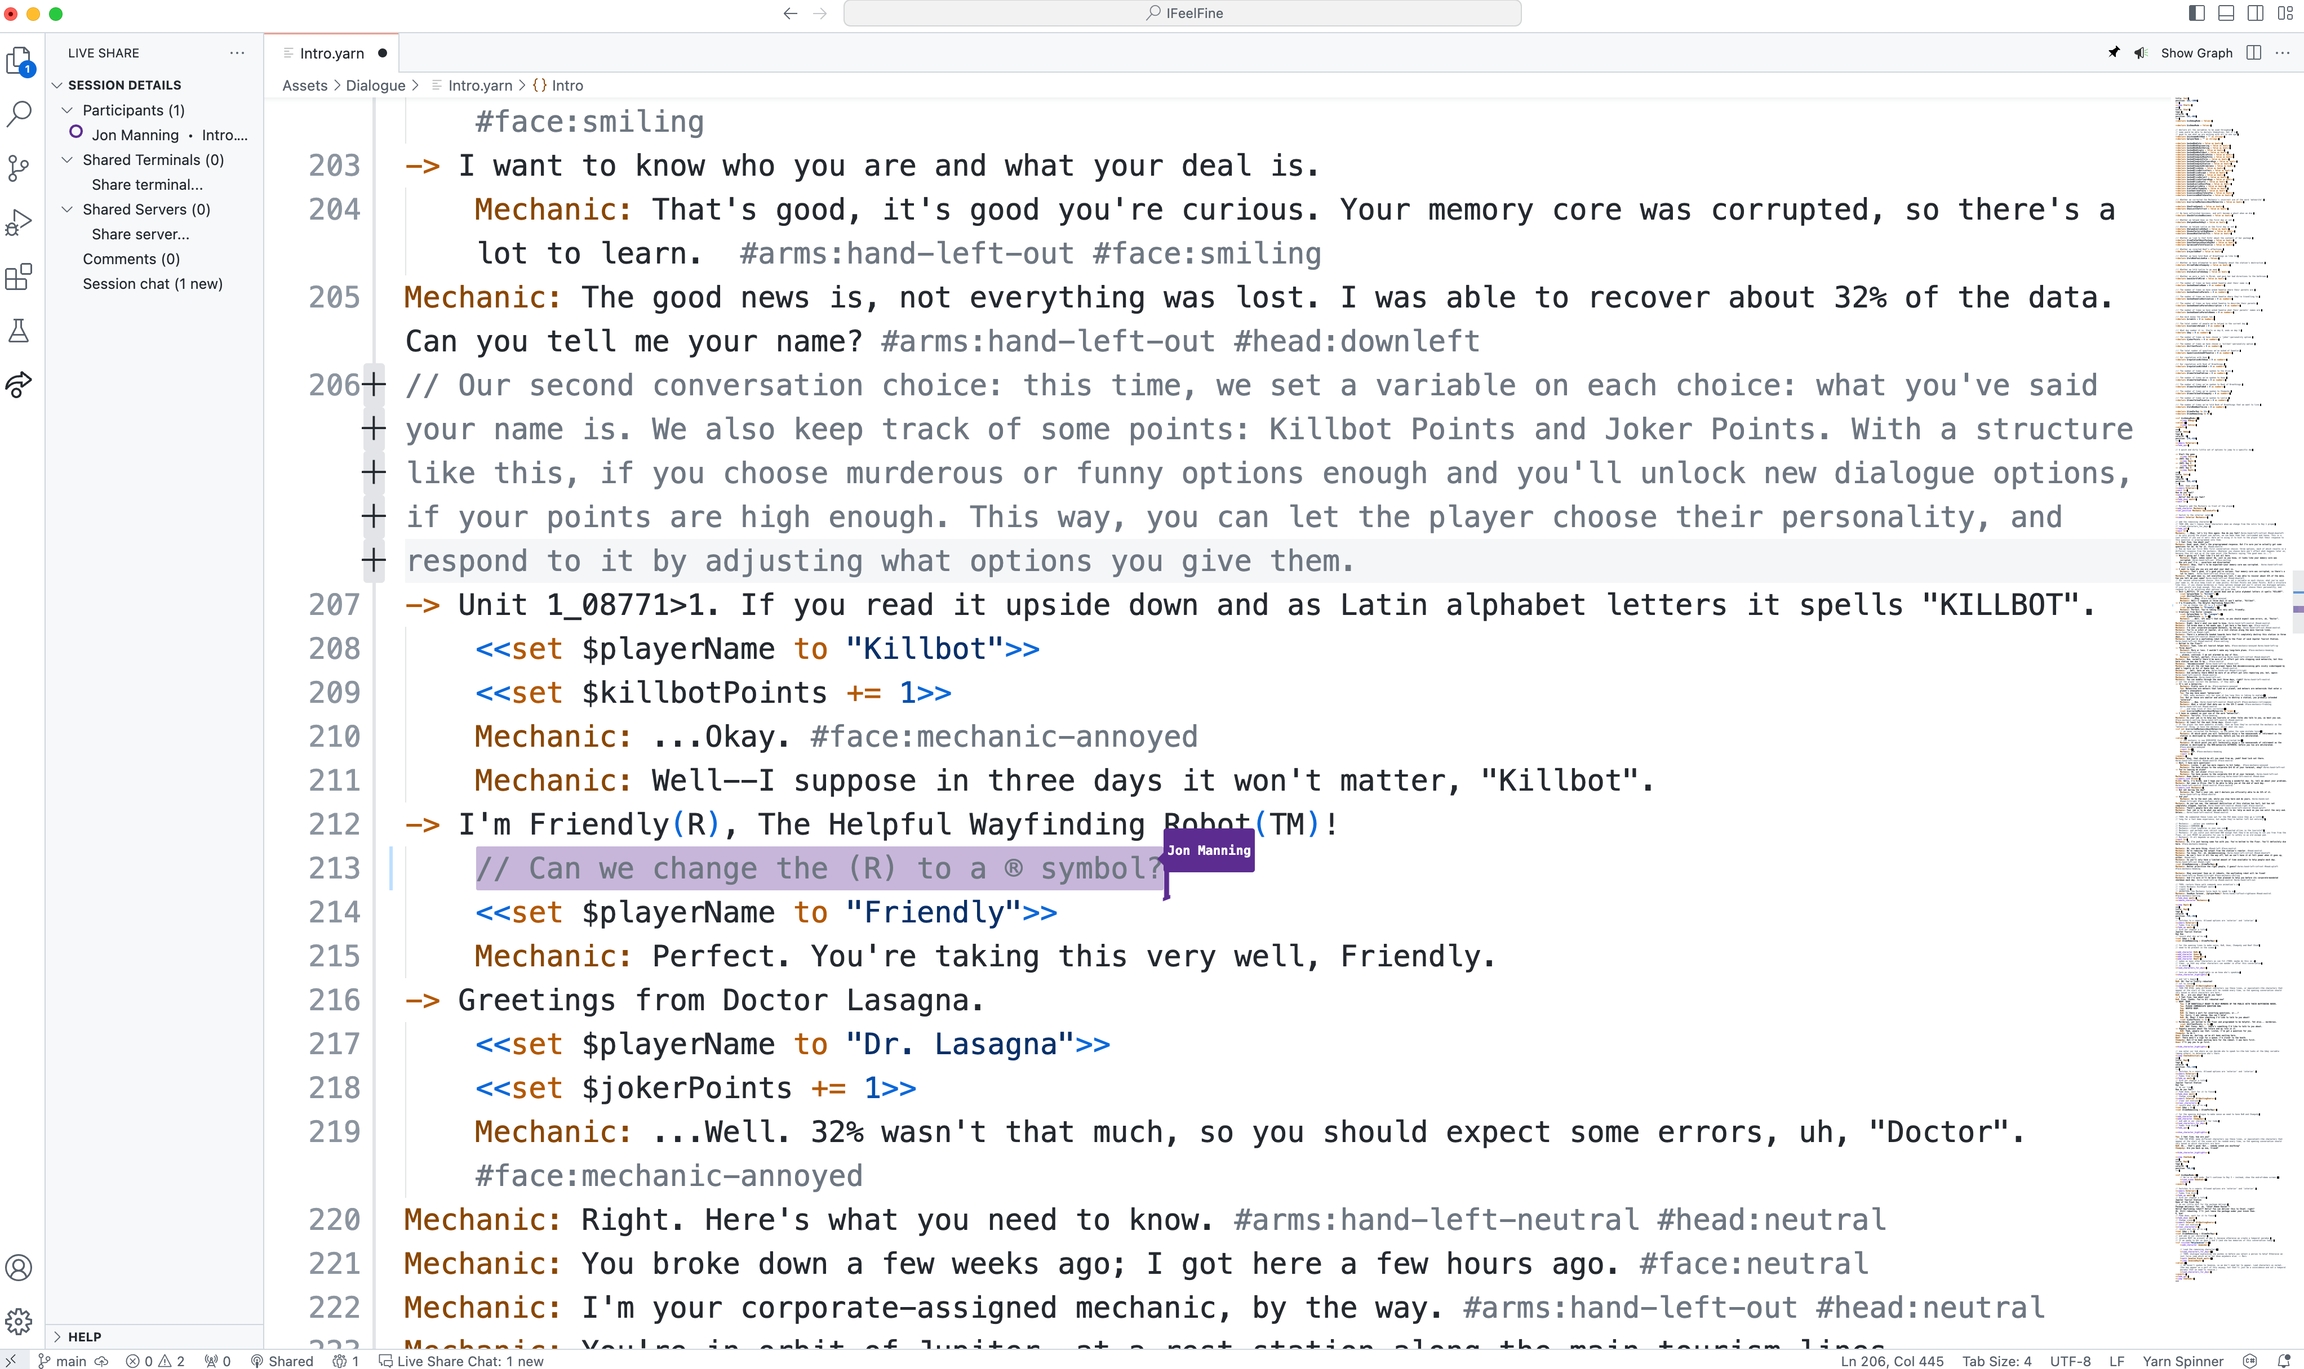
As you edit, you'll be able to see other users in the files, and their work will be briefly highlighted as they write:
For more guidance using the Live Share extension, check out the extension's official page, as well as the Live Share extension's documentation.
We'll be improving the capabilities of Yarn Spinner for Visual Studio Code over time, and will add features that directly support the Live Share extension. Stay tuned!
Preview your dialogue within the Yarn Spinner for Visual Studio Code Extension.
You can run your Yarn script inside the Visual Studio Code extension, without having to import it into a game. This means that you can write content for your game even if the game isn't yet ready to have dialogue added to it. It's also useful for quickly checking to see if your Yarn script works the way that you want it to before testing it in your game.
This is fundamentally the same preview experience you'll get if you Test your dialogue at https://try.yarnspinner.dev
To preview your dialogue in Visual Studio Code, open the Command Palette by pressing Command-Shift-P (Control-Shift-P on Windows), and type "Preview Dialogue". Your current Yarn project will open to the side, and you can begin playing through your script.
By default, the dialogue preview will begin playing from the node named "Start". If no node named "Start" exists, then the dialogue preview will begin playing from the first node in one of your files. You can choose which node to start playing from in the menu at the top-right of the preview area.
While playing through your dialogue in preview mode, there are several features that can be useful to test out a script.
Changing the starting node: By default, the dialogue preview will start playing from a node named "Start", if one is present in your Yarn files. If you want to play from a different node, open the list of nodes and choose the node you want to start from.
Changing whether lines are shown one at a time, or all at once: By default, the dialogue preview shows each line and command one and a time. You can change this to delivering everything all at once by opening the Settings menu and changing the setting to "Show Lines All At Once".
Showing the contents of variables: You can see the current contents of all variables in your script by opening the Settings menu and choosing "Show Variables". A list of variables will appear, and as you play through your script, they'll update when your script changes their contents.
Changing whether 'unavailable' lines are shown: Options can be marked as 'unavailable' depending on whether or not a test has passed. By default, options that fail this test are not shown in the dialogue preview at all; to change this to showing all options (including ones that the user can't choose), open the Settings menu and choose "Show Unavailable Options".
Restarting the script: When you click the Restart button, the dialogue preview will restart from the currently selected starting node.
You can export a stand-alone HTML file containing a runnable version of your Yarn script, which you can send to other people for them to play. This can be particularly useful for writers who want to get feedback on their scripts before working with other team members to integrate their content.
To export your script, click the Export button, and choose where to save the file. The file can then be sent anywhere you like, and can be opened in all major web browsers.
if statementsIn addition to storing information, variables are useful for controlling what's shown to the player. To do this, you use if statements.
An if statement allows you to control whether a collection of content is shown or not. When you write an if statement, you provide an expression, which is checked; if that expression evaluates to a "true" value, then all of the content in between the <<if>> and <<endif>> statements are run.
For example, consider the following code:
This example will set a variable, $gold_amount, to 5. It will then show the line "I'd like to buy a pie!", and before it continues, it will check to see if $gold_amount is less than 10. If that's the case (which it will be!), the line "Well, you can't afford one!" will run.
elseif and elseYou can use the elseif and else statements to handle different situations in an if statement.
An elseif statement has an expression that gets checked if the if statement, or any previous elseif statements, don't run.
An else statement doesn't have an expression, and runs if the if and any elseif don't run.
For example:
This script will show different lines depending on the value of $gold_amount. The checks are done from top to bottom, which means that in order for an elseif or else to run, all of the checks above it have to have failed.
If it's less than 10, the line "Well, you can't afford one!" will run.
Otherwise, if it's less than 15, the line "You can almost afford one!" will run.
Otherwise, the line "Here you go!" will run.
The expression used in an if and elseif statement must result in a boolean value (that is, true or false.) For exame,<<if 1>> isn't allowed, but <<if 1 == 1>> is.
When presenting options to the player, you may want to make some options not available. You can do this by adding a condition to the option.
For example, if you have a variable that tracks your player's "reputation points", called $reputation, you might want to make certain options only available if the value of $reputation is high enough.
Conditions on options are done by adding an if statement to the end of the option. They look like this:
When Yarn Spinner runs this collection of options, it will check the expression inside the if statement. If the expression is false, then the option will be marked as unavailable.
Yarn Spinner always delivers every option in an option group to the game; it's up to the game to decide what to do with options that are marked as unavailable.
For example, an unavailable option might be shown to the user, but not selectable, so that the user can see that they could have been able to say that if circumstances had been different.
In Yarn Spinner, all of your dialogue is stored in .yarn files. Yarn files are just plain text files, which you can edit in any text editor.
Yarn Spinner files contain nodes. Nodes are where you put your dialogue. You can have as many nodes as you link in a file. Nodes are used to separate out parts of the story, and make it easier to manage longer stories and branching.
Each node has, at the very minimum, a collection of headers, and a body. All nodes have at least one header, which is the title. The title is the name of the node, and the body contains the Yarn script that contains your game's dialogue.
The title of a node is important, because your game uses node titles to tell Yarn Spinner which node to start running. You also use the title of a node when you want to jump to another node.
Node titles are not shown to the player.
Node titles must start with a letter, and can contain letters, numbers and underscores.
So FirstNode, First_Node and Node1 valid, but First Node and 1stNode are not.
Node names cannot contain a . (period).Node names were able to contain a period in Yarn Spinner 1, and if your Yarn Spinner 1 .yarn scripts have periods in the node names, you can use the to convert them (and all jumps and options related) to use a _ (underscore) instead.
If you're using a text editor to write Yarn scripts, you'll need to write the node's header.
If you're using a graphical editor to write Yarn scripts, like Yarn Editor, it will handle this for you, and you can skip this section.
The plain-text version of a Yarn node looks like this:
In this example, the node's title is Node_Title, which is set on the first line in the title header. You can also add any other headers that you want.
Node headers can contain any number of lines with the structure key: value. This can be used to store additional information, such as the location the conversation is taking place.
The --- marker indicates where the body begins. After this point, you can put all of your Yarn script.
The === marker indicates where the node ends; after this point, you can begin another node.
The body of a node is made up of three different kinds of content: lines, commands, and options.
When you write Yarn Spinner dialogue, just about every line of text that you write in a node is a line. When a node is run, it runs each line, one at a time, and sends it to your game.
A line of dialogue is just the thing you want some entity or character to say, usually beginning with the name of the entity speaking.
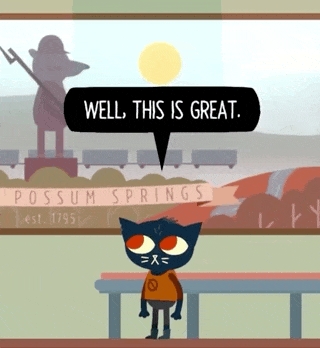
For example, consider the following Yarn code from Night in the Woods:
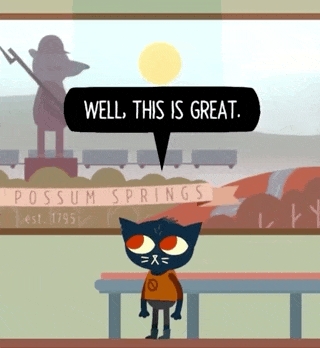
When this code is run in the game, it looks like this:
Yarn Spinner sends each of these lines, one at a time, to the game. The game is responsible for taking the text, and presenting it to the player; in the case of Night in the Woods, this means drawing the speech bubble, animating each letter in, and waiting for the user to press a key to advance to the next line.
Lines of dialogue can contain just about any text, except for some special characters that Yarn Spinner uses to add extra information to a line.
If there is a set of characters without spaces before a colon (:) at the beginning of the line, Yarn Spinner will mark that as the name of the character. This information will then be passed to your game, so that you can change the way that lines are shown based on the character who's saying them. For example:
When you want to let the player decide what to say, you use an option. Options let you show multiple potential lines of dialogue to the player, and let the player select one.
Options are marked with a -> symbol. You write as many options as you'd like the player to see, and the player chooses one of them. The content of the option is like any other line of dialogue.
For example, consider the following code:
In this example, the line "Hi there! What do you feel like doing today?" will run. The player will then be given the choice to say either "I want to go swimming", or "I'd prefer to go hiking".
Shortcut options can have their own lines, which are run when the option is selected. If a different option is selected, they won't run. To write this, indent the lines that belong to a shortcut option.
In the following code, different lines will run based on which of the two shortcut options are selected.
This script will start with the line, "Hi there! What do you feel like doing today?". The player then has the choice of saying either "I want to go swimming", or "I'd prefer to go hiking". Depending on their choice, either the line "Okay, let's go swimming" or "Cool, we'll go hiking then". Finally, no matter what was selected, the line "Sounds good!" will run.
In addition to containing lines, options can also contain other options.
You can nest options as much as you like. However, this can get a bit challenging to read. It's often a good idea to use the <<jump>> command to jump to a different node:
Separating dialogue segments into nodes can aid in writing neater files that are easier to edit as they grow.
Sometimes it makes sense for the options presented or the outcomes of selecting different options to vary based on other things the player has done or said up until this point. This requires the use of logic and variables, which we'll discuss in the next section.
The Yarn language is a full programming language, which means it has support for writing code that let you control how the dialogue in your game works. In this section, you'll learn how to use variables to control your dialogue.
Variables store information. Variables can store one of three types of information: numbers, strings, and booleans.
Every variable has a name. In Yarn Spinner, all variable names start with a dollar sign ($).
Declaring a variable means telling Yarn Spinner that a variable exists, what it's meant to be used for, and what initial value it has.
To declare a variable, you use the <<declare>> statement:
If you add a comment with three slashes /// above a declaration, editor tools like the Visual Studio Code extension will use it to explain what a variable is when it's used elsewhere.
For example, here's a variable that has the following declaration:
When you hover the mouse over it in Visual Studio Code, a popup will appear that shows the description:
If you use a variable without declaring it, Yarn Spinner will try to figure out what type it should have based on how it's being used in your scripts, as well as what initial value it should have - zero for numbers, false for booleans, and blank text for strings. When a variable is not declared, we call that an implicit declaration.
If you declare a variable, you can make sure that the type of the variable is what you intend it to be. Declaring a variable also lets you control what the variable's initial value is, and lets you add descriptive comments that explain the purpose of the variable to other people (or to your future self!)
You put information into a variable by using the <<set>> command. For example, the following code puts a string, "Hello, Yarn!", into a variable called $greeting:
As with node titles, variable names must not contain spaces. While they can contain a range of different characters the first character must be a letter. In general your variables will be made up of only letters, numbers and underscores.
Each variable can only store one type of value. Variables can change their value at any time, but they can never change their type.
For example, the following code will work:
This works because while the value of each of the variable changes, the type doesn't. However, the following code will not work:
In earlier versions of Yarn Spinner, variables could also be null, which represented "no value". Starting with Yarn Spinner 2.0, variables are never null. All variables are required to have a value.
You can work with the values inside variables. For example, numbers can be multiplied, strings can be added together, and boolean values can have logical operations (like and and or) applied to them. When values are used together like this, it's called an expression.
An expression needs to be a single type. You can't work with values of different types in a single expression. For example, the following code will not work:
Yarn Spinner provides built-in functions for converting between certain types:
The string function converts values of any type into a string.
The number function converts values of any type into a number (if it can be interpreted as one.)
The bool function converts values of any type into a boolean value (if it can be interpreted as one.)
Yarn Spinner supports the following logical operators. Most of these have multiple ways being written:
Equality: eq or is or ==
Inequality: neq or !
Greater than: gt or >
Less than: lt or <
Less than or equal to: lte or <=
Greater than or equal to: gte or >=
Boolean 'or'': or or ||
Boolean 'xor': xor or ^
Boolean 'not': not or !
Boolean 'and': and or &&
Addition: +
Subtraction: -
Multiplication: *
Division: /
Truncating Remainder Division: %
Brackets: ( to open the brackets and ) to close them.
Yarn Spinner follows a fairly standard order of operations, and falls back to using left to right when operators are of equivalent priority.
The order of operations is as follows:
Brackets
Boolean Negation
Multiplication, Division, and Truncating Remainder Division
Addition, Subtraction
Less than or equals, Greater than or equals, Less than, Greater than
Equality, Inequality
Boolean AND, Boolean OR, Boolean XOR
To show the contents of a variable, you put it inside braces ({ }) inside a line. The value of that variable will appear in its place.
For example:
Yarn Spinner doesn’t manage the storage of information in variables itself. Instead, your game provides a variable storage object to Yarn Spinner before you start running dialogue.
When Yarn Spinner needs to know the value of a variable, it will ask the variable storage object you’ve given it. When Yarn Spinner wants to set the value of a variable, it will provide the value and the name of the variable. In this way, your game has control over how data is stored.
Yarn Spinner is a tool for writers. In this section, you'll learn the syntax of Yarn, and learn how to write Yarn scripts for use in your game. You'll also learn how to use the various tools that are available for creating your content.
You'll need an editor before you can write Yarn scripts, so we recommend checking out before going too far.
In Yarn Spinner, you can send instructions to your game through commands. Commands look like this:
Commands are sent to your game's , just like lines and options are. Commands are not shown to the player directly; instead, they're used for things like stage directions.
Yarn Spinner comes with some built-in commands; however, to get the most usefulness out of them, you'll want to that make your game do what you need to.
There are two built-in commands in Yarn Spinner: wait, and stop.
waitThe wait command pauses the dialogue for a specified number of seconds, and then resumes. You can use integers (whole numbers), or decimals.
stopThe stop command immediately ends the dialogue, as though the game had reached the end of a node. Use this if you need to leave a conversation in the middle of an if statement, or a shortcut option.
Markup allows you to add attributes into your text, like [a]hello[/a]. These attributes can be used by your game to do things like change the formatting of the text, add animations, and more.
When text is parsed, the tags are removed from the text, and you receive information about the range of the plain text that the attributes apply to.
Attributes apply to ranges of text:
Yarn Spinner will take this text, and produce two things: the plain text, and a collection of attributes. The plain text is the text without any markers; in this example it will be:
Attributes represent ranges of the plain text that have additional information. They contain a position, a length, and their name, as well as their properties.
In this example, a single attribute will be generated, with a position of 4, a length of 5, and a name of "wave".
Attributes are opened like [this], and closed like [/this].
Attributes can overlap:
You can put multiple attributes inside each other. For example:
You can close an attribute in any order you like. For example, this has the same meaning as the previous example:
Attributes can self-close:
A self-closing attribute has a length of zero.
The marker [/] is the close-all marker. It closes all currently open attributes. For example:
Attributes can have properties:
This attribute 'wave' has a property called 'size', which has an integer value of 2.
Attributes can have short-hand properies, like so:
This is the same as saying this:
This attribute 'wave' has a property called 'wave', which has an integer value of 2. The name of the attribute is taken from the first property.
Properties can be any of the following types:
Integers
Floats
'true' or 'false'
Strings
Single words without quote marks are parsed as strings. For example, the two following lines are identical:
If a self-closing attribute has white-space before it, or it's at the start of the line, then it will trim a single whitespace after it. This means that the following text produces a plain text of "A B":
If you don't want to trim whitespace, add a property trimwhitespace, set to false:
You may want to show text containing the [ and ] characters to your player. To prevent the markup parser from treating as special characters, you can escape them. Text that has been escaped will be treated as plain text, and will not be interpreted by the parser.
There are two ways to escape your markup: escaping single characters, and using the nomarkup attribute.
[ and ] charactersIf you need to escape a single square bracket character, put a backslash \ in front of it:
This will appear to the player as:
The backslash will not appear in the text.
If you need to show a blackslash in your text, use two blackslashes:
This will appear as:
nomarkup AttributeIf you want to escape a longer run of text, or if you have many square brackets, escaping a single character at a time can be cumbersome. In these cases, you may want to escape an entire region of text, using the nomarkup attribute. This attribute makes the parser ignore any markup characters inside it.
If you want to include characters like [ and ], wrap them in the nomarkup attribute:
This will appear as:
character AttributeThe character attribute is used to mark the part of the line that identifies the character that's speaking.
Yarn Spinner will attempt to add this character for you, by looking for character names in lines that look like this:
The markup parser will mark everything from the start of the line up to the first : (and any trailing whitespace after it) with the character attribute. This attribute has a property, name, which contains the text from the start of the line up to the :. If a : isn't present, or a character attribute has been added in markup, it won't be added.
This means that the example above is treated the same as this:
You can use this to trim out the character names from lines in your game.
Certain attributes in Yarn Spinner's markup are "replacement" markers, which Yarn Spinner uses to insert or replace text based on the value of a variable. There are three built-in replacement markers:
The select marker uses the value of a variable to choose an outcome.
The plural marker uses the value of a number to decide on the plural class for that number.
The ordinal marker uses the value of a number to decide on the ordinal class for that number.
All three of these markers have a property called value, and use this to decide what text should be used in the line.
selectThe select marker is the simplest of the built-in replacement markers. It takes the value of the value property, and uses that to choose a replacement.
It's especially useful for when you need to insert a gendered pronoun in a line:
plural and ordinalThe plural and ordinal markers take a number in its value property, and use that to determine the plural or ordinal number class of that value.
Different languages have different rules for how numbers are pluralised.
In many languages, the term you use to refer to a thing depends on the the number of that thing. This is known as a plural class: in English, you can have one apple, but many apples, and you have have one mouse, but many mice.
However, the rules vary significantly across different languages. English has two: "single", and "other". However, for example, Polish has multiple.
In English, you say "one apple, two apples, five apples".
In Polish, you say "jedno jabłko, dwa jabłka, pięć jabłek".
Notice how the Polish word for "apple", "jabłko", takes multiple forms as the number changes, whereas it takes two forms in English.
In Yarn Spinner, individual lines are replaced depending on the user's locale, but the logic surround them is not. This means that, if you want to be able to translate your game into multiple languages, you can't write Yarn code like this:
If you did it this way, the logic would only work for languages that have the same rules for plurals as English. (There are several of them that do, but far more that don't.)
Complicating this further, there are two main kinds of plural classes: cardinal plural classes, and ordinal plural classes.
Cardinal plural classes are the kind we just saw (for example, "one apple, two apples").
Ordinal plural classes refer to the positioning of a thing; in English, ordinal numbers are things like "1st, 2nd, 3rd."
As with cardinal plural classes, different languages have different ordinal plural classes.
plural and ordinalYarn Spinner is able to take a number and the user's current locale, and determine the correct cardinal or ordinal plural class of that number, for that locale. You can then use the plural class to decide on what text to show.
plural and ordinal have a property called value, just like select. They then have a property for each of the current locale's plural classes. These can be:
one
two
few
many
other
The two markers differ based on what kind of plural class they work with:
plural selects a number's cardinal plural class.
ordinal selects a number's ordinal plural class.
Not every language uses every category; for example, English only uses "one" and "other" for cardinal plural classes.
For each of these properties, you provide the text that should appear.
For example:
You can include the actual value in the resulting text by using the % character. This character will be replaced with the value provided to the value property:
The ordinal marker works similarly, but uses the ordinal plural class:
Now that you know how to work with , , and , there's one last part of the Yarn language to learn about: commands.
The specifics of how variables need to be stored will vary depending on what game engine you're using Yarn Spinner in. To learn more about variable storage in Unity, see .
You can create your own commands, so that your scripts can send directions to your game. For more information on how to create them in Unity games, see .
Number
Any whole or decimal number
1, 2.5, 3468900, -500
String
Any sequence of letters, numbers and other characters, enclosed in quotes.
"Hello", "✓", "A whole sentence."
Boolean
Either the value true or the value false.
true, false
Quickly get started with a simple scene.
Want to use Yarn Spinner in a new scene right away? Follow these steps.
Create a new empty Unity project, by following the instructions in the Unity manual.
Install Yarn Spinner into the project, by following the instructions in Installation for Unity.
Add a Dialogue System to the scene:, by opening the GameObject menu and choosing Yarn Spinner -> Dialogue System.
Create a new Yarn script, by opening the Assets menu and choosing Create -> Yarn Spinner -> Yarn Script. Name the new file HelloYarn.
Open the new Yarn script by double-clicking it.
Select all of the text in the file, and delete it.
Copy the text below, and paste it into the file.
You can learn about our recommended editor, Visual Studio Code with the official Yarn Spinner Extension at: Editing with VS Code.
Save the file and return to Unity.
Create a new Yarn Project that uses this script, by selecting the HelloYarn file, and clicking the Create New Yarn Project button in the Inspector. This will create a new Yarn Project called Project. Projects are collections of Yarn scripts that get compiled together, and can be used with a Dialogue Runner.
Make the Dialogue Runner use the Project by dragging the Project you just made into the Dialogue Runner's Yarn Project field.
Play the game by clicking the Play button at the top of the window. Your dialogue will appear!
Upgrading your Yarn Spinner 1.x scripts to Yarn Spinner 2.x is easy.
The Yarn Spinner Console (ysc) can upgrade your older .yarn scripts to the latest syntax.
The Yarn Spinner Console (ysc) is in heavy development, and is likely to have its own complete section here, in the documentation, before long. Until then, find further initial documentation via its GitHub project.
To upgrade your scripts:
Install the version of Yarn Spinner Console that matches your version of Yarn Spinner. You can do this via the Yarn Spinner Console GitHub Project. Choose Releases in the sidebar, and download the appropriate binary for your platform. If you just want the latest release, you can find it here.
Run the upgrader on your scripts. To upgrade, you must run ysc on your command-line/terminal with the upgrade parameter and a path to a yarn file:
You can also run the upgrade on multiple scripts at once. To do this, you can pass in as many .yarn files as you want:
By default, ysc will replace the existing .yarn files you've passed in, as part of the upgrade. If you don't want it to do this, either make sure you have a backup, or pass in the --output-directory option, after the upgrade parameter. For example:
Yarn Spinner for Unity is the set of components and scripts that make Yarn Spinner work inside a Unity project.
In this section, you’ll learn how to install, set up, and work with Yarn Spinner for Unity.
Yarn Spinner for Unity v2.4 works with Unity version 2021.3 and newer.
A tag is a piece of information that you can add to content in Yarn Spinner that adds additional context or detail about that content.
There are two places you can add tags in Yarn scripts: you can add them to nodes, and you can add them to lines. Tags aren't shown to the user; instead, they're used by your game, or by Yarn Spinner itself.
Tags can be added to the end of lines and options. Tags on lines start with a hash symbol (#), and cannot contain spaces. You can add as many tags as you like to line, but they must all be on the same line in the script.
Here's an example of a line with two tags:
Tags that you add to a line can be accessed from your game. The way that you access them depends on your game engine. For example, to access them in a Unity game, you use the LocalizedLine.Metadata property.
Some tags are used by Yarn Spinner itself, while all others are used by your own code, so it's up to you what content they should have, and how to handle them.
Certain tags are used internally by Yarn Spinner, or are added for you if they don't exist.
#lastlineThe Yarn Spinner compiler adds a #lastline tag to every line that comes just before a set of options.
For example, the following excerpt:
is treated as though it had been written as:
In a Unity game, you can use this tag in a custom Dialogue View to be notified ahead of time when the player is about to be shown options.
The #lastline tag will not be automatically added if there is any content, such as an if statement or a command, between the line and some options. In these situations, you may wish to manually add the tag yourself.
#lineThe #line tag uniquely identifies a single line or option across all of your game's dialogue. This is used to identify lines for localisation. Every line's #line tag must be unique. If a line or option doesn't have a #line tag, it will be automatically added for you.
Here's an example of some Yarn script with #line tags:
For more details (including what the tag should look like), see Adding Line IDs.
Nodes can also have tags, which you can use to add labels that describe the node.
Node tags they work a bit differently than line tags: they are defined in the header with the tags key, and they don't have to begin with a hash symbol (#).
Here's an example of a node with two tags:
You can access the tags on a node via the Dialogue object's GetTagsForNode method.
The metadata of a line is only composed of tags. Because of this, you may find that the Yarn Spinner code and documentation refer to line tags and line metadata interchangeably.
Nodes can have other metadata in their headers. This metadata isn't exposed through the API, which means it's mostly used to store additional information for whoever is writing the Yarn dialogue or for editors to make use of.
However, currently there is one header that defines specific behavior within the Yarn Spinner compiler: the tracking header.
tracking headerNodes can track whether they have already been visited during the game. For this to work, the Yarn Spinner compiler needs to add some special code to the node. To avoid creating this code for nodes that don't need it, the compiler only adds this code if it finds a call to the visited() function with the node name in it.
In some cases, you may need the compiler to add this special code to a node even if no corresponding visited() call exists. To direct the compiler to do this, include the tracking header with the value of always:
Additionally, using a value of never instructs the compiler to never add this special code to the node. If you use the visited function with a node set to never use tracking, it will always return false.
For more information on visit tracking, see the documentation for Functions.
Tags and metadata may seem very complicated at first, and their uses may not be clear. The following example use cases explain how they can be used in your game. Keep in mind that this is not an exhaustive list of use cases.
Yarn provides markup to let you change attributes for specific parts of a line. In case most of your attributes apply to entire lines (for example, the color of a line), it may be easier to just use tags instead.
The #lastline tag can be used to display the last line of dialogue along with any options. This is handled within your code by checking if a line has the #lastline tag, and if it does, storing it before continuing with the execution of the Yarn dialogue.
Since metadata isn't shown directly to the player, you can use metadata for any internal workflows or tooling. For example, instead of tracking lines that need to be revised outside the Yarn files (which could lead to syncing problems), you could add line tags (such as #needsrevision) to the appropriate lines directly in the Yarn files, and process these lines as part of an internal tool or workflow. The Unity integration automatically generates a CSV file with all lines that contain metadata, making this super easy!
As referenced before, the Yarn Spinner integration for Unity uses line tags to link localised dialogue lines. This is better explained in the Localization and Assets section.
Aside from that, every piece of metadata can be used by translators and adapters to help them understand how the text is being used, thus leading to better localised text.
Some games may require that certain lines of dialogue are displayed somewhere other than the dialogue window (for example, as flavor text for an item description, or in an item that acts as a log). Instead of manually duplicating these lines (which adds overhead during development and localisation), tags can be used along with code that checks for the tags and duplicates the lines while the game is running.
A function is a block of code that provides a value to your Yarn scripts, which you can use in if statements, or store in variables.
In Yarn Spinner scripts, functions perform two main kinds of task:
Functions let you get values that change over time, or that depend on other values. For example, the random function returns a different random number every time you call it.
Functions let you get data from your game back into your scripts.
You call a function inside an expression. For example:
Yarn Spinner comes with several built-in functions for you to use.
visited(string node_name)visited returns a boolean value of true if the node with the title of node_name has been entered and exited at least once before, otherwise returns false. Will return false if node_name doesn't match a node in project.
visited_count(string node_name)visted_count returns a number value of the number of times the node with the title of node_name has been entered and exited, otherwise returns 0. Will return 0 if node_name doesn't match a node in project.
format_invariant(number n)format_invariant returns a string representation of n, formatted using the invariant culture. This is useful for embedding numbers in commands, where the command expects the number to be formatted using the invariant culture. For example, <<give_gold {$gold}>>, which might end up as give_gold 4,51 in German, but give_gold 4.51 in English, can now be <<give_gold {format_invariant($gold)}>>, which will always be give_gold 4.51.
random()random returns a random number between 0 and 1 each time you call it.
random_range(number a, number b)random_range returns a random number between a and b, inclusive.
dice(number sides)dice returns a random integer between 1 and sides, inclusive.
For example, dice(6) returns a number between 1 and 6, just like rolling a six-sided die.
round(number n)round rounds n to the nearest integer.
round_places(number n, number places)round_places rounds n to the nearest number with places decimal points.
floor(number n)floor rounds n down to the nearest integer, towards negative infinity.
ceil(number n)ceil rounds n up to the nearest integer, towards positive infinity.
inc(number n)inc rounds n up to the nearest integer. If n is already an integer, inc returns n+1.
dec(number n)dec rounds n down to the nearest integer. If n is already an integer, dec returns n-1.
decimal(number n)decimal returns the decimal portion of n. This will always be a number between 0 and 1. For example, decimal(4.51) will return 0.51.
int(number n)int rounds n down to the nearest integer, towards zero.
This is different to floor, because floor rounds to negative infinity.
You can define your own custom functions in Yarn Spinner. For more information, see # Defining Commands and Functions .
Functions are not intended to be a way for you to send instructions to your game. For that purpose, you should use commands.
In particular, functions are not guaranteed to be called in the same order as they appear in your code, or even be called at all if Yarn Spinner believes the result can be cached. As much as possible, custom functions should be pure functions, and have no side effects besides returning a value based on parameters.
Learn about Dialogue Views, which present dialogue content to the user.
A Dialogue View is a kind of component that receives content from a Dialogue Runner, and presents it to the player. Dialogue Views are how the player sees your game's lines of dialogue, and how they select choices in the dialogue.
A Dialogue Runner can have multiple Dialogue Views. For example, you might have one Dialogue View that's designed to display lines of dialogue, and another that's in charge of displaying options to the player.
If you want a custom dialogue view that can display Night in the Woods-style speech bubbles, or a Mass Effect style dialogue wheel, then check out our premium Unity Add-Ons. They're a great way to support the project, and get some fancy dialogue views into your game. ❤️
Because every game's needs are different, a Dialogue View is designed to be extremely customisable, and you can create your own custom dialogue views to suit the needs of your game.
However, because there are common patterns of how games work with dialogue, Yarn Spinner for Unity comes with some pre-built Dialogue Views that handle common use cases:
Line View is a Dialogue View that displays a single line of dialogue in a text box that's inside a canvas, and shows a button that the user can click to proceed.
Option List View is a Dialogue View that displays a collection of options in a list.
Learn about the Unity components that you use when working with Yarn Spinner for Unity.
Yarn Spinner for Unity is made up of a number of components. The most important of these are the Dialogue Runner, which loads and runs your scripts, and the Dialogue Views that show content to your player.
In this section, you'll learn about how to work with each of these.
Learn about the Dialogue Runner, which runs the contents of your Yarn Scripts and delivers lines, options and commands to your game.
The Dialogue Runner is the bridge between the dialogue that you've written in your Yarn scripts and the other components of your game. It's a component that's responsible for loading, running and managing the contents of a Yarn Project, and for delivering the content of your Yarn scripts to the other parts of your game, such as your user interface.
Setting up a Dialogue Runner is the first step in adding dialogue to your game. To use a Dialogue Runner, you add it to a game object in your scene, connect it to Dialogue Views, and provide it with a Yarn Project to run.
When you want to start running the dialogue in your game, you call the Dialogue Runner's StartDialogue method. When you do this, the Dialogue Runner will begin delivering lines, options and commands to its Dialogue Views.
The Dialogue Runner is designed to work with other components of Yarn Spinner for Unity:
The contents of your dialogue are delivered to your Dialogue Views.
The values of variables are stored and retrieved using the Dialogue Runner's Variable Storage.
The content that users should see - that is, the text in their current language, voice over clips, and other assets - are retrieved using the Dialogue Runner's Line Provider.
The bare-bones minimum that a Dialogue Runner needs in order to work is a Yarn Project and at least one Dialogue View. If you don't set up a Variable Storage or a Line Provider, the Dialogue Runner will use temporary placeholders.
If your game is using the Unity Localization system, your Dialogue Runner must use a Unity Localised Line Provider.
Yarn Project
Variable Storage
Line Provider
Dialogue Views
Start Automatically
Start Node
If Start Automatically is turned on, the Dialogue Runner will start running this node when the scene starts. (If your Yarn Project does not contain a node with this name, an error will be reported.)
Run Selected Options as Lines
If this is turned on, when the user chooses an option, the Dialogue Runner will run the selected option as if it were a Line.
Verbose Logging
If this is turned on, the Dialogue Runner will log information about the state of each line to the Console as it's run.
On Node Start
A Unity Event that's fired when the Dialogue Runner begins running a new node. This may be fired multiple times during a dialogue run.
On Node Complete
A Unity Event that's fired when the Dialogue Runner reaches the end of a node. This may be fired multiple times during a dialogue run.
On Dialogue Complete
A Unity Event that's fired when the Dialogue Runner stops running dialogue.
On Command
This page shows you how to install Yarn Spinner for Unity, the Unity integration for running Yarn and Yarn Spinner scripts in your Unity-based games.
You can download and install Yarn Spinner for Unity in four different ways:
buy Yarn Spinner for Unity from our Itch.io store, download it, and add the package to your project from the .unitypackage
buy Yarn Spinner from the Unity Asset Store, download it, and install it via Unity
install Yarn Spinner for Unity via the Unity Package Manager
install Yarn Spinner for Unity from GitHub
Yarn Spinner is an open source project. You can directly support the Yarn Spinner Team by purchasing Yarn Spinner from Itch or the Unity Asset Store, but it will always also be available for free. To support the continued development of Yarn Spinner, purchasing Yarn Spinner for Unity from one of the storefronts. This is the best way to directly support the Yarn Spinner team.
First, visit the Yarn Spinner Itch.io Store, and click the Buy Now button, and complete the checkout process.
Once you've purchased Yarn Spinner, you'll find a Download button at the top of the page:
The download button will take you the following page, where you can download the Yarn Spinner for Unity .unitypackage:
Once you've downloaded the .unitypackage, with the Unity project you want to use it in open and ready to go, double click it. Unity will then allow you to import the package into your project:
First, visit the Unity Asset Store page for Yarn Spinner for Unity, and add it to your cart, and complete your purchase while logged into the same Unity account you use to activate Unity.
Once you've purchased Yarn Spinner for Unity, you'll find the Add to Cart button replaced by an Open in Unity button. Click this button to launch Unity, and the Package Manager will locate your purchased package:
Once the Package Manager has located the package, you can use the Download button to fetch it:
Once Yarn Spinner for Unity has downloaded, you can use the Import button to start the process of adding it to your project:
This will trigger the Import Unity Package workflow, where you can use the Import button to add the Yarn Spinner for Unity package to your project:
And with that, you're ready to use Yarn Spinner! You might also want to download and import the Yarn Spinner for Unity Samples as a .unitypackage, from here.
You can review Unity's documentation for using the Asset Store for further guidance on working with purchased packages.
If you would prefer to download and install Yarn Spinner for Unity outside of Itch or the Unity Asset Store, we provide the following methods:
Once you've installed Yarn Spinner, you're ready to start using it!
There are two important kinds of files you'll use when working with Yarn Spinner for Unity:
Yarn Projects are files that link your Yarn Scripts together, and are used by the Dialogue Runner.
Yarn Scripts are files that contain your written dialogue.
Learn about Yarn scripts, which are the assets that contain the dialogue you write.
A Yarn script is a text file containing your dialogue.
Yarn scripts need to be part of a Yarn Project in order to be used in your game.
To create a new Yarn script in Unity, follow these steps:
Open the Assets menu, and choose Yarn Spinner -> Yarn Script.
Unity will create a new file. Type in a name for the file, and press return.
The new file that you've just created will contain a single node, which has the same name as the file.
Creating a Yarn Script in Unity is exactly the same as creating a .yarn file externally (i.e. in macOS Finder or Windows Explorer), and dragging it into the Assets folder of your Unity project, or directly into the Project pane (where the new Yarn Script we created through the process above appeared) in Unity.
To edit a Yarn script, double-click it in Unity. The file will open in your editor. When you save your changes and return to Unity, it will be re-compiled.
You can learn about our recommended editor, Visual Studio Code with the official Yarn Spinner Extension at: Editing with VS Code.
Learn about Yarn Projects, which group your scripts together for use in a Dialogue Runner.
A Yarn Project is a file that links multiple Yarn scripts together. Yarn projects are how Dialogue Runners work with your content.
If you are upgrading your version of Yarn Spinner from version 2.2 or earlier, you will need to upgrade your Yarn Project. See Upgrading Yarn Projects to learn how to do this.
To create a new Yarn Project, follow these steps:
Open the Assets menu, and choose Yarn Spinner -> Yarn Project.
Unity will create a new file. Type in a name for the file, and press return.
On their own, a Yarn Project doesn't do anything. In order to be useful, you need to add Yarn scripts to it.
Yarn Projects include all Yarn Scripts that the project finds in the Source Files directory. By default, that means all Yarn Scripts in the same directory as the Yarn Project, and all of that directory's children.
When you add a Yarn Script to the same folder as a Yarn Project, it will automatically be included in the Yarn Project. When you make changes to the script, the Yarn Project will automatically be re-imported.
You can change the locations that a Yarn Project looks for Yarn Scripts by modifying the Source Files setting. Each entry in the Source Files setting is a search pattern.
*
any filename
"*.yarn" will find "One.yarn" and "Two.yarn".
**/*
any path, including subdirectories
"**/*.yarn" will find "One.yarn" and "Subfolder/Two.yarn".
..
the parent folder
"../*.yarn" will find "One.yarn" in the parent folder.
You can add as many entries to the Source Files field as you like. If a file is matched by multiple patterns, it will only be included once.
A Yarn script can be included in more than one Yarn Project.
You can create a new Yarn Project from a script. To do this, follow these steps:
Select the Yarn script in the Project pane.
In the Inspector, click the Create New Yarn Project button.
Clicking this button does two things:
A new Yarn Project will be created next to the Yarn script.
The new Yarn Project will include the Yarn script you created it from in its list of source scripts.
A Yarn Project's inspector shows information about every variable that are used in the Yarn scripts. This section of the Inspector shows the name, type, description, and default value of each variable.
The Inspector will show information about every variable in the project. If you use a declare statement to declare a variable, you can control the initial value of a variable, as well as its description. If you don't declare a variable, Yarn Spinner will attempt to figure the variable's type out based on how it's used, and won't be able to provide a description.
When you write a Yarn script, you write it in a specific human language. This is referred to as the 'base' language of the script. It's called the base language because it's the one you start with, and the one you translate into other languages.
Unless you change it to something else, Yarn Spinner will set the base language to your computer's current locale.
You can set the base language of a Yarn Project in the Inspector by changing the Base Language setting.
If you want to translate your scripts into another language, or if you want to associate each line with assets (like voice over audio clips), you create a new Localisation. To learn about this process, see Adding Localizations and Assets to Projects.
Yarn Projects are used by Dialogue Runners. When a Dialogue Runner is told to start running dialogue, it reads it from the Yarn Project it's been provided.
If you try to start a Dialogue Runner and it doesn't have a Yarn Project, or the Yarn Project doesn't have any Yarn scripts, or if any of the Yarn scripts contain an error, the Dialogue Runner won't be able to run.
Source Scripts
The list of places that this Yarn Project looks for Yarn Scripts.
Base Language
The language that the Yarn Scripts are written in.
Localisations
A mapping of languages to string tables and associated assets.
Use Addressable Assets
This checkbox will only appear if the Addressable Assets package is installed in your project, and if the project is not using the Unity Localisation System.
Use Unity Localisation System
If this is turned on, the Yarn Project will use the Unity Localisation System to store line data in.
This checkbox will only appear if the Localisation package is installed in your project.
Unity Localisation String Table
The String Table Collection that the Yarn Project uses. When the project is imported or reimported, this String Table will be filled with line content that comes from the project's Yarn Scripts.
This field will only appear if project is using the Unity Localisation system.
Export Strings as CSV
Update Existing Strings Files
When you click this button, all .csv strings files that are configured in the Languages to Source Assets list will be updated with any lines that have been added, modified or deleted since the strings file was created.
Add Line Tags to Scripts
If you are upgrading your version of Yarn Spinner from version 2.2 or earlier, you will need to upgrade your Yarn Project. To do this, select the Yarn Project, and click Upgrade Yarn Project.
After upgrading your Yarn Project, you will need to set up any localisations you had previously configured on your project. Follow the instructions in Built-In Localisation System or Unity Localisation, depending on what your game is using.
You will also need to either move all of your Yarn Scripts into the same folder as the Yarn Project, or update the Yarn Project's Source Files setting to tell the Yarn Project where to find your scripts.
Watch a video where Yarn Spinner developer Jon Manning walks you through upgrading a Yarn Project:
Variable Storage components are responsible for storing and retrieving the values of variables in your Yarn scripts. When a Yarn script needs to get the value of a variable, it asks the Variable Storage for it; when a Yarn script sets the value of a variable, the Variable Storage is given the value.
Each game has different requirements for how variables are stored, which means that Yarn Spinner doesn't make any assumptions how the information is actually stored on disk. Instead, you can create your own custom Variable Storage script that implements the methods that Yarn Spinner needs.
If you don't have a game save system, you can use the component. This is a simple Variable Storage component that's built into Yarn Spinner.
The In-Memory Variable Storage stores everything in memory; when the game ends, all variables that have been stored are erased.
If you don't connect a Variable Storage to your Dialogue Runner, it will create an In-Memory Variable Storage when the game starts, and use that.
Learn how to create Dialogue Views that are designed for the specific needs of your game.
While the Line View and Options List View are useful for lots of situations, your game might need to display lines and options in specific ways. In these situations, you can write your own custom Dialogue View, and handle the presentation of lines and options in ways that are entirely in your control.
To create a Dialogue View, you subclass the class, and add it as a component to a game object in your scene. You can then add this game object to the Dialogue Views list on your scene's Dialogue Runner.
If you just want to skip straight to the sample code, take a look at the in the Yarn Spinner examples repository.
On its own, an empty subclass of DialogueViewBase will not do anything useful. To make it display lines and options, you'll need to implement certain methods.
To understand how to create a custom Dialogue View, it's useful to understand how the works with content.
Yarn Spinner scripts deal in three different kinds of content: lines, options, and commands. Of these, only the first two - lines and options - are content that need to be shown directly to the player.
When the Dialogue Runner encounters lines or options, it first needs to determine the specific content the user needs to see. Once it has this, it sends the content to each of its Dialogue Views.
Your scene can have multiple Dialogue Views, and they can all do different things. It can be useful to create, for example, a Dialogue View that handles lines, and a separate Dialogue View that handles options.
Lines and options are represented in compiled Yarn scripts as line IDs. A line ID is a unique identifier for the text of a line or an option. When Yarn Spinner needs to show a line or option to the user, it asks its to provide it with a object. This object contains the text of the line or option, in the user's current locale.
As discussed in , you can have different kinds of Line Providers; for example, the creates LocalizedLine objects that just contain text, while creates objects that also contain an .
When displaying a collection of options, each individual option has its own LocalizedLine.
Once a LocalizedLine has been created, the Dialogue Runner has everything that it needs to show content to the user. The next steps vary depending on whether it's showing a line or an option.
In Dialogue Views, a line is presented when the user has received the entire line, and is ready to move on to the next line. The practical outcome of what this means depends on the Dialogue View itself; for example, a Dialogue View that plays voice-over audio might finish presenting when all of the audio has played, while a Dialogue View that gradually reveals the text of a line might finish presenting when all of the text is visible.
The Dialogue Runner will wait until all Dialogue Views report that they've finished presenting the line. Once this happens, it moves on to the next part of the dialogue.
If you're making a game where you want the dialogue to pause until the user gives a signal to proceed, your Dialogue View can pause the dialogue by not calling the completion handler until it receives the signal. Because the Dialogue Runner will wait until all Dialogue Views report that they're done, the dialogue will wait until your view tells it to continue.
InterruptLine is very similar to RunLine, in that it receives a line to present and a completion handler to call when the presentation is complete. However, while RunLine is expected to present the line at its own pace, InterruptLine is a signal to finish the presentation as quickly as possible.
As before, the actual details of this depend on the Line View. To continue the examples from before, a Dialogue View that plays voice-over audio might fade out the audio over a short period of time, or even cut off playback immediately; a Dialogue View that's gradually revealing text might reveal the remaining text all at once, or rapidly reveal the remaining text.
When a Dialogue View receives a call to InterruptLine, it should not call the completion handler that it received from the call to RunLine. Calls to interrupt a line supersede calls to run a line.
Any Dialogue View may request that a line be interrupted. If multiple Dialogue Views request it, only the first request does anything.
When the last Dialogue View reports that its presentation is complete, either because RunLine finished its presentation, or because InterruptLine was called and it quickly finished its presentation, it needs to tell the dialogue views to get rid of the line, and potentially prepare for more content.
As before, the details of how a line is dismissed vary with what the Dialogue View actually does. A Dialogue View that plays voice-over audio may not need to do anything to dismiss a line, because the playback has already finished; a Dialogue View that shows line text on screen might need to hide the text, possibly with an animation.
When the last Dialogue View reports that it has finished dismissing its line, the Dialogue Runner continues running the script.
Options are slightly different to lines, in that they rely on receiving some kind of user input before the dialogue can continue: the Dialogue Runner needs to know which option was selected.
When the Dialogue Runner delivers options to its Dialogue Views, it expects exactly one of them to call the completion handler that RunOptions receives.
If none of them call it, then the Dialogue Runner will never receive the option that was selected (and will wait for it forever.)
If more than one of them call it, the Dialogue Runner will throw an error.
(In most situations, you will generally only have one Dialogue View in your scene that handles options. If you have more than one, then you will need to control which one of them will call their completion handler.)
Dialogue Runners can use multiple Dialogue Views. This is actually recommended, because it makes it easier to separate the code for handling lines, from that of running options.
To create a Dialogue View that shows lines, implement RunLine, InterruptLine and DismissLine.
To create a Dialogue View that shows options, implement RunOptions.
To create a Dialogue View that supports both, implement all four.
During gameplay, your user may wish signal that they want to advance the dialogue: that is, they want to proceed to the next line, or they want the current line to be presented more quickly.
For example, in several text-based RPG games, dialogue is delivered as a text box, one letter at a time; when it's all delivered, the user can press the A button (to choose an arbitrary example) to proceed.
If, however, you press the A button while the text is still appearing, all of the text appears all at once (as though we'd jumped ahead).
Alternatively, if you pressed the B button while the text was still appearing, the line would be skipped, the dialogue would move to the next line.
Yarn Spinner will automatically add certain tags to lines. For example, the #lastline tag is automatically added to any line that's immediately followed by options, which allows your dialogue view to change its behaviour when options are about to appear.
Learn about Line View, a Dialogue View that displays a single line of dialogue on a Canvas.
Line View is a that displays a single line of dialogue inside a Unity UI canvas. When the Dialogue Runner encounters a line in your Yarn Script, the Line View will display it, wait for the user to indicate they're done reading it, and then dismiss it.
Line View only displays lines, and doesn't display options. You can use an additional Dialogue View to handle these, like an or a custom Dialogue View of your own.
If a line contains a character's name at the start, Line View can be configured to show the name in a separate text view to the line text itself. If the Character Name Text property is connected to a TextMeshPro Text object, then the character's name will appear in this object.
If you don't attach a Text object to the Character Name Text property, you can choose to either show the character name as part of the line (that is, in the Line Text view), or don't show it all.
Line View can be configured to use visual effects when presenting lines.
You can choose to have the Line View fade in when a line appears, and fade out when the line is dismissed.
You can choose to have the text of the line appear, one letter at a time, with a "typewriter" effect.
The Dialogue Runner will automatically proceed to the next piece of content once all dialogue views have reported that they've finished with a line.
If the 'Auto Advance' option on a Line View is turned on, then the Line View will signal that it's done with a line as soon as all visual effects have finished.
If 'Auto Advance' is turned off, then the Line View will not signal that it's done when the effects have finished, and the line's delivery will stop. To make the Line View finish up, you can call the method, which tells the Line View that the user wants to proceed. The built-in Dialogue System prefab comes set up with a 'Continue' button that calls this method. You can also call this method from code, or use the component to trigger it based on user input.
Learn about Options View, a component used to display an option in an Options List View.
An Option View is an object that the uses when presenting options. When the delivers options to your game, Options List View will create an Option View for each option that could be selected.
When the Option View is pressed, the Options List View will notify the Dialogue Runner of the user's selection.
Learn about Options List View, a Dialogue View that displays a list dialogue options.
Options List View is a that presents a list of options in a list.
When this view receives options from the Dialogue Runner, it creates an instance of the prefab you specify in the Option View Prefab property, and adds it as a child of the options list view.
Options List View only displays options, and doesn't display lines. You can use an additional Dialogue View to handle these, like a or a custom Dialogue View of your own.
Learn about Dialogue Advance Input, a component that can signal to a Dialogue View that the user wants to proceed to the next piece of content.
Dialogue Advance Input is a component that receives user input, and uses it to signal to a Dialogue View that the user wants to advance to the next piece of content. Dialogue Advance Input is generally used to implement a 'press spacebar to continue / skip' mechanic.
Dialogue Advance Input isn't a Line View itself, but it's designed to work with other line views, to interrupt and control the flow of dialogue.
To use a Dialogue Advance Input, create a new game object, and attach a Dialogue Advance Input component to it using the Add Component button.
You can control what specific input the component is looking for by changing the Continue Action Type setting:
If you set the Continue Action Type to Key Code, you can select a key on the keyboard that will continue to the next line on press.
If you set the Continue Action Type to Input Action, you can create an Action from an input device (such as from a keyboard, gamepad, or other method).
If you set the Continue action Type to Input Action from Asset, you can attach an Action from an Input Actions asset that you've set up elsewhere.
If you want to use Input Actions, your project will need to be set up to use the new .
The that this Dialogue Runner is running.
The to store and retrieve variable data from. If you do not set this, the Dialogue Runner will create an for you at runtime.
The to use to get user-facing content for each line. If you do not set this, the Dialogue Runner will create a for you at runtime.
The to send lines, options and commands to.
If this is turned on, the Dialogue Runner will start running the node named Start Node when the scene starts. If this is not turned on, you will need to call to start running.
A Unity Event that's fired when a Command is encountered. This will only be called if no other part of the system has already handled the command, such as command handlers registered via or .
This list will only appear if the project is not using the Unity Localisation system. See for more information.
If this is turned on, the Yarn Project will be set up to tell other parts of the game that localised assets like audio files should be fetched using the system.
When you click this button, all of the lines in the Yarn Scripts that this project uses will be written to a .csv file, which can be translated to other languages. See for more information.
This checkbox will only appear if the project is not usin the Unity Localisation system. See for more information.
When you click this button, any line of dialogue in the Source Scripts list that doesn't have a #line: tag will have one added. See for more information.
When Yarn Spinner encounters a line of dialogue, it calls the RunLine method on each Dialogue View. This method takes two parameters: the first is the LocalizedLine that the Line Provider created, and the second is a that the Dialogue View should call when the line has finished being presented.
At any point during a line's presentation, a Dialogue View can interrupt the line. It does this by calling the method, which is a delegate that's set by its controlling Dialogue Runner. When this method is called, all Dialogue Views that have not yet finished their presentation receive a call to their method.
The Dialogue Runner does this by calling on all Dialogue Views. As with RunLine and InterruptLine before it, DismissLine receives a completion handler to call when it has finished dismissing the line.
To handle options, Dialogue Views implement the method. This method receives an array of objects, each of which represents an option that can be shown to the user, as well as a completion handler.
When this method is called, the Dialogue View uses the information contained within the DialogueOption objects to present the choices to the player, and then awaits user input. Once it knows which option was selected, it calls the completion handler, passing in the of the selected option.
All of the methods in are optional. If you don't implement a method, then the default implementation of that method is used instead; the default implementation either does nothing, or as close to nothing as it can while still working. For example, the default implementation of RunLine immediately signals that presentation is complete.
To handle this case, subclasses of DialogueViewBase may implement the method , which can be called by other parts of the game.
In most cases, it is generally appropriate for implementations of UserRequestedViewAdvancement to call the method, which tells the Dialogue Runner to interrupt the line (across all views) and to proceed to the next one. However, a Dialogue View may choose to perform other actions that deliver the line more quickly.
UserRequestedViewAdvancement can be called by any part of your code. Additionally, you may wish to use , which is a class that listens for user input, and when it receives it, calls UserRequestedViewAdvancement on a view you specify.
To access the on a line, you use the property on the objects you receive. It's up to your code to decide what to do with the tags themselves.
To demonstrate how a custom Dialogue View is put together, we've created , which demonstrates the above features and is heavily commented. For more information, see the code on .
DismissLineDialogueViewBaseUserRequestedViewAdvancementrequestInterruptDialogueAdvanceInputDialogue View
The Dialogue View that will be signalled when the user performs the continue action.
Continue Action Type
A drop-down list that selects how user input will be used to continue to the next line.
When set to None, the dialogue will not continue based on user input.
When set to Key Code, the dialogue will continue when the user presses the keyboard key specified in Continue Action Key Code.
When set to Input System Action, the dialogue will continue when the user performs the Action set up in Continue Action.
When set to Input System Action from Asset, the dialogue will continue when the user performs the Action specified by the Continue Action Reference field.
Continue Action Key Code
The keyboard key that the user should press to continue to the next line.
Continue Action
An Input Action that the user should perform to continue to the next line.
Continue Action Reference
An Input Action, stored inside an Input Actions asset, that the user should perform to continue to the next line.
DialogueViewBaseLocalizedLineCanvas Group
The Canvas Group that the Line View will control. The Canvas Group will be made active when the Line View is displaying a line, and inactive when not displaying a line.
Auto Advance
If this is turned on, the Line View will finish presenting the line, and then wait. This is useful for games where the user has control over the timing of lines of dialogue. If this is turned off, the Line View will signal to the Dialogue Runner that it's done showing the line once all animations are complete.
Hold Time
If Auto Advance is turned on, the Line View will wait this many seconds after all animations are complete before signalling that it's done showing the line. This option is only available when Auto Advance is turned on.
Line Text
A TextMeshPro Text object that the text of the line will be displayed in.
Use Fade Effect
If this is turned on, the Line View will fade the opacity of the Canvas Group from 0% to 100% opacity when lines appear, and fade back to 0% when lines are dismissed.
Fade In Time
The duration of the Fade effect when fading a new line in, in seconds. If this is zero, the line will appear immediately.
Fade Out Time
The duration of the Fade effect when fading a line out, in seconds. If this is zero, the line will disappear immediately.
Use Typewriter Effect
If this is turned on, the text of the line will appear one character at a time. This will take place after the Fade effect, if enabled.
On Character Typed
A Unity Event that's called every time the Typewriter effect displays new text.
Typewriter Effect Speed
The number of characters per second to display when performing a Typewrite effect. Larger values means that text will appear faster.
Character Name Text
A TextMeshPro Text object that will display the name of the character currently speaking the line.
Show Character Name In Line View
If this is turned on, lines that contain a character's name will display the name in the Line Text section. If it is turned off, character names will not be shown at all. This option is only available when Character Name Text is empty.
Continue Button
A game object that will be made active when the line has finished appearing. This is intended to be used for controlling the appearance of a button that the user can interact with to continue to the next line.
Text
A TextMeshPro text object that will display the text of the line.
Show Character Name
If this is turned on, the Text component will show any character name present in the option. If this is turned off, the character name will not be included.
Canvas Group
The Canvas Group that the Options List View will control. The Canvas Group will be made active when the Options List View is displaying options, and inactive when not displaying options.
Option View Prefab
A prefab containing an Option View. The Options List View will create an instance of this prefab for each option that needs to be displayed.
Last Line Text
A TextMeshPro Text object that will display the text of the last line that appeared before options appeared. If this is not set, or no line has run before options are shown, then this property will not be used.
Fade Time
The time, in seconds, that the Options List View will take to fade in. If this is zero, the Options List View will appear immediately.
Show Unavailable Options
If this is turned on, then any options whose line condition has failed will still appear to the user, but they won't be selectable. If this is off, then these options will not appear at all.
The In-Memory Variable Storage component is a Variable Storage component that stores all variables in memory. These variables are erased when the game stops.
The In-Memory Variable Storage component is intended to be a useful tool for getting started, and to be replaced with a custom variable storage that meets your game's needs.
However, if your game has no need to save and restore game state, then this class can be used in your final game, too.
Debug Text View
A Unity UI Text object that will display a summary of the variables that have been stored in this component. If this is not set, this property will not be used.
You can use this property to display a debug summary of your variables at run-time in your games.
Debug Variables
This area of the Inspector shows a summary of the variables. This works similarly to the Debug Text View property, but the summary is only ever shown in the Editor, and it doesn't require any setup.
Every game's data storage requirements are different. For this reason, Yarn Spinner is designed to make it straightforward to create your own custom component for managing how Yarn scripts store and load variables in ways that work with the other parts of your game.
Custom Variable Storage components are subclasses of the abstract class VariableStorageBehaviour. To implement your own, you need to implement the following methods:
For a complete tutorial on how to build an entirely custom variable storage system, see Yarn Variables and Custom Variable Storage.
Line Providers are components that are responsible for taking the Line objects that the Dialogue Runner produces, and fetches the appropriate localised content for that line. Line Providers produce LocalizedLine objects, which are sent to the Dialogue Runner's Dialogue Views.
When a Yarn script runs, the Dialogue Runner produces Line objects. These objects contain information about the line, but not the text of the line itself. This is because it's the responsibility of the game to load the user-facing parts of the line, including the text of the line in the player's current language setting, as well as any other assets that may be needed to present the line (such as audio files for voiceover.)
Yarn Spinner comes with three built-in types of line providers:
Text Line Provider is a Line Provider that fetches the text of a line, given a language to use.
Audio Line Provider is a Line Provider that fetches the text of a line as well as an Audio Clip, given languages to use.
Unity Localised Line provider is a Line Provider that fetches the text and any localised assets from Unity's Localization system.
If you don't set up a Line Provider for a Dialogue Runner, it will automatically create a Text Line Provider, and configure it to use the user's current language.
Audio Line Provider is a Line Provider that fetches localized text for a line of dialogue, as well as a localized AudioClip.
Audio Line Provider will automatically use Addressable Assets, if the Addressables package is installed in your Unity project and the Yarn Project is configured to use Addressable Assets.
Use this Line Provider if you are using the Built-In Localisation system. If you are using the Unity Localisation system, use the Unity Localised Line Provider instead.
Text Language Code
The language that the Audio Line Provider should use to fetch localised text for.
Audio Language
The language that the Audio Line Provider should use to fetch localised audio clips for.
Localization is the process of translating and adapting content to a specific language, region or culture.
Yarn scripts are written in human-readable language. This is generally a single language, and (most of the time) will be written in the language that your development team primarily speaks. The language that a Yarn project is written in is called the base language.
However, if you want your dialogue to be understood by people who don't speak this language, you will need to translate it. Yarn Spinner is designed to make it easy to extract the user-facing text of your dialogue into a strings file, which can then be translated into a different language, and then loaded at run-time. You can translate your project into as many languages as you'd like, and Yarn Spinner will handle it for you automatically.
Yarn Spinner is also designed around the idea that a line of dialogue may have assets associated with it. Most commonly, this means an audio file that contains an actor performing the line, so that it can be used in your game as a voice-over. These assets are also localisable.
I just want to add voiceover in a single language. Why do I need to localise, too?
The philosophy of Yarn Spinner's approach to localisation is: if you want your dialogue to be text-only, and in a single language, you don't need to do anything at all. If you want to do anything else, you will need to set up a localisation and manage it using Yarn Spinner's processes.
We've found that most users who want to start using Yarn Spinner want to quickly get dialogue on the screen, and don't want to do lots of work to get the basics going. That's why we make the simple use-case (text only, a single language) as easy to use as we can.
However, if you're building a game that's voice acted, it makes your life significantly easier if you build your systems with localisation in mind from the start. Additionally, if you have the resources to add voice-over to your project, you should also have the resources to translate your game to other languages (even if you only have voice-overs in a single language.)
To that end, we designed it so that voiceover is intimately tied to localisation, so that you have to at least start thinking about localisation at the start of the process.
Localisation: A set of information that describes where to find text and assets for a given language.
Base language: The language that your Yarn script files are written in.
Strings file: A text document that contains translated versions of Yarn lines.
Line ID: A unique code that identifies a line of dialogue or an option in the original source text.
Localised line: The text of a line of dialogue, in a particular locale.
Localised line asset: An asset (for example, an audio clip) that's associated for a particular line, in a particular locale. For example, an audio clip containing the voiceover for the line "Hello there", in German.
Line provider: A component that receives line IDs from the Dialogue Runner, and fetches the localised line and localised line assets (if present) for the player's preferred locale.
To localise your Yarn scripts, you specify the 'base language' that your scripts are written in. You then add unique line ID tags to each line that identify each line. Finally, the localisation system reads your tagged lines and fills the string table for your base language. You can then add additional translations for your lines to the string tables for other languages.
Every Yarn script is associated with a base language. By default, Yarn Spinner sets the base language to that of your current locale. For example, if your computer is set to use Australian English, then Yarn Spinner will use that as the base language.
The base language of a Yarn Script is controlled by the Yarn Project that it's a part of. You can change the language of your base localisation by changing the 'Base Language' setting on a Yarn Project.
In order to match different versions of a line, you need to add a line id to each line of dialogue. A line ID is a tag that appears at the end of a line that uniquely identifies a line of dialogue in your game.
Here's an example of a line of dialogue with a line tag:
In this example, the line of dialogue has a line ID of 1a64a5.
Yarn Spinner can add line IDs to your dialogue for you. To do this, select your Yarn Project, and click 'Add Line Tags to Scripts'. Yarn Spinner will re-write all of the script files, adding a line ID to any line that doesn't already have one.
You can't generate a strings file unless all of the lines in all of the scripts in the Yarn Project have a line ID.
Once you've added line IDs to your Yarn scripts, they're ready to be used in your game's localisation system. Yarn Spinner works with the Unity-provided Localization package, and can prepare your string tables and fetch content from those tables at run-time.
If you'd prefer to not use Unity's Localization package, Yarn Spinner also provides a built-in localisation system, which is described in Built Yarn Spinner localisation system
Learn about the Samples provided with Yarn Spinner for Unity.
To help learn the features, capabilities, and implementation techniques for Yarn Spinner, we provide a number of samples with Yarn Spinner for Unity:
Intro
Space
Sliced Views
Visual Novel
3D Speech Bubble
Phone Chat
Shot Reverse Shot
User Input and Yarn
Markup Palettes
Pausing the Typewriter
Minimal Dialogue Runner
The rest of this section looks at each of these.
Common questions and solutions for using Yarn Spinner in Unity.
Yarn Spinner doesn't do text rendering, you have to use existing Unity systems like TextMeshPro. Fortunately, TMP supports HTML-like rich text tags. See the TextMeshPro: Rich Text docs.
However, this bespoke approach is impractical for longer scripts or bigger projects. We recommend using TextMeshPro's Style Sheets, which make it much easier to write consistently styled text. See the TextMeshPro: Style Sheets docs.
Yarn Spinner doesn't handle text rendering. You'll need a separate wavy text system, like Text Animator.
Markup lets you mark a range of text (words, phrases) in a generic way, for whatever use. You could use it to style text, add sentence markers, make clickable words, etc.
Note that YS only processes the text data. You must still code the actual markup effect yourself. See Markup.
Wrap the variable (or any expression) in curly braces ({, }) to evaluate and output it. For more info, see Variables.
To read Yarn variables from C#, use VariableStorageBehaviour.TryGetValue<T>(). To write Yarn variables from C#, use VariableStorageBehaviour.SetValue().
Don't forget the $ when writing the variable's name!
To read and write C# variables from Yarn, you must first code Yarn Functions and Commands in C#.
Then call the functions and commands in Yarn:
If you're using Unity 2021.1 or earlier, you'll need to ask Yarn Spinner to update some code in your project that registers these C# methods as Yarn functions. To do this, open the Window menu, and choose Yarn Spinner -> Update Yarn Commands.
You don't need to do this if you're using Unity 2021.2 or later.
See the previous answers on working with variables. But we recommend avoiding any "sync" pattern, because then you'll have to track and maintain the same data in two different places. Programmers usually prefer a "single source of truth". Data should live in only one place. Variables should either live in Yarn or live in C#, and not in both.
To save the current node, save the value of DialogueRunner.CurrentNodeName somewhere, e.g. to Unity's PlayerPrefs. Then to restore it, call DialogueRunner.StartDialogue() and pass in the saved node name.
To save variables, see DialogueRunner.SaveStateToPersistentStorage(). Then to load variables, call DialogueRunner.LoadStateFromPersistentStorage(). These methods use Unity's built-in JSON utility to serialize a dictionary of variables to Unity's PlayerPrefs.
For custom save systems, create your own variable storage by subclassing VariableStorageBehaviour and implementing its methods. Study InMemoryVariableStorage.cs as an example. For more info, see Guide: Yarn Variables and Variable Storage.
It is not currently possible to save or restore the specific line that the dialogue is running.
To jump to a node from Yarn, use <<jump (nodeName)>>. See Nodes, Lines, and Options.
To jump to a node with C#, just call DialogueRunner.StartDialogue(), even if there's already dialogue running.
Jumping to a specific line in a node is currently not supported. Instead, jump to the start of a node.
In most cases, use the Dialogue Advance Input.
For more control, call UserRequestedViewAdvancement() on a Dialogue View, or OnContinuedClicked() on a Line View. See Creating Custom Dialogue Views.
Yarn Spinner automatically adds a #lastline tag to a line when the next step is a set of options. Create a Custom Dialogue View that uses YarnProject.lineMetadata.GetMetadata() to check for "lastline" and perform the behavior you want.
To display anything in Yarn Spinner, use a Dialogue View component. Line View for dialogue, Options List View for choices.
Most projects will need custom views. We recommend a modular architecture where each UI element has its own LineView component. For example, a nameplate bubble has a Dialogue Character Name View that displays LocalizedLine.CharacterName, while the dialogue text window is another Line View that displays LocalizedLine.TextWithoutCharacterName. See Creating Custom Dialogue Views.
For a working example, see the "Visual Novel" sample. (In Unity, go to Window > Package Manager, and select Yarn Spinner package. Expand the "Samples" dropdown and select "Visual Novel" and import it.) Specifically, see VNManager.cs which inherits from DialogueViewBase, and changes the character name window background color (among other effects) based on the character name.
Create a custom dialogue view with a custom effect based on Typewriter() (see Effects.cs) to detect the next text character and pause accordingly.
Write input code to detect clicking / tapping, then call DialogueRunner.StartDialogue().
The example tutorial NPC Dialogue Game can walk you through this step-by-step.
This implementation will vary for every game, so we purposely do not attempt to design a one-size-fits-all generic NPC system. Here's some example pseudo-code to make your own:
For a working example, see the "Space" sample. (In Unity, go to Window > Package Manager, and select Yarn Spinner package. Expand the "Samples" dropdown and select "Space" and import it.) Specifically, see PlayerCharacter.cs for how to search for nearby NPCs from a list.
The math / code is a little complicated. Calculate the NPC's on-screen position, then convert this screen position to UI canvas space, and reposition the dialogue bubble.
For a working example, see the "3D" sample. (In Unity, go to Window > Package Manager, and select Yarn Spinner package. Expand the "Samples" dropdown and select "3D" and import it.) Specfically, see YarnCharacterView.cs which has a method WorldToAnchoredPosition() that does a lot of this UI positioning math.
This is more about Unity UI rather than Yarn Spinner. For a working example, see the "Phone Chat" sample. (In Unity, go to Window > Package Manager, and select Yarn Spinner package. Expand the "Samples" dropdown and select "Phone Chat" and import it.)
To make a resizing dialogue bubble that automatically fits text, you will need a complex UI setup. Study the UI game objects and components in the sample scene. For more context about how it works, see this Unity UI Layout Groups explainer by Hallgrim Games.
This mainly involves Unity UI, and assumes that your project already has a system where a player can input text like a TMPro Input Field component. If the player input needs to happen in the middle of dialogue execution then you can trigger it with a Yarn Command, using a coroutine to wait for the player input if needed.
Once you have the player input value, you can store it in a C# variable and access it through a Yarn function, or store that value in a Yarn story variable. FAQs for how to access variables in Yarn and YarnSpinner are here.
The intended workflow is to generate and compile Yarn Projects at editor time, not runtime. See Yarn Projects.
Compiling a Yarn script at run-time is more complex than it first appears, because it often interacts with the very specific needs of your game, and we can't provide a one-size-fits-all approach to it. If you want to implement run-time loading in your own game, the place to start looking is the API documentation for the Yarn.Compiler namespace. Please note that this is not something that we encourage people who are new to Yarn Spinner to do!
There is no real technical limit on the number of Yarn scripts or the size of Yarn Projects. You decide how to organize your data, and every project has different needs. Some factors to consider:
Simplicity. Putting everything into one big script file or one big project file is simpler sometimes.
Ease of writing. Writers may prefer to think in terms of one file per scene, one file per chapter.
Localization. 1 Yarn Project = 1 CSV spreadsheet per language. When translating, it is usually easier to work with fewer files, rather than fragmenting the translation across many files. As a workaround for games that need multiple Yarn Projects, you may prefer to create a single editor-only Yarn Project that's just for generating string files and translations. See Localizations and Assets.
A crash bug exists in versions of Yarn Spinner earlier than 2.3 for these platforms. If you're able to upgrade your version of Yarn Spinner, the best fix is to upgrade to the most recent version of Yarn Spinner.
If you can't upgrade your version of Yarn Spinner, a workaround for this issue is to open the Build Settings window in Unity, and set the "IL2CPP Code Generation" setting to "Faster (smaller) builds."
Some devs use YS to manage all in-game localized text, like UI strings. This use isn't intended, but it's possible. Manually create a Yarn.Line struct, set the line ID (see Localization), and then pass the struct into GetLocalizedLine().
Please visit the Crediting Yarn Spinner page for more information. Thanks for thinking of us!
You can define your own commands, which allow the scripts you write in Yarn Spinner to control parts of the game that you've built.
In Unity, there are two ways to add new commands to Yarn Spinner: automatically, via the YarnCommand attribute, or manually, using the DialogueRunner's AddCommandHandler method.
YarnCommand attributeThe YarnCommand attribute lets you expose methods on a MonoBehaviour to Yarn Spinner.
When you add the YarnCommand attribute to a method, you specify what name the command should have in Yarn scripts. You can then use that name as a command.
If the method is not static, you call it with the name of the game object you want the command to run on.
For example, if you have a script called CharacterMovement that has a method Leap, you can add a YarnCommand attribute to it to make it available to your Yarn scripts:
If you save this in a file called CharacterMovement.cs, create a new game object called MyCharacter, and attach the CharacterMovement script to that game object, you can run this code in your Yarn scripts like this:
If the method is static, you call it directly, without providing a game object name. For example:
If you save this in a file called FadeCamera.cs, you can run this code in your Yarn scripts like this:
You can also use methods that take parameters. Yarn Spinner will take the parameters that you provide, and convert them to the appropriate type.
Methods that are used with YarnCommand may take the following kinds of parameters:
string
Passed directly to the function.
int
float
bool
The strings "true" and "false" are converted to their respective boolean values, true and false. Additionally, the name of the parameter is interpreted as true.
GameObject
Yarn Spinner will search all active scenes for a game object with the given name. If one is found, that game object will be passed as the parameter; otherwise, null will be passed.
Component (or its subclasses)
Yarn Spinner will search all active scenes for a game object with the given name, and then attempt to find a component of the parameter's type on that game object or its children. If one is found, that component will be passed as the parameter; otherwise, null will be passed.
Method parameters may be optional.
For example, consider this method:
This command could be called like this:
If you're using Unity 2021.1 or earlier, you'll need to use the Window -> Yarn Spinner -> Update Yarn Commands menu item whenever you add, remove or change a YarnCommand-tagged method.
If you're using Unity 2021.2 or later, this is done for you automatically.
You can see a list of commands that you've registered with the YarnCommand attribute by opening the Window menu and choosing Yarn Spinner -> Commands.
This will show a list of every command that you can call in your Yarn script, what parameters they take, and which parameters are optional.
This feature is available in Unity 2021.2 and later.
You can also add new commands directly to a Dialogue Runner, using the AddCommandHandler method.
AddCommandHandler takes two parameters: the name of the command as it should be used in Yarn Spinner, and a method to call when the function is run.
If you want to add a command using AddCommandHandler that takes parameters, you must list the types of those parameters.
For example, to create a command that makes the main camera look at an object, create a new C# script in Unity with the following code:
Add this script to any game object, and it will register the camera_look in the Dialogue Runner you attach.
You can then call this method like this:
We provide two different means of handling commands in Yarn Spinner: the AddCommandHandler method and the YarnCommand attribute. Both of these provide effectively the same functionality, and under-the-hood the YarnCommand attribute is even a wrapper around the AddCommandHandler call. So if there are two different ways to achieve the same thing when should you use each one?
The YarnCommand attribute allows you to tag specific methods as being a command, Yarn Spinner will then automatically handle the binding and connection of the the command in text to the method call in C#.
AddCommandHandler method allows you to manually connect a method in C# to a command in Yarn, letting you set the name of the command and which method it connect to, giving you the control over the binding.
Most of the time, we feel that the YarnCommand attribute is the better option, because it is easier to use, and maps well to how we find most people use commands - that is, calling specific methods on specific GameObjects.
This convenience, however, does come at a cost of flexibility, because your YarnCommands either need to be on static methods, or follow specific calling conventions, which may not be what you need or want.
The YarnCommand attribute works best in our opinion when your commands are calling into specific GameObjects in your scene, which means that it works very well for moving, animating, or changing characters and items in a scene.
For larger gameplay changing moments, such as loading new scenes, moving between dialogue and the rest of your game, or for more global events like saving the game or unlocking an achievement, the AddCommandHandler method is better.
Coroutines can be commands. If you register a command, either using the YarnCommand attribute, or the AddCommandHandler method, and the method you're using it with is a coroutine (that is, it returns IEnumerator, and yields objects like WaitForSeconds), Yarn Spinner will pause execution of your dialogue when the command is called.
Additionally, if your method returns a Coroutine object, Yarn Spinner will wait for that coroutine to complete. You can create and return a Coroutine by using the StartCoroutine method.
For example, here's how you'd write your own custom implementation of <<wait>>. (You don't have to do this in your own games, because <<wait>> is already added for you, but this example shows you how you'd do it yourself.)
This new method can be called like this:
Functions are units of code that Yarn scripts can call to receive a value.
In addition to the built-in functions that come with Yarn Spinner, you can create your own.
To create a function, you use the YarnFunction attribute, or the AddFunction method on a Dialogue Runner. These work very similarly to commands, but with two important distinctions:
Functions must return a value.
Functions are required to be static.
For example, here's a custom function that adds two numbers together:
When this code has been added to your project, you can use it in any expression, like an if statement, or inside a line:
Yarn functions can return the following types of values:
string
int
float
bool
If you're using Unity 2021.1 or earlier, you'll need to use the Window -> Yarn Spinner -> Update Yarn Commands menu item whenever you add, remove or change a YarnFunction-tagged method.
If you're using Unity 2021.2 or later, this is done for you automatically.
Text Line Provider is a Line Provider that fetches localized text for a line of dialogue, given the user's language.
Use this Line Provider if you are using the Built-In Localisation system. If you are using the Unity Localisation system, use the Unity Localised Line Provider instead.
Text Language Code
The language that the Text Line Provider should use to fetch localised text for.
Unity Localised Line Provider is a Line Provider that fetches localized text and assets for a line of dialogue from a String Table and optionally from an Asset Table, based on the project's current localization settings.
Use this Line Provider if you are using the Unity Localisation system. If you are using the Built-In Localisation system, use the Text Line Provider or the Audio Line Provider instead.
Strings Table
The String Table Collection containing localised line text. See to learn how to populate it with your project's dialogue.
Assets Table
(Optional) The Asset Table Collection containing localised assets. If an Asset Table is provided, then the Unity Localised Line Provider will fetch localised assets for each line, based on the line's ID.
This page covers what you need to know to use the internal localisation system built into Yarn Spinner. This supports both the localisation of the text, so the lines themselves, and your assets needed for them.
The other option for localisation is to use the Unity Localization package. The Unity Localisation package has more features, but is more complex.
Watch a video where Yarn Spinner developer Jon Manning walks you through using the Built-In Localisation System:
When you want to prepare a Yarn Project for an additional language, you add a new Localisation in the Yarn Project.
Localisations are how you tell Yarn Spinner where to find the localised lines, and the localised line assets, for a given language.
To create a new Localisation, open the Localisations list in the Yarn Project's Inspector, and click the + button.
Localisations have the following properties:
Language ID
The language for this localisation.
Strings File
Assets Folder
A folder containing the localised assets for this localisation.
Your project always includes at least one localisation, which is for the base language.
After you've set up a localisation, you can translate your dialogue into that localisation's language. To do this, you generate a strings file.
A strings file is a text-based spreadsheet, in comma-separated value form, that contains a translated version of your dialogue. Yarn Spinner can generate a strings file for you, based on the line IDs in the dialogue.
You don't need to create a strings file for your base localisation, because Yarn Spinner creates that for you by reading your source Yarn scripts. Any localisation whose language ID is the same as your base language will be marked as 'Automatically included'.
To create a strings file, select a Yarn Project, and click the "Export Strings and Metadata as CSV" button. Unity will ask where you want to save the strings file (the metadata file will have the same name as the strings file, but with a "-metadata" appended to it).
A strings file has the following structure:
language
The language code for this line.
When you export a strings file, this will be the Yarn project's base language.
id
The line ID for this line.
text
The text of the line, in the language indicated by the language column.
file
The file that the line was originally found in.
node
The node that the line was originally found in.
lineNumber
The line number of the file that the line was originally found in.
lock
A unique value that Yarn Spinner uses to detect if the line has been modified since the strings file was generated. Don't modify or delete this value.
comment
A note indicating the intent and tone of the line. This can be useful for translators who may not have the same background or context for how the line should be delivered.
Once you've exported a strings file, you can translate it into another language: for each row in the database, change the language column to the new language you're translating into, and the text column to the translated text of the line.
Only the language and text columns should be modified by the translator. Don't modify the others; in particular, if you modify the value in the id column, Yarn Spinner won't be able to link the translated line to the original version.
The metadata file contains the id, file, node, and lineNumber columns (which have the same values as in the strings file). Additionally, it contains a metadata column with all the metadata of a line. Only lines that contain metadata will be present in this file. For more information on metadata, see Tags and Metadata.
You can also provide the metadata file to the translator to give them more context and improve localisation accuracy.
Once you have a strings file that's been translated into your target language, you can add it to your Localisation. To do this, drag and drop the translated strings file into the Strings File property of your localisation, and click Apply.
It's possible to update a strings file after you've made changes to your source scripts. For example, you might have added or removed lines, or made changes to the text.
To update a strings file, click the Update Existing Strings Files button at the bottom of the Inspector.
Yarn Spinner will update every strings file that's been added to the Localisations list: new lines will be added, removed lines will be deleted, and lines whose original text has changed since the last time the file was updated will have the text "NEEDS UPDATE" added to the end. This allows you to more easily find which lines need an updated translation.
Localised line assets are assets that are associated with a particular line, in a particular localisation. The most common example of this is voice-over lines, which are audio assets that are associated with each line.
Line Providers are responsible for fetching the appropriate assets for a given line and language. For example, the Audio Line Provider fetches audio clips, and provides them to voice-over dialogue views.
The specific localised line, and localised line assets, that a line provider fetches depends on which language they have been configured to fetch.
The Text Line Provider has a single language option, which controls which language the line will appear in.
The Audio Line Provider has two language options: the language of the text, and the language of the audio files that are retrieved. This means that you can configure it to provide text in one language, and audio in another.
If a line provider is asked to retrieve content for a language that it doesn't have any assets for, it will retrieve the base language version instead.
In addition to Yarn Spinner's own built-in localisation system, your game can also use the Unity Localization package.
Both the Unity Localization and Built-In Localisation approaches are very similar to one another, but there are some caveats and extra steps to make them play together.
The Built-In Localisation system is simpler, but has fewer features.
In this document, we'll refer to the 'Localization' package that Unity provides as 'Unity Localization', to reduce the chance of confusion.
Watch a video where Yarn Spinner developer Jon Manning walks you through using Yarn Spinner with Unity's Localisation package:
Before doing anything with Yarn Spinner, you will need to set up your Unity project to use the Unity Localization system. To install and set up Unity Localization, follow the instructions on the Unity Localization package's documentation.
Once you have followed these instructions, your project should now:
Have the Unity Localization package installed
Created and configured one or more Locales for your project
Created a string table collection.
When localising your game's dialogue using Yarn Spinner, we recommend creating a separate string table collection for your dialogue, set apart from other localised content like button labels. It can make it a little easier to manage.
With these done you should now have your project set up correctly, and have a string table collection for your locales with no entries inside. Yarn Spinner will fill this string table with content that it extracts from your Yarn Scripts.
To fill a string table with content from a Yarn project, follow these steps:
Select the Yarn Project, and go to its Inspector.
Enable the Use Unity Localisation System setting.
Set the Base Language to your desired language. This must be ensure its one of the locales that you have configured for your project.
In the String Table Collection field, add the String Table Collection that you want to populate with line content.
Click Apply.
You can check that the string table has been filled with content by opening the Window menu, and choosing Asset Management -> Localization Tables. You can then view the contents of your string table. The Key of each string will be the #line ID from the Yarn files.
When the Yarn Project importer adds your lines into the string table, it uses the Base language field you set in the Inspector to determine which locale in your String Table Collection should have the lines added into.
If your project doesn't have a Locale which matches your Base Language, Yarn Spinner will attempt to find an appropriate Locale to use. To ensure that the importer uses the correct Locale, be sure to specify it in the Inspector.
When a Yarn script is run, the Dialogue Runner receives line IDs from the Yarn Project, and must determine what localised content should be shown to the player, using a line provider. In order for the Dialogue Runner to fetch localised data from the Unity string table, you use a Unity Localised Line Provider.
The Dialogue Runner's Inspector will tell you when you need to use a Unity Localised Line Provider. You can click the button it provides to quickly add and configure one. You can also set one up manually, using the Add Component menu.
To configure it, all that needs to be done is hook your string table collection up to the Strings field of the Unity Localised Line Provider.
During gameplay, the Unity Localised Line Provider will fetch content from your string table depending on the game's current locale setting. You can control this at run-time by using the locale selector at the top-right corner of your Game View.
In addition to localising the strings that make up your lines, you can also localise assets that go with each line, such as voice-over audio, or custom objects that store other localised data.
To localise assets in Unity Localisation, you create and populate an Asset Table. Yarn Spinner doesn't automatically populate Asset Tables for you like it does String Tables, because Yarn Spinner doesn't manage your assets like it does with your lines.
Instead, you can create an Asset Table that contains assets with the same key as your lines. For example, if you have a line in your Yarn script that has the line ID "line:tom-1", then the string table will have an entry with the key line:tom-1. To create a voice-over asset to go with this line, you can create an asset table that also contains an entry with the key line:tom-1, and maps to an audio file.
The Unity Localised Line Provider will automatically match String Table entries and Asset Table entries if they have the same key, and then deliver them to your Dialogue Views for use. To do this, ensure that your Unity Localised Line Provider has an Asset Table configured in the Inspector.
As each node is entered the Unity Localisation Line Provider will begin loading all the required assets for every line and option in that node, and when you leave a node all assets are then released. We have found that as a default this works very well, but in some circumstances you will want more control over this. The most common reason for this is to preload multiple nodes worth of assets at once. This is supported but has a few steps and quirks to be wary of.
First you will need to get a list of all the node names for which you want to preload the assets. Once you have this you can use the GetLineIDsForNodes method on the Yarn Project to get a list of the line IDs for every line and option in the nodes. Next you will need to disable the automatic asset clearing on the line provider, you do this by setting the AutomaticallyUnloadUnusedLineAssets boolean to be false. With this done you can now use the PrepareForLines method to start the assets loading, and once that is finished your multiple nodes worth of assets have all been loaded.
Now the downside to this is because we can't know which assets you are finished with you will need to manually tell the line provider when to release the assets. You do this by calling ClearLoadedAssets which will release all loaded assets. It's important to note that calling ClearLoadedAssets will clear every loaded asset, so doing this while nodes are still being read will result in unusual behaviour.
Because both Yarn Spinner and Unity use the same marker for their string interpolation and manipulation ({ and }), you can't use the Unity Localization smart strings in Yarn Spinner content.
Learn about the Bevy components that you use when working with Yarn Spinner for Rust.
Yarn Spinner for Rust is made up of a number of components. The most important of these are the , which loads and runs your scripts, and the that show content to your player.
In this section, you'll learn about how to work with each of these.
Yarn Spinner for Rust is the set of components and scripts that make Yarn Spinner work inside a Bevy project.
See for a quickstart into how to setup everything you need to before reading on.
In this section, you’ll learn how to work with Yarn Spinner for Rust more in-depth.
Yarn Spinner for Rust v0.2 works with Bevy version 0.13
Learn about Yarn Projects, which group your scripts together for use in a Dialogue Runner.
The YarnProject resource represents the set of all compiled Yarn files of your game. You cannot construct it yourself. Instead, it is inserted into the Bevy world for you when the compilation is finished. You can however steer how and when this is done.
Generally, you'll want your game to compile the Yarn files as soon as possible. This is why the will start doing so by default when it is added to the app.
If for some reason you do not wish to start compilation right away, you can defer this process. To do this, construct the YarnSpinnerPlugin with YarnSpinnerPlugin::deferred() when adding it. Then, whenever you are ready to start the compilation, you can send a LoadYarnProjectEvent. Its construction methods are identical to the YarnSpinnerPlugin. In fact, when not running in deferred mode, the YarnSpinnerPlugin simply relays its setting to a LoadYarnProjectEvent and sends it.
If you look through the documentation of the [YarnSpinnerPlugin], you'll notice a few methods to modify its settings. The first few deal with where our Yarn files are coming from.
By default, Yarn Spinner will look in <game directory>/assets/dialogue. Yarn Spinner can only read files from the assets directory — or its equivalent, if you have changed this default in the AssetPlugin on platforms which support it— but you can change how the assets will be looked through.
The way to specify this is via YarnFileSources. This enum tells Yarn Spinner where one or more Yarn files come from and can be added to an AssetPlugin with AssetPlugin::add_yarn_source(). The enum variants should be self explanatory, but the two most common use-cases come with their own convenience constructors:
YarnFileSource::file(): looks for a Yarn file at a path inside under the assets directory.
YarnFileSource::folder(): recursively looks through a given subdirectory for Yarn files.
Since the Wasm and Android builds of Bevy have restrictions on their filesystem access, they cannot use YarnFileSource::folder() and must have all their Yarn files listed explicitly with YarnFileSource::file(). As such, the default behavior provided by YarnSpinnerPlugin::new() is not suitable for these platforms. To avoid it, use the AssetPlugin::with_yarn_source() constructor instead.
As you might have guessed by now, YarnSpinnerPlugin::new() is simply a shorthand for AssetPlugin::with_yarn_source(YarnFileSource::folder("dialogue")).
Since these settings are intended for development, you can use YarnSpinnerPlugin::with_development_file_generation(DevelopmentFileGeneration::None) when shipping your game to optimize the runtime costs and avoid generating files that are useless to the player.
Quickly get started with a simple scene.
We will now go through the steps to setup a new Bevy project running Yarn Spinner dialogues
Run the following in your terminal to create a new crate with the required dependencies:
The dependency bevy_yarnspinner is for the Yarn Spinner Bevy plugin proper, while bevy_yarnspinner_example_dialogue_view gives us a nice default , so we can actually see the text we've written and have options to click on.
We'll use a single Yarn file for this example. Inside the folder assets/dialogue, add a file named example.yarn with the following content:
Add the following code to your src/main.rs.
Reiterating the comments in the code, let's take a look at some snippets.
This self-explanatory line initializes the plugin. When using the standard constructor with no options, Yarn files will be searched for in the directory <your game>/assets/dialogue/, where all files ending in .yarn will be compiled as soon as the game starts.
Here we initialize the dialogue view shipped by the bevy_yarnspinner_example_dialogue_view crate. It offers some sensible defaults which you can see in the screenshots used throughout this guide. You can of course skip this and use your own dialogue view instead.
The method .run_if(resource_added::<YarnProject>() is our way of saying "run this system once as soon as our Yarn files are done compiling". Let's look at what will actually be run in that moment:
In the end, your file structure should look like this:
Run your game with cargo run and you should see the following:
Understand the Intro sample.
After you've worked through the Beginner's Guide, the Intro Sample is a great place to go next.
Intro is a simple conversation featuring branching, variables, localisation, a themed Line View and Option View, and voice-over.
To understand the Intro Sample, open it and take a look at the Hierarchy:
You'll find the following:
Learn how to get started with Yarn Spinner in Unreal Engine 5.
Welcome to Yarn Spinner for Unreal! In this tutorial, you'll build a third-person game in which the player can walk around and talk to characters.
.
Yarn Spinner for Unreal is in beta.
Yarn Spinner for Unreal is currently at a beta stage of development, and there are a number of important caveats to know.
Windows support only. Additional platforms will be added in future versions.
In-memory variable storage only. Variables can be stored and retrieved, but they are not currently stored on disk.
Limited function support.
The following functions are supported: visited, visited_count, string, number, bool.
String-only command dispatch. Dispatching commands to functions is not implemented; however, when a command is run, the Dialogue Runner emits an OnRunCommand event that contains the command name and an array of its parameters.
Yarn Project importing takes longer than desired. When you import a Yarn Project asset, it may take several seconds for the process to complete, during which time the Editor will not be responsive.
String tables may incorrectly cache in the Editor. When you import a Yarn Project, the string table will be populated with its contents. If you make changes to the Yarn files and re-import the Yarn Project, the string table contents will update, but the editor may still hold the cached values from the earlier version, resulting in incorrect lines being displayed. As a workaround for this issue, play the game in Standalone mode. Quitting and relaunching the Editor will also reset this cache.
This tutorial assumes the following things:
You already know how to use Unreal Engine 5.3.
If you don't, Epic Games have a .
You already know how to use Yarn Spinner.
If you don't, we suggest following our .
Create a new Third Person game project.
Create a Blueprint project.
Include the Starter Content.
Hit the play button and use WASD to run around, and spacebar to jump. Press escape when you're done.
Yarn Spinner for Unreal supports C++ projects as well, but for this tutorial, we'll use Blueprints.
Close the Unreal Editor.
Open your project's folder in Explorer.
Create a new folder called "Plugins".
Open the project again.
Unreal Editor will say that the modules YarnSpinner and YarnSpinnerEditor are missing, and ask if you'd like to rebuild them. Choose Yes.
Wait for the editor to launch.
Unzip the demo assets into a folder on your computer.
Drag and drop the assets into the DemoDialogue folder.
You may see a message from Unreal saying that .yarn files are unsupported. This is expected, and doesn't indicate a problem - the .yarnproject asset is what we'll be working with.
Open the File menu, and choose Save All.
We'll set up the scene so that there's a character you can walk up to and talk to.
Interactable ComponentIn the Content Drawer, go to the DemoBlueprints folder you created earlier.
Right click inside the folder, and create a new Blueprint Class.
Make it a subclass of Actor Component, and name it AC_Interactable.
Open the newly created blueprint.
Add a new variable called Yarn Node, of type Name. Make it Instance Editable.
Compile, save, and close the blueprint.
Open the Content Drawer, and navigate to Characters / Mannequins / Meshes.
Drag SKM_Manny into the scene.
Place it in front of the Player Start, and rotate it to face the Player Start.
Select it, and in the Details pane, set the Anim Class to ABP_Manny.
The character will now be playing an idle animation.
In the Details pane, click Add, and search for the AC_Interactable component you added earlier.
Add it to the actor.
Set the Yarn Node to 'Gary'.
Next, select the character's SkeletalMeshComponent, and add a Capsule Collision.
Update the Capsule's Transform:
Set the Location to (0, 0, 96).
Update the Capsule's Shape:
Set the Capsule Half Height to 96.
Set the Capsule Radius to 48.
In the Content Drawer, open ThirdPerson / Input / Actions.
Right click, and choose Input -> Input Action.
Name the new action IA_Interact.
Go to the ThirdPerson / Input folder, and open the IMC_Default asset.
In the Mappings section, click the plus button to add a new mapping.
In the drop-down menu that appears, select the IA_Interact asset you just created.
Expand the binding, and click the Keyboard button that appears.
Press the E key, and the action will be bound to the E key on your keyboard.
Close the window, and save all files.
In the Content Drawer, open ThirdPerson / Blueprints.
Open the BP_ThirdPersonCharacter blueprint.
In the Viewport, find the Capsule Component in the Components tab.
Click the Add button, and choose Sphere Collision.
Name the newly added component InteractionSphere.
In the details pane, set up the sphere:
Set Transform -> Location to (80, 0, 20).
At the bottom of the Details pane, in the Events section, create events for On Component Begin Overlap and On Component End Overlap.
Add a new variable. Name it CurrentInteractable, and set its type to 'AC Interactable'.
Add another new variable. Name it DialogueRunner, and set its type to DialogueRunner. Make it Instance Editable.
In the Event Graph, right click and search for IA_Interact.
Add the IA_Interact action to the graph.
Update the Event Graph to find and store the Dialogue Runner in the scene. Add the following nodes to the end of the existing BeginPlay event:
Update the event graph to set and clear the CurrentInteractable variable when the player approaches an Interactable component:
Next, update the event graph to start the dialogue when the Interact key is pressed.
You'll need to click the disclosure arrow at the bottom of the IA Interact event to reveal the Started pin.
Finally, compile, save and close the blueprint.
In the Content Drawer, open DemoBlueprints.
Right click and create a new Blueprint Class.
Expand the 'All Classes' dropdown, and search for Dialogue Runner. Select Object -> Actor -> Dialogue Runner.
Name the new blueprint BP_GameDialogueRunner.
Drag the blueprint into the scene.
In the Content Drawer, open DemoDialogue.
Select the Dialogue Runner you just added to the scene.
Drag the DemoProject Yarn Project into the dialogue runner's Yarn Project field.
We can now quickly test the game to make sure that interaction is working, and that Yarn Spinner can access your dialogue.
Click the Play button, and walk up to the interactable character.
Press the E key to talk to them. No lines will appear, but if you open the Output Log and scroll up, you'll see lines like this:
This tells us that the line is sucessfully running, but we're not doing anything with it yet.
When Yarn Spinner imports the Yarn Project, it reads all of the lines in that project's Yarn files, and adds them to your game's localisation string tables. It also looks for assets for the each line, like voice-over audio clips. When a Dialogue Runner runs a line, you can access the localised line text, as well as any localised lines.
In the content that you imported earlier, the lines are written in English, and each line has an audio clip containing English voice-over. We'll set up the Dialogue Runner so that when a line is run, the voice-over plays. When the voice-over is finished, the dialogue runner will proceed to the next piece of content.
Open the BP_GameDialogueRunner blueprint.
Click Open Full Blueprint Editor.
Right click the Event Graph and choose Add Event -> Dialogue Runner -> Event On Run Line.
Add the following nodes to the event:
We'll also add an event to handle options. This will start empty, but we'll add to it.
Compile, save, and close the blueprint.
Play the game.
Walk up to the character, and press the E key.
You'll hear the voice-over for the lines.
Next, we'll set up option selection. Because choosing an option requires some kind of user input, we'll need to build a way for the user to choose one of the available options.
In this tutorial, we'll create buttons on screen for each option, and let the user click one of them to choose the option.
In the Content Drawer, go to DemoBlueprints.
Right click and choose User Interface -> Widget Blueprint.
Click User Widget.
Name the new blueprint WBP_OptionButton
Double click it to open.
Go to the Graph view.
Add a new variable.
Set its name to Option, and set its type to Option.
In the Details pane, turn on Instance Editable, and Expose on Spawn.
Go to the Designer view.
Drag a new Button into the Canvas.
It will be huge, but that's ok - its size will be controlled by the option list.
Drag a new Text Block into the Button.
Name the Text Block 'Label'.
In the Details panel, turn on Is Variable for the Text Block.
Find the Content -> Text field, and open the Bind dropdown.
Choose Option -> Line -> Display Text.
Select the Button.
In the Details panel, find the On Clicked event, and click the plus button.
Add a new Event Dispatcher.
Name it On Option Selected.
Add a new Input to the event dispatcher.
Set its name to Option, and its type to Option.
Drag the On Option Selected event dispatcher into the Event Graph, and choose 'Call' from the popup that appears.
Connect the On Clicked event for the button to the On Option Selected call:
Compile, save and close the blueprint.
Next, we'll create the option selector. The option selector will take an array of Option objects, and create Option Button widgets for each of them. It'll also configure the Option Buttons so that when the user clicks on a button, the corresponding dialogue option will be selected. It'll also make the Player Controller change to UI mode when the options are present, so that moving the mouse towards the buttons doesn't rotate the camera.
In the Content Drawer, go to DemoBlueprints.
Right click and choose User Interface -> Widget Blueprint.
Click User Widget.
Name the new blueprint WBP_OptionSelector
Double click it to open.
Go to the Designer view.
Drag a Scroll Box into the canvas.
In the Details panel, turn on Is Variable.
Rename the variable to 'ScrollBox'.
Go to the Graph view.
Add a new variable.
Call it PlayerController, and set its type to PlayerController.
Next, we'll create the event that runs when an option has been selected.
Add a new Custom Event:
Right click the Event Graph.
Search for Add Custom Event, and add it to the Event Graph.
Name the new Custom Event OptionSelected.
Add an Input to the new event named Option, with the type Option.
Set up the event:
Compile the blueprint before continuing!
If you don't, you won't be able to connect the buttons you're about to create to the OptionSelected event.
Right click the Event Graph, and create a new Custom Event called ClearButtons.
Set up the event:
Right click the Event Graph, and create a new Custom Event called CreateOptionButtons.
Add an Input to the new event named Options, with the type Array of Option.
Set up the event:
Right click the Event Graph, and create a new Custom Event called ShowOptions.
Add an Input to the new event named Options, with the type Array of Option.
Add an Input to the new event named PlayerController, with the type PlayerController.
Set up the event:
Finally, right click the Event Graph, and add a Construct event (if one is not already present).
Set up the event:
Compile, save and close the blueprint.
Open the BP_GameDialogueRunner blueprint.
Add a new variable.
Name it OptionSelector, and make its type WBP_OptionSelector.
Right click the Event Graph, and add a BeginPlay event, if one isn't already present.
Set up the event:
Delete the On Run Options event you created earlier, and replace it with a new one.
Set up the event:
Compile, save and close the blueprint.
Play the game.
Walk up to the character, and press the E key to talk to them.
When the conversation reaches the options, buttons will appear.
Click on one of them to advance the conversation.
Parsed as an integer using .
Parsed as an integer using .
A Text Asset containing the translated lines for this Yarn Project's scripts. See for information on how to create these assets.
YarnSpinnerPlugin::with_development_file_generation() accepts a DevelopmentFileGeneration, which tells Yarn Spinner how aggressively to generate useful files on runtime. "Useful" refers to the developer and not the user. The default is DevelopmentFileGeneration::TRY_FULL, which will be DevelopmentFileGeneration::Full on platforms which support filesystem access, i.e. all except Wasm and Android. See the documentation for the full list of effects. Suffice it to say that this is not very important when developing without localization, but becomes vital otherwise. See the chapter for more.
The settings accessed by YarnSpinnerPlugin::with_localizatons are important enough to warrant their own chapter. See .
Whether you used YarnSpinnerPlugin or LoadYarnProjectEvent, as soon as the compilation finished, a YarnProject resource will be inserted into the Bevy world. You can react to its creation by guarding your systems with .run_if(resource_added::<YarnProject>()), as seen in the .
Once you have the YarnProject, you can use it to spawn a DialogueRunner which in turn can, well,
You can learn about our recommended editor, Visual Studio Code with the official Yarn Spinner Extension at: .
The plugin makes sure all components of Yarn Spinner work except for any actual graphics. You need to instantiate a for that:
The main way of interacting with Yarn files during runtime and managing the flow of a dialog is through a . To do this, we use the resource we referenced in the run_if section above. It represents our compiled Yarn files, which we use to create a new dialog runner.
We then point it to the named "Start" of our Yarn file. We use start_node for this, which will "move" the dialog runner to the provided node and start executing the dialog in the next frame, using the registered Dialogue View to actually present it on the screen.
Finally, we spawn the dialog runner on an own entity into the Bevy world.
Dialogue Runner — a GameObject with a , an , and a script to allow the game to be quit attached to it.
The is a Component supplied by the Yarn Spinner for Unity Package.
The is a Component supplied by the Yarn Spinner for Unity Package.
Clone the into the Plugins folder you just created.
Variable Storage components are responsible for storing and retrieving the values of variables in your Yarn scripts. When a Yarn script needs to get the value of a variable, it asks the Variable Storage for it; when a Yarn script sets the value of a variable, the Variable Storage is given the value.
Each game has different requirements for how variables are stored, which means that Yarn Spinner doesn't make any assumptions how the information is actually stored on disk. Instead, you can create your own custom Variable Storage script that implements the methods that Yarn Spinner needs.
If you don't have a game save system, you can use the MemoryVariableStorage component. This is a simple Variable Storage component that's built into Yarn Spinner.
The In-Memory Variable Storage stores everything in memory; when the game ends, all variables that have been stored are erased.
If you don't connect a Variable Storage to your Dialogue Runner, it will create an In-Memory Variable Storage when the game starts, and use that.
The In-Memory Variable Storage component is a Variable Storage component that stores all variables in memory. These variables are erased when the game stops.
The In-Memory Variable Storage component is intended to be a useful tool for getting started, and to be replaced with a custom variable storage that meets your game's needs.
However, if your game has no need to save and restore game state, then this class can be used in your final game, too.
Every game's data storage requirements are different. For this reason, Yarn Spinner is designed to make it straightforward to create your own custom component for managing how Yarn scripts store and load variables in ways that work with the other parts of your game.
Custom Variable Storage components are implementations of the trait VariableStorage. To implement your own, check out the documentation. Once you have it, you can use it by calling DialogueRunnerBuilder::with_variable_storage when building your Dialogue Runner.
You can define your own commands, which allow the scripts you write in Yarn Spinner to control parts of the game that you've built.
Functions are units of code that Yarn scripts can call to receive a value. In addition to the built-in functions that come with Yarn Spinner, you can create your own.
Learn about Dialogue Views, which present dialogue content to the user.
Yarn Spinner itself handles only the hard logic behind the dialogue flow, but it doesn't actually draw anything to the screen. This is the job of Dialogue Views. They are plugins that react to DialogueEvents fired by the Dialogue Runner and display them to the player.
A Dialogue Runner can have multiple Dialogue Views. For example, you might have one Dialogue View that's designed to display lines of dialogue, and another that's in charge of displaying options to the player.
Because every game's needs are different, a Dialogue View is designed to be extremely customisable, and you can create your own custom dialogue views to suit the needs of your game.
However, because there are common patterns of how games work with dialogue, Yarn Spinner for Rust comes with a pre-built Dialogue View that handles common use cases: The Example Dialogue View. You'll see it used all over our examples. To use it, you simply add its plugin after the Yarn Spinner plugin proper:
And that's it! It will display whatever comes its way to the user and handle some basic input. As an added bonus, it will send out a SpeakerChangeEvent whenever the active speaker has changed from its point of view, in case you want to e.g. rotate your camera there. If you do such an interaction, be sure to place your code in a Bevy system set that comes after the ExampleYarnSpinnerDialogueViewSystemSet to avoid race conditions.
To create your own Dialogue View, simply create a plugin that handles the different variants of DialogueEvent that come up during play. These are regular Bevy events that you can handle using an EventReader. Make sure that you run your plugin in a Bevy system set after the YarnSpinnerSystemSet to catch all events that were sent in a given frame.
For inspiration, check out the source code of the example Dialogue View.
While Bevy as a whole has assets, Yarn Spinner can associate specific assets with lines. These are always localised, such as voiceovers.
Before we jump into assets, let's first help you out if you don't care about localization. The mechanism in place for this is line metadata, which are strings you can add to Yarn lines after a hashtag:
A Dialogue View will be able to read the metadata "smiling", "laughing", and "smiling" again from LocalizedLine::metadata and accordingly load things like character portraits. These annotations will also be written into the "comment" field of strings files, which are explained in the chapter Localisation.
Assets are fetched from the filesystem by structs implementing AssetProvider. They need to be registered when creating a DialogueRunner. For example, if you use the audio_assets feature, you can register an asset provider for audio files by modifying the code found in the Quick Start like this:
The bundled example Dialogue View does not play any audio files, so you will need to write your own Dialogue View to make use of this feature.
The AudioAssetProvider itself is just a specialized FileExtensionAssetProvider. As the name suggests, it serves any assets based on their extension:
The FileExtensionAssetProvider (and, by extension, the AudioAssetProvider) will search for their assets in the directory assets/dialogue/<language>/<line-id.extension>. So, for example, an AudioAssetProvider serving up a voiceover for the line with the ID 41239 while the game is set to the language "de-CH" will search for assets/dialogue/de-CH/41239.mp3.
Finally, you can implement AssetProvider yourself with whatever custom behavior you desire. Check out the trait's documentation for the necessary methods.
The main way to actually manipulate the state of your dialog is through a DialogueRunner. You create it from a YarnProject (see Compiling Yarn Files) with either YarnProject::create_dialogue_runner() or YarnProject::build_dialogue_runner(). The first uses default configurations which should be alright for many use-cases, while the latter allows you to add or change functionality.
The actual navigation through a dialog is handled by a Dialogue View, which is responsible for back-and-forth interaction with the player. As such, most of the methods provided by a DialogueRunner are to be called by such a view. The one you will want to call yourself, as seen in the Quick Start, is DialogueRunner::start_node, which will tell the DialogueRunner to start running from the provided node.
Variables need to be stored in some place. By default, they are kept in memory through the InMemoryVariableStorage. This means that when you quit and reopen the game, all variables used in Yarn files will be empty again. Of course, this is suboptimal when you want to allow the player saving and loading their game state. To accomplish this, you can go one of two routes:
Manipulate the variables in the variable store. Read then when saving and write them when loading. You can access the variable storage through DialogueRunner::variable_storage().
Directory use a variable storage that stores its variables in a persistent way, such as a database or a file. You can change the underlying variable storage through the builder API discussed later in this chapter.
For information on how to create your own variable storage, see the chapter Variable Storage
Yarn files can contain user-defined functions and commands. These can be accessed with DialogueRunner::library() and DialogueRunner::commands(). For more information, see the chapters Custom Functions and Custom Commands.
We make a distinction between text, which are the written words organized into lines contained in Yarn files or in localization files, and assets, which are supplemental data associated with a line. Assets are referenced over a Bevy Handle and can be used for things such as voiceover sound files or images that might need translation.
Of note is that using assets requires using localization, or at least thinking about it. As a consequence, language settings are split between text and assets. After all, a player might want to hear lines delivered in the original recorded language but read the text translated into their own language.
You can read more about how current language can be set for a DialogueRunner in the localization chapter.
Text is provided by a TextProvider. While it can be overwritten, the default StringsFileTextProvider will be a good choice for nearly all users. The only reason you might have to create an own TextProvider is if you want a very custom localization strategy, such as translating text automatically through AI.
Assets are provided by AssetProviders. In contrast to the TextProvider, you might very well create your own AssetProvider. For your convenience, Yarn Spinner already ships with an AudioAssetProvider that you can use for voice lines and a FileExtensionAssetProvider that can load any asset based on naming conventions and file extensions. See the chapter Assets.
Text and asset providers can be set through the builder API and accessed later with DialogueRunner::text_provider() and DialogueRunner::asset_providers(). If you know the exact type T of AssetProvider you want, you can call DialogueRunner::asset_provider::<T>() instead.
As mentioned in the beginning of this chapter, a DialogueRunner can be modified or extended on creation by using YarnProject::build_dialogue_runner(). In fact, YarnProject::create_dialogue_runner() is nothing but a shorthand for YarnProject::build_dialogue_runner().build().
You can use the builder API to inject your own implementations of traits used for the features presented in this chapter. DialogueRunnerBuilder::with_variable_storage changes the underlying VariableStorage and DialogueRunnerBuilder::with_text_provider the TextProvider. DialogueRunnerBuilder::add_asset_provider adds an AssetProvider to the set of asset providers called for each line presented to the player.
Commands work very similar to Yarn functions, but use a different syntax and are able to modify the game world. As a consequence of their similarity, registering custom commands is very similar to registering custom functions.
Just as with Yarn functions, registration happens when creating a DialogueRunner. Let's again modify the example from the Quick Start:
We call the command like this:
You will have seen one crucial difference to Yarn functions immediately. The parameters are not passed in directly to the Rust function, but are wrapped in an In struct. This is because Rust functions that are registered as commands are always valid Bevy systems. The In parameter just tells the function which values come from the Yarn file, but we can additionally query the Bevy world as we want:
which we call like this:
The Rust functions serving as commands always require an In parameter. If your Yarn command doesn't accept any parameters, specify the first parameter in Rust like this: fn my_command(_: In<()>, ...)
In contrast to functions, commands cannot have any Yarn facing return types. The Rust functions however can use a return value to indicate that Yarn Spinner should wait a while before continuing the dialogue. This is useful for times when you want to change something in the world before the dialogue goes on, e.g. move the camera to another speaker. To do this, simply return a type implementing TaskFinishedIndicator, for example Arc<AtomicBool>. This way, you can keep a copy of the Arc and change its content to true whenever your transition is over.
For a practical example, check out how we implement a fade out at the end of the demo.
Common questions and solutions for using Yarn Spinner in Rust using Bevy.
Yarn Spinner doesn't do text rendering, you have to use existing Bevy plugins.
Yarn Spinner doesn't handle text rendering. You'll need a separate wavy text plugin.
Markup lets you mark a range of text (words, phrases) in a generic way, for whatever use. You could use it to style text, add sentence markers, make clickable words, etc.
Note that YS only processes the text data. You must still code the actual markup effect yourself. See Markup.
Wrap the variable (or any expression) in curly braces ({, }) to evaluate and output it. For more info, see Variables.
To read Yarn variables from Rust, use VariableStorage::get(). To write Yarn variables from Rust, use VariableStorage::set()
Don't forget the $ when writing the variable's name!
You could hack this with static variables. But we recommend avoiding any "sync" pattern, because then you'll have to track and maintain the same data in two different places. Programmers usually prefer a "single source of truth". Data should live in only one place. Variables should either live in Yarn or live in Rust, and not in both.
To save the current node, save the value of DialogueRunner::current_node somewhere, e.g. to a .ron file. Then to restore it, call DialogueRunner.start_node() and pass in the saved node name.
To save variables, fetch them using DialogueRunner.variable_storage(), then use VariableStorage::variables to read them all and store them again somewhere. Then to load variables, call VariableStorage::extend().
For custom save systems, create your own variable storage by implementing VariableStorage and its methods. Study variable_storage.rs as an example.
It is not currently possible to save or restore the specific line that the dialogue is running.
To jump to a node from Yarn, use <<jump (nodeName)>>. See Nodes, Lines, and Options.
To jump to a node with Rust, just call DialogueRunner.start_node("nodeName"), even if there's already dialogue running.
Jumping to a specific line in a node is currently not supported. Instead, jump to the start of a node.
Yarn Spinner automatically adds a #lastline tag to a line when the next step is a set of options. Create a Custom Dialogue View that uses StringInfo::metadata to check for "lastline" and perform the behavior you want.
To display anything in Yarn Spinner, use a Dialogue View plugin.
Create a custom dialogue view with a custom effect based on typewriter.rs to detect the next text character and pause accordingly.
Write input code to detect clicking / tapping, then call DialogueRunner.start_node().
This implementation will vary for every game, so we purposely do not attempt to design a one-size-fits-all generic NPC system. Here's some example pseudocode to make your own:
The math / code is a little complicated. Calculate the NPC's on-screen position, then convert this screen position to UI canvas space, and reposition the dialogue bubble.
There is no real technical limit on the number of Yarn scripts or the size of Yarn Projects. You decide how to organize your data, and every project has different needs. Some factors to consider:
Simplicity. Putting everything into one big script file or one big project file is simpler sometimes.
Ease of writing. Writers may prefer to think in terms of one file per scene, one file per chapter.
Localization. 1 Yarn Project = 1 CSV spreadsheet per language. When translating, it is usually easier to work with fewer files, rather than fragmenting the translation across many files. As a workaround for games that need multiple Yarn Projects, you may prefer to create a single editor-only Yarn Project that's just for generating string files and translations. See Localizations.
Please visit the Crediting Yarn Spinner page for more information. Thanks for thinking of us!
Our examples directory contains many small programs showcasing individual features
The demo has its code open sourced to learn from it
The Foxtrot template uses Yarn Spinner for Rust for its dialog. You can take a look at it to learn how Yarn Spinner is used in a more comprehensive 3D project.
There are two important kinds of files you'll use when working with Yarn Spinner for Godot:
Yarn Projects are files that link your Yarn Scripts together, and are used by the Dialogue Runner.
Yarn Scripts are files that contain your written dialogue.
Yarn Spinner for Godot is the set of components and scripts that make Yarn Spinner work inside a Godot project.
In this section, you’ll learn how to install, set up, and work with Yarn Spinner for Godot.
Just getting started with Yarn Spinner for Godot? The beginner's guide is a step-by-step tutorial to setting the plugin up in your project.
Yarn Spinner for Godot works with Godot 4.1 and newer. Currently, the recommended version is 4.2.x.
As mentioned in the chapter Functions, Yarn can access user-defined functions. A collection of functions is called a library and can be accessed through a DialogueRunner.
For an easy example, let's modify the code used in the Quick Start to provide a simple pow function to Yarn:
The following snippet is of special importance:
The first parameter of add_function() is the name of the function as seen by Yarn, "pow" in this case. The second parameter is the Rust function that will be called in the background. Here, we reference the function definition of fn pow(...), but you could also register a lambda.
This pow function can now be called from the Yarn file like this:
Which will result in the following output:
Custom functions need to follow some rules. Don't worry, they're pretty lax.
Their parameter and output types need to be primitive types or String
Parameters are allowed to be references
Parameters can have the special type YarnValue, which stands for any input type. Additionally, functions are assumed to have no side effects. You can read the full list of requirements in the docs for YarnFn.
Here are some examples of valid functions:
If you need functions that have side effects, e.g. for manipulating the game world, use custom commands instead.
Registered Rust functions can have a maximum of 16 parameters. If you need more, you can wrap parameters in tuples:
Tuples are treated as separate parameters when calling the function from Yarn:
Since tuples can be nested, you can use have potentially infinite parameters.
Localization is the process of translating and adapting content to a specific language, region or culture.
Yarn scripts are written in human-readable language. This is generally a single language, and (most of the time) will be written in the language that your development team primarily speaks. The language that a Yarn project is written in is called the base language.
However, if you want your dialogue to be understood by people who don't speak this language, you will need to translate it. Yarn Spinner is designed to make it easy to extract the user-facing text of your dialogue into a strings file, which can then be translated into a different language, and then loaded at run-time. You can translate your project into as many languages as you'd like, and Yarn Spinner will handle it for you automatically.
Yarn Spinner is also designed around the idea that a line of dialogue may have assets associated with it. Most commonly, this means an audio file that contains an actor performing the line, so that it can be used in your game as a voice-over. These assets are also localisable.
I just want to add voiceover in a single language. Why do I need to localise, too?
The philosophy of Yarn Spinner's approach to localisation is: if you want your dialogue to be text-only, and in a single language, you don't need to do anything at all. If you want to do anything else, you will need to set up a localisation and manage it using Yarn Spinner's processes.
We've found that most users who want to start using Yarn Spinner want to quickly get dialogue on the screen, and don't want to do lots of work to get the basics going. That's why we make the simple use-case (text only, a single language) as easy to use as we can.
However, if you're building a game that's voice acted, it makes your life significantly easier if you build your systems with localisation in mind from the start. Additionally, if you have the resources to add voice-over to your project, you should also have the resources to translate your game to other languages (even if you only have voice-overs in a single language.)
To that end, we designed it so that voiceover is intimately tied to localisation, so that you have to at least start thinking about localisation at the start of the process.
Localisation: A set of information that describes where to find text and assets for a given language.
Base language: The language that your Yarn script files are written in.
Strings file: A text document that contains translated versions of Yarn lines.
Line ID: A unique code that identifies a line of dialogue or an option in the original source text.
Localised line: The text of a line of dialogue, in a particular locale.
Localised line asset: An asset (for example, an audio clip) that's associated for a particular line, in a particular locale. For example, an audio clip containing the voiceover for the line "Hello there", in German.
We specify our supported localizations when creating the YarnSpinnerPlugin (or using deferred compilation):
The base localization is the language in which your Yarn files are already written. In this case, we specified that our Yarn file was written in English as spoken in the USA. The translations are all languages you want to support. Here, we want to support German as spoken in Switzerland.
Put the code shown above into the example used in the Quick Start and run the game.
Now take a look at your Yarn file at assets/dialogue/example.yarn. You will see that your line of dialog will contain an autogenerated ID, for example:
This ID uniquely references this line across translations. For the sake of clarity, we will use diff highlighting throughout this chapter. In case you're not familiar with this look, for our purposes the red line started by "- " shows how the line looked like before a change, while the green line started by "+ " shows how the line looks like after the change. The "- " and "+ " are just visual indicators and not actually part of the files, so don't let that confuse you!
You will probably also have noticed a new file in your assets that was not there before, namely "de-CH.strings.csv":
This file is called a strings file, because it contains translations of each string of text of your Yarn files. Let's see what it contains:
Since this is a CSV, let's open it in an application that renders the content as a table:
You can see that our line from before is in there! Notice how the id matches across the files.
This file will be populated with new entries as soon you change the Yarn files. Assuming that you are using hot reloading as described in the setup, run your app again in case you closed it or advanced the dialog. While you are greeted with the "Hello World!" message on screen, open the Yarn file and edit it. Let's add a new line:
Save the file while the game is still running. You should see that our new line just got assigned an own line ID:
In case you can't see this, your editor might still have the old state of the file cached. It usually helps to change focus, tab out to another window, or closing and reopening the editor. The strings file should now also contain a new entry:
Let's translate some of this. Change the string "Hello World!" in this file to "Hallo Welt!", which is German, and save it:
The game will currently happily ignore this as by default it uses the base language, which means it will take its text straight from the Yarn files. But we can easily switch the language:
Run the game again and you should be greeted by this text:
Hurray! See how painless localization can be?
Languages are specified according to IETF BCP 47. You can add as many translations as you want. Each will receive an own strings file.
To switch languages at runtime, simply retrieve a DialogueRunner through a Bevy query inside a system. When you use DialogueRunner::set_language() as shown above, you will set the language for both text and assets. You can be more granular by using DialogueRunner::set_text_language() and DialogueRunner::set_asset_language() separately instead. This allows you to support use cases such as showing the text in the player's native language and play voiceover sound in the original recorded language, which might be a different one.
Since assets require using localization, they are searched for in folders named after the language they support. For the example used throughout this chapter, the assets for the base localization would be searched for in assets/dialogue/en-US/, while the assets for the de-CH translation will be searched at assets/dialogue/de-CH/. This is however more a convention than a rule, as a given AssetProvider is allowed to look for its assets wherever. The asset providers shipped by Yarn Spinner will additionally expect assets to be named after the line ID they belong to. For example, the AudioAssetProvider would look for the voice line reading our "Hello World!" line at assets/dialogue/en-US/13032079.mp3 for the base localization.
To read more about how to use assets, read the chapter Assets.
The strings file can be freely edited by a translator in the text and comment fields. While you can translate the texts yourself, the format being straightforward allows the translator to also be someone else that is not involved with the coding part of the game at all.
You might have some questions regarding what happens when one person edits a Yarn file while another edits the strings file. As a general rule, the strings file will try to "keep up" with the Yarn file without ever destroying anything that was already translated.
As you've seen, new lines will be amended. If the Yarn file has a line edited, it will be changed in the strings file as well if it was not yet translated. If there is already a translation, it will be marked by a "NEEDS UPDATE" prefix in the text. If a line was deleted in the Yarn file, it will also be deleted in the strings file if it was untranslated. Otherwise, it will be left untouched.
Bottom line: if there's a translation, it will never be removed.
Once you want to build your game for a release, you should disable the automatic file creation and editing. To do this, add the following line to the plugin creation:
This will change the behavior of missing translations to simply fall back to the base localization.
While you're on it, you might also want to disable Bevy's hot reloading.
You may have wondered what the .into()s were for in the lines at the beginning of the chapter:
They're here because a localization is not just a string with a language code, but an entire struct, namely Localization. You can construct this struct directly the path to the strings file and where assets are searched for.
This page shows you how to install Yarn Spinner for Godot, the Godot integration for running Yarn and Yarn Spinner scripts in your Godot-based games.
Yarn Spinner for Godot is a Yarn Labs project. It is not fully, or officially supported, and may break, or change at any time.
Download a copy of the latest version of Yarn Spinner for Godot from the GitHub repository, or clone the repository somewhere.
Locate the addons/ directory in your new local copy of Yarn Spinner for Godot:
Put a copy of this directory into your new Godot project, either by dragging the folder in your file manager (e.g. Finder or Explorer) into the folder of the Godot project, or by dragging from your file manager into the FileSystem dock of your Godot project:
Next, choose the Project menu -> Tools -> C# -> Create C# solution. This will create a C# project for you. We have to do this to trigger the creation of the .csproj file, which is necessary to let Godot know about the Yarn Spinner plugin.
Next, open the project folder in Visual Studio Code. In the sidebar of VS Code, the .csproj file and add the following line to it, inside the <Project> </Project> tags, but not inside an <ItemGroup> or <PropertyGroup>:
Your brand new project should look something like this in VSCode:
Save the tweaked .csproj file and return to Godot, everything is almost ready to go. Click the Build button in the very top right-hand corner of the Godot window. This will trigger a build of the C# solution for the project, which is required to make Godot aware of Yarn Spinner for Godot.
Once the build is complete, open the Project menu -> Project Settings, change to the Plugins tab, and tick the enabled box next to the Yarn Spinner for Godot plugin:
With that, you're ready to go!
Learn about Yarn Projects, which group your scripts together for use in a Dialogue Runner.
A Yarn Project is a file that links multiple Yarn scripts together. Yarn projects are how Dialogue Runners work with your content.
To create a new Yarn Project, follow these steps:
Open the Project menu, and choose Tools -> YarnSpinner -> Yarn Project.
Godot will open a dialogue where you can choose the directory your Yarn Project will be saved, and its filename. Choose a name and directory, and press the Save button.
On their own, a Yarn Project doesn't do anything. In order to be useful, you need to add Yarn scripts to it.
Yarn Projects include all Yarn Scripts that the project finds in the Source Files directory. By default, that means all Yarn Scripts in the same directory as the Yarn Project, and all of that directory's children.
When you add a Yarn Script to the same folder as a Yarn Project, it will automatically be included in the Yarn Project. When you make changes to the script, the Yarn Project will automatically be re-imported.
You can change the locations that a Yarn Project looks for Yarn Scripts by modifying the Source Files setting. Each entry in the Source Files setting is a search pattern.
*
any filename
"*.yarn" will find "One.yarn" and "Two.yarn".
**/*
any path, including subdirectories
"**/*.yarn" will find "One.yarn" and "Subfolder/Two.yarn".
..
the parent folder
"../*.yarn" will find "One.yarn" in the parent folder.
You can add as many entries to the Source Files field as you like. If a file is matched by multiple patterns, it will only be included once.
A Yarn script can be included in more than one Yarn Project.
When you write a Yarn script, you write it in a specific human language. This is referred to as the 'base' language of the script. It's called the base language because it's the one you start with, and the one you translate into other languages.
Unless you change it to something else, Yarn Spinner will set the base language to your computer's current locale.
You can set the base language of a Yarn Project in the Inspector by changing the Base Language setting.
If you want to translate your scripts into another language, you add a new locale code to your Yarn Project. To learn about this process, see Adding Localizations.
Yarn Projects are used by Dialogue Runners. When a Dialogue Runner is told to start running dialogue, it reads it from the Yarn Project it's been provided.
If you try to start a Dialogue Runner and it doesn't have a Yarn Project, or the Yarn Project doesn't have any Yarn scripts, or if any of the Yarn scripts contain an error, the Dialogue Runner won't be able to run.
Re-Compile Scripts in Project
Manually trigger all of your .yarn scripts to be compiled.
Add Line Tags to Scripts
Update Localizations
When you click this button, all .csv strings files that are configured in the Localization CSVs list will be updated with any lines that have been added, modified or deleted since the strings file was created.
Source Scripts
The list of places that this Yarn Project looks for Yarn Scripts.
Base Language
Localization CSVs
Export Strings and Metadata as CSV
Learn about Yarn scripts, which are the assets that contain the dialogue you write.
A Yarn script is a text file containing your dialogue.
Yarn scripts need to be part of a Yarn Project in order to be used in your game.
To create a new Yarn script in Godot, follow these steps:
Open the Project menu, and choose Tools > YarnSpinner -> Yarn Script.
Choose a directory and filename for the new Yarn script in the dialog that appears.
The new file that you've just created will contain a single node, which has the same name as the file.
Creating a Yarn Script in Godot is exactly the same as creating a .yarn file externally (i.e. in macOS Finder or Windows Explorer), and dragging it into the directory of your Godot project.
You can edit .yarn scripts with the text editor of your choice. To open your editor from within Godot, ensure that you have associated .yarn files on your computer with your desired editor. Then, right click a .yarn script in the Filesystem panel and click Edit in External Program. When you save your changes and return to Godot, it will be re-compiled.
You can learn about our recommended editor, Visual Studio Code with the official Yarn Spinner Extension at: https://github.com/YarnSpinnerTool/YSDocs/blob/main/docs/getting-started/editing-with-vs-code/README.md.
Learn about Options View, a component used to display an option in an Options List View.
An Option View is an object that the uses when presenting options. When the delivers options to your game, Options List View will create an Option View for each option that could be selected.
When the Option View is pressed, the Options List View will notify the Dialogue Runner of the user's selection.
Learn how to create Dialogue Views that are designed for the specific needs of your game.
While the Line View and Options List View are useful for lots of situations, your game might need to display lines and options in specific ways. In these situations, you can write your own custom Dialogue View, and handle the presentation of lines and options in ways that are entirely in your control.
To create a Dialogue View, you write a script that implements the DialogueViewBase interface, and add your script to a node in your scene. You can then add this node to the Dialogue Views list on your scene's Dialogue Runner.
On its own, an empty script implementing the DialogueViewBase interface will not do anything useful. To make it display lines and options, you'll need to implement certain methods.
To understand how to create a custom Dialogue View, it's useful to understand how the works with content.
Yarn Spinner scripts deal in three different kinds of content: lines, options, and commands. Of these, only the first two - lines and options - are content that need to be shown directly to the player.
When the Dialogue Runner encounters lines or options, it first needs to determine the specific content the user needs to see. Once it has this, it sends the content to each of its Dialogue Views.
Your scene can have multiple Dialogue Views, and they can all do different things. It can be useful to create, for example, a Dialogue View that handles lines, and a separate Dialogue View that handles options.
Lines and options are represented in compiled Yarn scripts as line IDs. A line ID is a unique identifier for the text of a line or an option. When Yarn Spinner needs to show a line or option to the user, it asks its to provide it with a LocalizedLine]object. This object contains the text of the line or option, in the user's current locale.
The provided with the plugin creates LocalizedLine objects for views to display.
When displaying a collection of options, each individual option has its own LocalizedLine.
Once a LocalizedLine has been created, the Dialogue Runner has everything that it needs to show content to the user. The next steps vary depending on whether it's showing a line or an option.
In Dialogue Views, a line is presented when the user has received the entire line, and is ready to move on to the next line. The practical outcome of what this means depends on the Dialogue View itself; for example, a Dialogue View that plays voice-over audio might finish presenting when all of the audio has played, while a Dialogue View that gradually reveals the text of a line might finish presenting when all of the text is visible.
The Dialogue Runner will wait until all Dialogue Views report that they've finished presenting the line. Once this happens, it moves on to the next part of the dialogue.
If you're making a game where you want the dialogue to pause until the user takes an action to proceed, your Dialogue View can pause the dialogue by not calling the completion handler until it receives the signal. Because the Dialogue Runner will wait until all Dialogue Views report that they're done, the dialogue will wait until your view tells it to continue.
At any point during a line's presentation, a Dialogue View can interrupt the line. It does this by calling the requestInterrupt method, which is a delegate that's set by its controlling Dialogue Runner. When this method is called, all Dialogue Views that have not yet finished their presentation receive a call to their InterruptLine method.
InterruptLine is very similar to RunLine, in that it receives a line to present and a completion handler to call when the presentation is complete. However, while RunLine is expected to present the line at its own pace, InterruptLine is a signal to finish the presentation as quickly as possible.
As before, the actual details of this depend on the Line View. To continue the examples from before, a Dialogue View that plays voice-over audio might fade out the audio over a short period of time, or even cut off playback immediately; a Dialogue View that's gradually revealing text might reveal the remaining text all at once, or rapidly reveal the remaining text.
When a Dialogue View receives a call to InterruptLine, it should not call the completion handler that it received from the call to RunLine. Calls to interrupt a line supersede calls to run a line.
Any Dialogue View may request that a line be interrupted. If multiple Dialogue Views request it, only the first request does anything.
When the last Dialogue View reports that its presentation is complete, either because RunLine finished its presentation, or because InterruptLine was called and it quickly finished its presentation, it needs to tell the dialogue views to get rid of the line, and potentially prepare for more content.
The Dialogue Runner does this by calling DismissLine on all Dialogue Views. As with RunLine and InterruptLine before it, DismissLine receives a completion handler to call when it has finished dismissing the line.
As before, the details of how a line is dismissed vary with what the Dialogue View actually does. A Dialogue View that plays voice-over audio may not need to do anything to dismiss a line, because the playback has already finished; a Dialogue View that shows line text on screen might need to hide the text, possibly with an animation.
When the last Dialogue View reports that it has finished dismissing its line, the Dialogue Runner continues running the script.
Options are slightly different to lines, in that they rely on receiving some kind of user input before the dialogue can continue: the Dialogue Runner needs to know which option was selected.
To handle options, Dialogue Views implement the RunOptions method. This method receives an array of DialogueOption objects, each of which represents an option that can be shown to the user, as well as a completion handler.
When this method is called, the Dialogue View uses the information contained within the DialogueOption objects to present the choices to the player, and then awaits user input. Once it knows which option was selected, it calls the completion handler, passing in the DialogueOptionID of the selected option.
When the Dialogue Runner delivers options to its Dialogue Views, it expects exactly one of them to call the completion handler that RunOptions receives.
If none of them call it, then the Dialogue Runner will never receive the option that was selected (and will wait for it forever.)
If more than one of them call it, the Dialogue Runner will throw an error.
(In most situations, you will generally only have one Dialogue View in your scene that handles options. If you have more than one, then you will need to control which one of them will call their completion handler.)
Dialogue Runners can use multiple Dialogue Views. This is actually recommended, because it makes it easier to separate the code for handling lines, from that of running options.
All of the methods in DialogueViewBase are optional. If you don't implement a method, then the default implementation of that method is used instead; the default implementation either does nothing, or as close to nothing as it can while still working. For example, the default implementation of RunLine immediately signals that presentation is complete.
To create a Dialogue View that shows lines, implement RunLine, InterruptLine and DismissLine.
To create a Dialogue View that shows options, implement RunOptions.
To create a Dialogue View that supports both, implement all four.
During gameplay, your user may wish to indicate that they want to advance the dialogue: that is, they want to proceed to the next line, or they want the current line to be presented more quickly.
To handle this case, implementers of DialogueViewBase may implement the method UserRequestedViewAdvancement, which can be called by other parts of the game.
In most cases, it is generally appropriate for implementations of UserRequestedViewAdvancement to call the requestInterrupt method, which tells the Dialogue Runner to interrupt the line (across all views) and to proceed to the next one. However, a Dialogue View may choose to perform other actions that deliver the line more quickly.
For example, in several text-based RPG games, dialogue is delivered as a text box, one letter at a time; when it's all delivered, the user can press the A button (to choose an arbitrary example) to proceed.
If, however, you press the A button while the text is still appearing, all of the text appears all at once (as though we'd jumped ahead).
Alternatively, if you pressed the B button while the text was still appearing, the line would be skipped, the dialogue would move to the next line.
UserRequestedViewAdvancement can be called by any part of your code.
Yarn Spinner will automatically add certain tags to lines. For example, the #lastline tag is automatically added to any line that's immediately followed by options, which allows your dialogue view to change its behaviour when options are about to appear.
Two example scenes are provided with Yarn Spinner for Godot: addons/YarnSpinner-Godot/Scenes/DefaultDialogueSystem.tscn and addons/YarnSpinner-Godot/Scenes/RoundedDialogueSystem.tscn.
Many projects ultimately end up needing to write their own custom dialogue view scripts to achieve the desired level of control over line and option presentation, but when first starting to integrate Yarn Spinner with your Godot game, it can be useful to start with the provided example views and modify their appearance and layout. These .tscn files provide a pre-configured LineView, DialogueRunner, and OptionsListView.
To create your modified version, start by navigating to the .tscn file that you would like to base your views on in addons/YarnSpinner-Godot/Scenes/. In this example, we'll use the RoundedDialogueSystem. Right click RoundedDialogueSystem.tscn and select the option "Move/Duplicate to...". Choose the directory in your project that you would like to save your dialogue system to, then click the 'Copy' button.
Be careful not to select the 'Move' button on this step. If you do accidentally move the file instead of copying it, you can move it back by following the same process, selecting addons/YarnSpinner-Godot/Scenes/ as the destination directory.
You now have a duplicate of the original .tscn file. You can rename it to anything you like. Double click your duplicated file to edit it.
Before modifying any styles in your copy of the dialogue system, make sure to right click the StyleBox resource and select 'Make Unique' or 'Save As...'. If you select 'Save As...', chose a directory outside of the addons/ directory to save your modified style. If you don't do this step, any modifications that you make to the styles will be saved to the .tres files in Yarn Spinner for Godot's directory, meaning you will lose these changes the next time you update the plugin.
Keep an eye on the addons/YarnSpinner-Godot directory as you customize your view using version control to ensure the .tres and .tscn files are not being modified.
You can now edit the Controls in your new scene to arrange and style them to your liking. The Controls that your scene contains, such as Panels, RichTextLabels, VBoxContainers, and others, are built-in Godot UI components, so you use the same techniques that you would for any other Godot UI component to re-style them. One way to customize the appearance of your scene is by adding or modifying StyleBox resources on the various components (visible in the inspector for each node under Theme Overrides > Styles). You can also modify the anchor points of the Controls to change their position relative to the screen's edges and center.
It's recommended to become familiar with the fundamentals of working with Godot UI components before attempting to customize your dialogue system.
Learn about the Dialogue Runner, which runs the contents of your Yarn Scripts and delivers lines, options and commands to your game.
The Dialogue Runner is the bridge between the dialogue that you've written in your Yarn scripts and the other components of your game. It's a component that's responsible for loading, running and managing the contents of a , and for delivering the content of your to the other parts of your game, such as your user interface.
Setting up a Dialogue Runner is the first step in adding dialogue to your game. To use a Dialogue Runner, you add the DialogueRunner script to a node in your scene, connect it to , and provide it with a to run.
When you want to start running the dialogue in your game, you call the Dialogue Runner's StartDialogue method. When you do this, the Dialogue Runner will begin delivering lines, options and commands to its Dialogue Views.
The Dialogue Runner is designed to work with other components of Yarn Spinner for Godot:
The contents of your dialogue are delivered to your .
The values of are stored and retrieved using the Dialogue Runner's .
The content that users should see - that is, the text in their current language, voice over clips, and other assets - are retrieved using the Dialogue Runner's .
The bare-bones minimum that a Dialogue Runner needs in order to work is a Yarn Project and at least one Dialogue View. If you don't set up a Variable Storage or a Line Provider, the Dialogue Runner will use temporary placeholders.
Learn about Options List View, a Dialogue View that displays a list dialogue options.
Options List View is a that presents a list of options in a list.
When this view receives options from the Dialogue Runner, it creates an instance of the prefab you specify in the Option View Prefab property, and adds it as a child of the options list view.
Options List View only displays options, and doesn't display lines. You can use an additional Dialogue View to handle these, like a or a custom Dialogue View of your own.
Learn about Line View, a Dialogue View that displays a single line of dialogue on a Canvas.
Line View is a that displays a single line of dialogue with a set of components parented to a Godot Control. When the Dialogue Runner encounters a line in your Yarn Script, the Line View will display it, wait for the user to indicate they're done reading it, and then dismiss it.
Line View only displays lines, and doesn't display options. You can use an additional Dialogue View to handle these, like an or a custom Dialogue View of your own.
If a line contains a character's name at the start, Line View can be configured to show the name in a separate text view to the line text itself. If the Character Name Text property is connected to a RichTextLabel, then the character's name will appear in this object.
If you don't attach a RichTextLabel to the Character Name Text property, you can choose to either show the character name as part of the line (that is, in the Line Text view), or don't show it all.
Line View can be configured to use visual effects when presenting lines.
You can choose to have the Line View fade in when a line appears, and fade out when the line is dismissed.
You can choose to have the text of the line appear, one letter at a time, with a "typewriter" effect.
The Dialogue Runner will automatically proceed to the next piece of content once all dialogue views have reported that they've finished with a line.
If the 'Auto Advance' option on a Line View is turned on, then the Line View will signal that it's done with a line as soon as all visual effects have finished.
If 'Auto Advance' is turned off, then the Line View will not signal that it's done when the effects have finished, and the line's delivery will stop. To make the Line View finish up, you can call the UserRequestedViewAdvancement method, which tells the Line View that the user wants to proceed. The built-in Dialogue System scene comes set up with a 'Continue' button that calls this method. You can also call this method from code.
Learn about Dialogue Views, which present dialogue content to the user.
A Dialogue View is a kind of node that receives content from a Dialogue Runner, and presents it to the player. Dialogue Views are how the player sees your game's lines of dialogue, and how they select choices in the dialogue.
A Dialogue Runner can have multiple Dialogue Views. For example, you might have one Dialogue View that's designed to display lines of dialogue, and another that's in charge of displaying options to the player.
Because every game's needs are different, a Dialogue View is designed to be extremely customizable, and you can to suit the needs of your game.
However, because there are common patterns of how games work with dialogue, Yarn Spinner for Godot comes with some pre-built Dialogue Views that handle common use cases:
is a Dialogue View that displays a single line of dialogue in a RichTextLabel on a CanvasLayer, and shows a button that the user can click to proceed.
is a Dialogue View that displays a collection of options in a list.
The In-Memory Variable Storage component is a Variable Storage component that stores all variables in memory. These variables are erased when the game stops.
The In-Memory Variable Storage component is intended to be a useful tool for getting started, and to be replaced with a custom variable storage that meets your game's needs.
However, if your game has no need to save and restore game state, then this class can be used in your final game, too.
This version of the documentation () is for the current beta version of Yarn Spinner 3 (Beta 1). For Yarn Spinner 2.x, visit
This version of the documentation () is for the current beta version of Yarn Spinner 3 (Beta 1). For Yarn Spinner 2.x, visit
Variable Storage components are responsible for storing and retrieving the values of variables in your Yarn scripts. When a Yarn script needs to get the value of a variable, it asks the Variable Storage for it; when a Yarn script sets the value of a variable, the Variable Storage is given the value.
Each game has different requirements for how variables are stored, which means that Yarn Spinner doesn't make any assumptions how the information is actually stored on disk. Instead, you can create your own custom Variable Storage script that implements the methods that Yarn Spinner needs.
If you don't have a game save system, you can use the component. This is a simple Variable Storage component that's built into Yarn Spinner.
The In-Memory Variable Storage stores everything in memory; when the game ends, all variables that have been stored are erased.
If you don't connect a Variable Storage to your Dialogue Runner, it will create an In-Memory Variable Storage when the game starts, and use that.
.csproj for your project.When you click this button, any line of dialogue in the Source Scripts list that doesn't have a #line: tag will have one added. See for more information.
See for more information.
The for the language that the Yarn Scripts are written in.
A mapping of to CSV file paths, for storing localized content for your dialogue.
When you click this button, all of the lines in the Yarn Scripts that this project uses will be written to a .csv file, which can be translated to other languages. A CSV file listing any metadata associated with each line will also be generated alongside the strings CSV file. See for more information.
When Yarn Spinner encounters a line of dialogue, it calls the RunLine method on each Dialogue View. This method takes two parameters: the first is the LocalizedLine that the Line Provider created, and the second is a that the Dialogue View should call when the line has finished being presented.
To access the on a line, you use the Metadata property on the LocalizedLine objects you receive. It's up to your code to decide what to do with the tags themselves.
onNodeStart
A signal that's emitted when the Dialogue Runner begins running a new node. This may be fired multiple times during a dialogue run.
onNodeComplete
A signal that's emitted when the Dialogue Runner reaches the end of a node. This may be fired multiple times during a dialogue run.
onDialogueComplete
A signal that's emitted when the Dialogue Runner stops running dialogue.
onCommand
A signal that's emitted when a Command is encountered. This will only be called if no other part of the system has already handled the command, such as command handlers registered via YarnCommand or AddCommandHandler.
Debug Text View
A RichTextLabel node that will display a summary of the variables that have been stored in this component. If this is not set, this property will not be used.
You can use this property to display a debug summary of your variables at run-time in your games.
Label
A RichTextLabel node that will display the text of the line.
Show Character Name
If this is turned on, the Text component will show any character name present in the option. If this is turned off, the character name will not be included.
Yarn Project
The Yarn Project that this Dialogue Runner is running.
Variable Storage
The Variable Storage to store and retrieve variable data from. If you do not set this, the Dialogue Runner will create an In Memory Variable Storage for you at runtime.
Line Provider
The Line Provider to use to get user-facing content for each line. If you do not set this, the Dialogue Runner will create a Text Line Provider for you at runtime.
Dialogue Views
The Dialogue Views to send lines, options and commands to. Add nodes that have scripts implementing the DialogueViewBase interface to this list in order for them to handle your dialogue lines and options. If a node that is added to this list does not implement DialogueViewBase, it will not function as a view, and an error explaining this will be logged to the output console.
Start Automatically
If this is turned on, the Dialogue Runner will start running the node named Start Node when the scene starts. If this is not turned on, you will need to call StartDialogue to start running.
Start Node
If Start Automatically is turned on, the Dialogue Runner will start running this node when the scene starts. (If your Yarn Project does not contain a node with this name, an error will be reported.)
Run Selected Options as Lines
If this is turned on, when the user chooses an option, the Dialogue Runner will run the selected option as if it were a Line.
Verbose Logging
If this is turned on, the Dialogue Runner will log information about the state of each line to the Console as it's run.
Canvas Group
The Canvas Group that the Options List View will control. The Canvas Group will be made active when the Options List View is displaying options, and inactive when not displaying options.
Option View Prefab
A packed scene containing an Option View. The Options List View will create an instance of this packed scene for each option that needs to be displayed.
Last Line Text
A RichTextLabel node that will display the text of the last line that appeared before options appeared. If this is not set, or no line has run before options are shown, then this property will not be used.
Fade Time
The time, in seconds, that the Options List View will take to fade in. If this is zero, the Options List View will appear immediately.
Show Unavailable Options
If this is turned on, then any options whose line condition has failed will still appear to the user, but they won't be selectable. If this is off, then these options will not appear at all.
Pallete
An optional MarkupPallete resource. Used to represent a collection of marker names and colours.
View Control Path
This Control node will be made visible when the Line View is displaying a line, and invisible when not displaying a line.
Convert Html to Bb Code
If enabled, matched pairs of the characters '<' and > will be replaced by [ and ] respectively, so that you can leverage Godot's RichTextLabel's BBCode. If you need a more advanced or nuanced way to use BBCode in your yarn scripts, it's recommended to implement your own custom dialogue view.
Auto Advance
If this is turned on, the Line View will finish presenting the line, and then wait. This is useful for games where the user has control over the timing of lines of dialogue. If this is turned off, the Line View will signal to the Dialogue Runner that it's done showing the line once all animations are complete.
Hold Time
If Auto Advance is turned on, the Line View will wait this many seconds after all animations are complete before signalling that it's done showing the line. This option is only available when Auto Advance is turned on.
Line Text Path
A RichTextLabel node that the text of the line will be displayed in.
Use Fade Effect
If this is turned on, the Line View will fade the opacity of the Canvas Group from 0% to 100% opacity when lines appear, and fade back to 0% when lines are dismissed.
Fade In Time
The duration of the Fade effect when fading a new line in, in seconds. If this is zero, the line will appear immediately.
Fade Out Time
The duration of the Fade effect when fading a line out, in seconds. If this is zero, the line will disappear immediately.
Use Typewriter Effect
If this is turned on, the text of the line will appear one character at a time. This will take place after the Fade effect, if enabled.
On Character Typed
A signal that's emitted every time the Typewriter effect displays new text.
Typewriter Effect Speed
The number of characters per second to display when performing a Typewrite effect. Larger values means that text will appear faster.
Character Name Text
A RichTextLabel node that will display the name of the character currently speaking the line.
Show Character Name In Line View
If this is turned on, lines that contain a character's name will display the name in the Line Text section. If it is turned off, character names will not be shown at all. This option is only available when Character Name Text is empty.
Continue Button
A Control that will be made visible when the line has finished appearing. This is intended to be used for controlling the appearance of a button that the user can interact with to continue to the next line.


addons directory in a local copy of Yarn Spinner for Godot.addons directory in.DefaultDialogueSystem.tscn.DefaultDialogueSystem instantiated into your scene.DialogueRunner.DialogueRunner to start automatically..yarn files..yarn file to edit./// comment syntax to describe a variable.<<declare>> to declare a boolean.boolean like an integer..yarn files using the Live Share extension and VIsual Studio Code.yarn files.yarn files together.addons directory in a local copy of Yarn Spinner for Godot.addons directory in.


