> For the complete documentation index, see [llms.txt](https://docs.yarnspinner.dev/llms.txt). Markdown versions of documentation pages are available by appending `.md` to page URLs; this page is available as [Markdown](https://docs.yarnspinner.dev/yarn-spinner-for-unity/unity-add-ons/dialogue-wheel/using-six-segment-wheel.md).
# Using Image Wheel
Learn how to use the Image Dialogue Wheel, from the Dialogue Wheel for Yarn Spinner Add-On Package.
The Image Dialogue Wheel provides a dialogue wheel with a light sci-fi appearance, and can display up to six responses for your dialogue. You can specify exactly which segment of the wheel each response is located.
## Using the Image Dialogue Wheel
To use the Image Dialogue Wheel [make sure your Unity project has the Yarn Spinner package installed](https://github.com/YarnSpinnerTool/YSDocs/tree/main/docs/using-yarnspinner-with-unity/installation-and-setup.md), and the [install the Dialogue Wheel for Yarn Spinner package](/yarn-spinner-for-unity/unity-add-ons/dialogue-wheel/installing-dialogue-wheel.md).
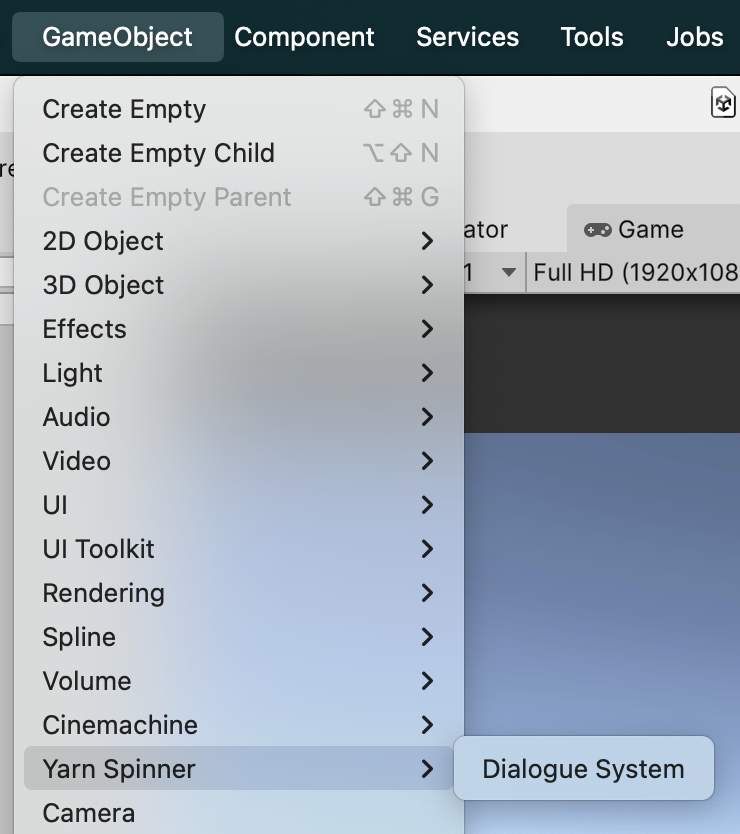
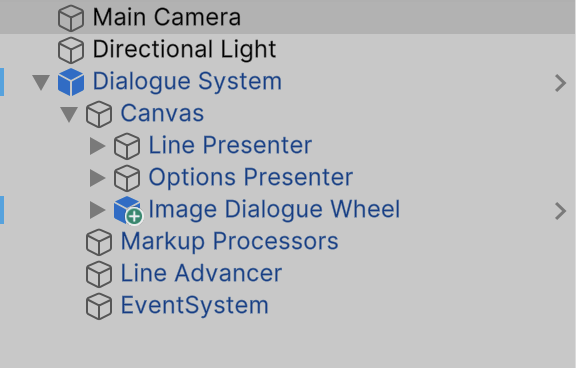
Then, create a new Dialogue System in your Hierarchy:
Adding a new Dialogue System to your scene.
{% hint style="info" %}
If prompted, click the Install TMP Essentials button to install TeshMesh Pro (TMP).
{% endhint %}
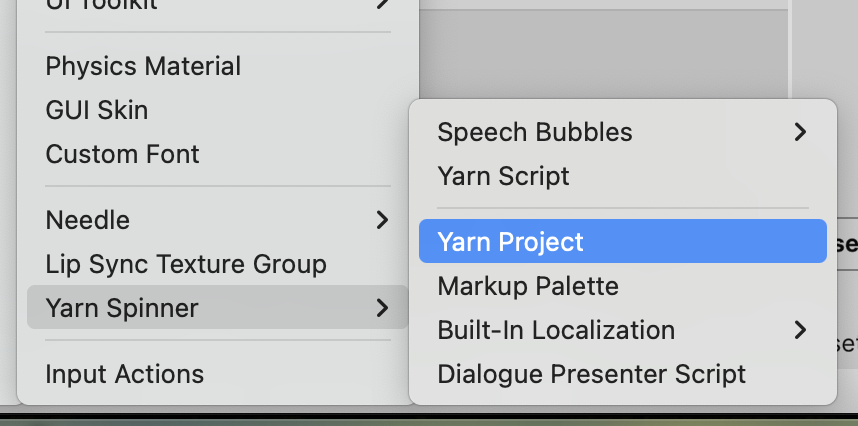
Make a folder to store your Narrative in the Project pane (ours is named `Narrative`), and then inside that folder, create a new Yarn Project asset:
Creating a new Yarn Project asset in the Project pane.
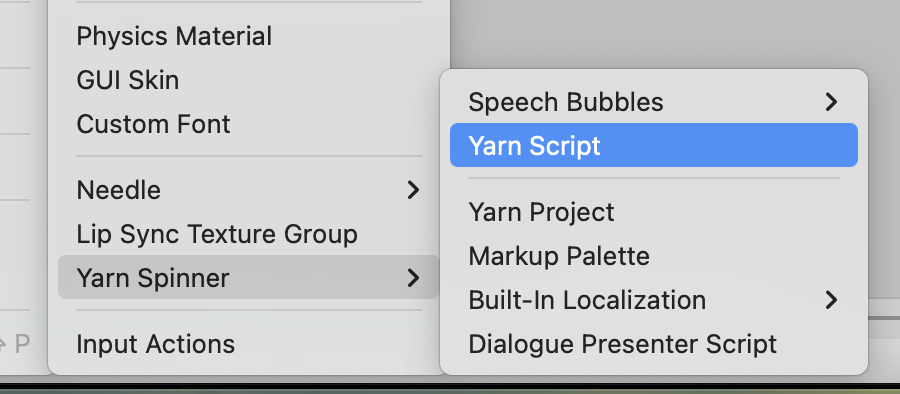
Similarly, also in the `Narrative` folder, create a new Yarn Script to use:
Creating a new Yarn Script asset in the Project pane.
Name both the Yarn Project and the Yarn Script something appropriate. Open the Yarn script to write your story. Then save the Yarn script and return to Unity.
We've provided an initial sample story here, if you want to test things out.
Initial sample story for Image Dialogue Wheel
{% code title="WheelDemoScript.yarn" overflow="wrap" %}
```xml
title: Start
---
Narrator: What brings to the pool?
-> Cleaning
I have come to clean the pool.
Narrator: Ah, just as I thought.
-> I'm a pool cleaner
Narrator: I know.
<>
-> I was actually lying.
Narrator: Oh, I see.
<>
-> Treasure
I am looking for the lost treasure of... the pool.
Narrator: There is no treasure in the pool.
-> WHAT!?
WHAT?! WHY NOT? I WAS TOLD THERE WAS TREASURE HERE!
Narrator: Nope.
<>
-> Oh, okay.
Oh, well, I guess I'll go.
Narrator: OK, bye!
<>
-> I know.
I know, I just wanted a swim.
Narrator: In you get, then!
<>
-> No reason
I have a fetish for pool cleaning equipment.
Narrator: Whatever floats your boat...
-> Thanks.
Narrator: Uh uh.
<>
-> Commerce
I'd like to buy a pool.
Narrator: Well, it's not for sale.
Narrator: Go away.
<>
-> Swimming
I'm here to go for a swim.
Narrator: Well, you can't.
<>
===
title: End
---
Narrator: Anyway...
Narrator: Have a nice day!
<>
===
```
{% endcode %}
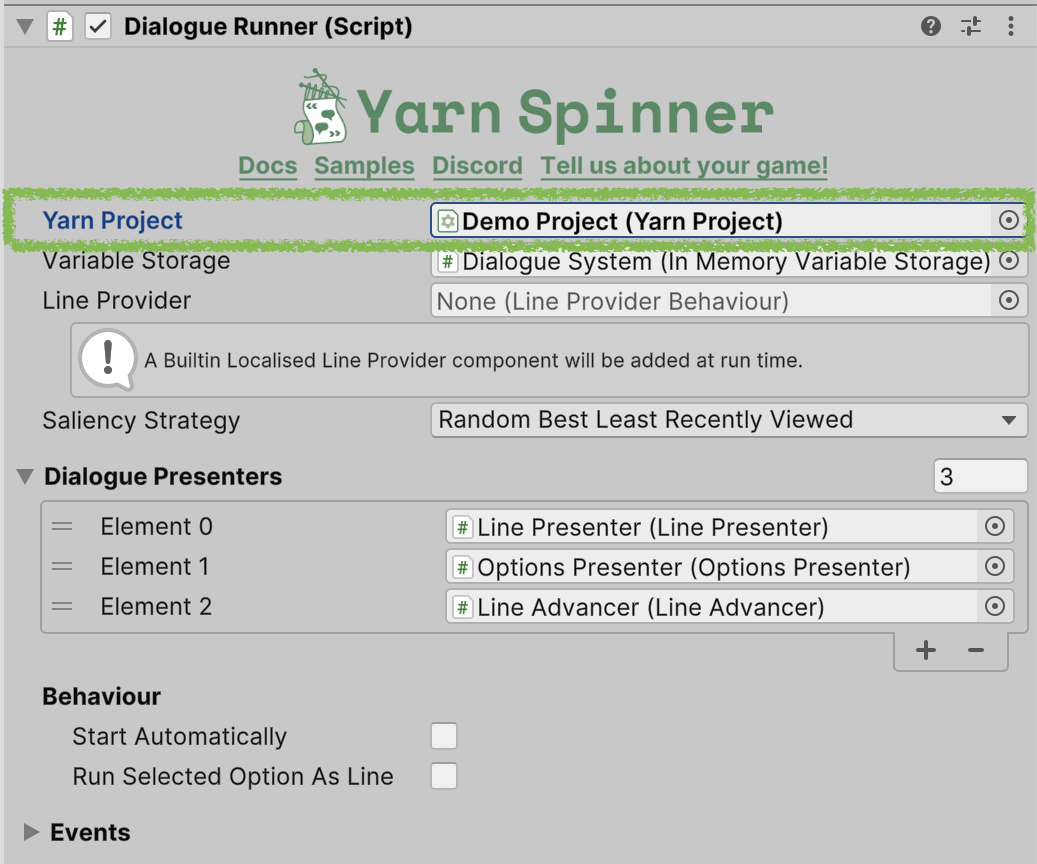
With the Dialogue Runner selected in the Hierarchy, drag the Yarn Project that you created from the Project pane into the Yarn Project slot in the Dialogue System's Inspector:
Assigning your Yarn Project to the Dialogue System.
Next, locate the Image Dialogue Wheel prefab, supplied with this add-on, and drag it from the Project pane, so it's below the Canvas in the Hierarchy:
The Image Dialogue Wheel, added below the Canvas of the Dialogue System.
Right-click on the Options Presenter in the Hierarchy, and choose Delete. You won't need that view, as you'll be displaying a wheel instead of a list.
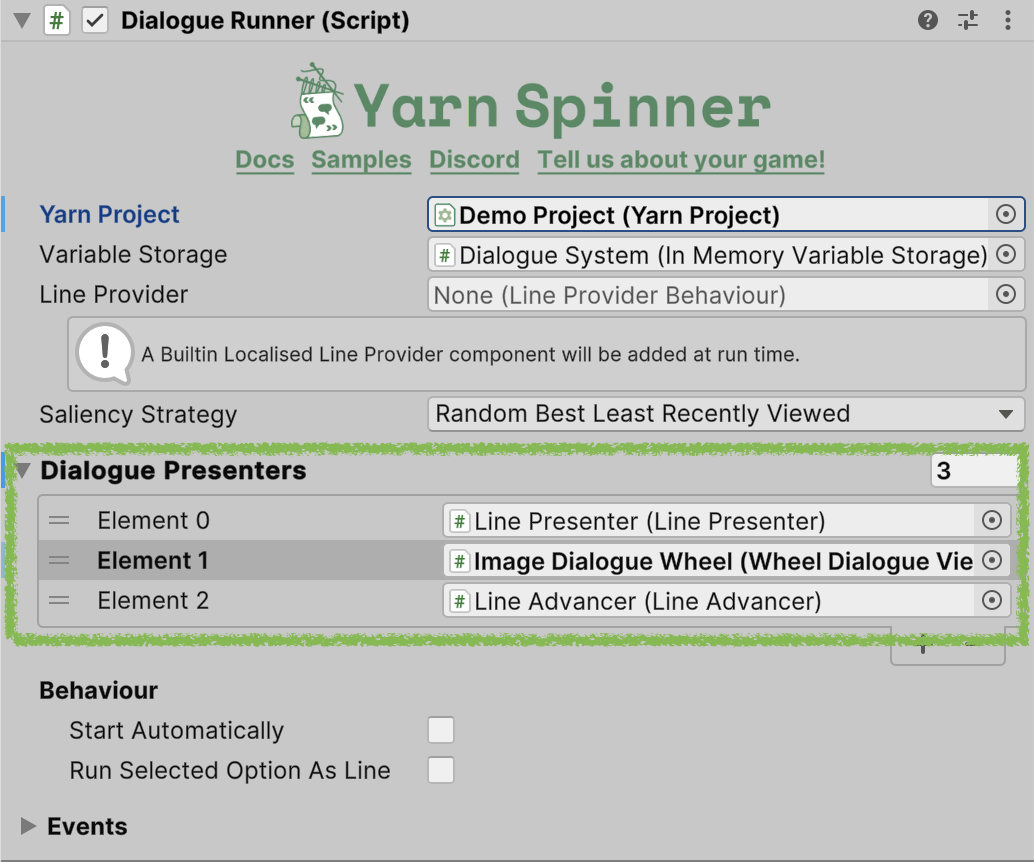
To make the Dialogue System aware of the Image Dialogue Wheel, select it (the Dialogue System) in the Hierarchy, and drag the Image Dialogue Wheel from the Hierarchy into the Element 2 slot of the Dialogue Views section in the Inspector:
Adding the Image Dialogue Wheel to the Dialogue System.
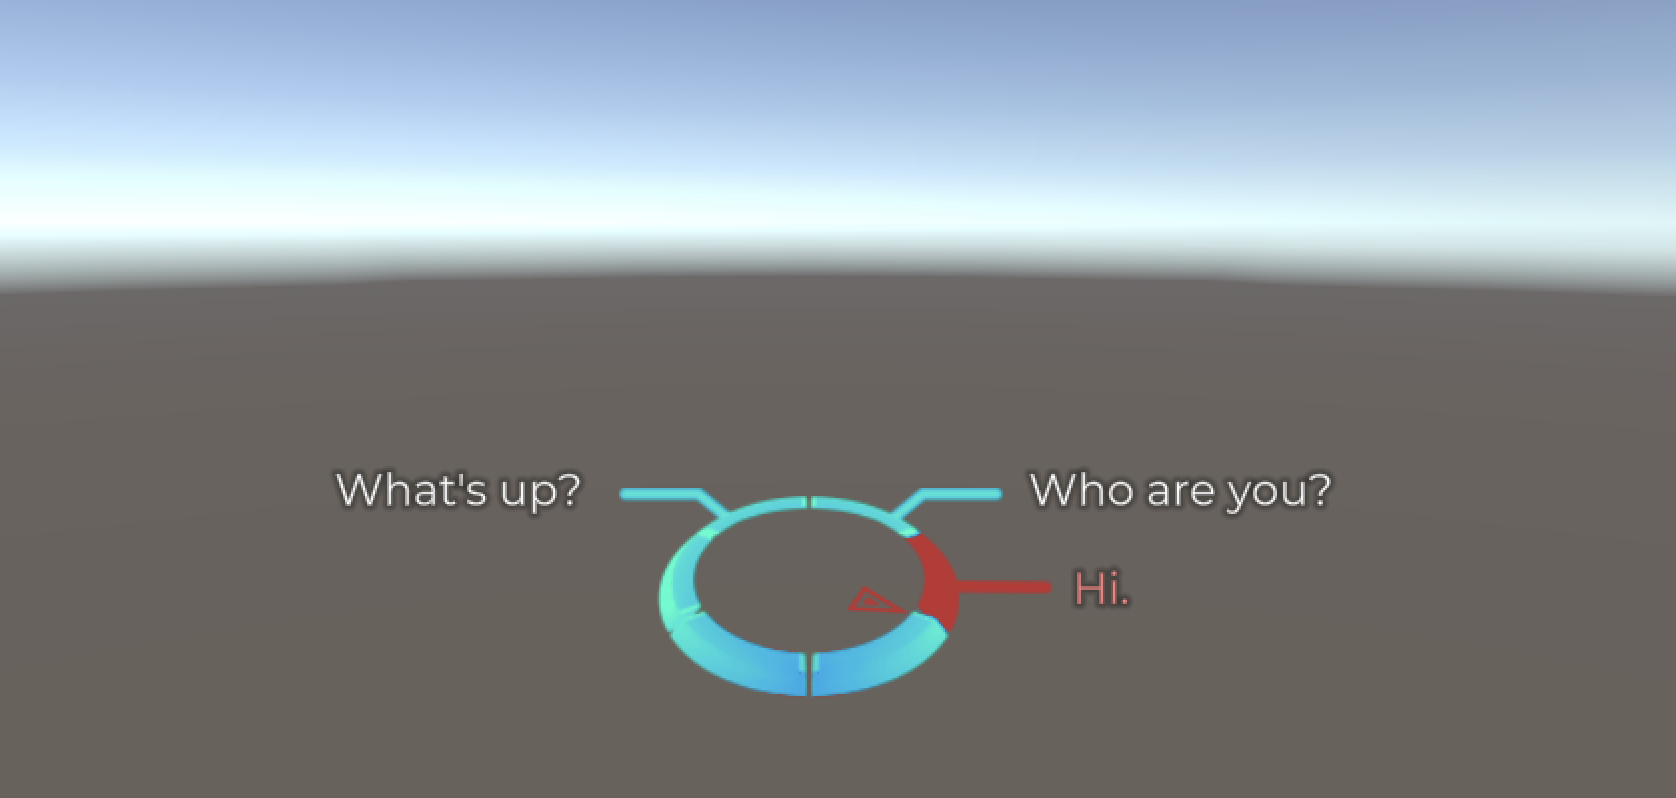
Finally we want to set our story to start automatically, click on the Start Automatically toggle on the Dialogue Runner Inspector and from the Start Node drop down pick `Start`. If you save your scene and run it, your Image Dialogue Wheel should now be working!
The Image Dialogue Wheel in action.
## Customising the Image Dialogue Wheel
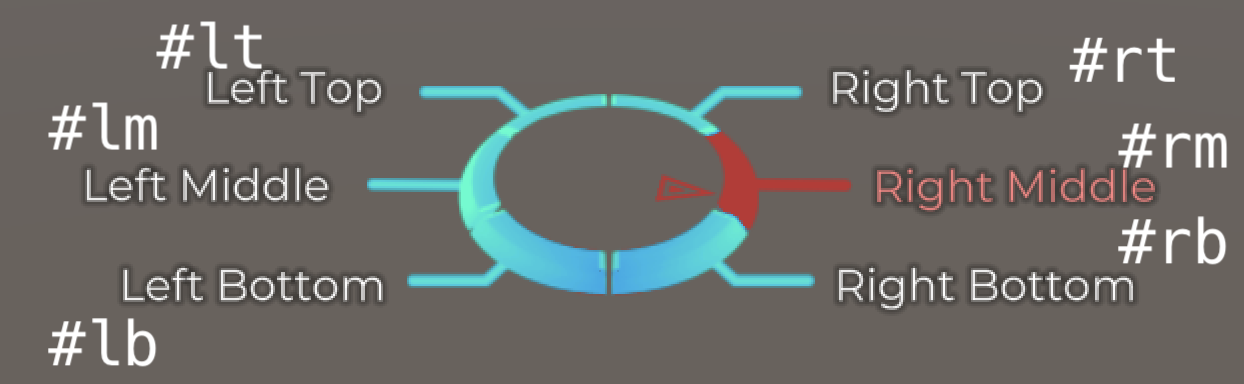
You can specify which position on the wheel your dialogue appears using [tags in your Yarn scripts](https://github.com/YarnSpinnerTool/YSDocs/tree/main/docs/yarn-spinner-for-unity/getting-started/writing-in-yarn/tags-metadata.md). Specifically, you can add tags to each set of options to specify where in the wheel the option should be placed.
For example, the following Yarn script:
```
title: Start
---
Narrator: Show me the positions on the Six-Segment Wheel?
-> Left Top #lt
-> Left Middle #lm
-> Left Bottom #lb
-> Right Top #rt
-> Right Middle #rm
-> Right Bottom #rb
===
```
Results in this:
If you select the Image Dialogue Wheel Prefab in the Hierarchy (under Dialogue System), you can look to the Inspector to customise these tags, among other options:
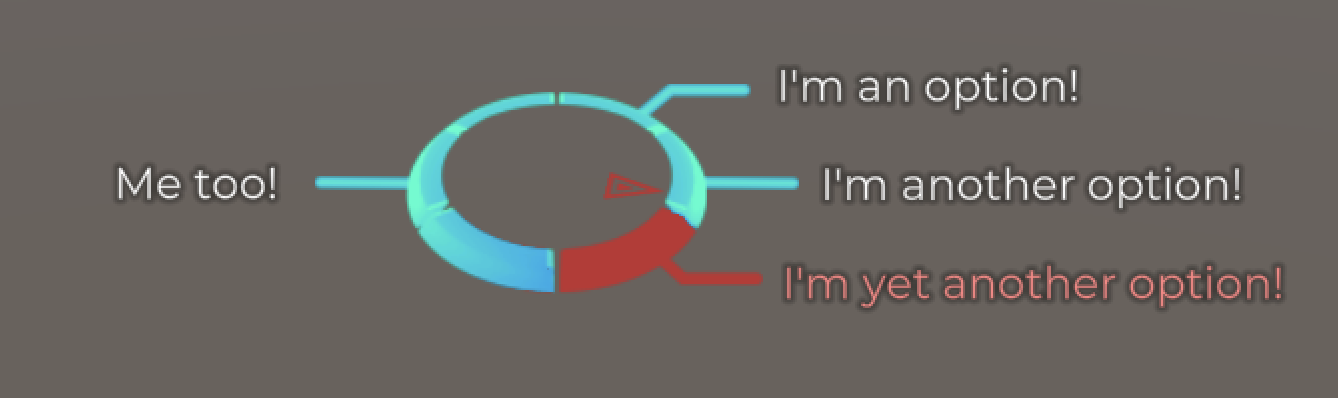
You can also use the Yarn Command `<>` before each group of options in your Yarn scripts to specify how many options (limited to a maximum of three on either side) should appear in each column (left or right).
For example, the following Yarn Script:
title: Start
---
Narrator: Show some options?
<<set-opt 1 3>>
-> I'm an option!
-> I'm another option!
-> I'm yet another option!
-> Me too!
===
Will result in this:
{% hint style="info" %}
If you use `set-opt` to specify more options than the six-segment wheel can handle (i.e. a maximum of 3 options on each side), things may not work as expected
{% endhint %}
Review the [provided Image Dialogue Wheel Example for more information](/yarn-spinner-for-unity/unity-add-ons/dialogue-wheel/dialogue-wheel-examples.md), or check out the guide on [Using Auto-Layout Dialogue Wheel](/yarn-spinner-for-unity/unity-add-ons/dialogue-wheel/using-auto-layout-wheel.md).
[^1]: Using `set-opt` to specify 1 option should be on the left, and 3 on the right.